The one and only rule of audio: it has to sound good
I don’t know about you, but one thing I’m sick of is some self-appointed expert lecturing me about the “rules” of mixing.
That you have to follow the “cut when you boost” formula, that EQ should always go before compression or vice versa, and so forth. That drum samples are Satan or that drum samples are God… and so on, ad nauseum. (BTW, have you noticed that for every person who says you should 100% always do a certain thing, there is another who says the exact opposite?)
Yes, there are certain things in audio that tend to work better than others, and we all have workflows and techniques that we keep going back to because they work for us. The problem is when those go-to solutions become rigid, inflexible rules!
If you keep doing things the same way, how can you expect your mixes to evolve? Yes, it’s good to stick to trusted tools/techniques that work for you, but you need to balance that against the possibility of stagnation, of getting stuck in your ways. Or worse *shudder* becoming one of those insufferable d-bags who waste their lives on Gearslutz or Reddit lecturing strangers on the internet about how they should be mixing (I’d literally rather be dead than turn into one of those people).
The truth is this: the ONLY THING that matters is whether it sounds good coming out of your speakers! It doesn’t matter if something is “fake” or “too processed” or “sloppy” or “robotic.” That is all BS. It only matters if it sounds good!
Want that trademark Taylor Larson snare sound in your mix? Wet, thwacky and thick as hell? Here’s how– some really unconventional processing going on here that you’ve probably never seen before. The session is Jason Richardson’s “Fragments,” ft Luke Holland, Mark Holcomb and Lukas Magyar.
We love people who live by this rule, and Taylor Larson is definitely one of them.
In this clip from his Nail The Mix session, Taylor shows why the rules of audio are meant to be broken as he mixes the snare in Jason Richardson’s “Fragments.” There’s a lot of unusual stuff going on here that you probably haven’t seen before– stuff that’s “against” the rules. For example, he uses a lot of presets.
You’ve probably heard from a lot of people (including us) that presets are BS. You’ve heard us say that every session is different, and therefore a preset built for someone else’s session is unlikely to sound good on YOUR session. While that isn’t wrong, this clip is proof that even THAT rule isn’t always true (in fact, make sure to copy down his settings for the snare gate, they will rock your world).
You’ll also see Taylor get amazing results out of some janky plugins that most of us would write off as trash– how many plugins are sitting unused on your hard drive because you told yourself they’re useless garbage? Maybe they’re the solution to your next mixing roadblock.
Try this as an exercise to find new creative territory: Pick a “rule” and break it. For example, if you always scoop a certain range on your kick, try boosting it instead. Or maybe you know that you hate Marshalls – so force yourself to use one. Or if you’ve told yourself that SSL E Channel is the best EQ for guitars, then throw an EQ you’ve never used before on your guitars. You get the idea.
The results of your experiment might sound like dogshit and end up being a complete waste of time, or they might sound amazing. But that’s not really the point. I can’t guarantee that your experiment will sound great, but I can you’ll learn something by stretching your creative boundaries.
Remember: if it sounds good, then it is good. Don’t listen to anyone who tells you otherwise!
Nail The Mix is our online mixing school that gives you REAL multi-tracks from REAL bands, plus a mixing class from the producer who recorded it. Past guests include Periphery, Gojira, Chelsea Grin, A Day To Remember, Machine Head and State Champs. Join now for instant access!
In this weekly series of Blogs I’ll attempt to take you through some of the most popular and effective audio processing techniques used in professional studios all over the world.
Each installment of this series will focus on a different instrument and provide you with links to relevant video examples of industry-leading engineers demonstrating these techniques.
This week, we’ll be taking a look at an instrument that forms the foundations on which a solid mix is built:
The sheer amount of variables and decisions that come into play while capturing each individual element makes drums one of the most time-consuming and complex instruments to get right at pretty much every step of the production process.
In this Blog we’ll take a look at some of the many tricks we can use in order to a achieve a punchy, rhythmic backbone of a drum sound.
1 – Make Them Pop! (Transient Enhancement):
An important part to making your drums poke through a dense mix and sound exciting is attack-enhancement.
Here are a few different methods you can use to manipulate your drum transients:
A – Compression For Accentuation:
The most classic way of increasing the initial click/smack of a drum is through the use of slow-attack compression:
Using a compressor with a medium-slow attack between 10-30ms depending on the drum will allow for the initial stick attack to pass through the compression threshold untouched. Alongside helping to level-out the performance, this will also effectively give you “X” amount of additional transient-gain depending on how much compression is being applied to the signal.
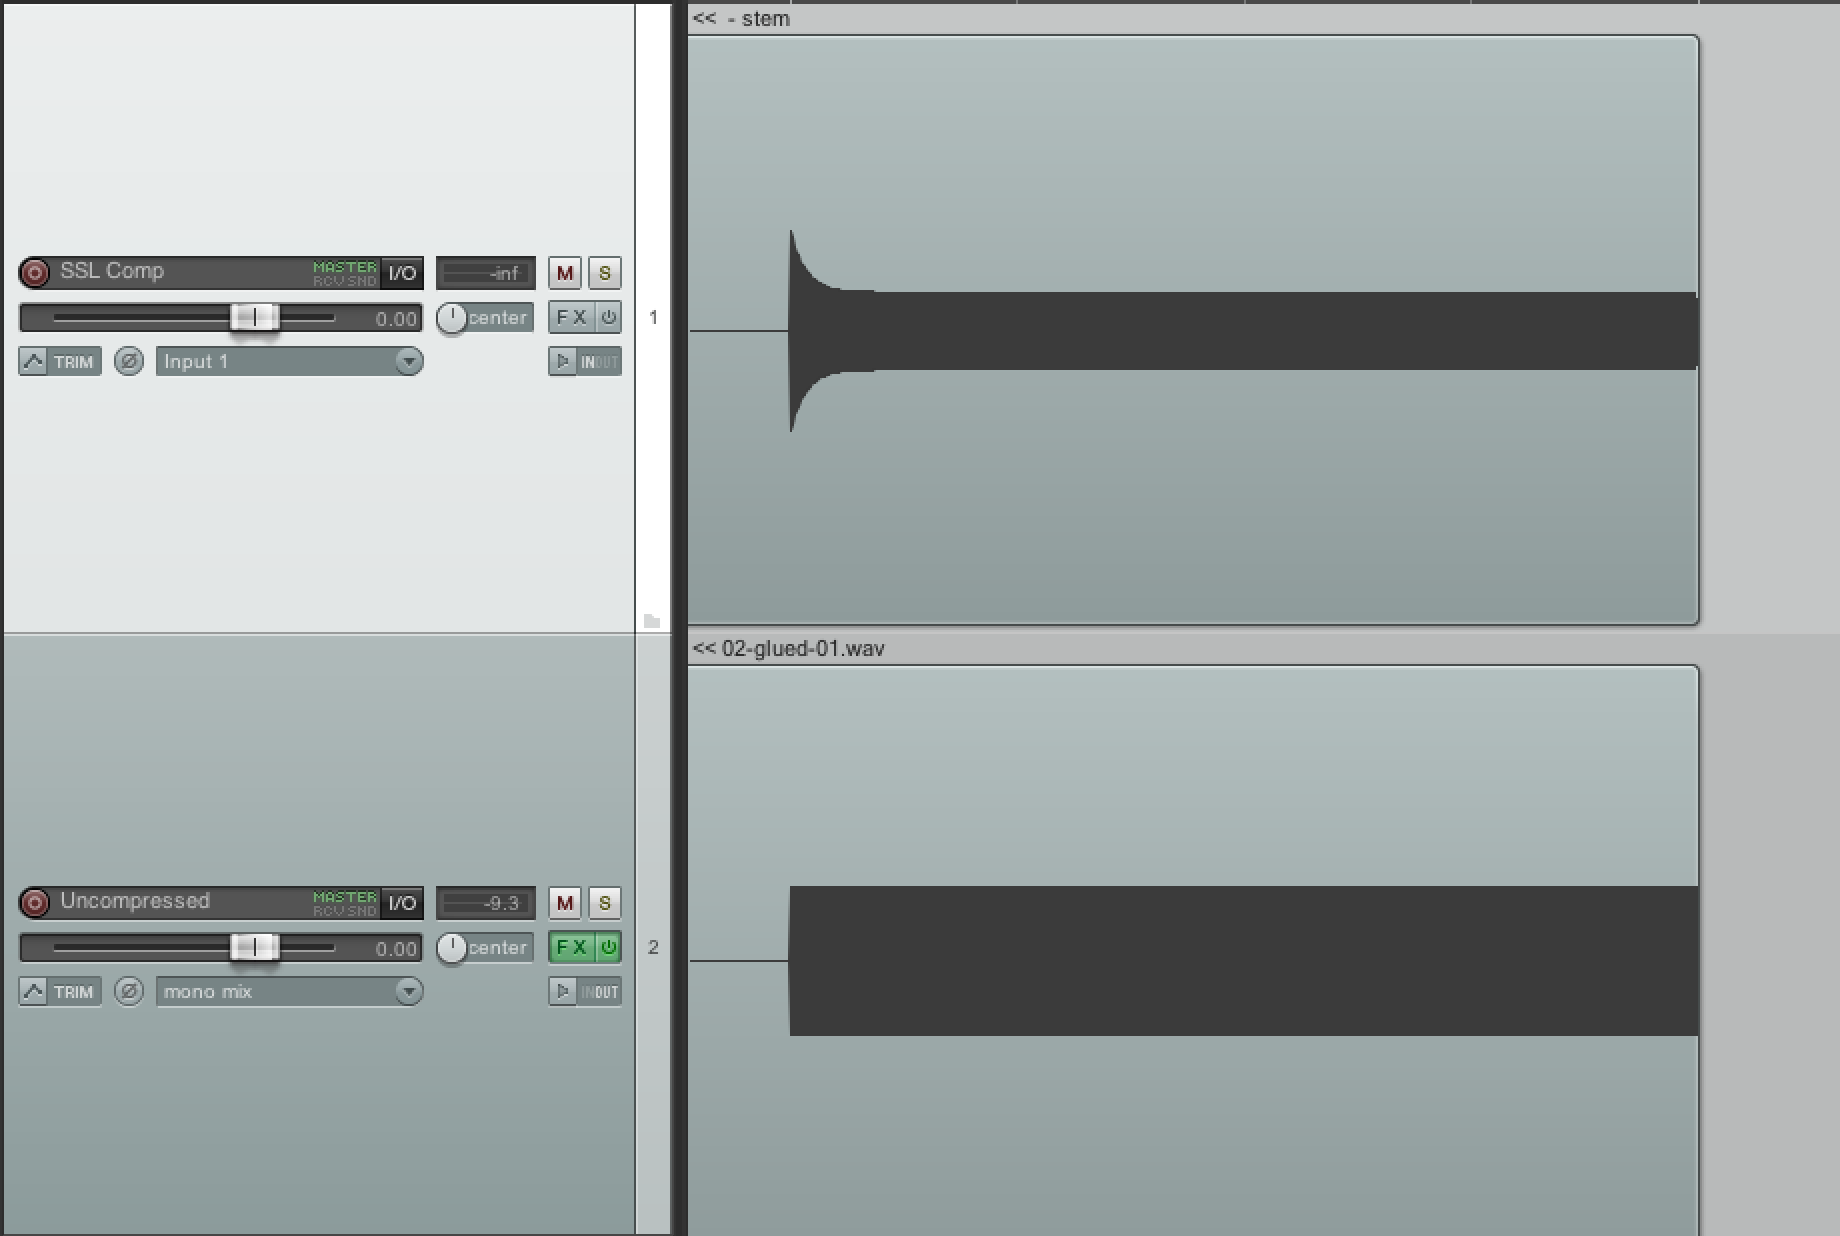
Some Visual Representations Of “Accentuation Compression”:
Example #1: In the example above I processed a 1kHz sine-wave through an SSL E-Channel Compressor on the “slow” attack setting with -10dB of gain reduction. As you can see from the processed waveform on the first channel, it took around 30ms for the compression to fully kick-in. As a result, we have a nice initial-attack envelope at the beginning of our signal.
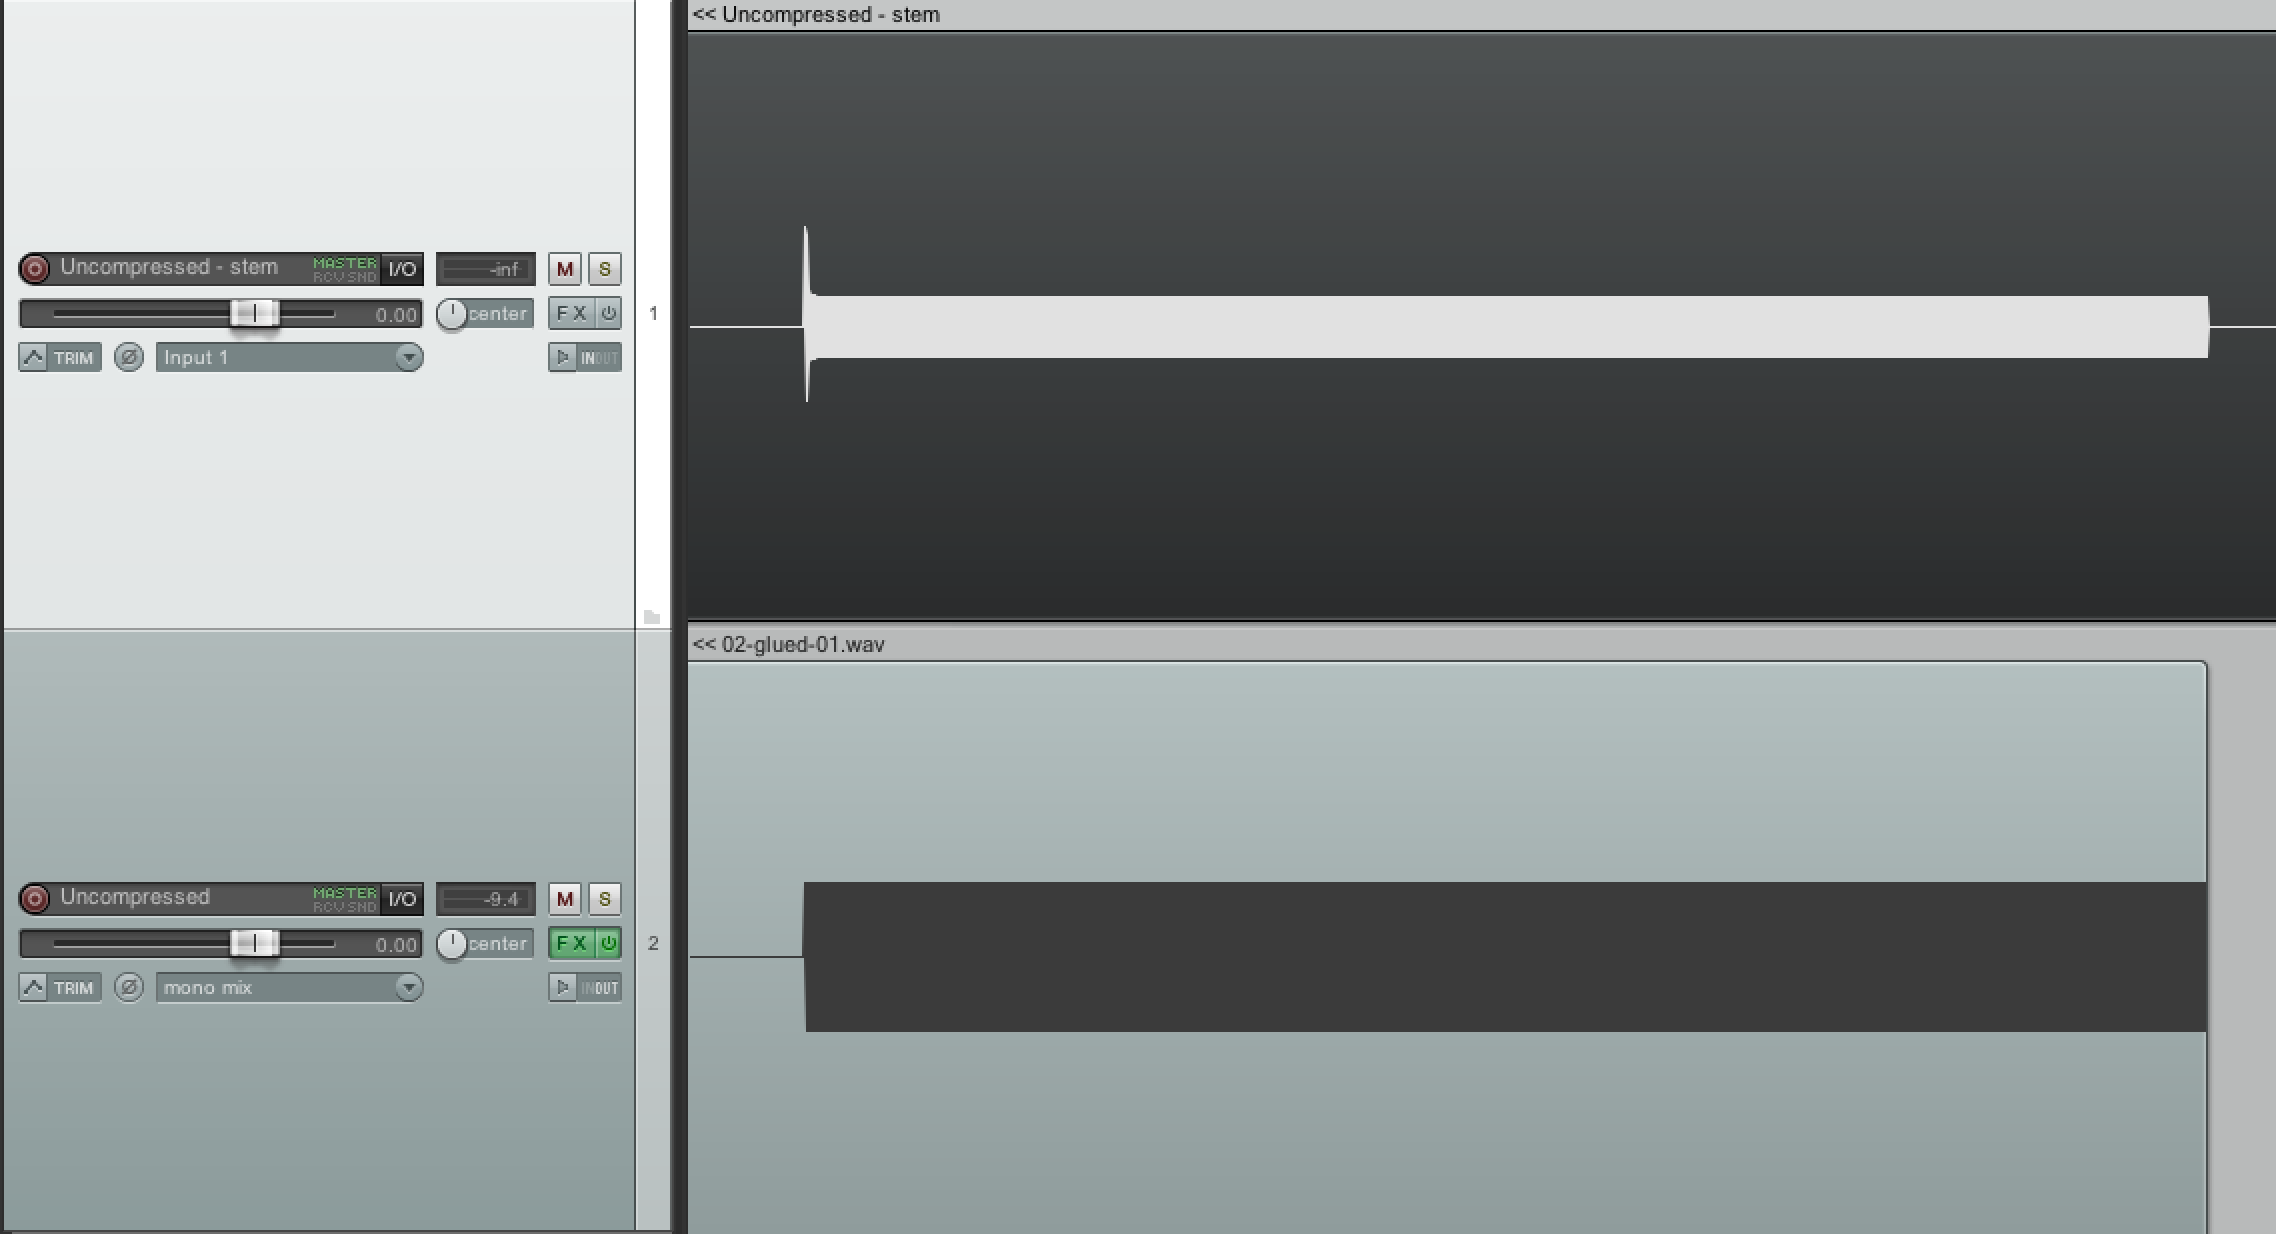
Example #2: In this second example I ran the same test through the SSL compressor’s “fast” attack setting. As you can see, on this setting the compressor is reacting to the signal at a much quicker time of 5ms or so.
Both of the compression settings I’ve demonstrated above are valid, and offer two distinctly different flavours of PUNCH. A good rule of thumb when it comes to compressing drums is to stick between the 10-30ms attack-range in order to just let the initial transients through unharmed.
NOTE:Although you can really go-to-town on trying to perfect your attack times on a per-drum basis, I often find that a simple compressor like the SSL E-Channel does a great job of preventing over-thinking and encouraging a quick workflow.
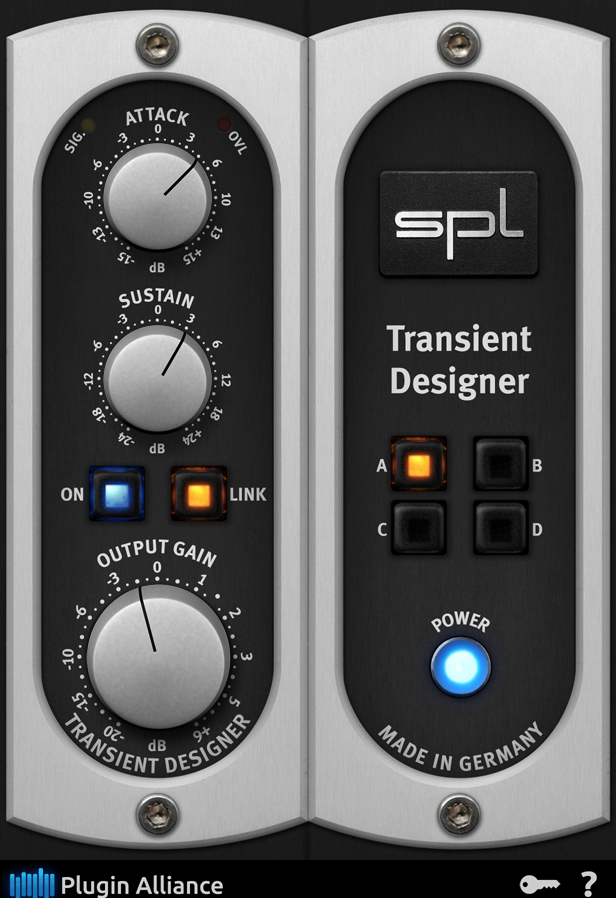
B – Transient Designers:
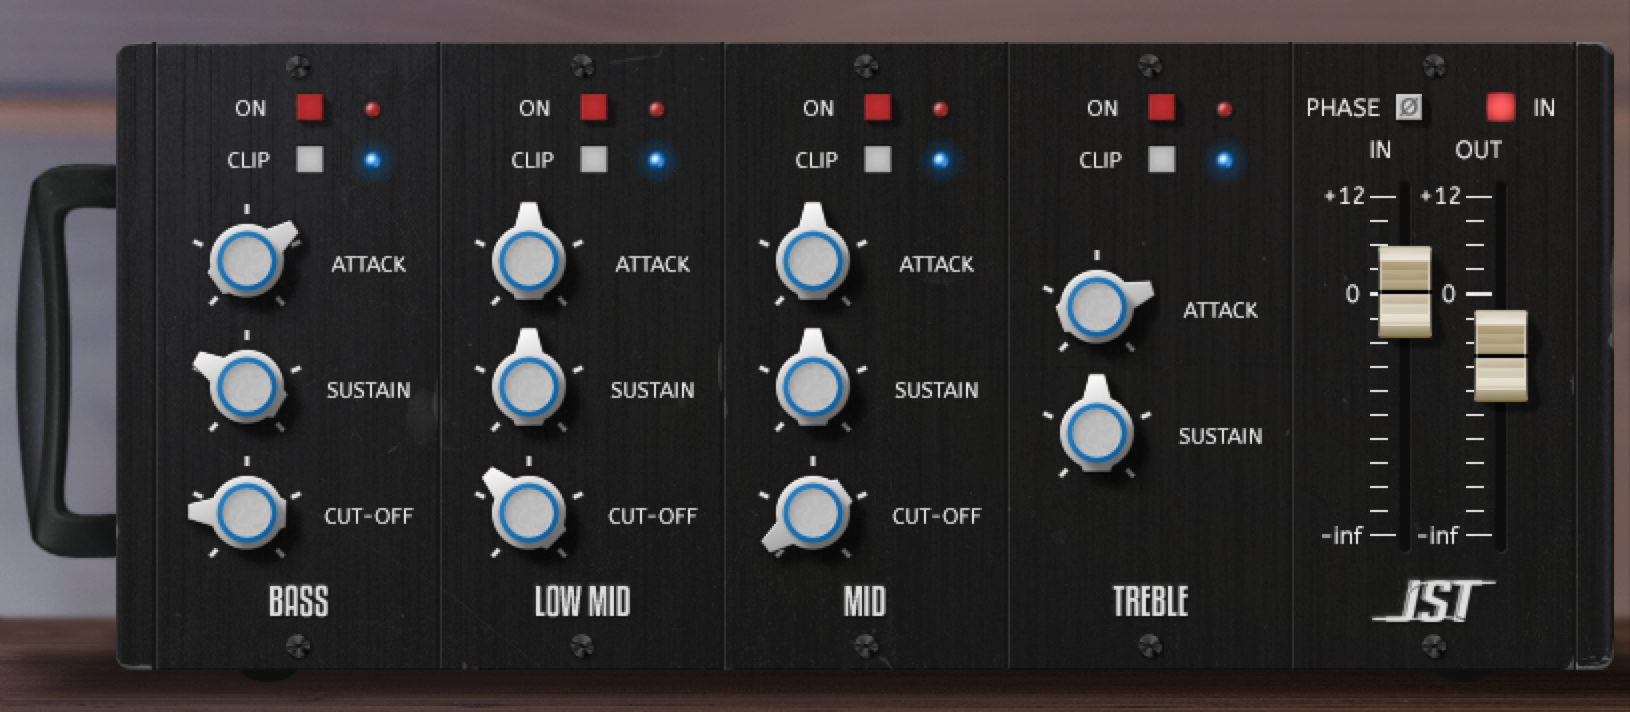
Full-Spectrum Transient Designers: A transient designer is basically an automatic “smart-volume–envelope-manipulation tool” which gives you the ability to accentuate the attack and sustain portions of a signal with the turn of a few simple knobs. This processing basically achieves a similar transient enhancement effect to the slow-attack Compression method mentioned above, but without any actual compression taking place.
Multi-Band Transient Designers: Multi-band transient designers offer even greater control over volume envelopes by allowing the user to manipulate the attack and sustain of individual frequency ranges within the signal independently.
Multi-band transient designers such as Joey Sturgis’ “Transify” offer unique processing possibilities such as boosting the high-end stick attack of a snare, or tightening up the low-end sustain of a kick drum. (Just to name a few!)
Ryan Bruce “Fluff” Demonstrates JST Transify on A Kick Drum Track:
One of the most difficult things to truly master when it comes to playing, recording and mixing the drums is bleed reduction between individual microphones.
Here are a few techniques you can reach for when trying to better-isolate your drum tracks:
NOTE: In this case I’ll only be talking about techniques for the mixing stage, as bleed reduction during recording would require a whole article to itself.
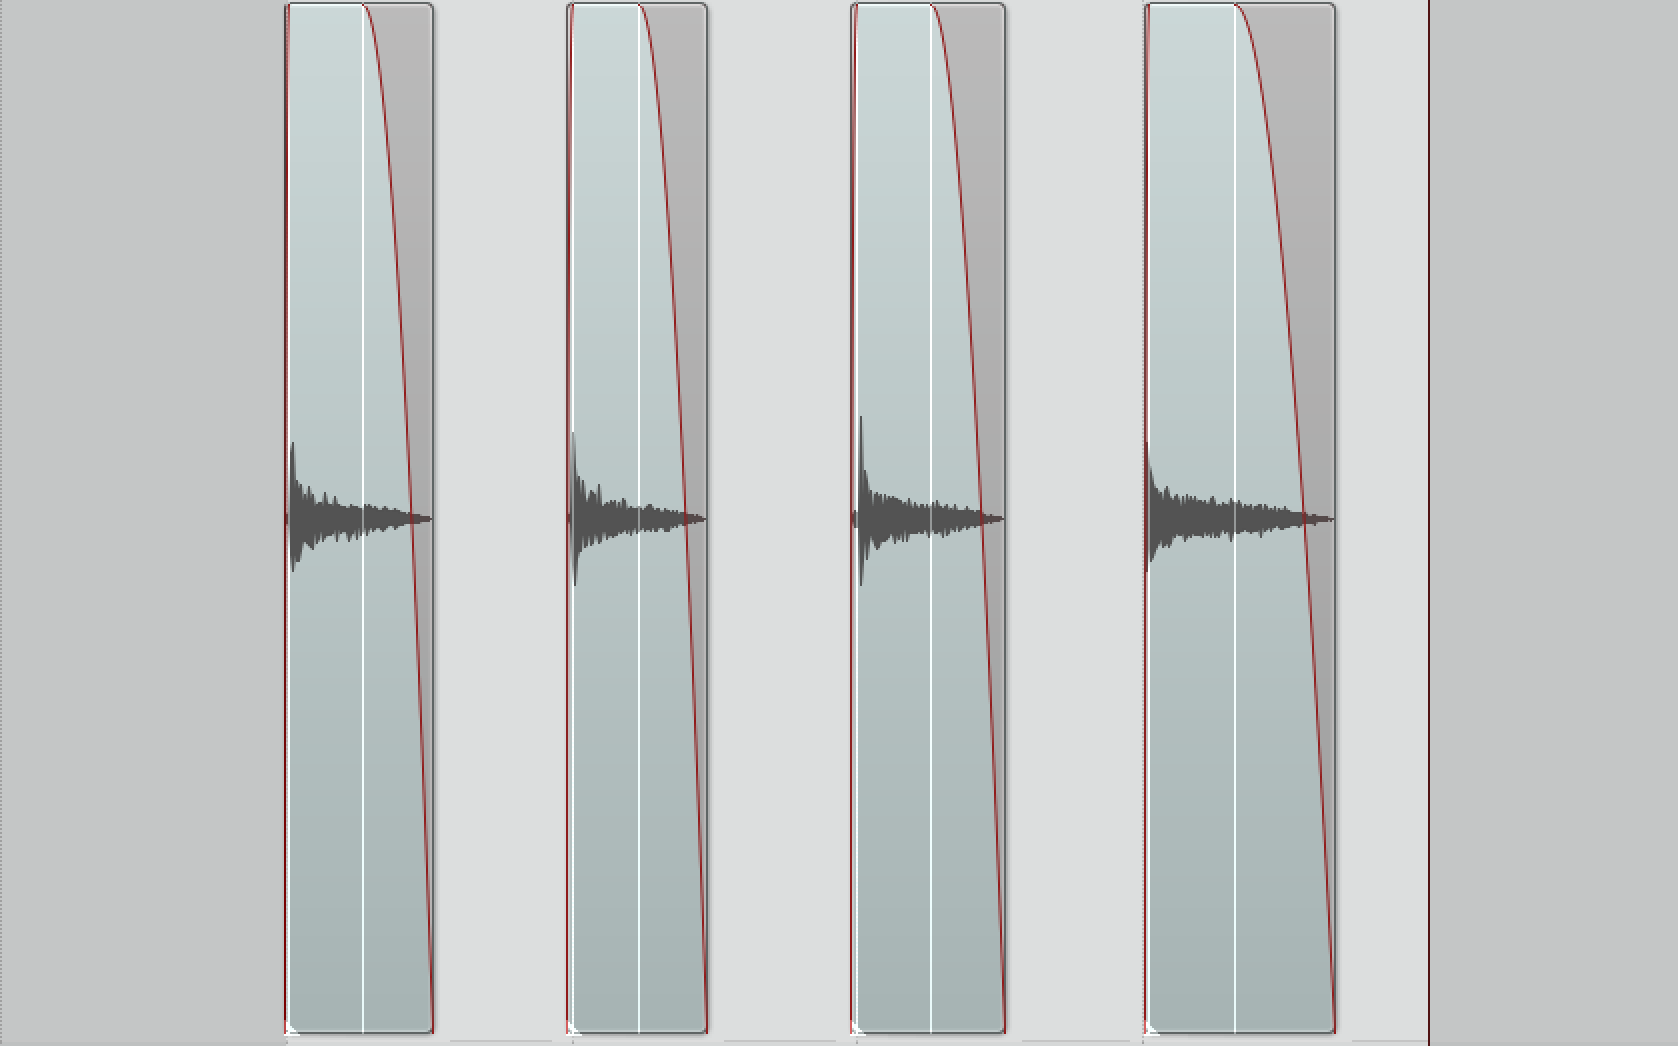
Manual Bleed Removal:
The most accurate way to deal with bleed between drums is to cut it out manually on a per-drum basis:
Although this is technically the most “perfect” way of eliminating the issue, it is also the most time-consuming.
How far you should take this process is entirely dependant on how long you’re willing to spend on the tedious, mind-numbing task of frantically moving a mouse around the screen.
Common practice in most studios is to only remove the bleed from tracks which aren’t played too often (toms, cymbal spot mics etc.) and address bleed on other tracks with a gate or expander.
TIP: The main key to making this type of bleed-removal sound natural in context of the full kit is to play around with your clip fades. Make sure to experiment with various fade-out lengths in order to find a good common ground between “real” sounding drum decays and smooth bleed removal.
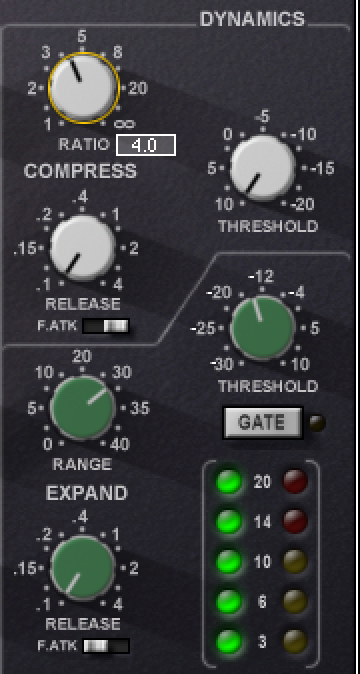
Gates/Expanders:
The most common way to remove bleed is through the use of a gate or expander due to the quick and mostly-precise nature of the process:
These tools are fairly similar to each other: A gate silences the audio (the bleed) entirely once the signal goes below the threshold, while an expander turns the signal down by a user-specified amount rather than cutting it out completely. Both are valid tools, with the expander being a less destructive (and in return more natural) way of dealing with the problem.
My gate/expander of choice is often the dynamics section built in to Waves’ SSL-E channel plugin due to the plugin’s “complete drum toolbox” vibe and overall simplicity.
Check out this awesome video of Eric Tarr from “The Pro Audio Files” explaining and demonstrating Gate/Expander usage on Drums:
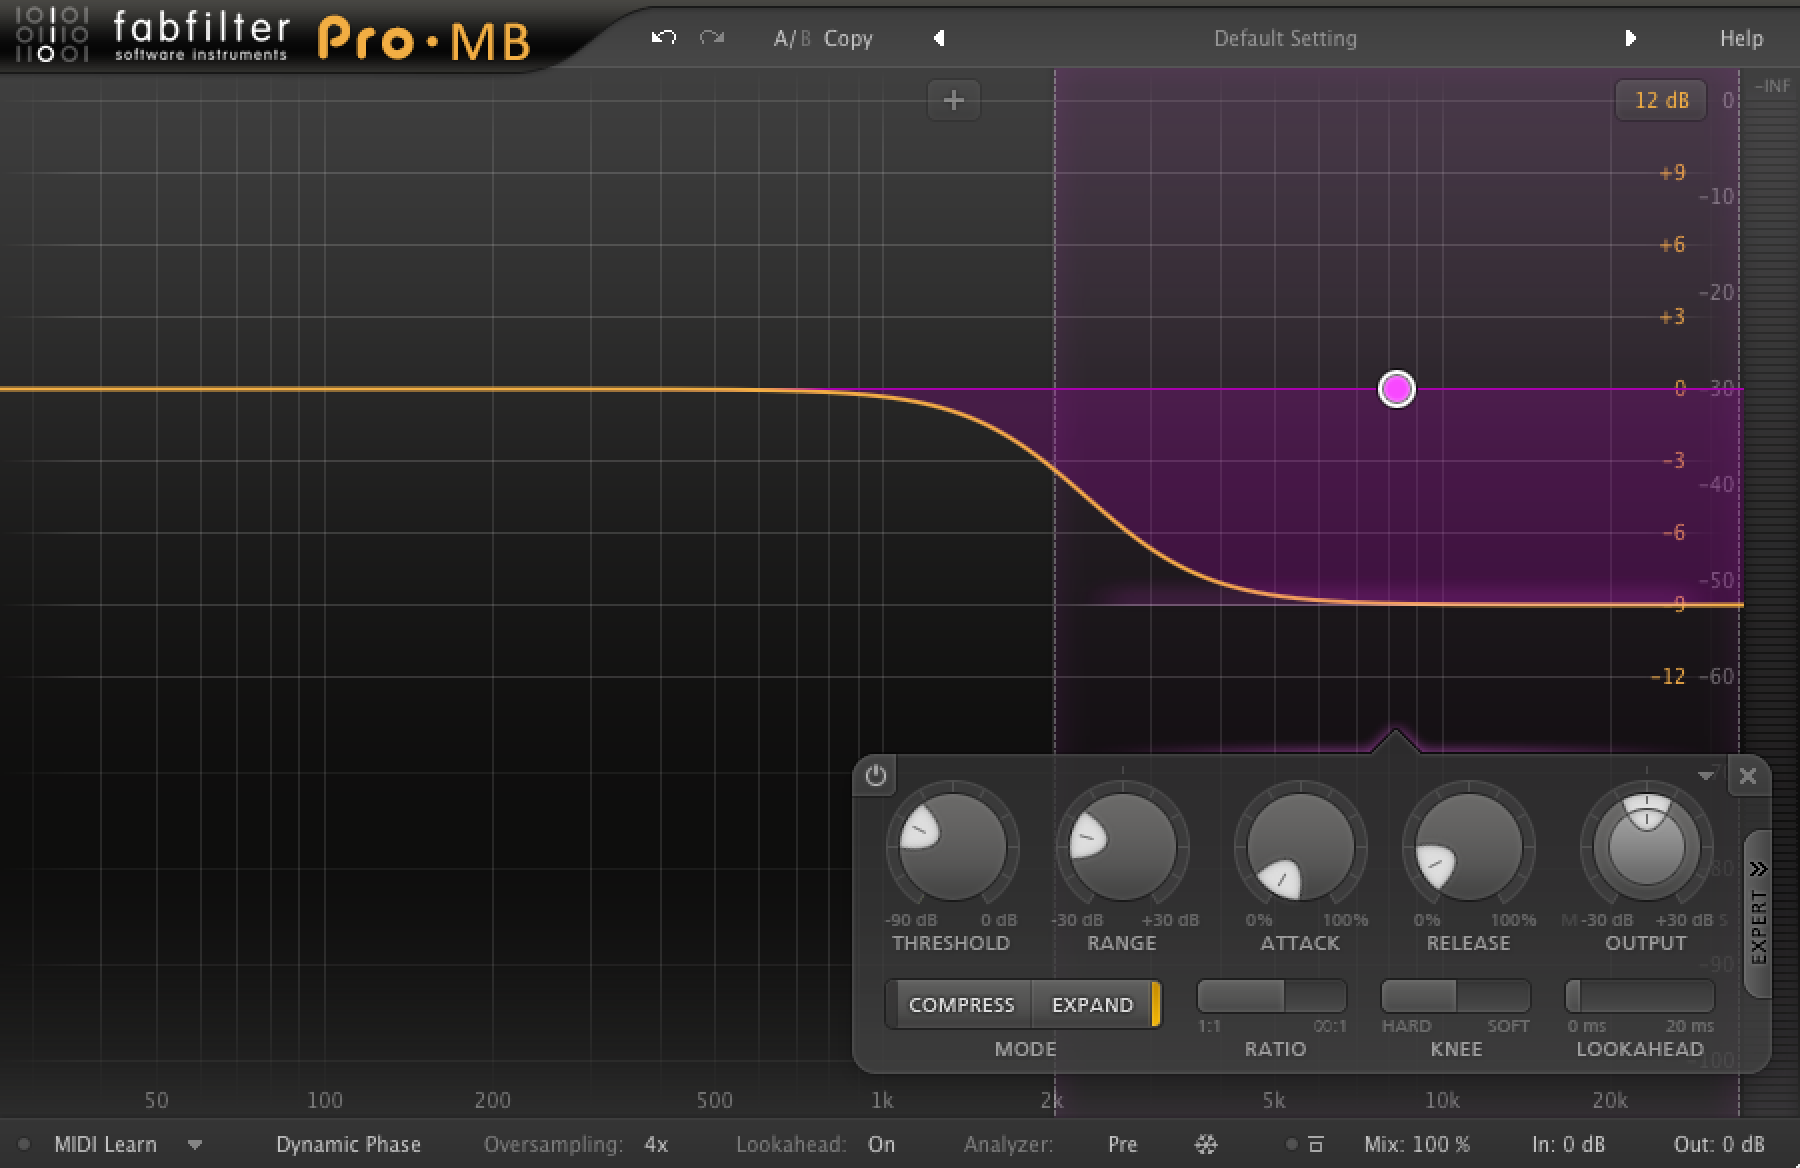
A fairly modern method of dealing with drum leakage is with multi-band expansion:
Certain Multi-Band compressors such as Fabfilter’s “Pro-MB” give you the option to switch each band into “expand” mode. This functionality allows the user to partially reduce a specific frequency range of the signal whenever it drops below the chosen threshold.
In the example above, I’ve set up a single band of expansion across the high-frequencies of a snare track in order to deal with the cymbal bleed between hits.
NOTE: Setting the attack, release and threshold controls so that you’re only letting through each snare hit and the reducing the bleed in between is the key to using this method effectively.
Limiters:
Limiters can be an extremely useful tool in certain situations where various elements jump out of the drum mix unnaturally.
Check out this video of Joey Sturgis demonstrating Limiting on a Drum Overhead track:
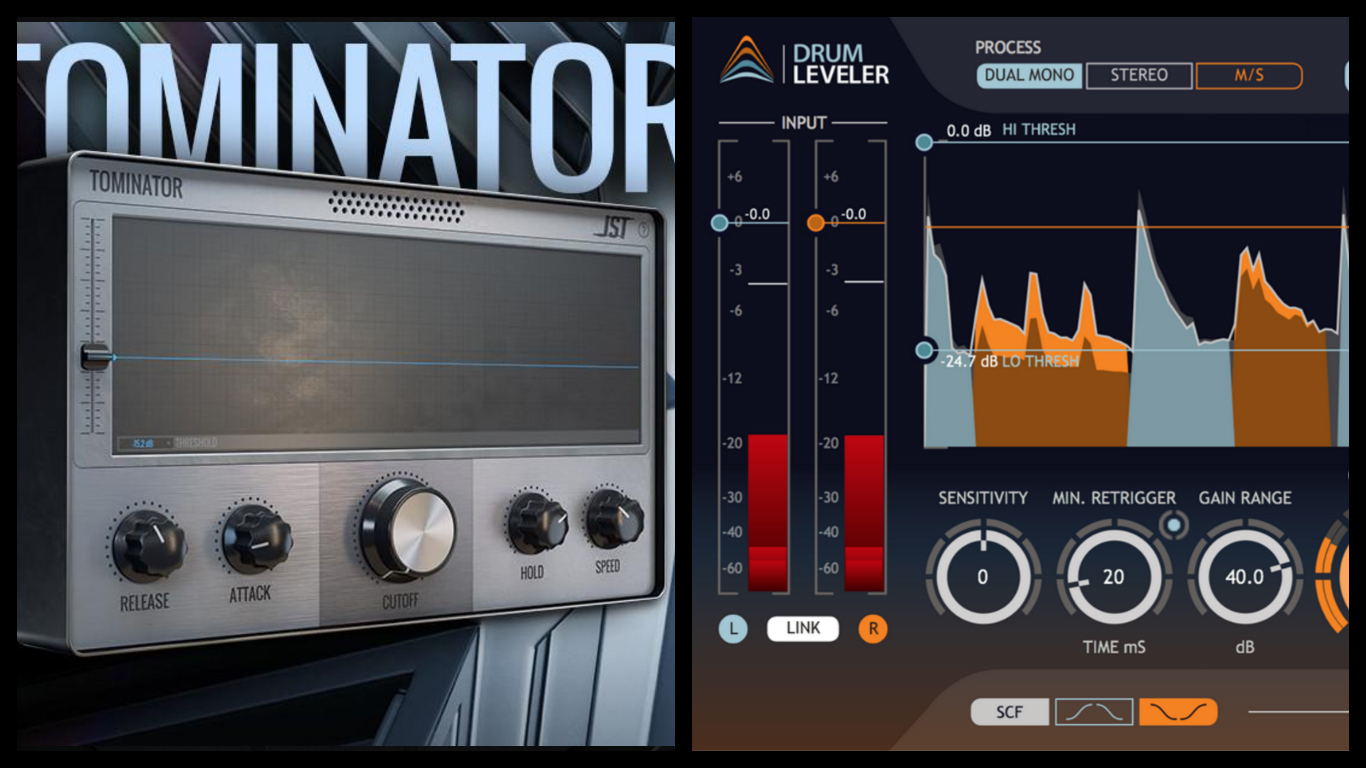
The past few years have seen some huge developments when it comes to easy-mode noise reduction and leakage control:
Plugins like Sound Radix’ “Drum Leveler” and Joey Sturgis Tones’ “Tominator” offer some unique processing algorithms which allow for intuitive, next-level bleed-removal processing options.
A great way of achieving thick and present drums which can punch straight through a dense mix is via the use of saturation & distortion.
Color in Sound?
You’ll often come across engineers using fancy metaphorical words such as “color” to describe various sonic characteristics. Although this terminology may come across a little weird to someone who’s just starting out, it’s actually a rather accurate definition of what it represents.
Here’s A Practical Example of “Color”:
Back in the “good-ole-days” of recording, each drum would have been captured through various layers of harmonically-rich tube, transistor and tape saturation right from the get go.
Nowadays, drums which have been recorded straight to a DAW through a linear, low-distortion digital audio interface will often end up sounding “flat” or “lifeless” as a result.
This non-linear harmonic saturation/distortion which adds pleasant warmth, depth and presence to the sound is often missing in modern-day digital recording, and what most engineers would refer to as “color” in the audio world.
Meet The Coloring Palette
Here are a few tools you can use in the digital domain in order to add some “color” to your drums:
Soundtoys Decapitator: This plugin is a personal favourite for most of my saturation/distortion needs due to the broad range of tone-shaping capabilities and utility options it offers.
The Pro Audio Files’ Matthew Weiss Demonstrates Soundtoys Decapitator on a drum track:
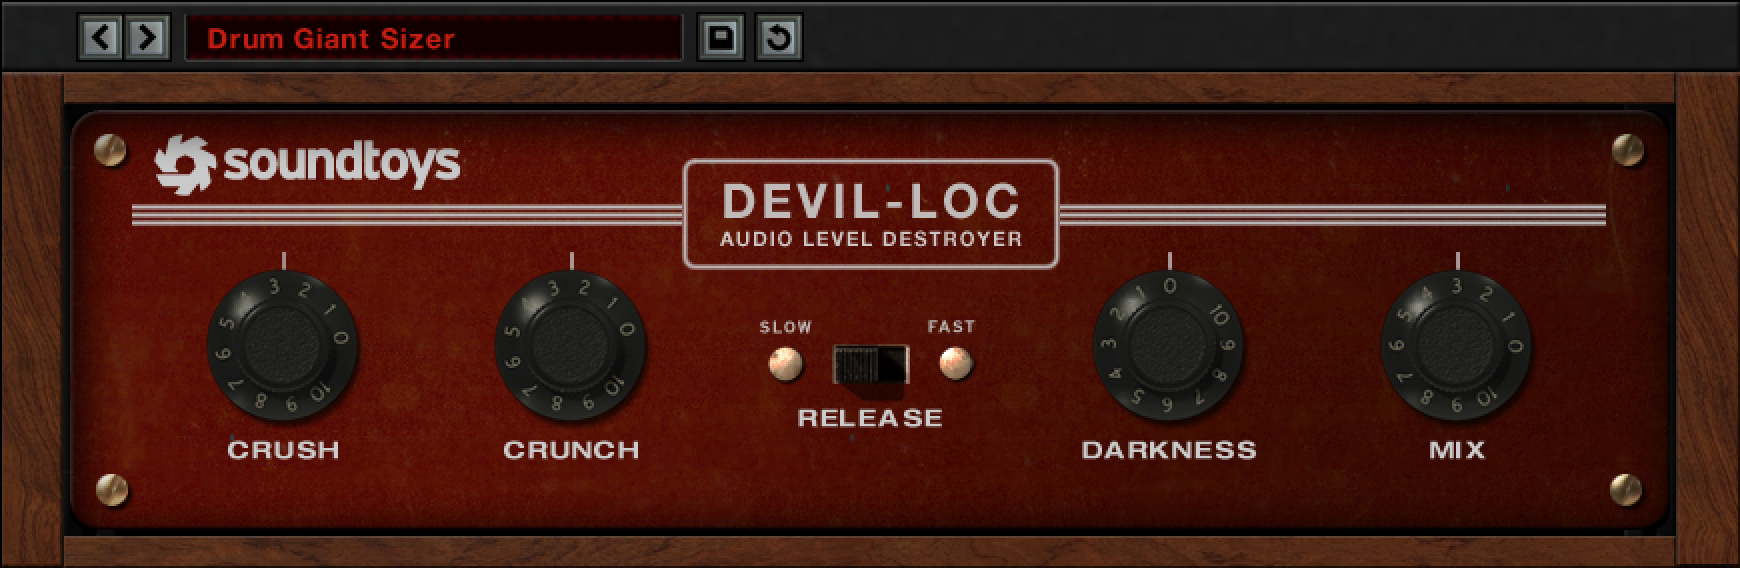
Soundtoys Devil-Loc: Another excellent plugin for achieving super-crunchy, pumping drum sounds that work especially well when blended underneath your unprocessed signal.
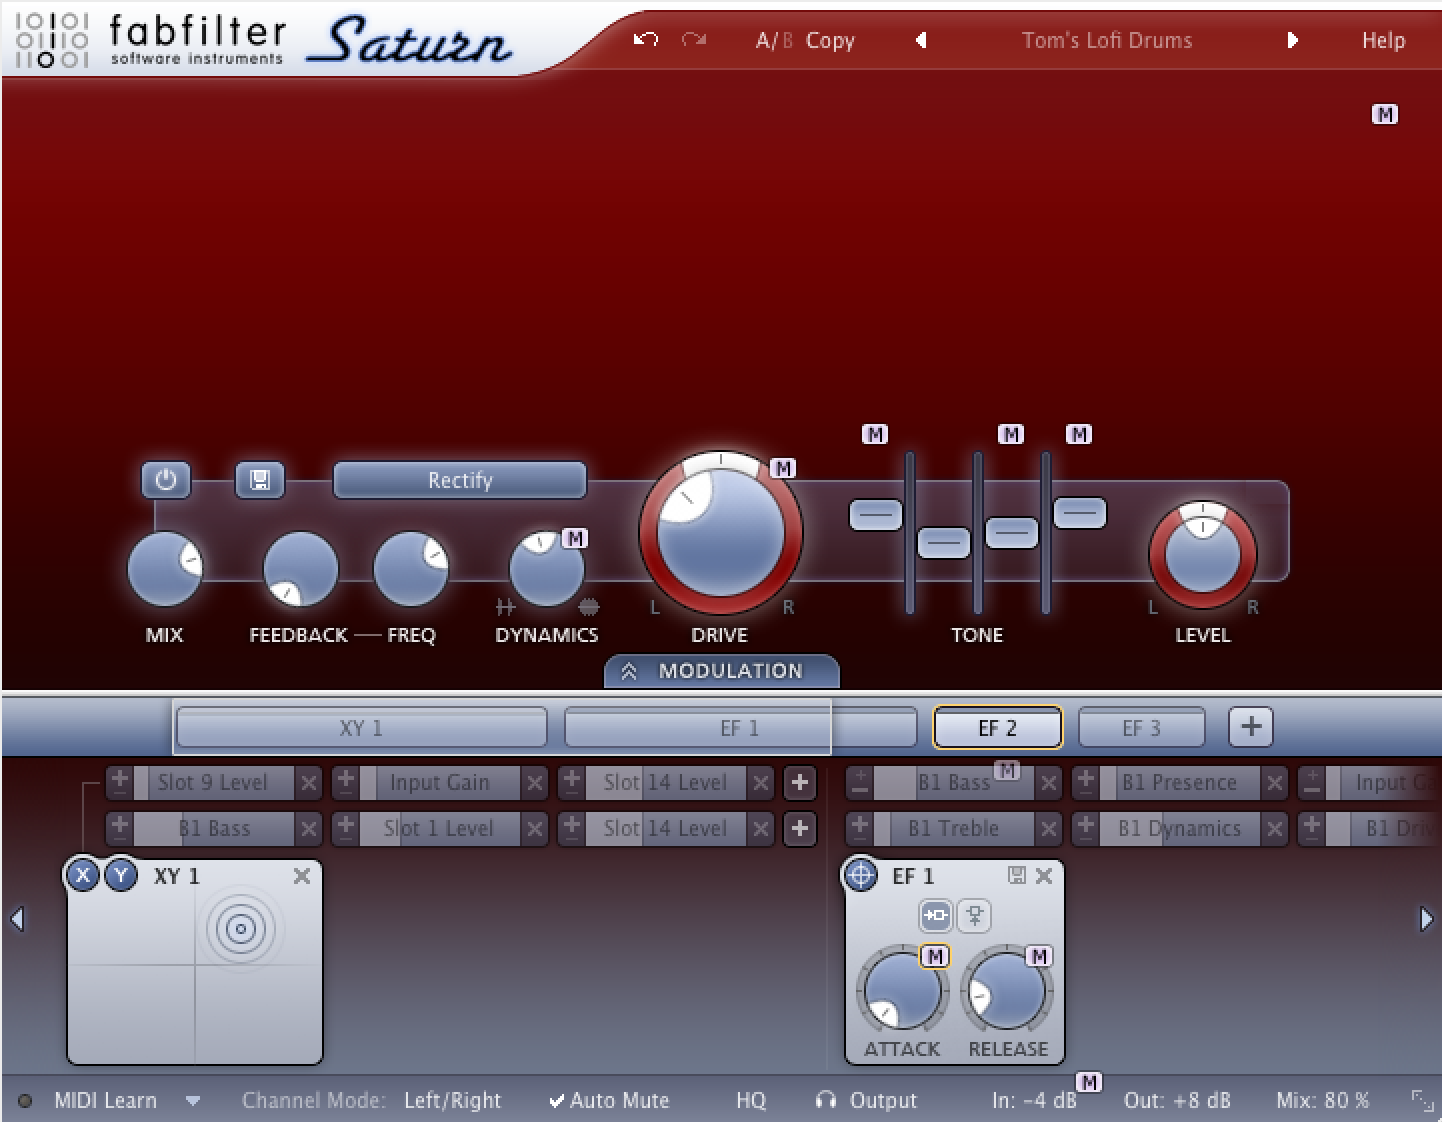
Fabfilter Saturn: If there’s one word to describe this plugin it’s CHARACTER. The sheer amount of processing capabilities this plugin delivers gives you endless control towards forging the sounds in your head.
NOTE: It’s also well-worth scrolling through the various presets in each of the plugins mentioned above for inspiration and possible creative ideas!
The Pro Audio Files’ Matthew Weiss Demonstrates Fabfilter Saturn on a Drum Loop:
An element that really helps define drum sounds within a specific genre is the use of ambience.
It’s not uncommon to recognise a specific drummer, band or genre just by listening to a few seconds of their isolated drum sound. Part of this phenomenon comes down to the fact that the specific rooms used while recording these tracks play a huge role in the overall drum picture.
Well known Artists and Producers discuss the famous “Sound City Drum Sound”
As you can clearly hear from the Sound City example mentioned above, a huge part of any drum sound is the room in which it was recorded. For this reason it’s paramount that you give your drum ambience the attention it deserves.
Here are a few quick ways to bring your room tracks to life:
Crush Them:
A common studio trick to achieve thick, large drum-room tracks is to crush them with a compressor:
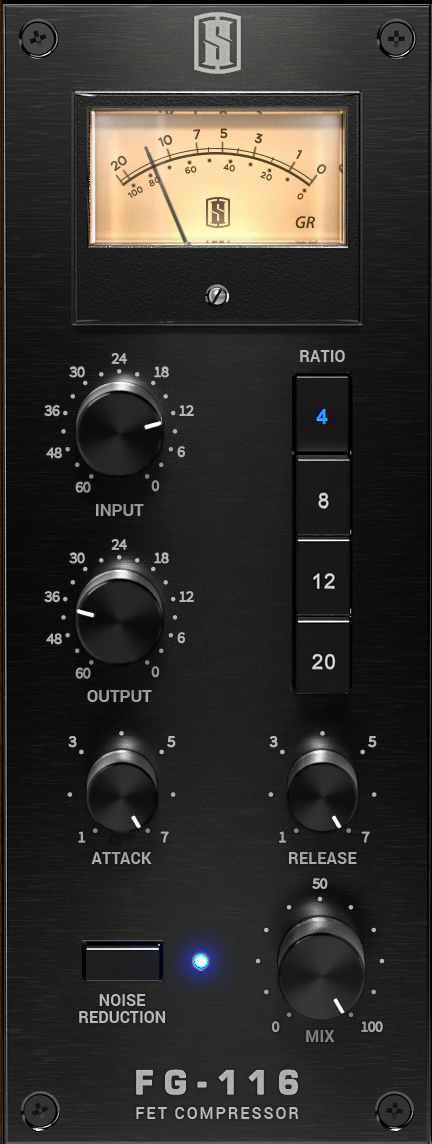
The most commonly used tool for this purpose is the classic UA 1176 set to stun.
Using a fast attack & release with 10dB+ of gain reduction will help increase the room sustain of the drum shells and reduce the “peakiness” of the drum transients.
TIP: Try using the “All Buttons In” mode on an 1176 for a really over-the-top (but awesome) Drum room sound.
Blow Them Up:
Adding distortion to rooms is also a great way of giving them some extra tonal “oomph” and dense, harmonic thickness.
NOTE: Refer to section 3 for some great plugin distortion options for drums.
My personal favourite tool for this application is Soundtoys’ “Devil Loc” distortion processor:
Check out this awesome video of Mitch Thomas From Soundtoys Demonstrating Devil Loc:
A Quick Word On Additive/Reductive EQ Methodology:
It’s important to note that the EQ’ing route you choose to go down when processing will dictate whether or not you’ll need to address certain frequency bands in a specific way. Keep this information in mind when EQ’ing, as you don’t necessarily NEED to mess with EVERY SINGLE frequency band just because I’ve told you about it.
Example: If you’re boosting a lot of high and low-end then you won’t need to remove as much mid-range, and vice versa…
Here are some of the general areas to look at while EQ’ing the Drums:
Note: Take these numbers as general guidelines, not as hard and fast rules! The exact frequencies you’ll need to boost/cut will vary greatly from track to track due to the sheer amount of variables involved in the recording process. Always make sure to sweep around and fish for the areas which complement the sound best!
Drum Shells (Kick, Snare, Toms):
Note: Exactly where to focus these boosts/cuts depends on the genre of music and specific drums & mics used during recording. Make sure to experiment with your particular sounds in order to find the frequencies which work best!
Kick:
Low-End “Thump” @ 60-80Hz: Most engineers like boosting around 60Hz for a thicker low-end, while somewhere a little higher around 80Hz can often work better for fast material with a lot of double kick content.
High-Mid “Presence” @ 1-4kHz: Boosting the beater/stick attack somewhere within this range is vital for a present kick drum that remains audible in a dense mix. Try sweeping a bell boost around this range in context of the full mix in order to determine a good spot which cuts through nicely.
Mid-Range “Junk” Centered @ 200Hz, 500Hz, 800Hz: These frequency areas often contain a fair amount of unnecessary content which you can afford reduce for a cleaner drum sound.
High-End “Click” @ 8-10kHz: Boosting a healthy amount of high-end in this range usually goes a long way towards achieving a clear and “transient” drum sound. How much to boost in this range is largely dependant on the musical context. (EX: More click for death metal, less click for rock)
EQ TIP: Boosting with a bell curve will result in a tighter, more-focused sound, while a broad shelf boost will often sound “bigger” sound.
Snare:
NOTE: I won’t go into specifics for the rest of the drum shells, as the EQ concepts I’ve talked about in the “kick” section are pretty transferrable across all of them.
Low-End “Punch” @ 150-250Hz
High-Mid “Presence” @ 1-5kHz
Mid-Range “Junk” Centered @ 400-500Hz, 800Hz
High-End “Crack” @ 6-10kHz
TIP: Grammy award winning engineer Chris Lord Alge is well known for absolutely cranking an 8kHz shelf on his SSL console for individual drum mics in order to achieve his signature sounds.
Toms:
NOTE: A lot of engineers will simply buss together the individual tom mics and process them as a single group for ease. If you’re particularly picky, you can always fine-tune your EQ settings for each drum individually instead.
Low-End “Boom” @ 80-150Hz
High-Mid “Presence” @ 1-4kHz
Mid-Range “Junk” Centered @ 200Hz, 500Hz, 800Hz
High-End “Thwack/Slap” @ 6-10kHz
TIP: You can often get a pretty clear visual representation of where a specific drum’s low-end and beater/stick attack lives by viewing it on a spectrum analyser.
Low-End “Kit Content” 500Hz and Below: It’s not uncommon for the low end content below 500Hz or so to get completely rolled off in the overheads in a metal mix. Depending on the genre, you may be able to get some usable low-end out of your overheads, so don’t automatically filter them!
Upper-Mid “Harshness” 2-4kHz: Cutting out a decent chunk of the harsh frequency content in this area can really make your overheads more listenable. This cut will also provide the added bonus of making more room for your guitars and vocals to live.
Mid-Range “Junk” Centered @ 500Hz & 800Hz: Consider cutting some of these areas if your overheads sound “boxy” or “flat”.
High-End “Clarity/Sheen” @8kHz+: Boosting with a gentle shelf in this area can really help towards giving the cymbals some extra sparkle and clarity. Be careful not to go overboard in this area, as this range is notoriously hard on the ears.
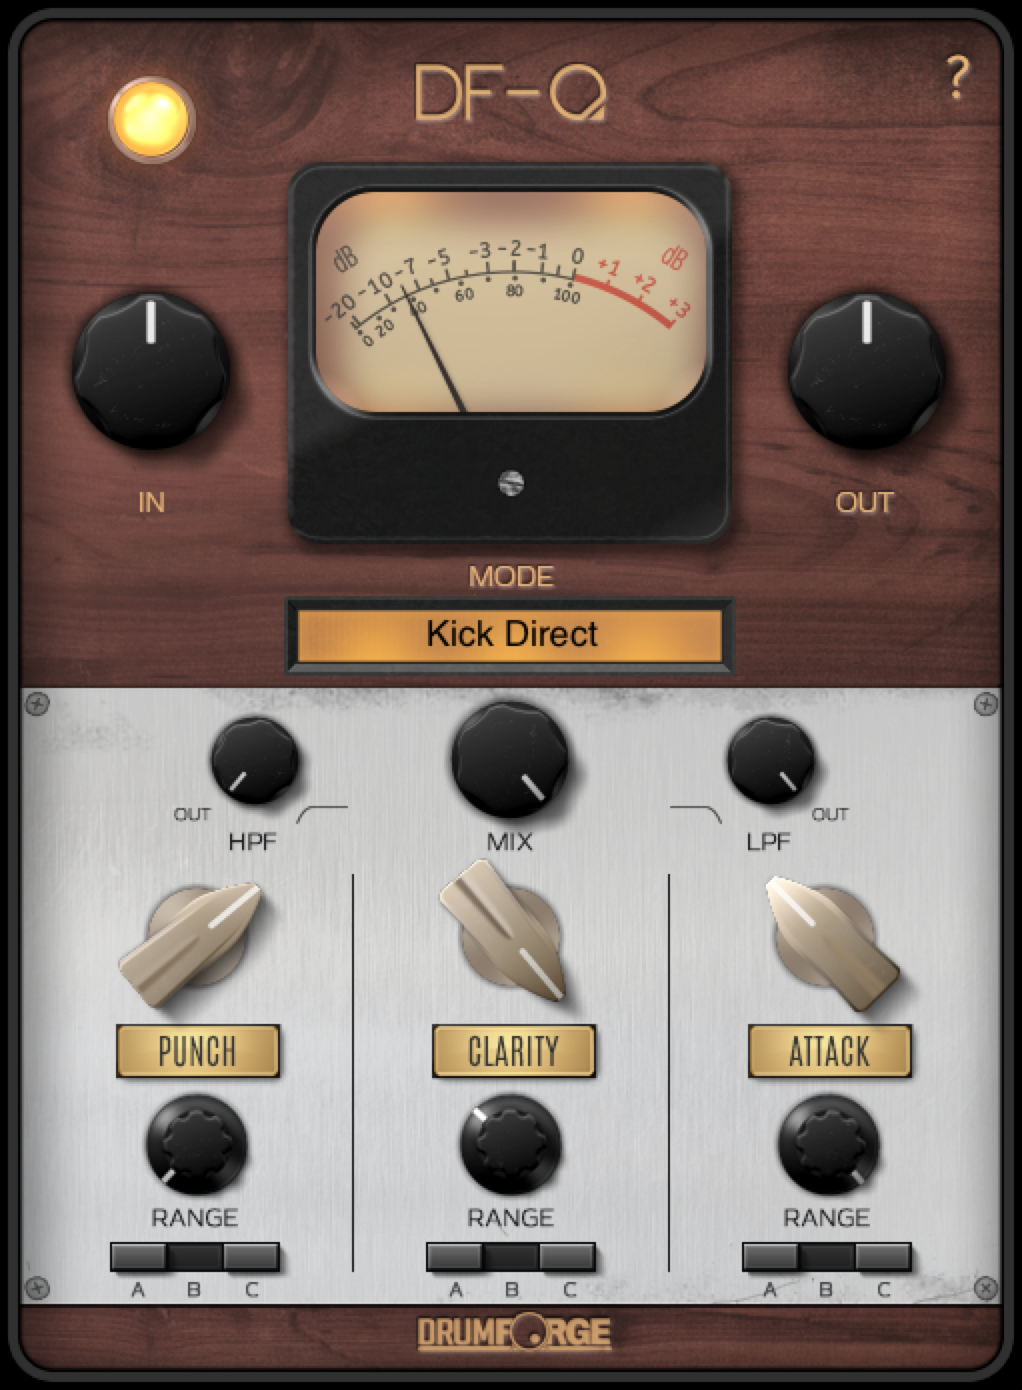
NOTE: A great drum EQ tool I’ve been checking out recently is the new Drumforge DF-Q plugin. This is an excellent tool when it comes to sculpting a great drum sound as it takes numbers out of the equation and forces you to really use your ears.
Watch Joel Wanasek Demonstrate DF-Q to achieve a variety of sounds:
Achieving great drum sounds takes a huge amount of practice, hard work and attention to detail. The main thing to keep in mind at all times while mixing drums is that each individual element is meant to fit together and form a single, cohesive unit.
Remember: Always make sure to see how things work in context of each other and the entire mix. An average listener is never going to hear your kick-direct mic in solo, so don’t bother trying to make it sound perfect in solo!
FINAL WORDS:
This concludes “Mixing Secrets – Drums”. I hope that this article has given you some new ideas to try out during your next project. Be sure to comment below if any of this information has helped you out, or if you have any questions.
Stay tuned for more production/mixing related articles in the not-so-distant future!
Nail The Mix is our online mixing school that gives you REAL multi-tracks from REAL bands, plus a mixing class from the producer who recorded it. Past guests include Periphery, Chelsea Grin, Machine Head and State Champs. Join now for instant access!
Eyal Levi is a producer, mixer, musician, and co-founder of URM Academy. As a founding member of the band Dååth, he has toured the world, and his production discography includes acclaimed albums for bands like The Black Dahlia Murder, August Burns Red, The Contortionist, Chelsea Grin, and Whitechapel.
In This Episode
Host Eyal Levi takes the reins for this Q&A episode, tackling a ton of awesome questions from the URM community. He kicks things off with some killer advice for a 15-year-old producer on how to land their first clients and build a reputation from scratch. Then, he gets into a super common dilemma: what do you do when a band or label asks for your full, open mix session? Eyal breaks down why that’s a tricky request and shares his strategy for handling it professionally. He also drops some serious knowledge on his process for mixing the massive low-end synths on The Contortionist’s album Intrinsic, and shares his philosophy on when (and when not) to use the solo button while EQing. To wrap it up, he gives a cool behind-the-scenes look at the origin story of URM and Nail The Mix and where it’s all headed.
Mary Zimmer is a vocalist and vocal coach best known for fronting the band Luna Mortis. She now runs VoiceHacks.net, where she provides tutorials and lessons for modern rock and metal singers, with a heavy focus on developing proper, sustainable screaming techniques. Drawing from her own experience in the studio and on the road, as well as her studies with renowned vocal coach Melissa Cross, Mary breaks down complex vocal mechanics into practical, easy-to-understand concepts for artists and producers alike.
In This Episode
In this episode, vocal coach Mary Zimmer drops a ton of knowledge that will help you get way better vocal performances in the studio. She gets into why it’s crucial for producers to understand how the voice works as an instrument and provides a bunch of practical tips you can give singers, even if you’re not a vocal coach. Mary covers simple tricks like the “sternum lift” for instant breath support and using mental imagery for powerful tone placement. She also lays out a complete game plan for vocal health to prevent blowouts, covering everything from prepping the studio with humidifiers and mint tea to giving vocalists a pre-session checklist that includes vocal rest, avoiding certain medications, and simple warmups. This is essential listening for any producer who wants to capture killer takes and avoid vocal injuries.
In this weekly series of Blogs I’ll attempt to take you through some of the most popular and effective audio processing techniques used in professional studios all over the world.
Each installment in this series will focus on a different instrument and provide you with links to relevant video examples of industry-leading engineers demonstrating these techniques.
This week, we’ll be taking a look at an instrument that really separates the mixing professionals from the beginners:
The bass guitar is often looked down on as a “simple” or “inferior” instrument within the music industry. In reality, most mixes/songs fall apart completely the moment the bass is taken away! (No, I’m not secretly a bass player…)
In this Blog we’ll take a look at some of the many tricks we can use in order to forge a thunderous monster of a bass sound that sits well in a mix.
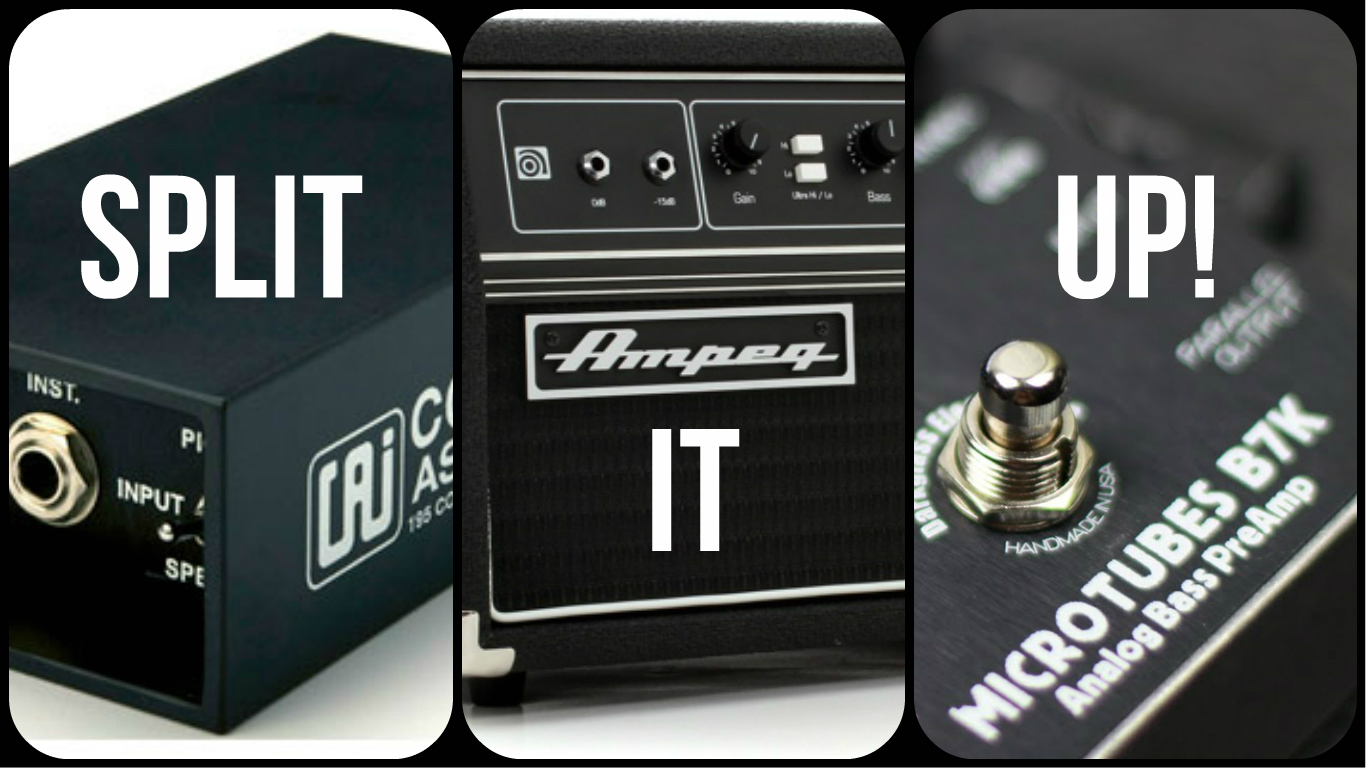
1 – Split It Up (Filtering):
A highly popular modern-day approach to processing bass guitar in heavy music is to split the various frequency bands of the instrument across multiple channels.
These channels usually consist of a combination of the following:
A Clean DI Channel (Low-End)
A Heavily Distorted “Grit” Channel (Upper Mid-Range & Highs)
OPTIONAL: A Lightly Saturated “Bass Amp” Channel (Mid Range)
Mixing bass in this way gives you a greater level of control over the overall frequency balance of the instrument by providing a means of processing each channel separately for a different purpose.
How Can I Use The Split-Processing Technique?
Here’s a brief, step-by-step guide to splitting up your bass guitar track:
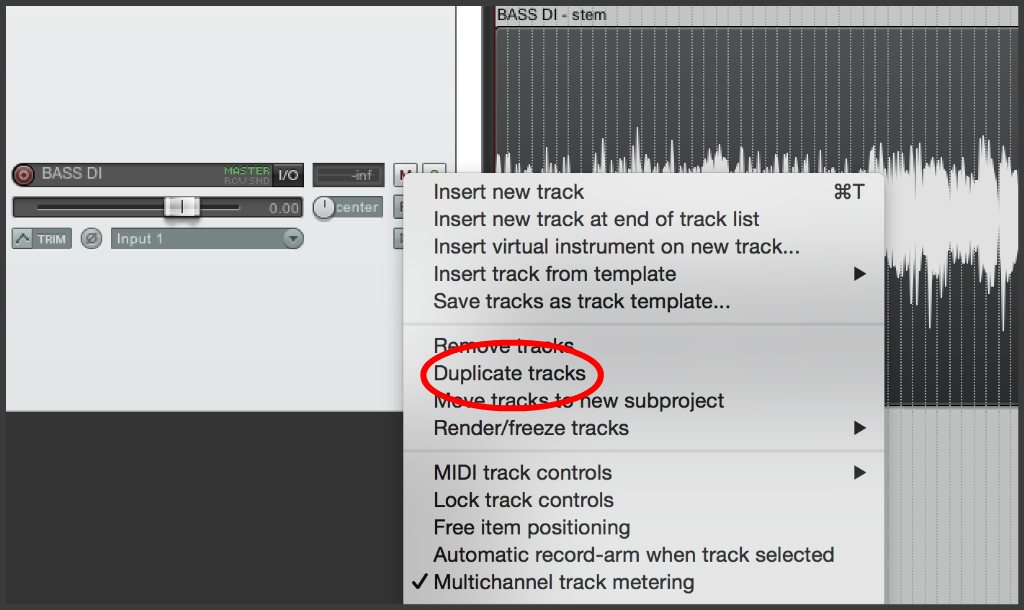
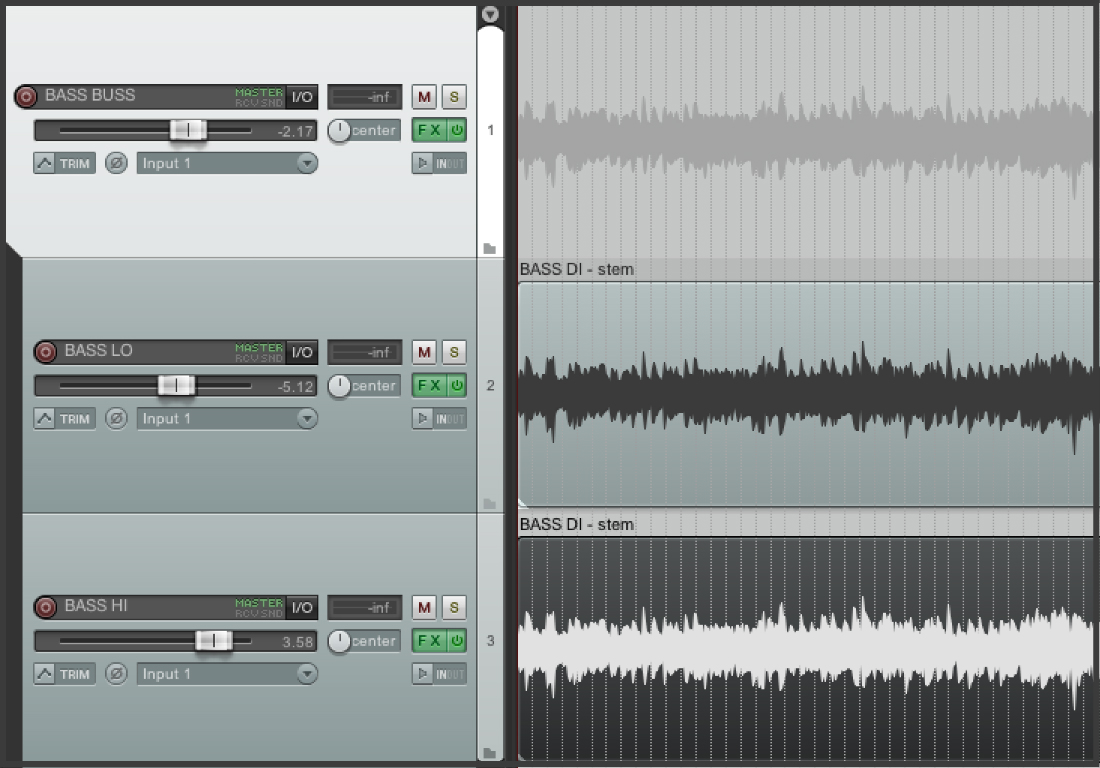
Step 1 – Duplicate: Start off by duplicating your raw DI Bass track so that you have the desired number of channels. (Usually 2 or 3 – Entirely up to you!)
Step 2 – Name The Channels: In this case, I’ll only be using 2 channels (Lo-Bass & Hi-Bass). Name your channels accordingly.
Step 3 – Set Up Your Initial Tones: Decide how you want to use each track. In this case, “lo” will be my clean, non-distorted low-end-only channel & “hi” will be my gritty mids/high-end-only channel:
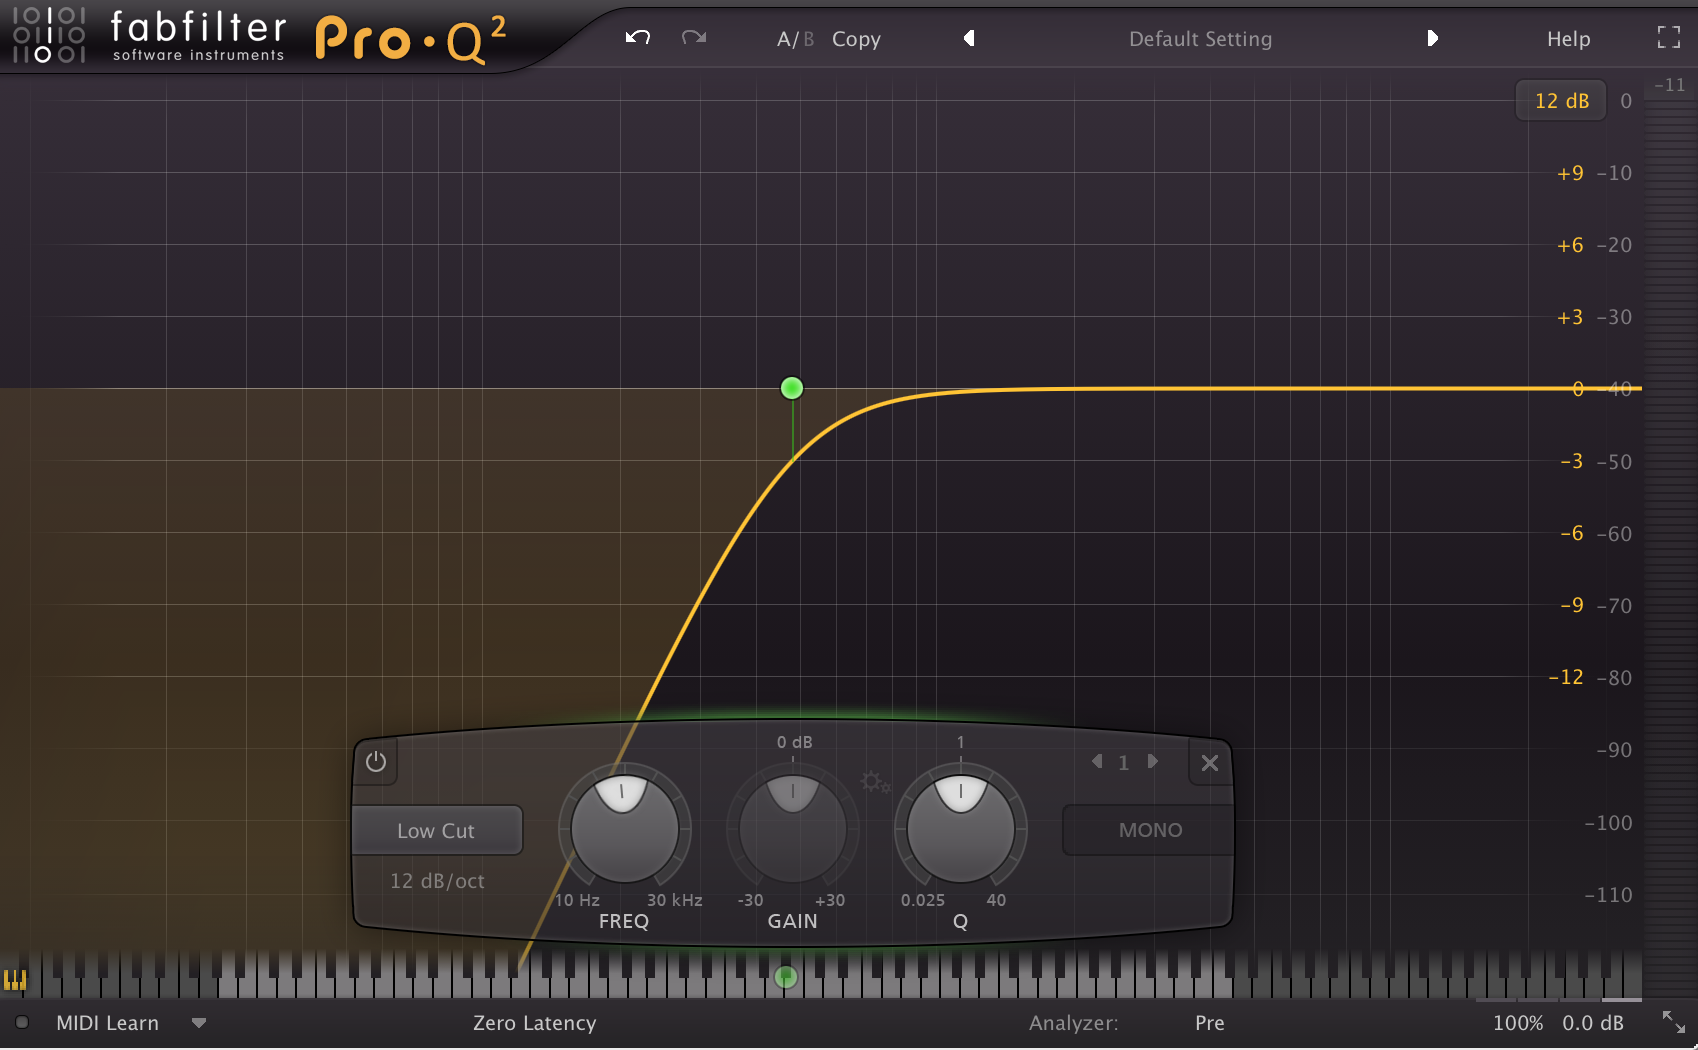
LO-Channel:
The aim for this channel is to provide clean, compressed, “Sine-Wave-Like” low-end which is consistent in level throughout the track. I won’t be using any amp simulation on this track, as a simple DI will provide the clearest low-end definition.
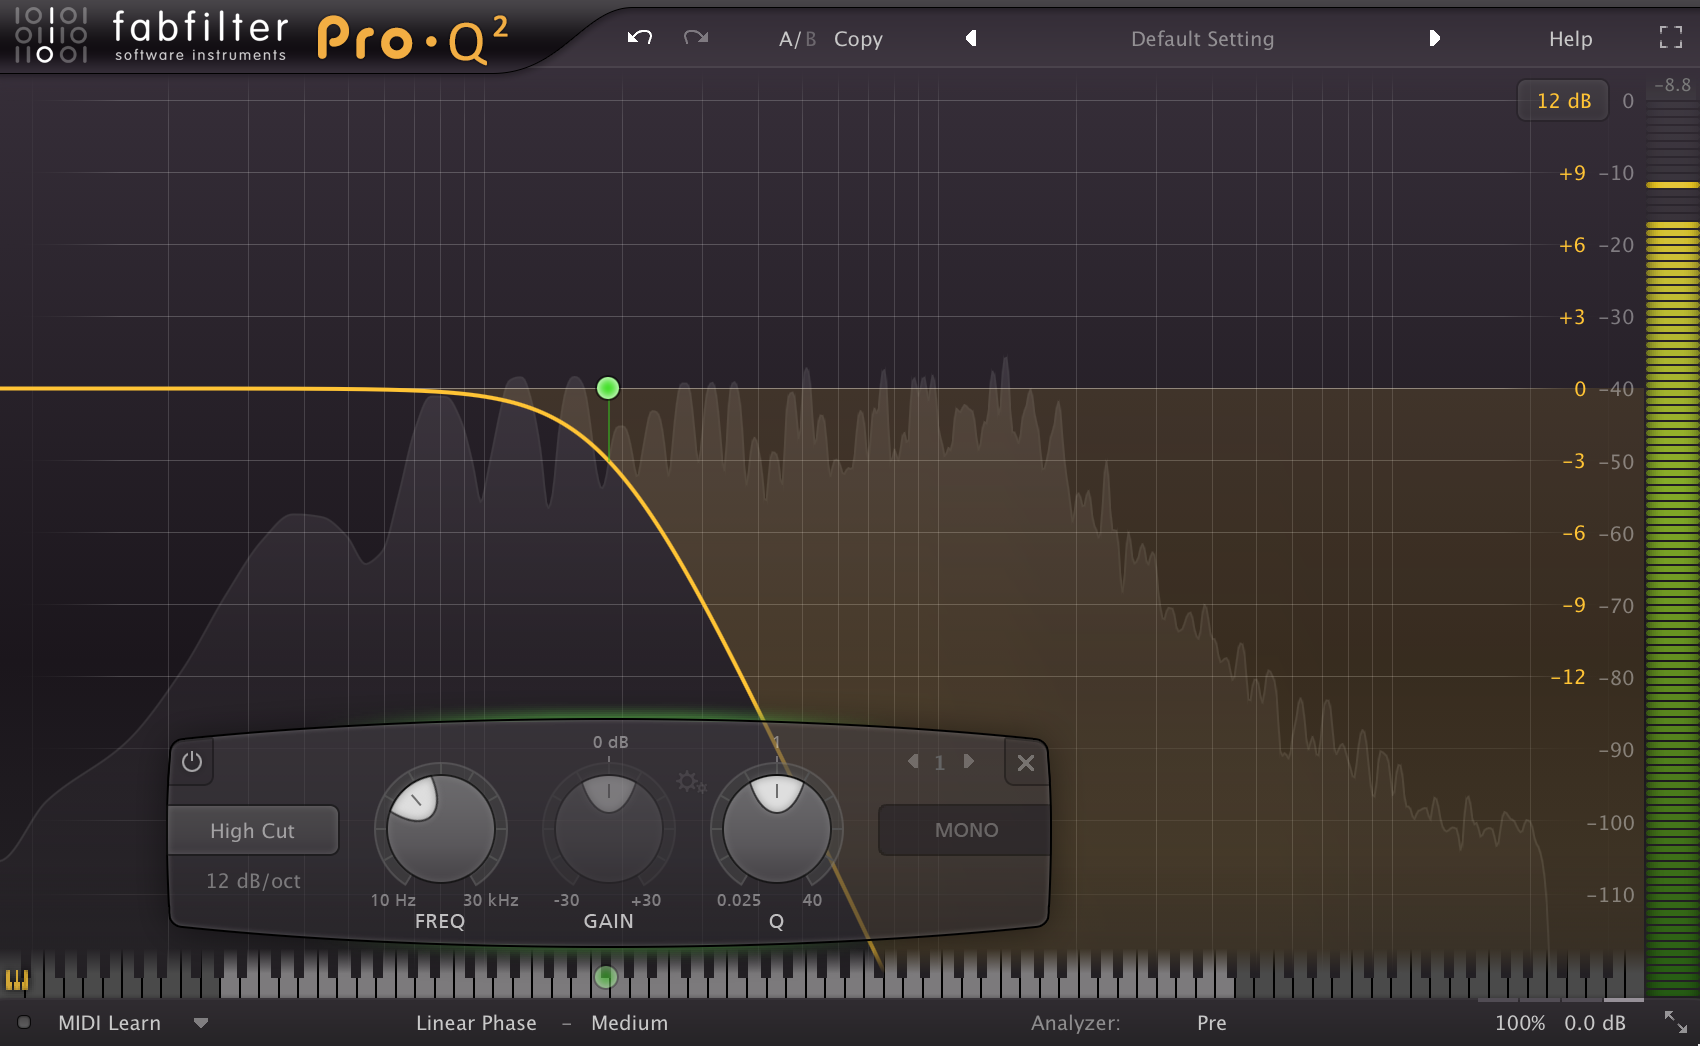
Filtering: Filter out most of the high-end content with a low-pass filter set somewhere between 100Hz-300Hz.
NOTE: Exactly where you should set the crossover of the filter depends largely on the parts being played. Make sure to tweak the depth of the filter so that you’re not losing any notes!
Limiting: Insert a limiter after your filter and set the threshold so that every note is getting evened out by the compression.
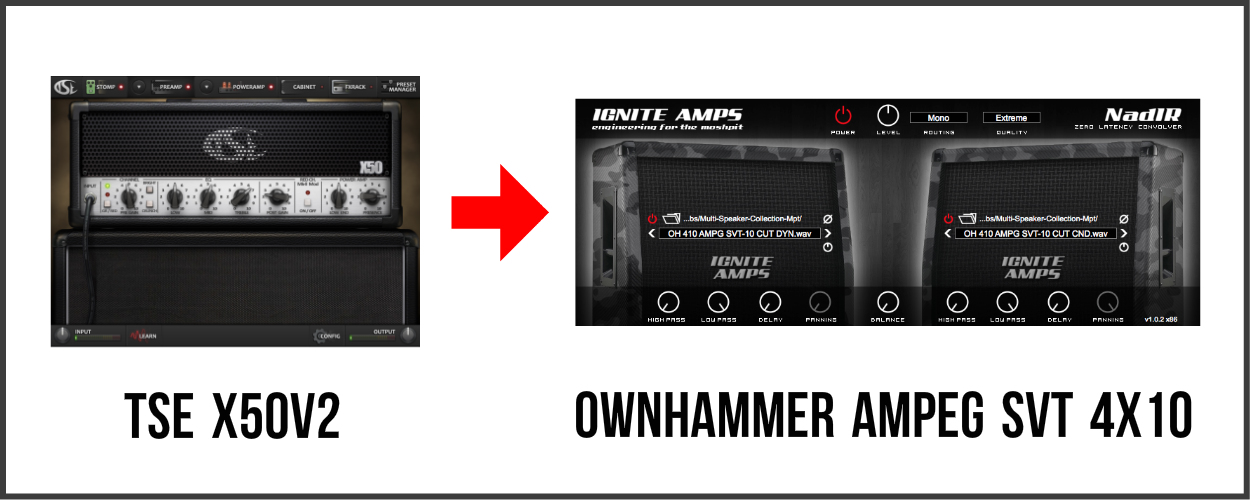
HI-Channel:
The aim for this channel is to provide a gritty high-end source which is free from any fuzzy or flubby low-end/mid content. In this case, I’ve sent this channel through TSE Audio’s X50v2 Amp Sim for grit and topped it off with an Ownhammer Ampeg SVT Speaker Cabinet IR. (Most distortion units will do the trick, experimentation is key!)
Filtering: Filter out most of the low-end and muddy mid-range content with a high-pass filter set somewhere between 450Hz-1kHz. I’ll usually filter this channel after the amp simulation so that the amp reacts to the full-range DI in a more natural manner.
NOTE:It’s not uncommon to have a 3rd “mid” channel which is usually sent through an amp simulation plugin for added girth. In this case, I’ll just be sticking to two channels.
Step 5 – Balancing/Bussing: Now that we’ve set up our initial tones we can set the levels of these two channels independently and buss them together in order to start treating our “lo/hi” blend as a single tone!
That’s pretty much all there is to splitting up a bass track. Keep on reading for further advice on the later stages of Bass Processing!
Here’s a video of mixing legend Dave Pensado demonstrating the split-channel bass mixing technique for reference:
The bass guitar is a dynamic instrument that requires consistency in order to work well in a mix. The best way to achieve this kind of dynamic control in the mixing stage (alongside playing consistently in the first place) is through the use of compression and limiting.
There are 3 main stages of compression I’ll typically opt for when mixing a bass. Each of these stages serves a different purpose:
1 – Accentuation Compression: This stage of compression serves as a light-leveler, but also accentuates the initial transients of each bass note in order to give them some additional life and punch.
I’ll typically use an 1176 style compressor with a medium/slow attack and fast release for this purpose and aim for 5-10dB of reduction.
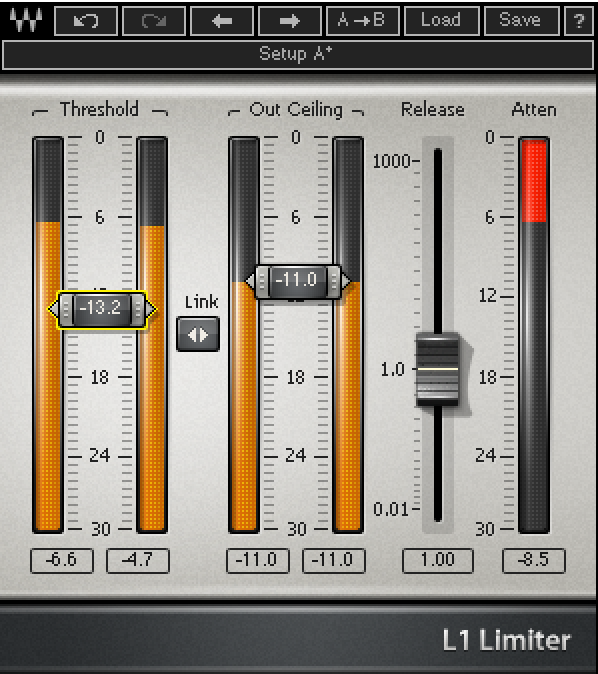
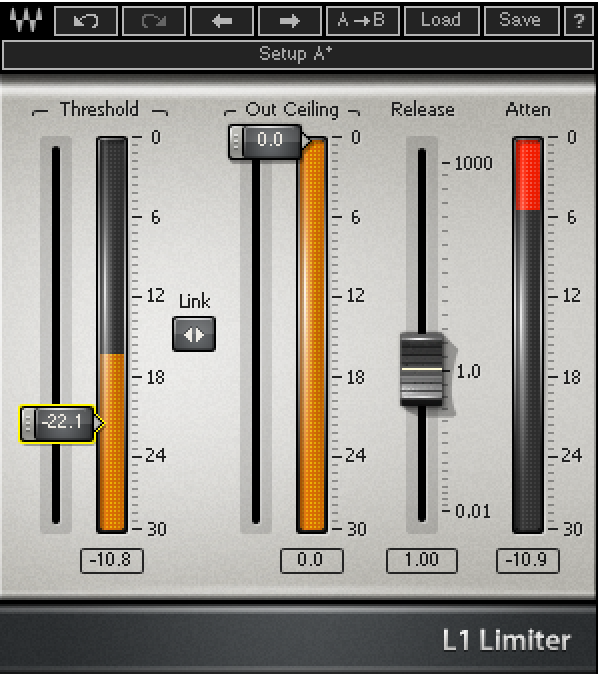
2 – Pin-Down Compression: This stage is where the majority of the volume leveling will take place. I’ll often use a brick-wall-limiter like Waves’ L1 for this purpose and set the threshold so that the output level of the bass is practically flatlined.
NOTE: Be careful not to suck the life out of your bass guitar by over-limiting it. This trick works best when applied on a low-end only channel, as it allows for the high-end transient information of your grit channel to stay intact!
3 – Low-End Tightness Control: The last instance of compression in my bass chain is often a multi-band compressor. This stage acts as a sort of “final low-end enhancer” which helps fine tune the low-end response of the bass within the track and really keep it locked in its place.
I’ll often use FabFilter’s Pro-MB for this purpose and tweak the attack and release controls so that the compression is punchy without pumping too hard.
Here’s a video of NailTheMix’s Joel Wanasek Using Waves L1 to limit a bass low-end track:
Although clean bass tones work well for a wide variety of genres, they can’t usually compete very well when it comes to distorted guitar-heavy genres like hard-rock and metal.
Whether you’re splitting the bass across multiple channels or just using a single channel of bass, it’s often a good idea to give it a healthy dose of saturation or distortion in order to help it cut through the mix and remain audible on smaller speakers.
Here’s a short list of bass distortion options to consider in the analog and digital worlds:
Hardware Units:
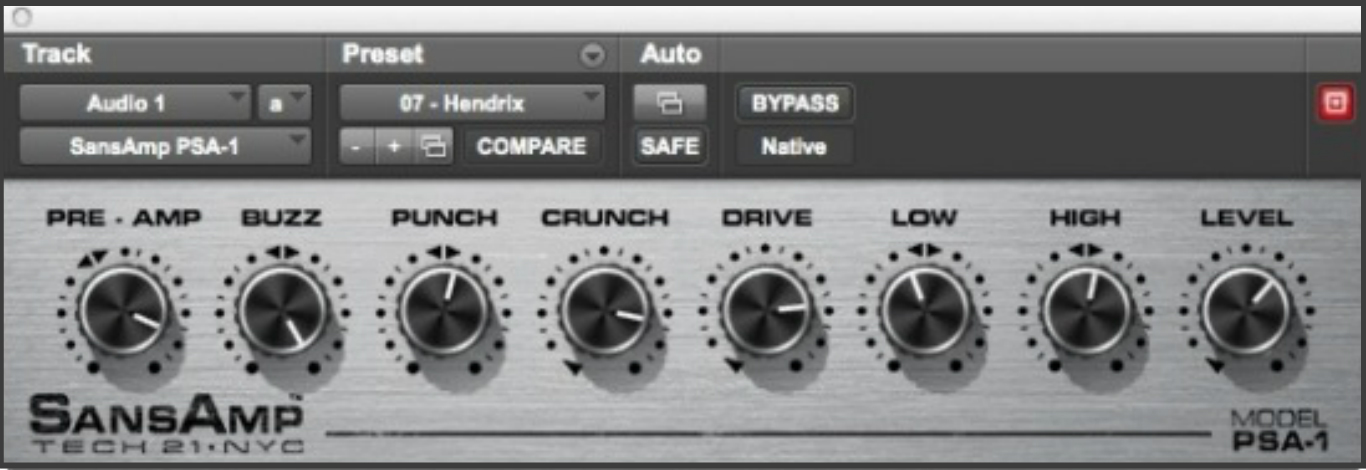
Sansamp: The Sansamp hardware units and pedals have been used as a bass distortion solution for decades in studios all over the world. There is also a great Sansamp emulation included with Pro-Tools if you’re unable to get your hands on the real deal.
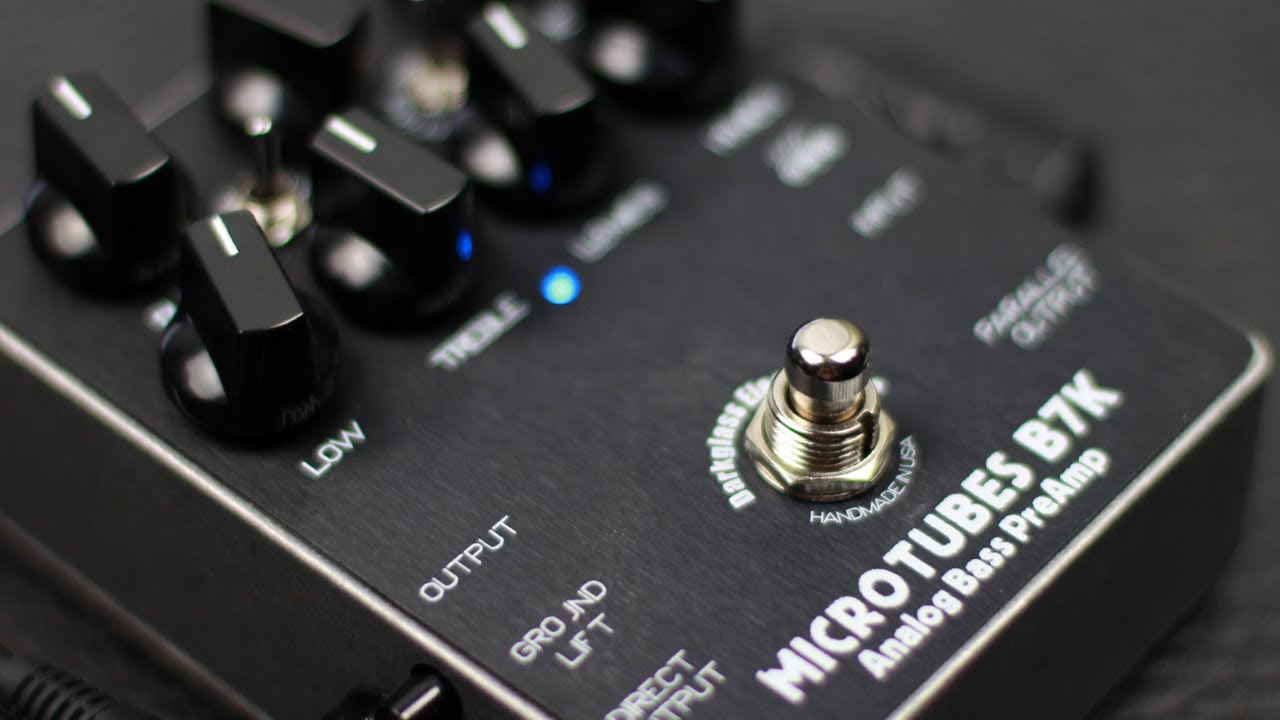
Darkglass Distortion Pedals: The Darkglass B3K and B7K Bass distortion preamps are the most popular modern hardware option of the past few years when it comes to killer bass tone. These pedals are my personal favourite due to their versatility and awesome blending options.
Nolly Performs “Prayer Position” Through A Darkglass B7K Distortion Pedal:
Guitar Amps: If you’re using the Split-channel processing method I talked about in section 1 of this Blog then it can often work well to simply re-amp your grit track through a guitar amplifier. TIP: A lot of engineers prefer using a 5150 style amp for this application.
Plugin Distortion Options:
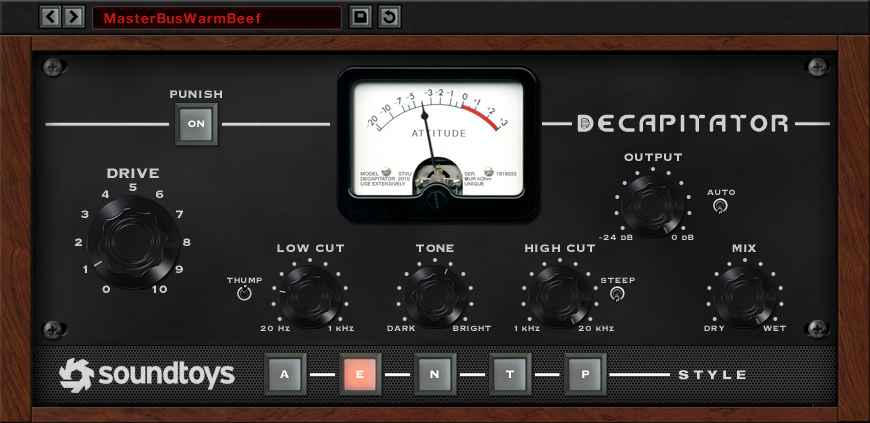
Soundtoys Decapitator: This is one of my personal favourites for In-The-Box bass processing. Decapitator offers multiple excellent colours of distortion alongside some great parallel processing functionality which really goes a long way towards sculpting the tone in your head.
FabFilter Saturn: Although this plugin has been around for a long time, I’d never thought of it as an all-in-one bass distortion solution until Nolly’s demonstration of the plugin during his NailTheMix session a few months back. After giving it a go myself I must say it’s an absolutely phenomenal tool for this purpose. (As well as many other purposes!)
Watch Nolly use Fabfilter Saturn to create a Bass Tone while mixing Periphery’s “Prayer Position”:
Amp Sims: There isn’t really a “wrong” method of distorting a bass, as it’s all about what sounds good and works well for the song. Because of this, it often works well to simply cycle through some different amp sim models until you find one that provides the tonal character you’re looking for.
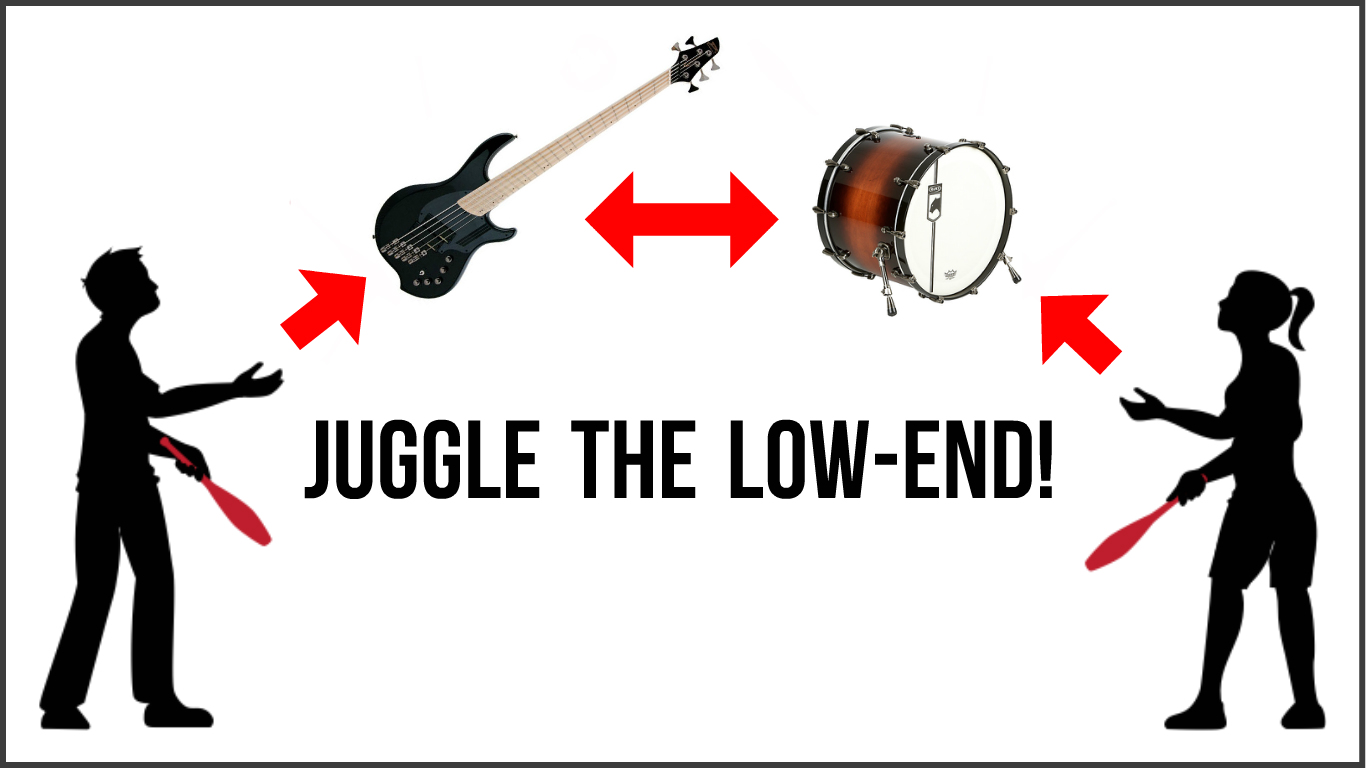
Who should dominate the low-end: The Kick, or the Bass?
WHY NOT BOTH?!?
If you’ve been in the production business for a while then you’ve probably come across videos, articles or forum discussions on how to go about balancing the kick and the bass at one point or another.
Let’s take a look at a few of the solutions to this issue:
The Classic Method (A Compromise):
The most classic, time-tested answer to balancing the kick and bass is usually to let one of these elements live in the low-lows (below 80Hz) and the other just above it in the upper-lows (80-200Hz) in order to reduce any clashing.
Although the thought process behind this approach is definitely valid, the advances in technology over the past few years have unlocked some interesting and effective new ways of dealing with this issue without the need for any compromises:
Side-Chain Compression (Better, But Still A Compromise):
A classic trick that’s been used to make the bass and kick work better with each other for years is side-chaining the kick to the bass in order to duck the bass guitar slightly every time a kick drum hits.
Graham Cochrane from RecordingRevolution demonstrates sidechain compression between a kick drum and bass guitar:
NOTE: The main downside to this technique is that it introduces an odd pumping effect on the bass guitar which is often noticeable to the listener in sparser arrangements or sections that don’t mask the effect.
Multiband Side-Chain Compression (No Compromises):
A fool-proof solution which offers flawless, interweaving ducking between the low-end of the kick and bass guitar without introducing any obvious artefacts is Multiband Side-Chain Compression. This technique is similar to regular side-chaining, with the main difference being the fact that it only affects the very low-end of the bass guitar rather than the entire signal.
Check out this video by TheProAudioFiles’ David Glenn demonstrating multi-band sidechaining with Waves Factory’s “Trackspacer” plugin:
A Quick Word On Additive/Reductive Bass EQ Methodology:
It’s important to note that the EQ’ing route you choose to go down when processing the bass will dictate whether or not you’ll need to address certain frequency bands in a specific way. Keep this information in mind when EQ’ing. You don’t necessarily NEED to mess with EVERY SINGLE frequency band just because I’ve told you about it.
Example: If you’re boosting a lot of high and low-end then you won’t need to remove as much mid-range, and vice versa…
NOTE: Before reading the following section, make sure to watch the entirety of Nolly’s NailTheMix Bass Mixing video which I mentioned before. It’s an awesome example of some of the aforementioned techniques being put into practice, and ties in closely with what I’m going to talk about next:
Here are some of the general areas to look at while EQ’ing a bass instrument:
Note: Take these numbers as general guidelines, not as hard and fast rules! The exact frequencies you’ll need to boost will vary greatly from track to track due to the sheer amount of variables involved in the recording process. Always make sure to sweep around and fish for the areas which complement the sound best!
Definition/Clarity @ 5kHz+: Notice how Nolly boosted an accumulative 20dB+ of high-end while barely having to scoop out anything in the mids? This kind of additive EQ approach is a great way of maintaining the mid-range character of the instrument while also essentially carving out a lot of space in a more natural manner.
NOTE: Pairing this kind of a drastic high-end boost with a similar boost in the low-end is what’s commonly called a “happy face scoop”. (Effectively the same thing as scooping out a WIDE chunk of the mid-range)
Growl/Throat/Presence @ 1-2kHz: This frequency range is the key to an aggressive, in-your-face bass tone that punches through a mix and sits nicely with guitars. I personally like to solo a fairly wide bell band and sweep around this range while simultaneously listening to the drums in order to find the right spot that’ll sound great to boost.
Mid-Junk: There are a few primary frequency areas which you can look at reducing in a bass guitar.
Mud @ 200-300Hz: This area consists of mostly unwanted ringy nonsense. A cut in this area will often help to tighten up and define your low-end further.
Boxiness @ 400-500Hz: A wide and fairly deep cut in this area will usually go a LONG way towards clearing up your bass and giving it that scooped classic rock bass sound.
Flatness @ 700-800Hz: Most instruments will have some “flat” nonsense somewhere up in this range. Getting rid of some of this junk can really help your bass sit in the mix in a more natural way.
Low-End @ 200Hz and Below:As mentioned previously in this article, it’s often a good idea to decide exactly where you want your bass guitar to live within this range and treat it accordingly.Depending on the other processing you’ve applied, you might need to boost or cut this area slightly in order to make it fit better in context.
Conclusion:
Achieving a thunderous bass tone that fits perfectly in a mix is a skill that can take years to master. Make sure to put aside some time to experiment with the techniques I’ve talked about in this blog and try out different things.
Remember: As it is with almost everything else in recording, the real key to a great bass sound is to get as close as possible to the sound you’re after from the get-go!
FINAL WORDS:
This concludes “Mixing Secrets – Bass”. I hope that this article has given you some new ideas to try out during your next project. Be sure to comment below if any of this information has helped you out, or if you have any questions.
Stay tuned for more production/mixing related articles in the not-so-distant future!
Nail The Mix is our online mixing school that gives you REAL multi-tracks from REAL bands, plus a mixing class from the producer who recorded it. Past guests include Periphery, Chelsea Grin, Machine Head and State Champs. Join now for instant access!