Mixing Secrets – Volume 2: Bass
urmadmin
Mixing Secrets – Volume 2: Bass
Introduction to the series:
In this weekly series of Blogs I’ll attempt to take you through some of the most popular and effective audio processing techniques used in professional studios all over the world.
Each installment in this series will focus on a different instrument and provide you with links to relevant video examples of industry-leading engineers demonstrating these techniques.
This week, we’ll be taking a look at an instrument that really separates the mixing professionals from the beginners:

The bass guitar is often looked down on as a “simple” or “inferior” instrument within the music industry. In reality, most mixes/songs fall apart completely the moment the bass is taken away! (No, I’m not secretly a bass player…)
In this Blog we’ll take a look at some of the many tricks we can use in order to forge a thunderous monster of a bass sound that sits well in a mix.
1 – Split It Up (Filtering):
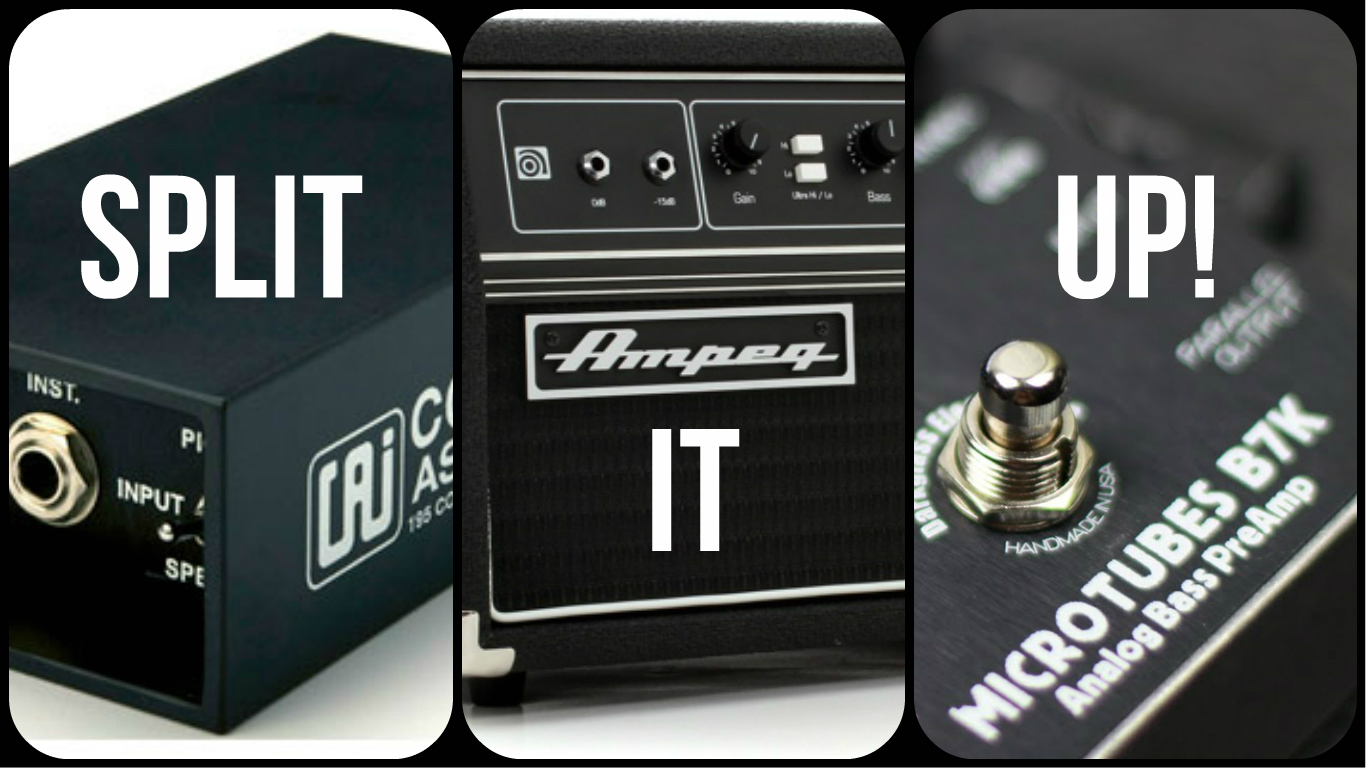
A highly popular modern-day approach to processing bass guitar in heavy music is to split the various frequency bands of the instrument across multiple channels.
These channels usually consist of a combination of the following:
- A Clean DI Channel (Low-End)
- A Heavily Distorted “Grit” Channel (Upper Mid-Range & Highs)
- OPTIONAL: A Lightly Saturated “Bass Amp” Channel (Mid Range)
Mixing bass in this way gives you a greater level of control over the overall frequency balance of the instrument by providing a means of processing each channel separately for a different purpose.
How Can I Use The Split-Processing Technique?
Here’s a brief, step-by-step guide to splitting up your bass guitar track:
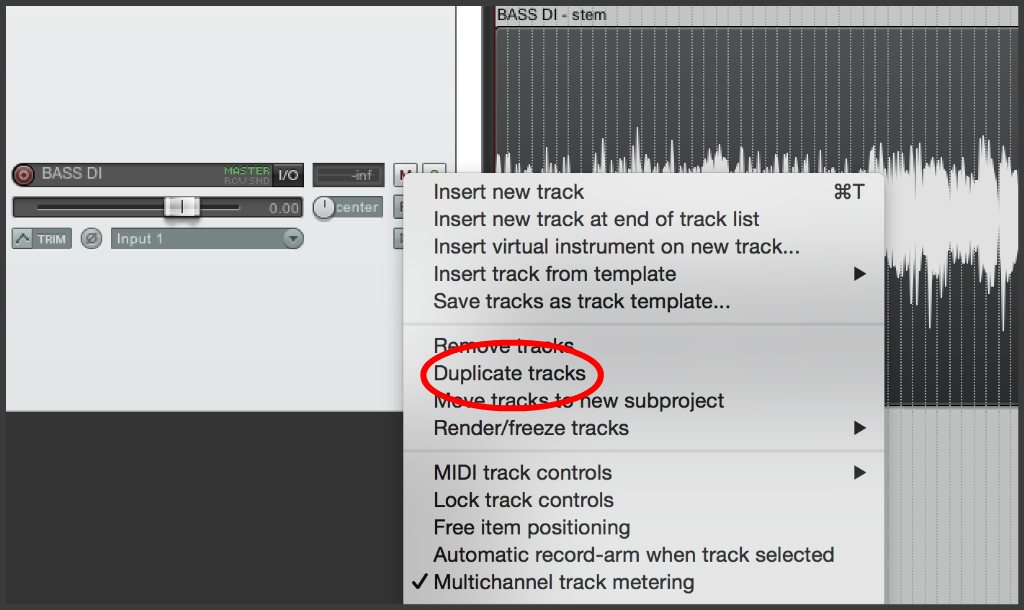
Step 1 – Duplicate: Start off by duplicating your raw DI Bass track so that you have the desired number of channels. (Usually 2 or 3 – Entirely up to you!)
Step 2 – Name The Channels: In this case, I’ll only be using 2 channels (Lo-Bass & Hi-Bass). Name your channels accordingly.
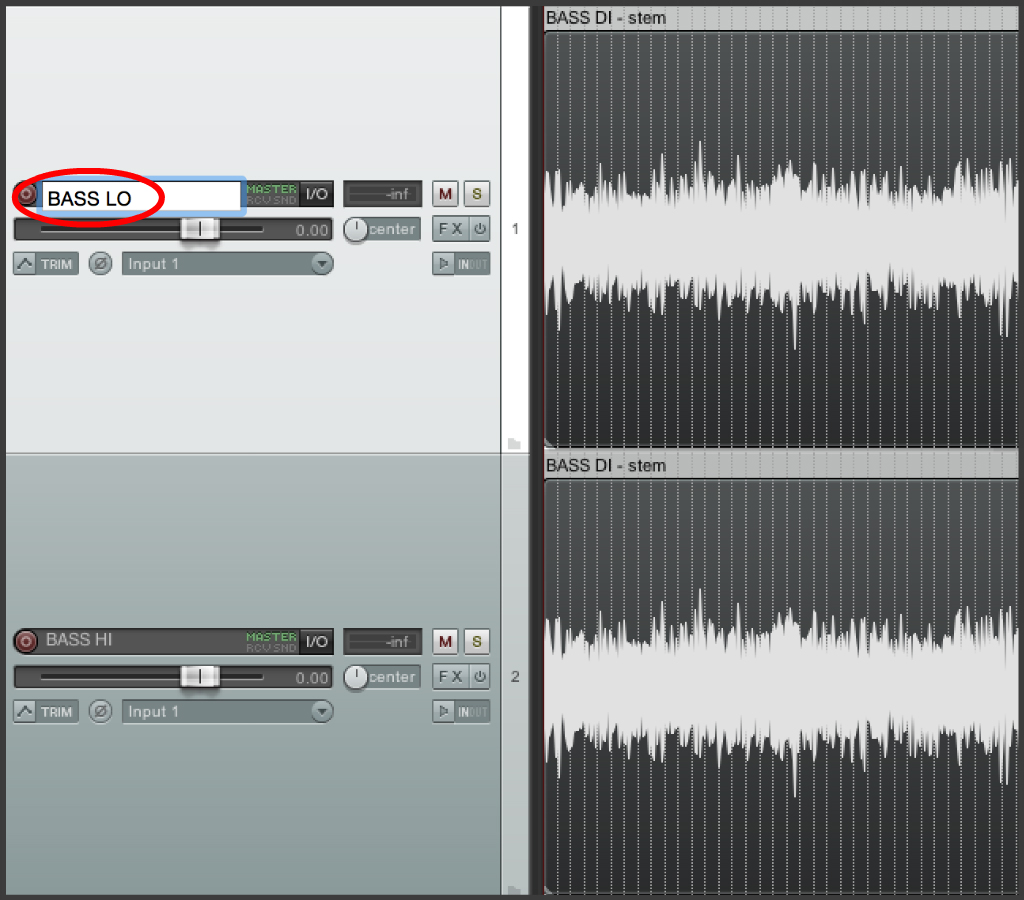
Step 3 – Set Up Your Initial Tones: Decide how you want to use each track. In this case, “lo” will be my clean, non-distorted low-end-only channel & “hi” will be my gritty mids/high-end-only channel:
LO-Channel:
The aim for this channel is to provide clean, compressed, “Sine-Wave-Like” low-end which is consistent in level throughout the track. I won’t be using any amp simulation on this track, as a simple DI will provide the clearest low-end definition.
- Filtering: Filter out most of the high-end content with a low-pass filter set somewhere between 100Hz-300Hz.
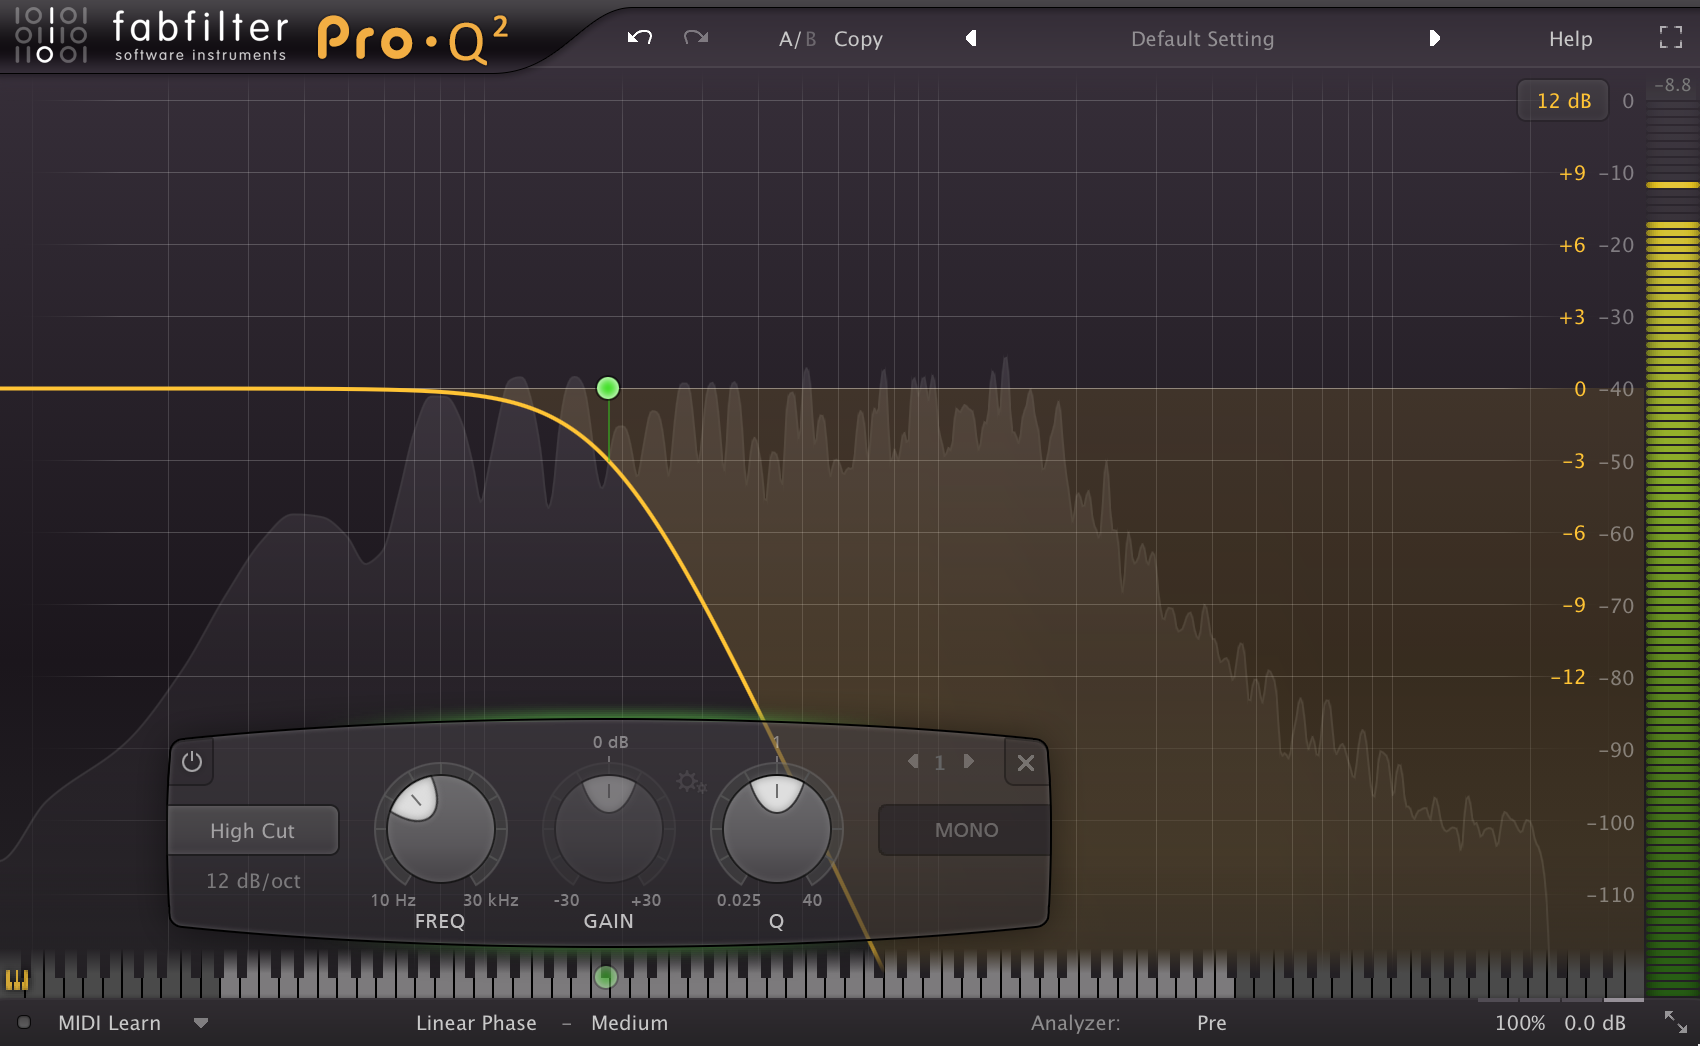
NOTE: Exactly where you should set the crossover of the filter depends largely on the parts being played. Make sure to tweak the depth of the filter so that you’re not losing any notes!
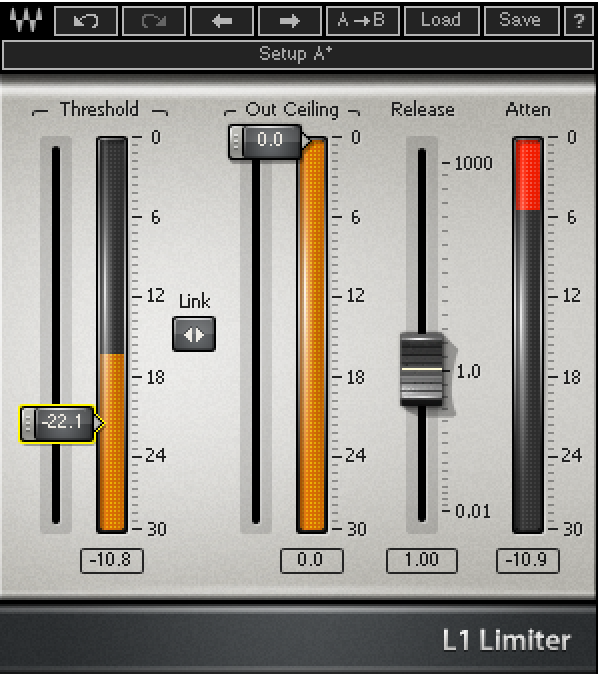
- Limiting: Insert a limiter after your filter and set the threshold so that every note is getting evened out by the compression.
HI-Channel:
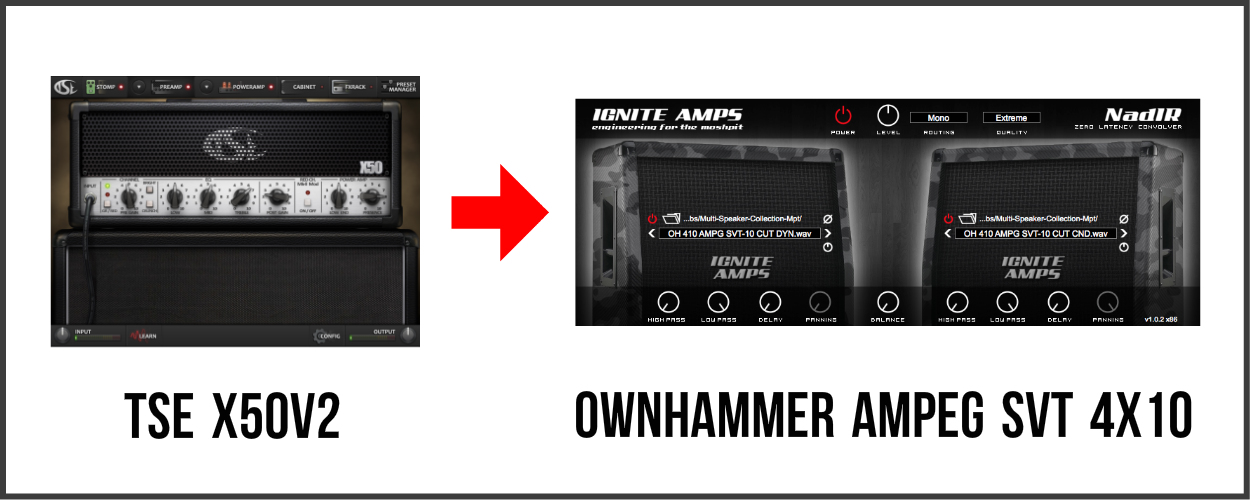
The aim for this channel is to provide a gritty high-end source which is free from any fuzzy or flubby low-end/mid content. In this case, I’ve sent this channel through TSE Audio’s X50v2 Amp Sim for grit and topped it off with an Ownhammer Ampeg SVT Speaker Cabinet IR. (Most distortion units will do the trick, experimentation is key!)
- Filtering: Filter out most of the low-end and muddy mid-range content with a high-pass filter set somewhere between 450Hz-1kHz. I’ll usually filter this channel after the amp simulation so that the amp reacts to the full-range DI in a more natural manner.
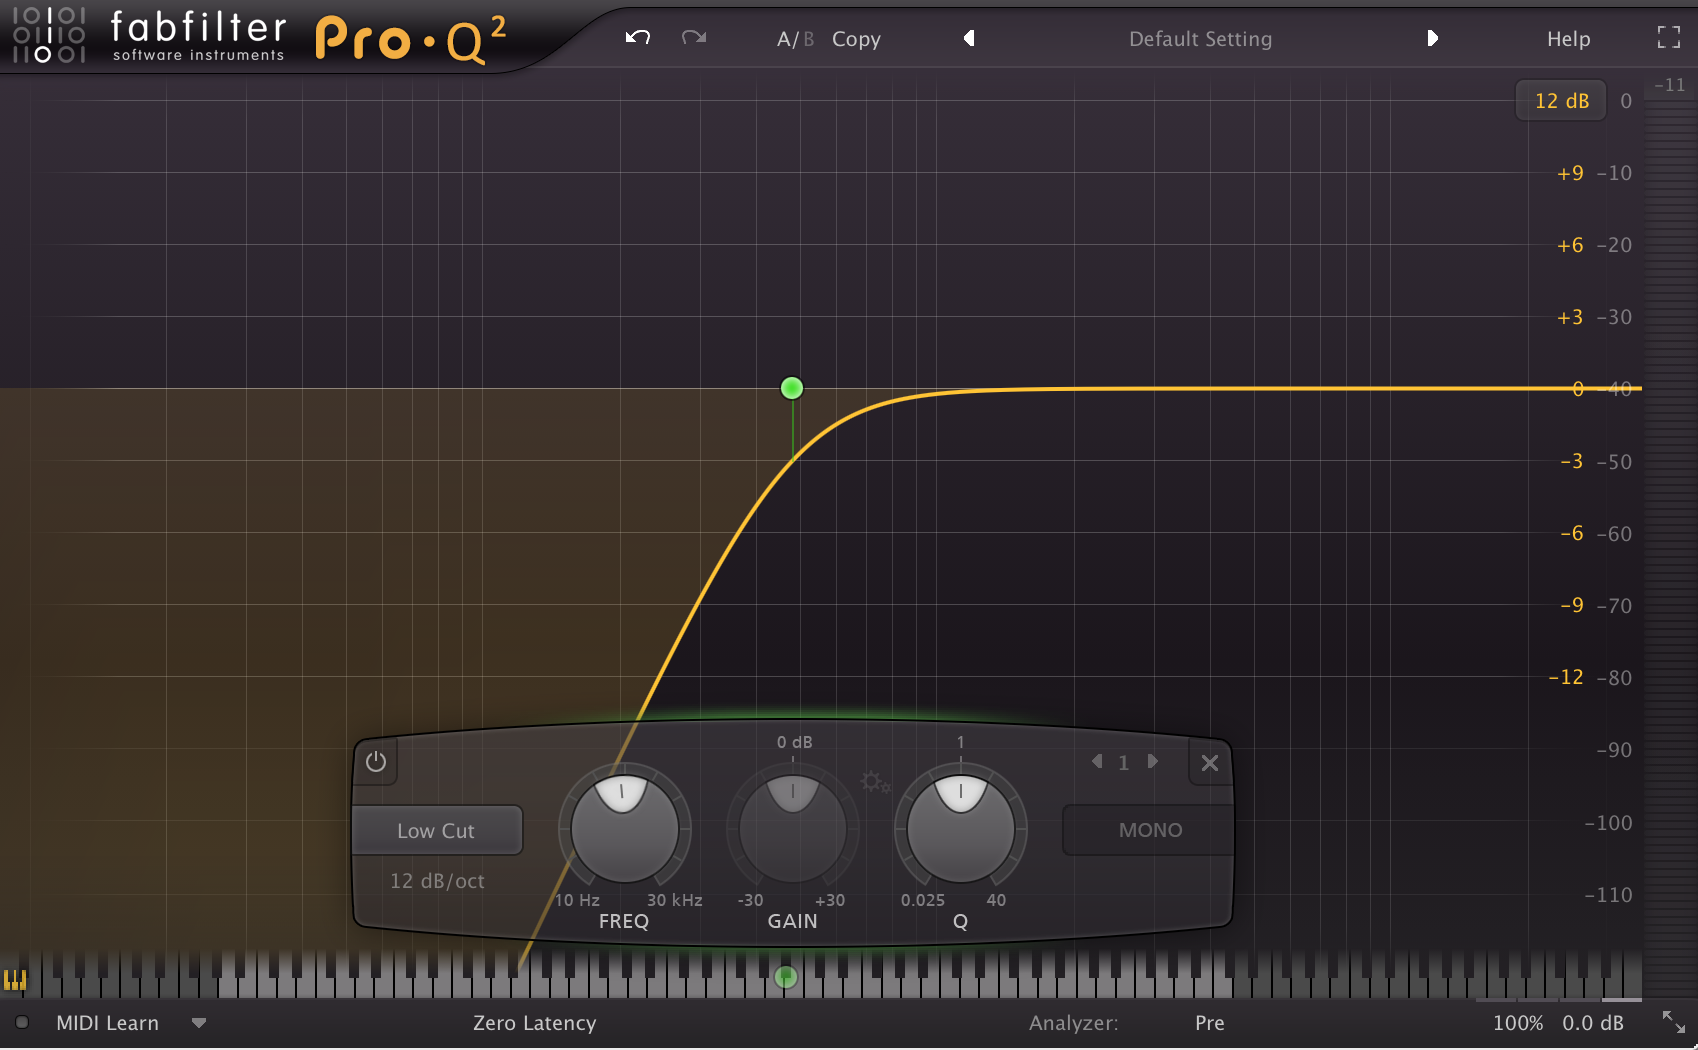
NOTE: It’s not uncommon to have a 3rd “mid” channel which is usually sent through an amp simulation plugin for added girth. In this case, I’ll just be sticking to two channels.
Step 5 – Balancing/Bussing: Now that we’ve set up our initial tones we can set the levels of these two channels independently and buss them together in order to start treating our “lo/hi” blend as a single tone!
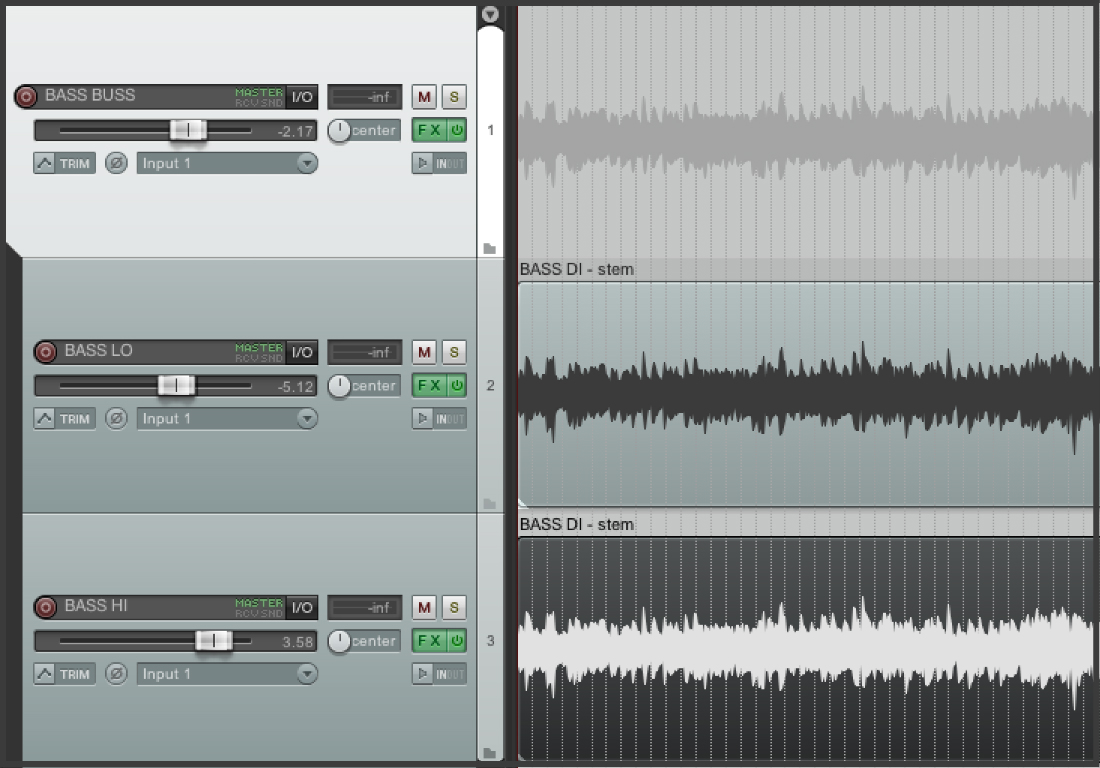
That’s pretty much all there is to splitting up a bass track. Keep on reading for further advice on the later stages of Bass Processing!
Here’s a video of mixing legend Dave Pensado demonstrating the split-channel bass mixing technique for reference:
https://www.youtube.com/watch?v=2zTSyEjkm3k
2 – Lock It Down! (Dynamics):
The bass guitar is a dynamic instrument that requires consistency in order to work well in a mix. The best way to achieve this kind of dynamic control in the mixing stage (alongside playing consistently in the first place) is through the use of compression and limiting.
There are 3 main stages of compression I’ll typically opt for when mixing a bass. Each of these stages serves a different purpose:
1 – Accentuation Compression: This stage of compression serves as a light-leveler, but also accentuates the initial transients of each bass note in order to give them some additional life and punch.
- I’ll typically use an 1176 style compressor with a medium/slow attack and fast release for this purpose and aim for 5-10dB of reduction.
2 – Pin-Down Compression: This stage is where the majority of the volume leveling will take place. I’ll often use a brick-wall-limiter like Waves’ L1 for this purpose and set the threshold so that the output level of the bass is practically flatlined.
- NOTE: Be careful not to suck the life out of your bass guitar by over-limiting it. This trick works best when applied on a low-end only channel, as it allows for the high-end transient information of your grit channel to stay intact!
3 – Low-End Tightness Control: The last instance of compression in my bass chain is often a multi-band compressor. This stage acts as a sort of “final low-end enhancer” which helps fine tune the low-end response of the bass within the track and really keep it locked in its place.
- I’ll often use FabFilter’s Pro-MB for this purpose and tweak the attack and release controls so that the compression is punchy without pumping too hard.
Here’s a video of NailTheMix’s Joel Wanasek Using Waves L1 to limit a bass low-end track:
https://www.youtube.com/watch?v=00kI0Ashqp8
3 – Heat It Up! (Distortion):

Although clean bass tones work well for a wide variety of genres, they can’t usually compete very well when it comes to distorted guitar-heavy genres like hard-rock and metal.
Whether you’re splitting the bass across multiple channels or just using a single channel of bass, it’s often a good idea to give it a healthy dose of saturation or distortion in order to help it cut through the mix and remain audible on smaller speakers.
Here’s a short list of bass distortion options to consider in the analog and digital worlds:
Hardware Units:
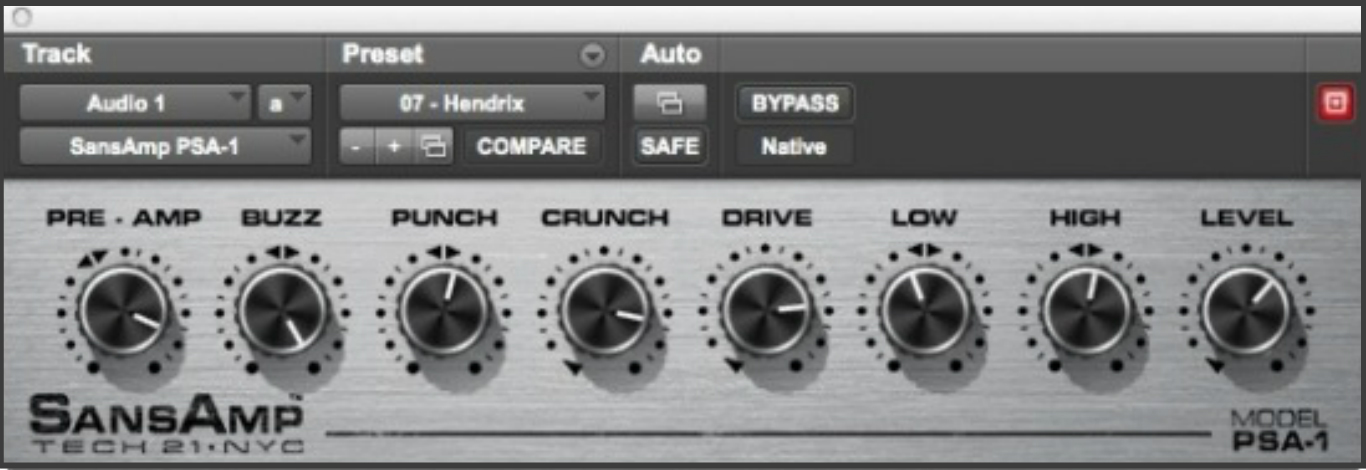
- Sansamp: The Sansamp hardware units and pedals have been used as a bass distortion solution for decades in studios all over the world. There is also a great Sansamp emulation included with Pro-Tools if you’re unable to get your hands on the real deal.
- Darkglass Distortion Pedals: The Darkglass B3K and B7K Bass distortion preamps are the most popular modern hardware option of the past few years when it comes to killer bass tone. These pedals are my personal favourite due to their versatility and awesome blending options.
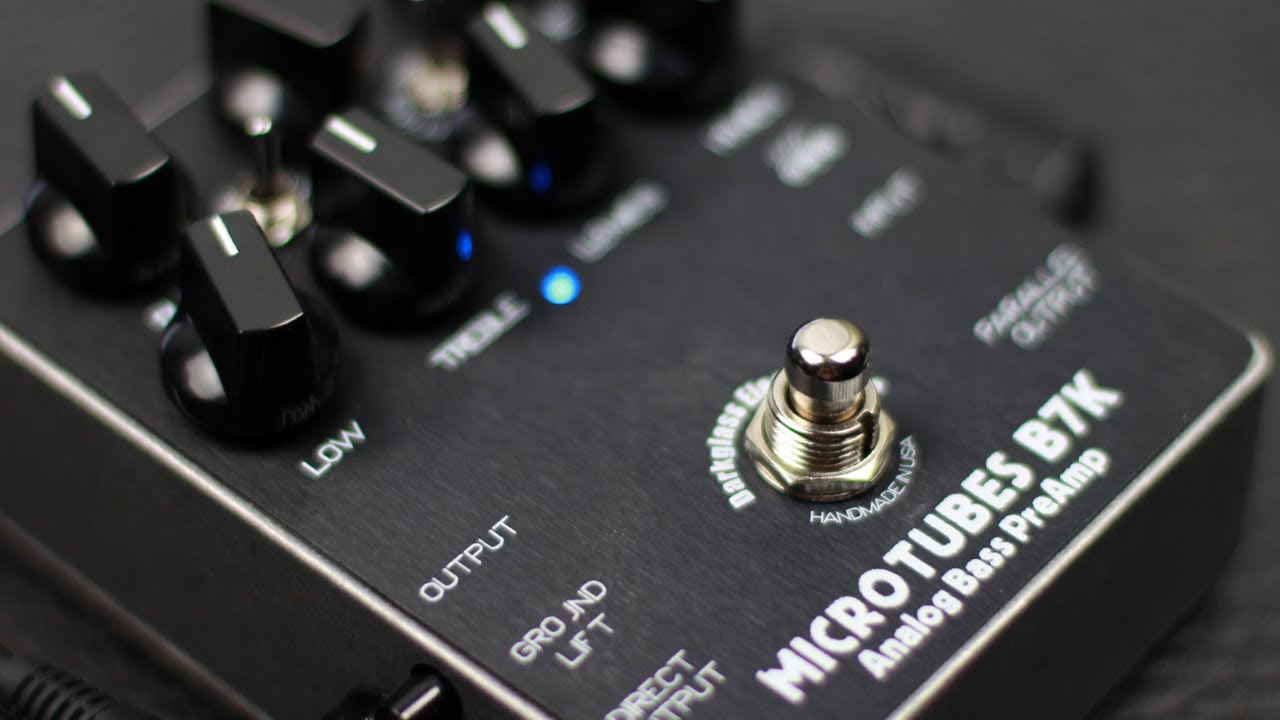
Nolly Performs “Prayer Position” Through A Darkglass B7K Distortion Pedal:
https://www.youtube.com/watch?v=-w5qFCT6EZY
- Guitar Amps: If you’re using the Split-channel processing method I talked about in section 1 of this Blog then it can often work well to simply re-amp your grit track through a guitar amplifier. TIP: A lot of engineers prefer using a 5150 style amp for this application.
Plugin Distortion Options:
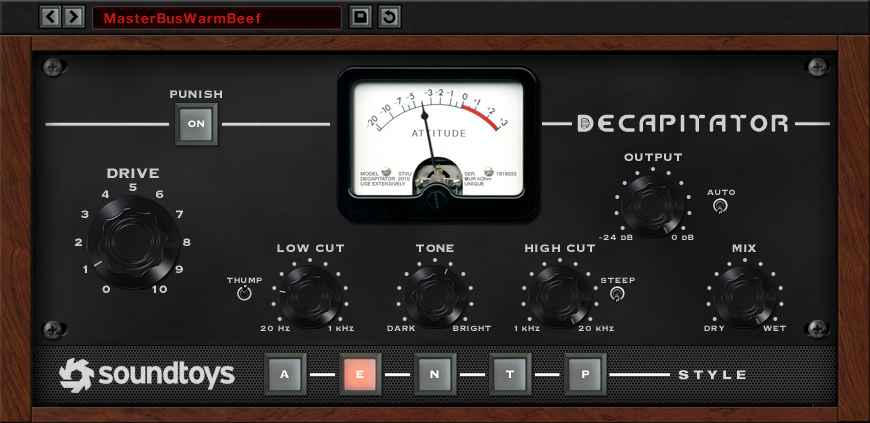
- Soundtoys Decapitator: This is one of my personal favourites for In-The-Box bass processing. Decapitator offers multiple excellent colours of distortion alongside some great parallel processing functionality which really goes a long way towards sculpting the tone in your head.
- FabFilter Saturn: Although this plugin has been around for a long time, I’d never thought of it as an all-in-one bass distortion solution until Nolly’s demonstration of the plugin during his NailTheMix session a few months back. After giving it a go myself I must say it’s an absolutely phenomenal tool for this purpose. (As well as many other purposes!)
Watch Nolly use Fabfilter Saturn to create a Bass Tone while mixing Periphery’s “Prayer Position”:
https://www.youtube.com/watch?v=Oq62X1hQoFY
- Amp Sims: There isn’t really a “wrong” method of distorting a bass, as it’s all about what sounds good and works well for the song. Because of this, it often works well to simply cycle through some different amp sim models until you find one that provides the tonal character you’re looking for.
Joey Sturgis Dials In A Bass Tone Using Pod Farm:
https://www.youtube.com/watch?v=gB8K2-lHJHQ
4 – Juggle The Low-End! (Side-Chaining):
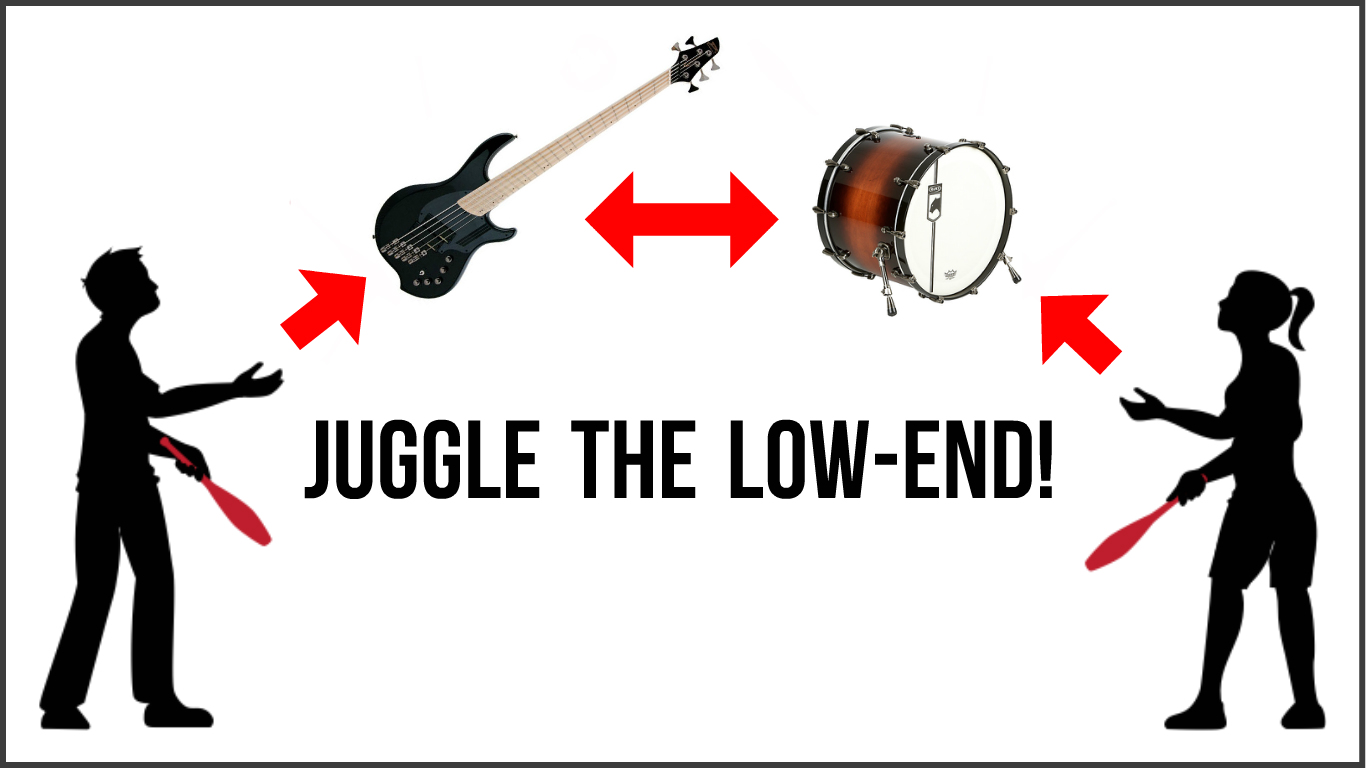
Who should dominate the low-end: The Kick, or the Bass?
WHY NOT BOTH?!?
If you’ve been in the production business for a while then you’ve probably come across videos, articles or forum discussions on how to go about balancing the kick and the bass at one point or another.
Let’s take a look at a few of the solutions to this issue:
The Classic Method (A Compromise):
The most classic, time-tested answer to balancing the kick and bass is usually to let one of these elements live in the low-lows (below 80Hz) and the other just above it in the upper-lows (80-200Hz) in order to reduce any clashing.
Although the thought process behind this approach is definitely valid, the advances in technology over the past few years have unlocked some interesting and effective new ways of dealing with this issue without the need for any compromises:
Side-Chain Compression (Better, But Still A Compromise):
A classic trick that’s been used to make the bass and kick work better with each other for years is side-chaining the kick to the bass in order to duck the bass guitar slightly every time a kick drum hits.
Graham Cochrane from RecordingRevolution demonstrates sidechain compression between a kick drum and bass guitar:
https://www.youtube.com/watch?v=VR1tDwl0r5k
NOTE: The main downside to this technique is that it introduces an odd pumping effect on the bass guitar which is often noticeable to the listener in sparser arrangements or sections that don’t mask the effect.
Multiband Side-Chain Compression (No Compromises):
A fool-proof solution which offers flawless, interweaving ducking between the low-end of the kick and bass guitar without introducing any obvious artefacts is Multiband Side-Chain Compression. This technique is similar to regular side-chaining, with the main difference being the fact that it only affects the very low-end of the bass guitar rather than the entire signal.
Check out this video by TheProAudioFiles’ David Glenn demonstrating multi-band sidechaining with Waves Factory’s “Trackspacer” plugin:
https://www.youtube.com/watch?v=prH1vYMwbLE
5 – Bass Frequency Guide (EQ):
A Quick Word On Additive/Reductive Bass EQ Methodology:
It’s important to note that the EQ’ing route you choose to go down when processing the bass will dictate whether or not you’ll need to address certain frequency bands in a specific way. Keep this information in mind when EQ’ing. You don’t necessarily NEED to mess with EVERY SINGLE frequency band just because I’ve told you about it.
Example: If you’re boosting a lot of high and low-end then you won’t need to remove as much mid-range, and vice versa…
NOTE: Before reading the following section, make sure to watch the entirety of Nolly’s NailTheMix Bass Mixing video which I mentioned before. It’s an awesome example of some of the aforementioned techniques being put into practice, and ties in closely with what I’m going to talk about next:
https://www.youtube.com/watch?v=Oq62X1hQoFY
Here are some of the general areas to look at while EQ’ing a bass instrument:
Note: Take these numbers as general guidelines, not as hard and fast rules! The exact frequencies you’ll need to boost will vary greatly from track to track due to the sheer amount of variables involved in the recording process. Always make sure to sweep around and fish for the areas which complement the sound best!
Definition/Clarity @ 5kHz+: Notice how Nolly boosted an accumulative 20dB+ of high-end while barely having to scoop out anything in the mids? This kind of additive EQ approach is a great way of maintaining the mid-range character of the instrument while also essentially carving out a lot of space in a more natural manner.
NOTE: Pairing this kind of a drastic high-end boost with a similar boost in the low-end is what’s commonly called a “happy face scoop”. (Effectively the same thing as scooping out a WIDE chunk of the mid-range)
Growl/Throat/Presence @ 1-2kHz: This frequency range is the key to an aggressive, in-your-face bass tone that punches through a mix and sits nicely with guitars. I personally like to solo a fairly wide bell band and sweep around this range while simultaneously listening to the drums in order to find the right spot that’ll sound great to boost.
Mid-Junk: There are a few primary frequency areas which you can look at reducing in a bass guitar.
- Mud @ 200-300Hz: This area consists of mostly unwanted ringy nonsense. A cut in this area will often help to tighten up and define your low-end further.
- Boxiness @ 400-500Hz: A wide and fairly deep cut in this area will usually go a LONG way towards clearing up your bass and giving it that scooped classic rock bass sound.
- Flatness @ 700-800Hz: Most instruments will have some “flat” nonsense somewhere up in this range. Getting rid of some of this junk can really help your bass sit in the mix in a more natural way.
Low-End @ 200Hz and Below: As mentioned previously in this article, it’s often a good idea to decide exactly where you want your bass guitar to live within this range and treat it accordingly. Depending on the other processing you’ve applied, you might need to boost or cut this area slightly in order to make it fit better in context.
Conclusion:
Achieving a thunderous bass tone that fits perfectly in a mix is a skill that can take years to master. Make sure to put aside some time to experiment with the techniques I’ve talked about in this blog and try out different things.
Remember: As it is with almost everything else in recording, the real key to a great bass sound is to get as close as possible to the sound you’re after from the get-go!
FINAL WORDS:
This concludes “Mixing Secrets – Bass”. I hope that this article has given you some new ideas to try out during your next project. Be sure to comment below if any of this information has helped you out, or if you have any questions.
Stay tuned for more production/mixing related articles in the not-so-distant future!
Read Mixing Secrets – Volume 1: Vocals here!
Read Mixing Secrets – Volume 3: Drums here!
Read Mixing Secrets – Volume 4: Guitars here!
Read Mixing Secrets – Volume 5: Synths here!
 Nail The Mix is our online mixing school that gives you REAL multi-tracks from REAL bands, plus a mixing class from the producer who recorded it. Past guests include Periphery, Chelsea Grin, Machine Head and State Champs. Join now for instant access!

