We’ve been hard at work improving the quality of what we are offering the audio community over the last year and a half at Nail The Mix. We’ve pushed ourselves to deliver more and more value to our students, and we think we’ve done that — but we haven’t changed the price of NTM since the BETA launch in November, 2015. NTM has come a long way since its initial inception, and we’ve seen several of our users landing big mixing gigs which is exciting to say the least! We are no longer a beta – and our experiment turned out to be a game changer.
When we started we were working with local bands, in our home studios, and with zero employees. Since then we’ve added 9 amazing employees, and have brought you top of the line artists and mixers like Meshuggah, Gojira, Kane Churko, Papa Roach, Tue Madsen, Andrew Wade, A Day To Remember, and the list goes on. Our operation has grown as have the costs of delivering to you. Guys, Meshuggah doesn’t come cheap.
On April 1st the price for any NEW subscriber to Nail The Mix will be $24.95 a month. We know it’s April fools but we aren’t fooling around – this is a serious service that is changing lives. For those of you who are current members of our Nail the Mix service, you will enjoy your original price of $19.99 as long as you are subscribed. That rate remains locked in until you unsubscribe.
Don’t worry, URM Enhanced will stay the same price it has always been – keep digging into your vault!
Our annual rates will renew at your original rate if you buy/bought one before April 1, 2017. That means that your annual subscription will lock in at $199 every year you remain a member. If you purchase an annual subscription on or after April 1, 2017 the price will be $249.95. That’s still two months free!
Make sure to sign up for our April session with Billy Decker where we will be giving you access to 5 brand new songs and a whole lot more. Buckle up because it’s all going down at NailtheMix.com!
Jacob Hansen is a Danish producer, mixer, and engineer who owns and operates Hansen Studios. He’s known for his polished, powerful sound and has worked with a ton of huge names in the scene, including Volbeat, Amaranth, Epica, and Aborted. He also handles guitar duties for the power metal band Pyramaze.
In This Episode
Jacob Hansen sits down to share some of the techniques behind his super polished productions. He gets into the nitty-gritty of his vocal chain, explaining how he gets those massive, pop-style vocals for bands like Amaranth, and how that same chain works for brutal death metal vocals. Jacob also breaks down his entire drum miking setup, from his go-to mics like the Neumann U 87 and Sennheiser MD 441 to why he prefers an XY overhead configuration over the more common spaced pair. He covers his approach to getting a killer bass tone (hint: change your strings constantly), the game-changing impact of Evertune bridges for guitar tracking, and how he uses subtle automation and EQ to make massive orchestral arrangements sit perfectly in a heavy mix. It’s a masterclass in getting things right at the source.
You Shouldn’t Record Your Own Band | By Dave Whalen |
In 2017 it’s easy to say technology hasn’t completely turned the audio world on its head.
Let’s face it, every other kid has a MacBook and every MacBook has the ability to churn out million-dollar productions with the click of a few buttons in GarageBand. Or for a couple hundred dollars you can get Logic and the buttons click themselves right?
Every band these days has a guy that does all of this stuff. He engineers, mixes and masters. Heck he even programs the harp solo the band desperately wanted at the end of the breakdown. This guy is extremely motivated and is dedicated to making the best recordings with the limited resources available.
But there’s one problem…
The recordings always suck.
I was that guy:
In fact, I had people paying me to produce recordings that, looking back, weren’t really all that good.
Like many budding engineers I was basically a guy with a set of microphones, a copy of Cubase and no experience. Regardless of how hard I tried, I couldn’t make my recordings sound great. They were good for what they were, but I could never get them to sound full and balanced. As a result, I could never get them to be as loudas a commercial mix.
In other words, they weren’t good.
Tool Problems:
At first I tried upgrading the tools I was using. After all, my compressor didn’t act or sound like an 1176. That’s what the pros use, so that’s why my mixes sounded terrible. I always upgraded to the latest version of Cubase with the new gadgets and the fancy lights.
It didn’t work. In fact, it just left me with less money to spend on what really mattered:
Education and experience.
You see, the sad truth is not that your tools are inadequate.
Professional engineers have been making your favorite records, with a tiny fraction of the options at your disposal, for decades.
The problem was me:
There’s no doubt that I could have listened to my favorite records intently every day for hours, but I wasn’t doing it in an environment that equipped me to reproduce the sounds I heard on them.
I didn’t have anyone to help me break down the elements of the songs and explain why they were important to the mix.
I had no idea what elements went into getting a great drum recording – how to mic the kit for proper phase-coherence, where to position room mics, or how to utilize the various voices in the mix.
Mic position on a guitar cab or how to dial in a good tone? I was completely clueless about that.
I sure as heck didn’t understand that the secret to a great guitar tone has less to do with the gear you’re recording, and more to do with how the player attacks the strings.
Window-reverb on vocal takes, and motivating a vocalist to greatness were ideas that were completely beyond my grasp.
In other words…
I didn’t know what I didn’t know. And my recordings suffered for it.
You shouldn’t record your own band:
Don’t get me wrong, you should by all means pursue your craft and be the absolute best you can be, and often recording demos for your band can be a great tool to achieve that. After all, you can’t gain experience without actually putting the faders up on some material.
The problem is that if you haven’t been directly involved in that world or worked in that environment, you may not know what good sounds like. A well-recorded and produced song is more than just an end result, it’s the product of literally hundreds of small decisions made during the process, starting with how well it’s performed, to the amount of compression an instrument receives. Each one of these decisions requires a degree of experience and knowledge.
I think one of the best ways to acquire the information and experience you need to succeed in audio is to find a studio in your area who has a track record of putting out great productions in your style of music, and hire them to record you. You don’t have to necessarily get a 12-song record done, but ask them to do your 5-song EP. Hire a producer too. The insights you can glean from this process are numerous and invaluable:
You’ll be able to hear what “good” sounds like as it relates to your music
You will see first-hand how the engineer goes about capturing music you’re intimately familiar with, which you can use to enhance your own processes
You’ll be able to witness different engineering techniques and see how they affect the sounds of your individual instruments
You’re likely to learn about arrangement as you work with your producer to re-arrange the songs for maximum impact
You can ask your engineer/producer about the finer points of why they are doing what they are doing, and get an explanation in real-time
You develop a relationship with some local pros which could end up being a mentor/student type of relationship
As it’s a band project, provided they’re not complete deadbeats, you can get your band to cover part of the cost of your education
Cheaper than college:
Of course nothing in this world is free, so it will cost a bit of money. But hey, it’s still cheaper than signing up at a university (especially if you get those deadbeat bandmates to cough up some money), and you get a sweet record out of the deal!
Even if it’s still a little out of reach for your budget, don’t despair. There are an ever-increasing number of sources where you can get world-class instruction for free or next to nothing. There are also many Facebook groups full of engineers who love to help. Whatever you do, make sure you find a place with people you trust, and get to work learning your craft.
Dave Whalen is a producer and mix engineer currently based in western Ohio.
You can find some of his work and other production/mixing tips on his website – The Mix Shed.
Nail The Mix is our online mixing school that gives you REAL multi-tracks from REAL bands, plus a mixing class from the producer who recorded it. Past guests include Periphery, Chelsea Grin, Machine Head and State Champs. Join now for instant access!
In this weekly series of Blogs I’ll attempt to take you through some of the most popular and effective audio processing techniques used in professional studios all over the world.
Each installment of this series will focus on a different instrument and provide you with links to relevant video examples of industry-leading engineers demonstrating these techniques.
This week, we’ll be taking a look at the instrument that metal and rock are famous for:
An instrument which rock and metal engineers (and fans) take a lot of pride in and often spend countless hours obsessing over is the Electric Guitar. For this very reason, it’s crucial that your guitar sounds live up to what’s expected from a great metal production.
In this Blog we’ll take a look at some of the many mixing tricks we can use in order to a achieve an aggressive, clear, and powerful Electric Guitar sound that’ll help win over a heavy audience:
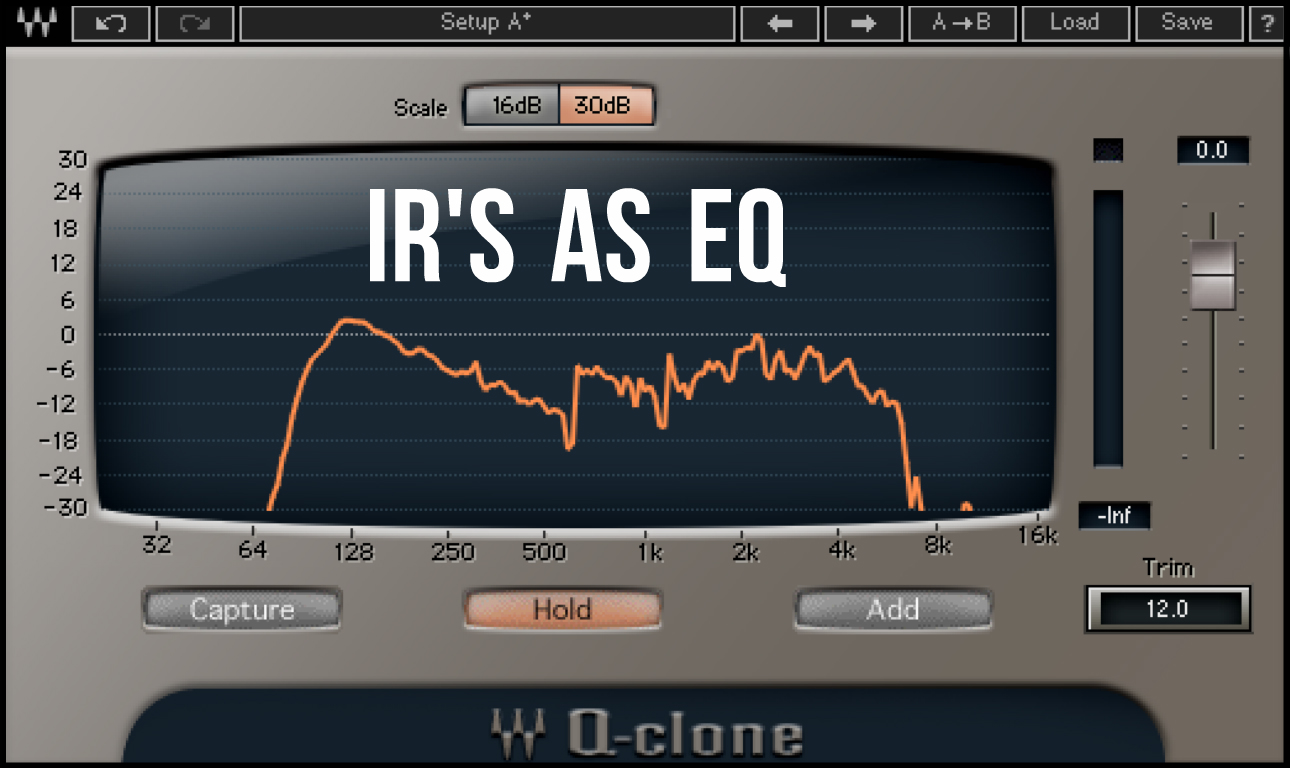
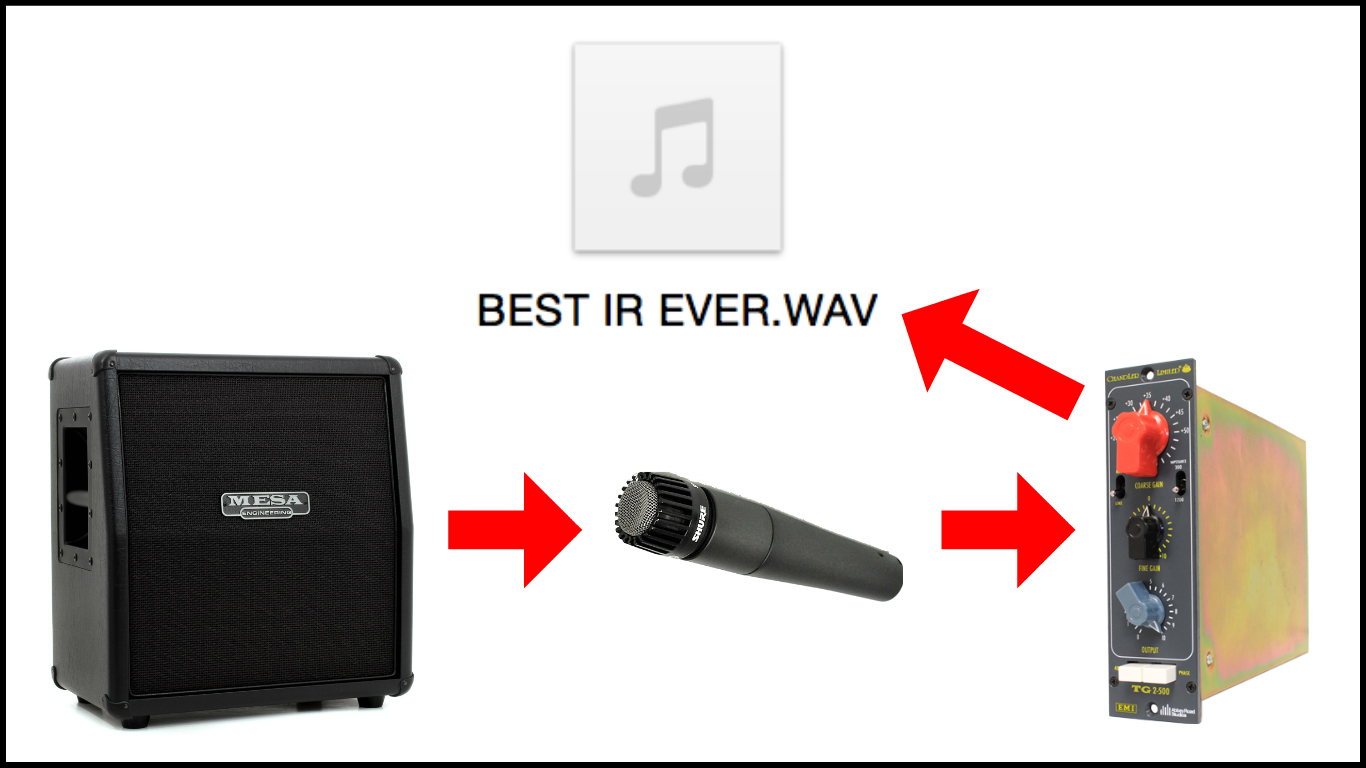
1 – IR’s As EQ (Speaker & Microphone Simulation):
A common mistake which a lot of newer engineers tend to make when dialing in guitar tones is using the wrong Speaker Cabinet & Microphone setup in the first place.
NOTE: In this case, I’m primarily talking about in-the-box guitar tones. The following principles DO apply to both in-the-box & out-of-the-box situations, howeverswitching between speaker & mic variations in real world is a much longer and more tedious process that requires some serious experimentation.
Impulse Responses Are A Blessing!
The various speakers, cabinets, microphones, and placements that were used in its creation all play a significant part in an impulse response’s final sound.
As much as you could argue that there are certain downsides to using digital amp & cab simulation, you could also argue that they offer an equal (if not larger) number of advantages.
When it comes to forging a digital guitar tone, simply trying out a different Speaker IR can get you much closer to the sound you’re after than trying to EQ your way there. The fact that current digital recording technology allows us to change multiple parameters with a single click is simply phenomenal!
How Do I Pick The Right IR?
The main downside to having the ability to change IR’s so easily is the fact that there are so many options to choose from:
NOTE: Check out my “Recording Guitars” URM Series from a few months back for a detailed guide on choosing the right Impulse Responses:
NOTE: It’s important to remember that having too many options can be just as harmful as not having enough. My advice is to do some shoot-outs between various IR packs and try to narrow it down to a manageable number of go-to impulses which cover a broad range of tonal variations.
2 – Layered Control (Dynamics):
A key technique to making your guitars sound present and aggressive within a dense mix is to use layered compression.
Layered?
Distorted guitars don’t take kindly to large amounts of compression due to the fact that they are already fairly clipped. For this reason it’s often a better idea to give them layers of subtle dynamic control in several stages instead of pummeling them with a single dynamics processor.
Let’s take a look at the various layers of dynamic control we can utilise in order to cement our guitars firmly in place:
Multi-Band Compression:
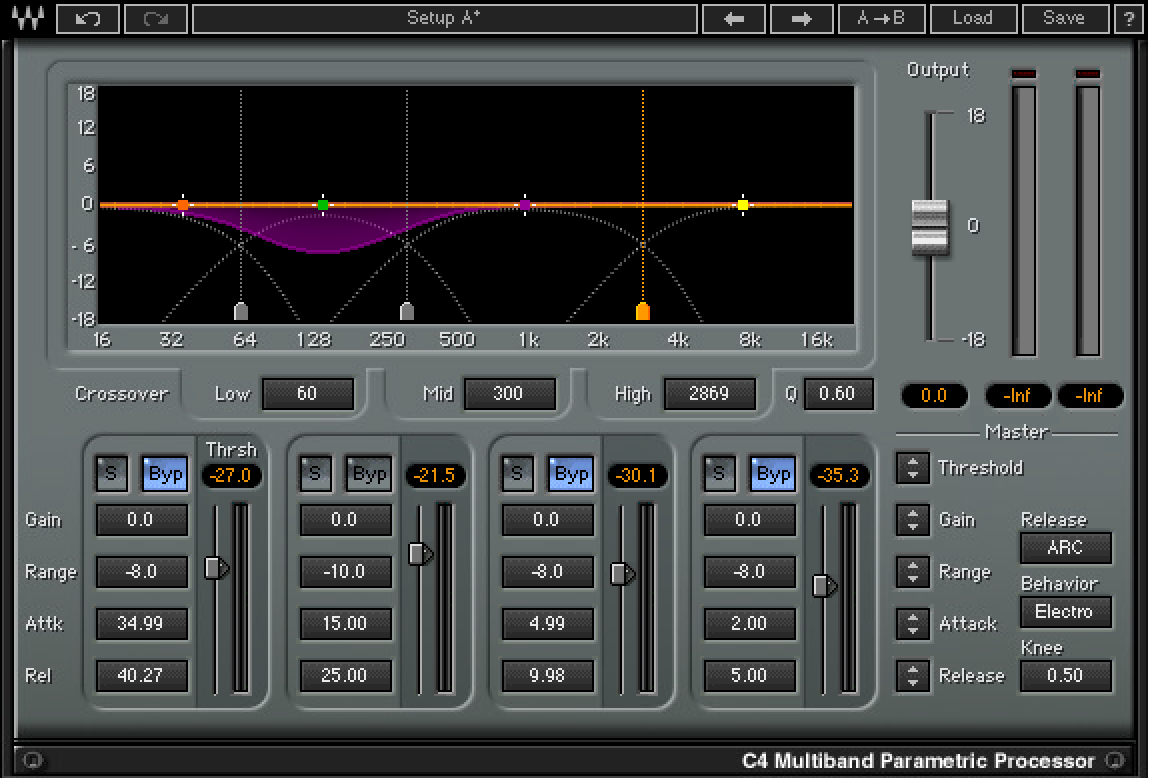
It’s not uncommon for the low-mids in an electric guitar track to jump out unnaturally within certain playing styles or particular sections. While most beginner engineers would usually reach for an EQ to resolve this issue, a more dynamic and natural-sounding solution is to address the problem area with a multi-band compressor:
Multi-Band compressors offer similar controls to a regular compressor, but allow you to compress a specific band of frequencies without affecting the entirety of the signal via the use of crossover points:
Waves C4 – Example Settings For Controlling Guitar Low-End.
NOTE: This type of low-end “jumpiness” usually isn’t constant throughout the entire song, and most prominently occurs in chuggy/palm-muted sections. For this reason, using an EQ to remove these frequencies can often lead to the guitars sounding thin.
Check Out This Video of Joey Sturgis Demonstrating Multi-Band Compression on Electric Guitars:
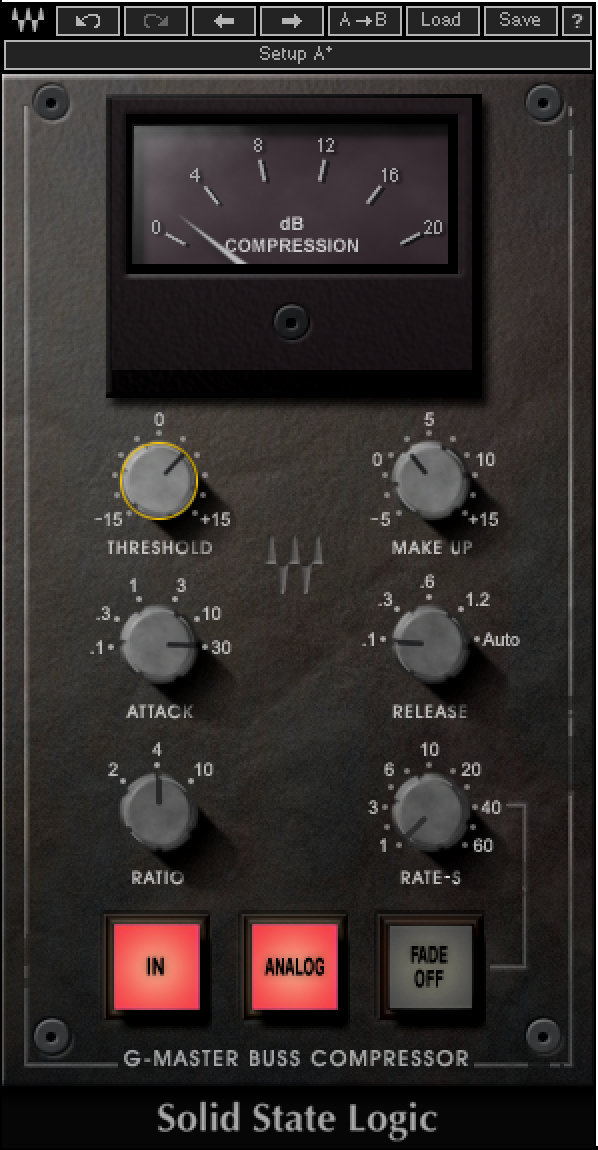
A great way of adding an extra layer of control and subtle pick-attack enhancement to your guitar sound is applying some buss compression across your guitar stereo group:
Using a med-slow attack time and fast release setting will allow some of the initial transients through, effectively making the guitars sound like they were picked harder.
Example Settings On Waves’ SSL Comp Plugin
Don’t go overboard with the amount of buss compression you apply to guitars as over-compressing them can end up sounding brittle and harsh. As little as 2dB of compression often goes along way!
Limiting:
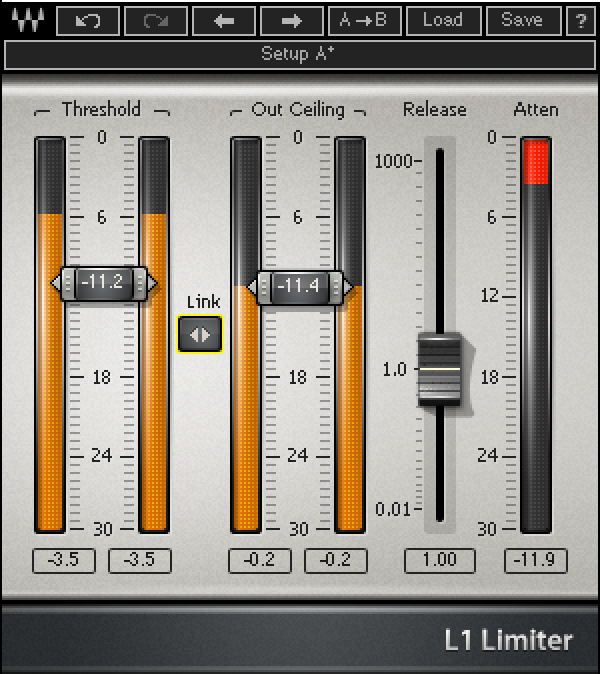
Another cool technique to help maintain a constant overall volume balance for your guitars within the mix is limiting:
Waves’ L1 Is A Favourite For Most Limiting Applications
Inserting a Limiter on your guitars can help control drastic peaks that may cause digital clipping and, in turn, give you more headroom to work with.
It often works well to Limit after your reductive EQ & Low-End control in order to reduce the amount of gain reduction needed and prevent any unpleasant pumping artefacts.
Watch Joel Wanasek Demonstrate Limiting on a Rhythm Guitar Track:
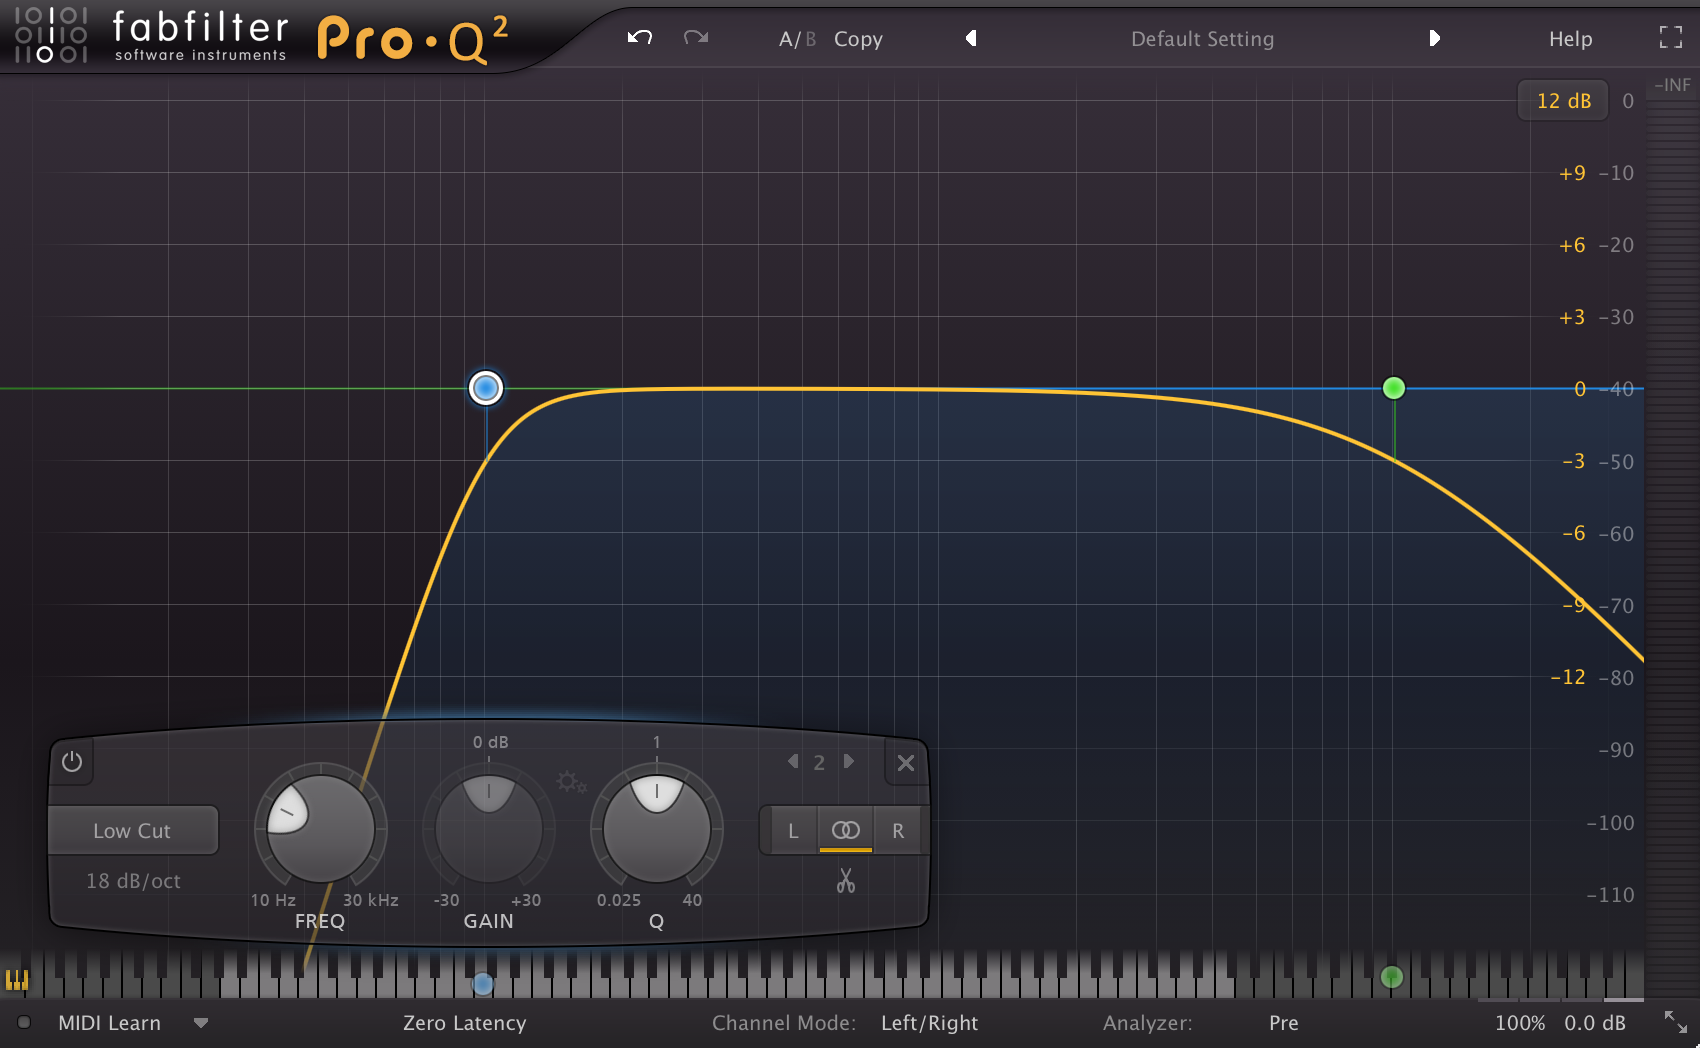
Using filters to roll-off any unnecessary low-end “rumble” or high-end “fizz” is common practice on guitars… But are you getting the most out of your filters?
“But filtering is simple…”
Although filtering might seem like a simple, no-brainer process that we often skim over rather quickly, there are a few cool tricks we can use in order to sweeten and “perfect” our filters so that less processing is required later on.
Here Are A Few Things To Consider While Filtering Guitars:
Filter Resonance (Q):
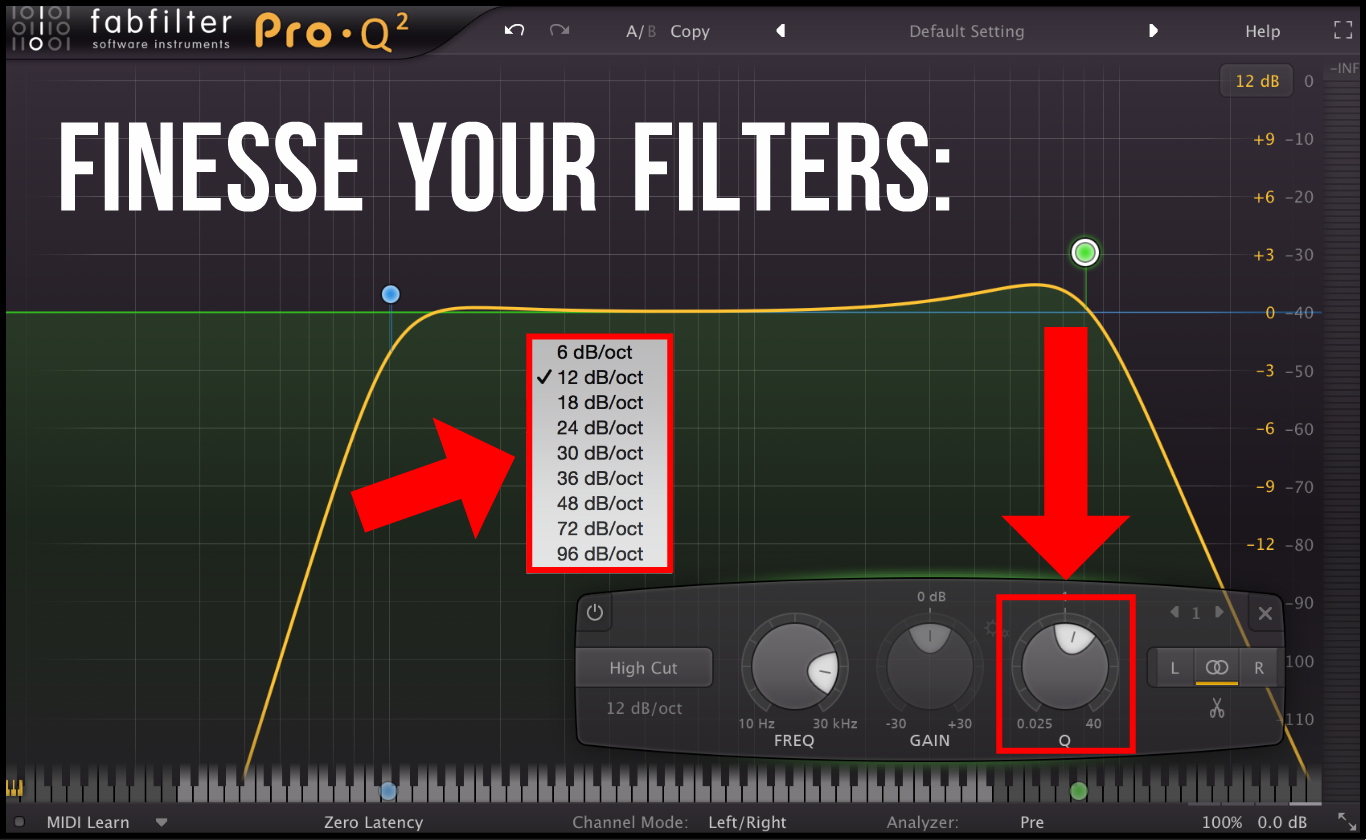
The “Q”, or resonance control of a filter determines how steep or smooth the initial frequency roll-off is:
The steeper the “Q” of the filter, the more resonant the cut-off frequency will become (and vice versa). Keeping this fact in mind can really help to get the best results out of your filtering decisions.
It often works well to compensate for your filtering with a subtle boost at the filter’s cut-off point. Engineers will often insert an additional bell or shelving filter for this purpose. However, boosting the “Q” of the filter slightly achieves a similar goal without the need for additional bands of EQ.
Check out this quick and simple demonstration of how filter resonance works by Wickiemedia:
The severity of the slopes you use while filtering have a huge impact on how natural they sound:
Steeper filters often do a better job at dealing with the low-end, while gentle filters will sound more natural on the high-end.
Try using a gentle 6/12dB slope while filtering high-end for a smooth, natural sounding roll-off and a steep 18/24dB slope while filtering low-end for a tight & punchy sounding low-end.
In this video, Periphery’s Misha Mansoor demonstrates Resonant Filtering while EQ’ing a guitar track:
Heavy metal is often associated with cranking the gain to the max. The truth is, there comes a point where less is actuallymore while setting the gain for a brutally heavy rhythm tone…
Glenn Fricker Dials in A Metal Guitar Tone On A Peavey 5150:
Let’s take a quick look at a few of the downsides to using too much gain while dialing in a metal/rock guitar tone:
Added Noise & Hum: This is a fairly obvious one: Turning up the gain too high also enhances and brings forward all of the unwanted low frequency hum and noise from the amp. Although this isn’t a problem in the digital world, it’s fairly annoying to deal with while working with a real amp and is better to avoid completely.
High-End Fizz: Another side-effect to using too much gain is the drastic high-end fizz it results in. Although removing fizzy high-end with a low-pass filter is fairly simple, making sure you’re not over-cooking it in the first place is a far better approach.
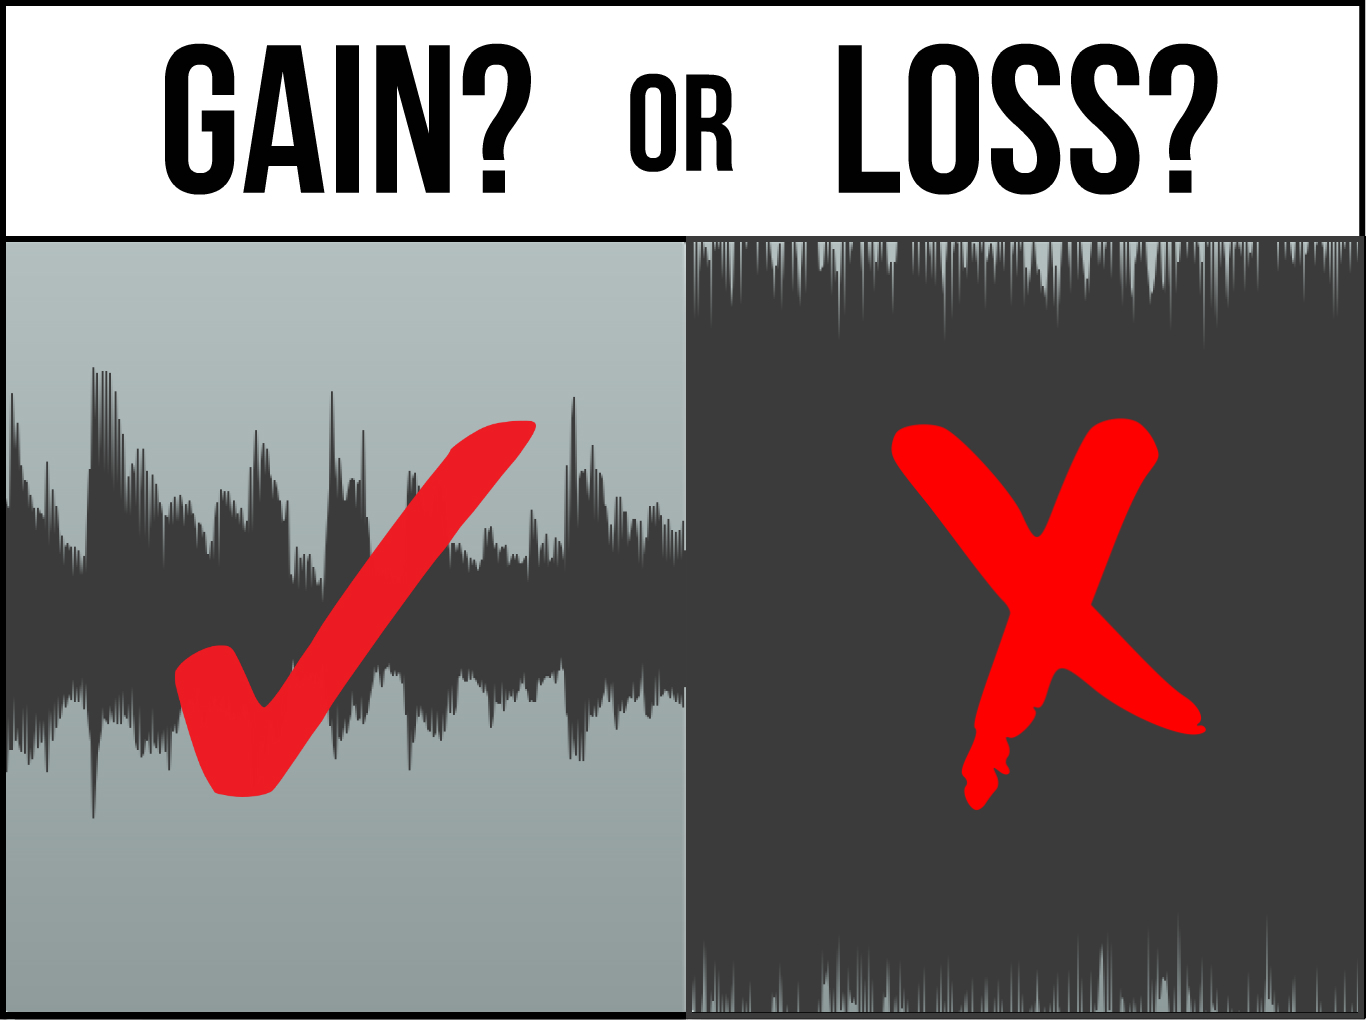
Loss of Impact & Dynamics: Pushing your guitars too far into distortion effectively chops off all of the peaks, resulting in a dynamically “flatlined” end signal. Remember: If everything is hitting hard then nothing is hitting hard!
Check out this video in which CSGuitars Explains and Demonstrates the drawbacks of using TOO MUCH GAIN:
A Quick Word On Additive/Reductive EQ Methodology:
It’s important to note that the EQ’ing route you choose to go down when processing will dictate whether or not you’ll need to address certain frequency bands in a specific way. Keep this in mind when EQ’ing, as you don’t necessarily NEED to mess with EVERY SINGLE frequency band just because I’ve told you about it.
Example: If you’re boosting a lot of high and low-end then you won’t need to remove as much mid-range, and vice versa…
Here are some of the general areas to look at while EQ’ing Guitars:
Note: Take these numbers as general guidelines, not as hard and fast rules! The exact frequencies you’ll need to boost/cut will vary greatly from track to track due to the sheer amount of variables involved in the recording process. Always make sure to sweep around and fish for the areas which complement the sound best!
Low-Mid “Mud/Flub” @ 200-250Hz: As I’ve talked about previously in this blog, this area is often better controlled with a Multi-Band compressor. However, don’t be afraid to reduce this area further via EQ if necessary.
Mid-Range “Boxiness” @ ±500Hz: This is the area which a lot of guitarists and engineers will often cut out for a “scooped tone”. Although there is definite value in removing some of the content in this area if needed, don’t over-do it! Removing too much mid-range content from your guitars will result in a weak and lifeless tone that can’t compete in a dense mix.
Mid-Range “Flatness” @ 700-800Hz: Excessive build-up in this frequency band can cause your guitars to stick out in an unpleasant and lifeless way. Make sure to address this area in context with the other instruments; removing too much can kill your guitars entirely.
Upper-Mid “Presence” @ 1kHz-2kHz: A subtle, broad boost in this range can help push your guitars further in-your-face and accentuate the pick attack.
Upper-Mid “Harshness” Centered @ 2-3kHz: This is where the “bite” and “aggression” of your guitar sound lives. It’s often a good idea to reduce some of the content in this range in order to make more space for your vocals. Controlling this range will also help towards making your guitar tracks less fatiguing during prolonged listening.
Static Ringing: Most distorted guitar tones will have a few unpleasant ringing frequencies that offer absolutely nothing beneficial to a mix. Cutting out a few of these frequencies with a narrow notch can really aid towards the clarity of your tone.
NOTE: Try not to go crazy with this procedure, as each cut you make will evidently make another frequency stick out. Cutting out 1-2 of the most obvious “rings” is usually enough.
High-End “Clarity” @ ±8kHz: Boosting a healthy dose of high-end into your guitar tracks (where necessary) is probably the quickest way of getting them to sound more “mix-ready”.
Check out this video by Joel Wanasek for a great example of boosting high-end on guitars:
High-End “Fizz” @ 8kHz-12kHz: Filtering off the excess high-end in this range will help to clear up a lot of space and free up a lot of the “air” range which is crucial for vocals.
Joey Sturgis Demonstrates some Overall Guitar EQ’ing Techniques:
It’s important to realise that the tips I’ve mentioned in this article are designed to help you make a good tone sound even better. If your core tone or performance is weak, then no amount of “fix it in the mix” will suffice.
REMEMBER THIS:
Great guitar tone isn’t something you can just pull out of thin air. It requires proper attention to detail at every step of the recording process.
Make sure to put the right amount of time and effort into mastering the art of guitar production, as NAILING the guitars is one of the most important things you can do towards crafting an awesome rock/metal mix!
FINAL WORDS:
This concludes “Mixing Secrets – Guitars.” I hope that this article has given you some new ideas to try out during your next project.Be sure to comment below if any of this information has helped you out, or if you have any questions.
Stay tuned for more production/mixing related articles in the not-so-distant future!
Nail The Mix is our online mixing school that gives you REAL multi-tracks from REAL bands, plus a mixing class from the producer who recorded it. Past guests include Periphery, Chelsea Grin, Machine Head and State Champs. Join now for instant access!
As a key architect of the 2000s metalcore sound, producer Joey Sturgis has helmed genre-defining albums for bands like The Devil Wears Prada, Asking Alexandria, Of Mice & Men, and We Came As Romans. Through his work and his company Joey Sturgis Tones, he has become a leading voice in modern metal production, known for his polished, impactful, and forward-thinking mixes.
In This Episode
In this special Q&A episode, Joey Sturgis fields questions directly from the URM community, diving into a mix of technical, business, and mindset topics. He kicks things off with a detailed breakdown of when and why to use mono versus stereo busses, explaining how your source tracks and panning goals should dictate your routing choices. From there, he gives a dose of real-world advice to an international band trying to get noticed, stressing the importance of a compelling story and building a fan base before ever worrying about record labels. Joey also tackles the classic debate of mixing in solo versus in context, sharing his philosophy on using solo mode as a diagnostic tool while making the final, often more extreme, decisions with the full track playing. He wraps up with some killer advice on overcoming burnout and discusses why obsessing over room correction software can be a bigger roadblock than the room itself.