urmadmin, Author at Unstoppable Recording Machine - Page 44 of 45

Kyle Black: What Makes a Great Intern, Tracking Massive Guitars, and Why He Avoids Reamping

Producer Kyle Black has been behind the board for some of the biggest names in modern pop-punk and hardcore. His impressive credit list includes genre-defining albums for bands like State Champs, Stick To Your Guns, New Found Glory, Comeback Kid, Set Your Goals, and All Time Low, showcasing his knack for creating sounds that are both powerful and polished.

In This Episode

Kyle Black kicks things off with some real talk about what it takes to make it in a competitive market like Los Angeles, sharing how he landed his first major gigs through a mix of mentorship, skill, and just the right amount of persistence. He and the guys get into a fantastic discussion about the qualities that separate a great intern from a bad one, emphasizing the importance of humility and a relentless work ethic. The conversation then shifts into a technical deep dive, with Kyle breaking down his go-to signal chains for tracking massive rhythm guitars, clear and punchy bass, and organic, powerful drums. He details his hybrid mixing setup, his “gridded but natural” editing philosophy, and why he’ll almost always choose to nail a tone at the source rather than reamping later. It’s a killer balance of career advice and studio nerd-out.

Products Mentioned

Timestamps

  • [1:20] How do you get anything done while living in LA?
  • [8:12] Should aspiring producers move to LA to pursue a career?
  • [8:55] How Kyle got his start through mentorship and persistence
  • [10:37] The fine line between being persistent and being annoying
  • [15:27] The real purpose of an internship (it’s about learning, not just getting paid)
  • [18:10] The single most important quality that makes an intern stand out
  • [24:08] How Kyle’s assistant proved his worth and graduated from intern to paid assistant
  • [33:00] Using your competitive ego as a positive motivator
  • [35:21] Why having an “abundance mindset” helps you and your competitors
  • [37:14] Kyle’s favorite pieces of gear in his studio
  • [38:39] Using a summing mixer for better stereo separation and dynamics
  • [47:02] Kyle’s simple but effective chain for tracking heavy rhythm guitars
  • [49:50] Why he believes there’s quality loss when you reamp
  • [52:04] The versatility and power of the Bogner Ecstasy amp
  • [54:29] Why bass is one of the hardest instruments to track well
  • [59:08] Mic placement for a clear and bright bass tone
  • [1:07:34] The key to a great drum recording starts with the player, the tuning, and the cymbals
  • [1:10:05] Why Kyle prefers to tune drums “big and wet and roomy”
  • [1:17:24] A simple rule for deciding when to double-track vocals
  • [1:19:42] The “gridded yet natural” editing approach on the Shai Hulud record

Recording Guitars – Silent Recording Options (Part 2)

Recording Electric Guitars – Silent Recording Options: Part 2 

In the current age of digital recording technology, we have more options available to us than ever before. When it comes to capturing great guitar tones within a home studio environment/budget, we’ve never had it better.

Here is an overview of what I consider to be some of the best silent-recording options available today:

Recording Option #2: Hybrid Setup – Real Amp + Reactive Load Box + Speaker Simulation

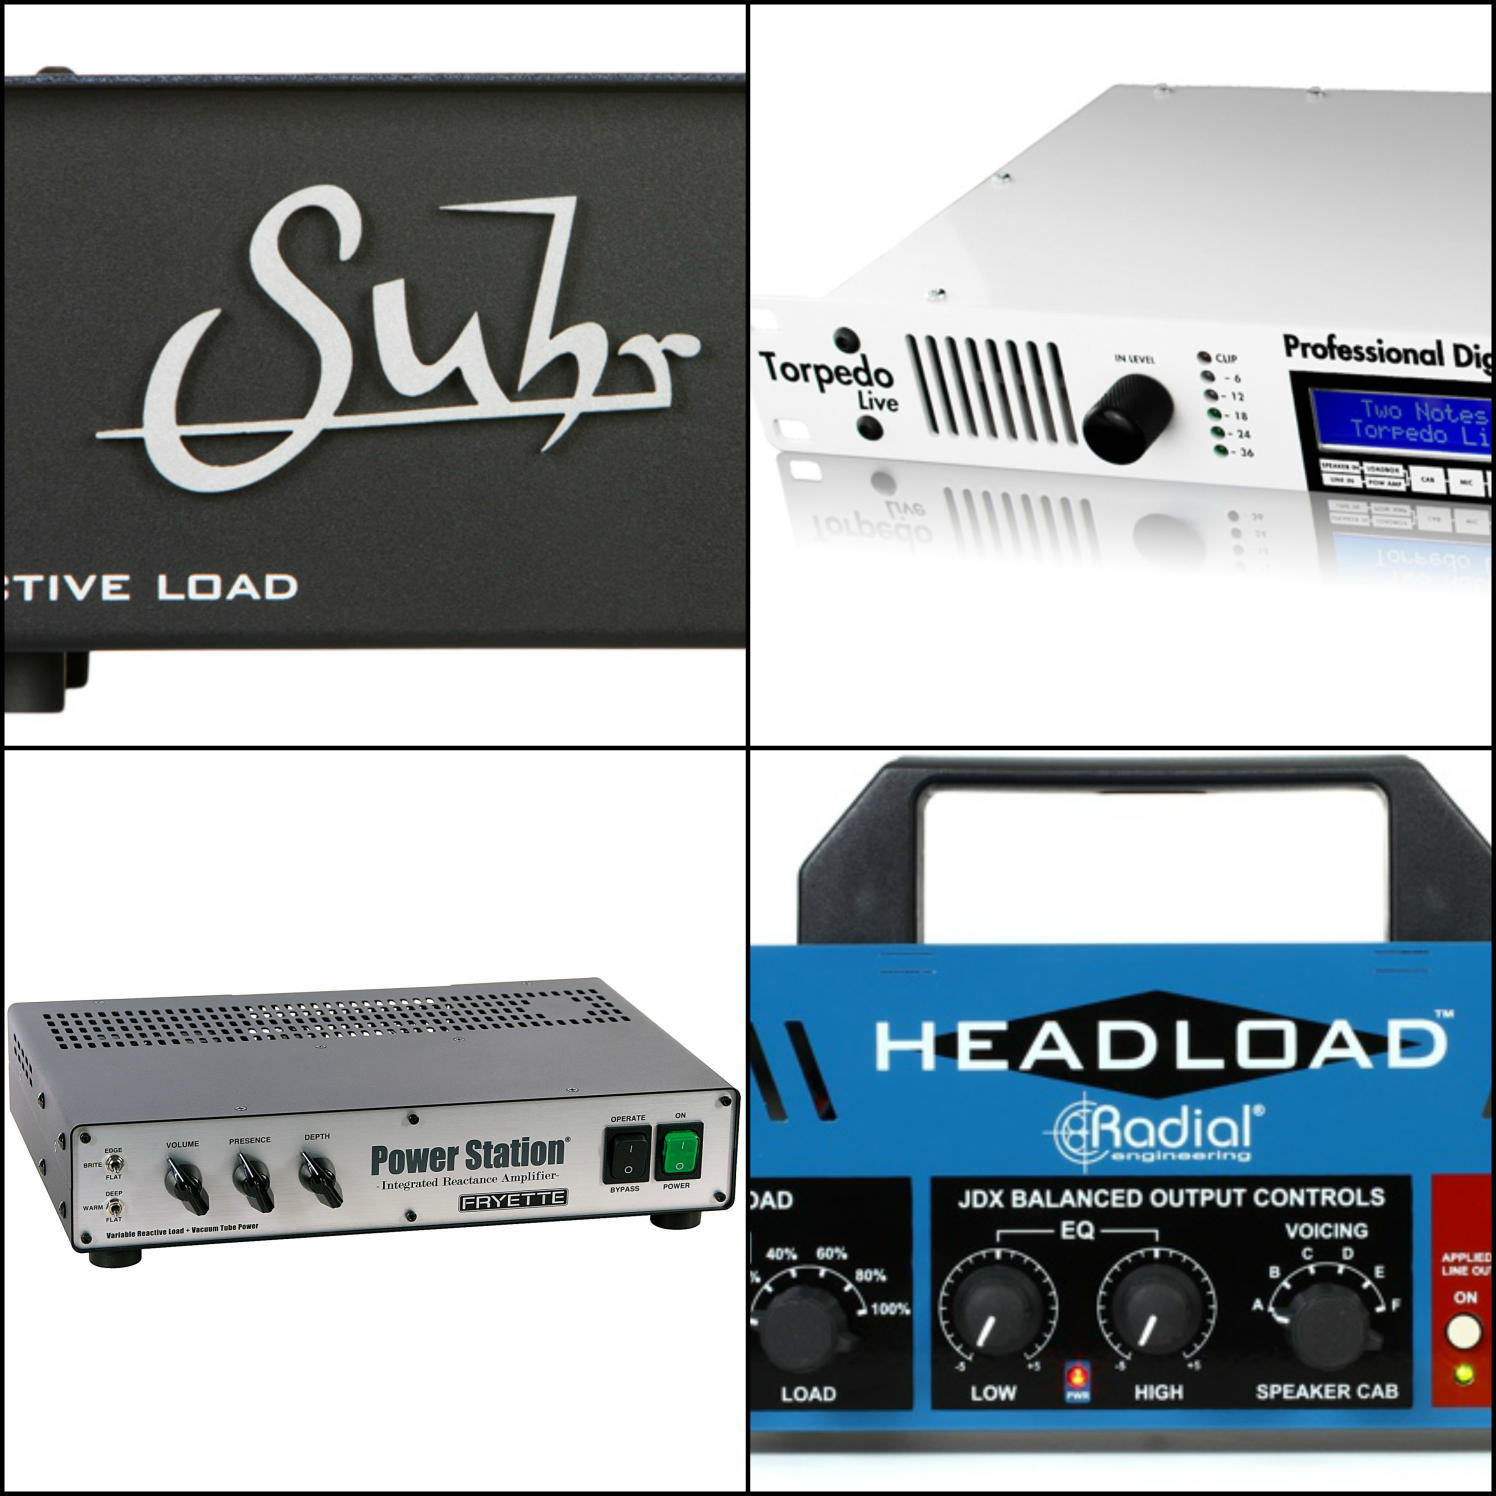
1-load-boxes-collage

Using a Load-Box is my  favorite way to record guitars silently. This method is the most accurate way to capture the sound and feel of an analog amplifier, while retaining most of the benefits of silent recording.

Introduction to Load Boxes

To use this method you’ll need to purchase a Load-Box. More specifically, a Load-Box with a line output option. A Load-Box is a piece of gear which can be used to replace a speaker cabinet. It loads your amp’s speaker output down to a line level signal, so that you can safely connect it up to your audio interface without damaging it.

Load-Boxes come in a few technical variations
  • Reactive Load-Boxes
  • Resistive Load-Boxes
  • Load-Boxes With or Without Built-In Speaker Emulation
What’s the difference between Reactive and Resistive?

Think of it this way: When an amplifier is plugged into a speaker cabinet, the signal flow relationship between the head and the cab isn’t exactly linear. It’s more of a push/pull, “interactive” relationship. This has a huge influence on the way that the gear sounds, how it reacts, and how it feels to play through as a guitarist.

NOTE: In more technical terms, this relationship between the amp and the speaker cabinet is called the “impedance curve” of the gear.

Reactive Load-Boxes

As it’s name suggests, a reactive Load-Box will preserve this Impedance Curve. It allows your gear to “react” with the guitar player, thus retaining the benefits of playing through a real speaker cabinet.

Resistive Load-Boxes

A resistive Load-Box on the other hand, will get rid of the Impedance Curve. It loses the relational benefits gained from playing through a real cab.

Load-Boxes With or Without Built-In Speaker Emulation

2-cabs-collage

While using a Load-Box you’ll still need to use speaker simulation on the back-end of your chain.

Some Load-Boxes come with built-in speaker emulation. Others simply serve the sole purpose of converting your amp’s speaker output into a line level signal and don’t really do anything else.

Which one to go for mainly comes down to where and how you’re planning to use the unit. If you’re planning on using the Load-Box for live performance as well as studio recording, you might be better off going with an option with built-in speaker simulation. You can save yourself from having to buy an additional speaker simulation unit in the future.

Whichever option you go for, you’re bound to find a speaker simulation setup that works well. There’s a plethora of accurately captured 3rd party speaker impulse-response packs available from companies like Ownhammer, Two-Notes, JST, Fat Lazy Cabs, etc. (Check out Part 1 of my “Silent Recording Options” Blog for a longer list of speaker simulation software and IR packs)

Which Load-Box Should I Buy?

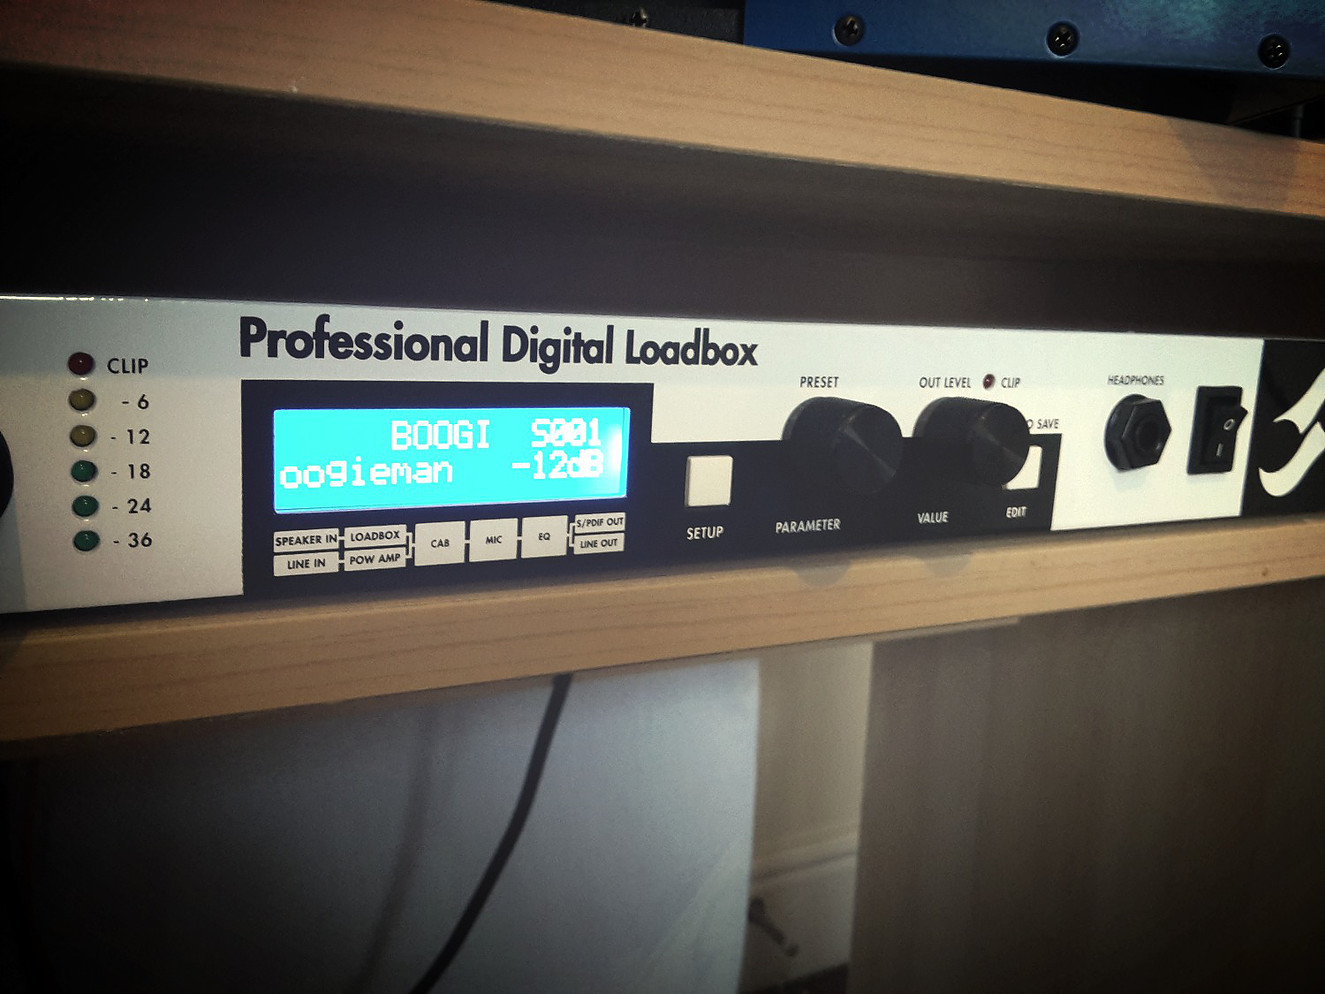
3-brett-brothers-torpedo

The Torpedo Live Digital Load-Box which I use at Brett Brothers Recording Studio.

Good Load-Boxes aren’t a cheap purchase by any means… but they make up for it by providing an excellent way to capture the sound and feel of a real amp in complete silence. They also retain the user-friendly functionality of having analog knobs and switches to tweak in real-time.

There are quite a few great reactive load boxes to choose from available on the market at the moment. Most of these products serve the same purpose. They mainly differ in connectivity options and extra features (such as built-in speaker simulation).

Here’s a list of a few excellent Load-Box options to consider

NOTE: I won’t go into too much detail about the individual products in these lists. They each offer a different set of features and functionality and would require a whole blog post for each of them in order to cover everything. I’d highly recommend checking out some sound demos and doing your own research before you make a decision on which unit to buy.

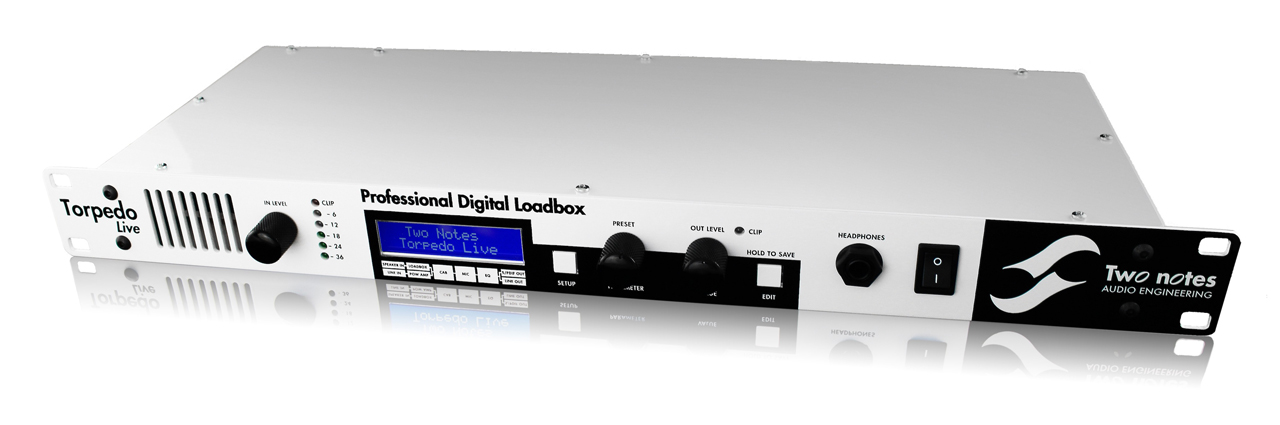
Example Load-Box With Built-In Speaker Emulation

4-torpedo-live-close-up

Two Notes Engineering Products – Torpedo-Live, Torpedo Studio

Reactive, Built-In Speaker Simulation, Additional Functionality

  • Built-in, High-Quality Two-Notes speaker simulation included within each unit. The built in simulation is extremely tweakable, with parameters such as microphone choice, microphone placement, speaker choice and power-tube simulation.
  • Extremely versatile when used alongside the “Torpedo Wall of Sound III” plugin within your DAW.
  • Supplies a Reactive Load for your amp, which helps to maintain the warmth, dynamics and feel of playing through a real speaker cabinet.
  • Great for Live-Use. You can load your favorite IR’s into the units and keep a consistent tone every night without the need for any extra speaker simulation gear.
Example Load-Box Without Built-In Speaker Emulation

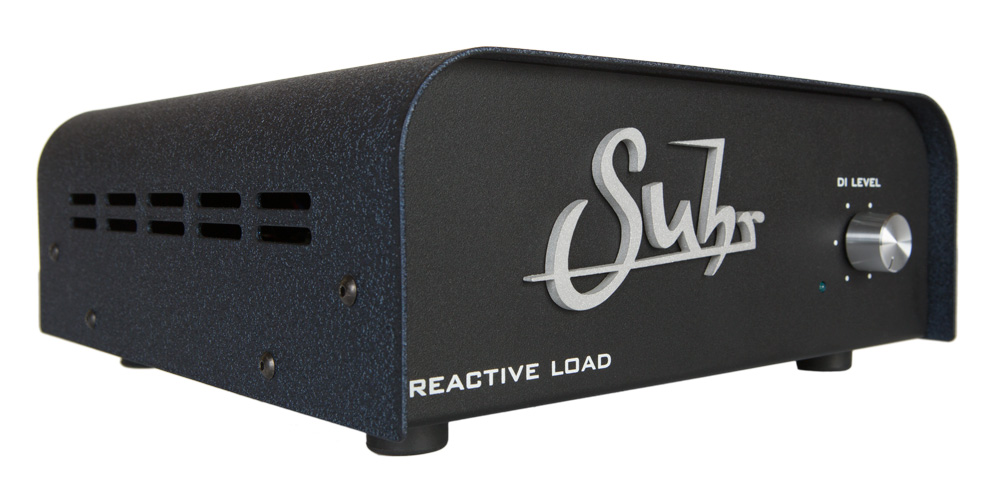
5-suhr-reactive-load

Suhr Reactive Load

Reactive, No Built-In Speaker Simulation or Extra Functionality

  • Supplies a Reactive Load for your amp, which helps to maintain the warmth, dynamics and feel of playing through a real speaker cabinet.
  • A more affordable option than the high-end Two-Notes products. However, the lower price point is reflected in the fact that the unit is a bit of a one-trick-pony (Albeit a very high-quality pony!). There’s no built in speaker-simulation or extra bells and whistles.
  • Mainly designed for studio use. You’ll have to pair the unit with some additional speaker simulation (such as a Two-Notes Cab unit) if you want to use it live.
Other High-End Load-Boxes to Check Out
  • Fryette Power Station
  • Radial HeadLoad

NOTE: There are many more brands and models to choose from when it comes to Load Boxes. These are just some of the more popular high-quality options available at the moment. Whatever you decide to go for, make sure to check out reviews and do some thorough research before you pull the trigger on anything!

Here’s a brief step-by-step guide on how to record using a real amplifier alongside a Load-Box and some speaker simulation software in your DAW

IMPORTANT NOTE ON USING AMPLIFIERS: Always make sure to have a speaker cabinet or Load-Box connected while using a guitar/bass amplifier! (Unless the amp has an in-built load-box, such as the Laney IRT Studio). Using an amplifier without connecting it to a suitable load can damage the amp and cost a ton to repair!

How to do it
  1. Buy a Load Box. (Check out my list above)
  2. Make sure that the speaker output of your amplifier is connected to the correct speaker input on your Load-Box depending on the impedance of the amp. Always make sure the Load-Box is turned on before you switch on your amp. (This is very important, as you can fry the output transformer on the amp if you use it without connecting it to a proper load!)
  3. Set the gain and EQ settings on your amp similar to where you’d usually set them. Make sure to set the amp volume at a level close to what you’d usually use, as if you were playing through a speaker cabinet in a room. Just because you can crank the volume on the amp to 10 in a silent recording scenario doesn’t mean you should… Running your amp volume too high runs the risk of damaging it in the long run, and it probably won’t sound it’s best at stupid levels anyway…
  4. Connect the line output of your Load-Box to your audio interface and set the input gain on the interface appropriately. (So that it’s loud enough, but not clipping when the guitar is strummed hard)
  5. Load up a speaker simulator as the first plugin in the chain in your DAW (Check out Part 1 of my “Silent Guitar Recording” Blog for a list of speaker simulation plugins and IR packs)6-speaker-sim-example
  6. Choose the speaker IR that fits your tone and song the best.
  7. You are now ready to play/record!
Recording Option #3: Hybrid Setup – Real Amp + Power-Amp Simulation + Speaker Simulation

7-fx-output-method

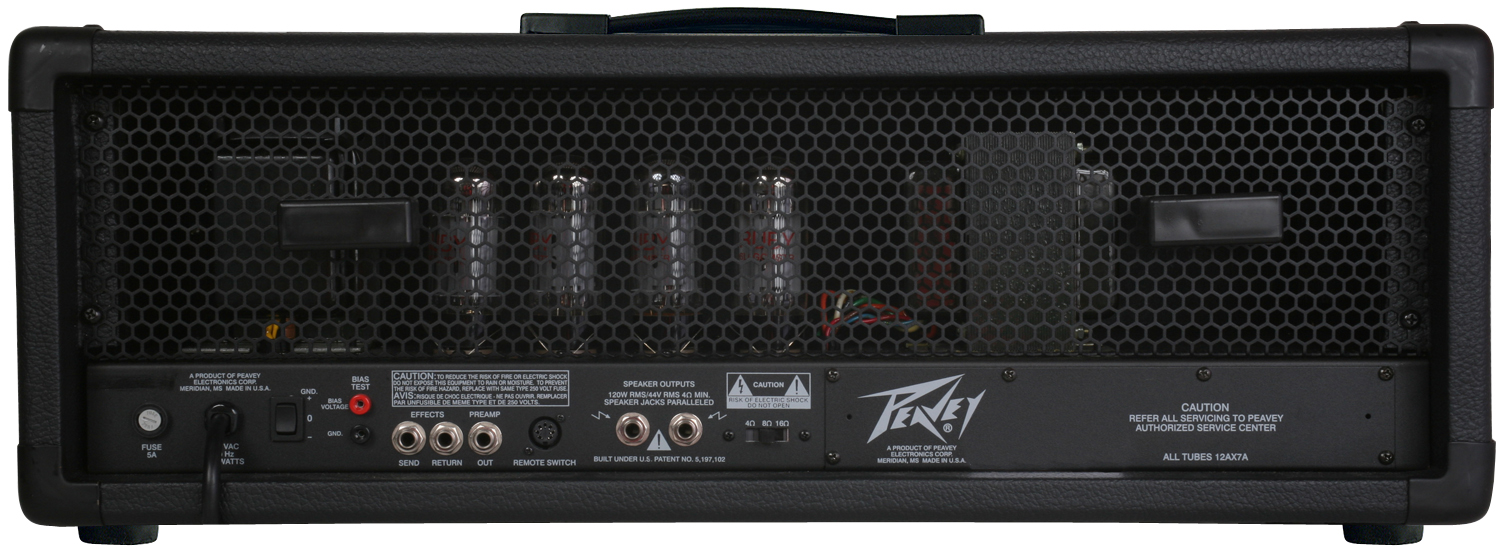
This is another interesting option, as it allows you to record directly from the preamp section of any real amplifier which has an FX loop or DI output.

The main benefits of this method include utilizing the pre-amp section of a real guitar amplifier to record, while also being able to run real FX units and stomp-boxes. The main downside of this method is that you’ll still need to hook your amp up to a suitable load, as not to damage any of the components.

IMPORTANT NOTE ON USING AMPLIFIERS: Always make sure to have a speaker cabinet or Load-Box connected while using a guitar/bass amplifier! (Unless the amp has an in-built load-box, such as the Laney IRT Studio). Using an amplifier without connecting it to a suitable load can damage the amp and cost a ton to repair!

How to do it
  1. Make sure that the speaker output of your amplifier is connected to the correct speaker input on your Load-Box depending on the impedance of the amp. Always make sure that the Load-Box is turned on before you switch on your amp. (This is very important, as you can fry the output transformer on the amp if you use it without connecting it to a proper load!)
  2. Turn the master volume of the amp down and leave it there for the entire process. The power section of the amp is unused in this method.
  3. Run a regular TS cable between the FX send of the amp and into an instrument input on your recording interface or into a DI box (some amps have a separate “Preamp” or “DI” output). (Check out Part 1 of my “Silent Guitar Recording” Blog for an in-depth explanation of DI boxes)
  4. Run another TS cable into the FX return of the amplifier, but don’t plug the other end of it into anything.
  5. Set the gain and EQ on the amp where you usually would (depending on the tone you’re after). Adjust the input gain on your interface so that it’s loud enough, but doesn’t peak when you strum hard.
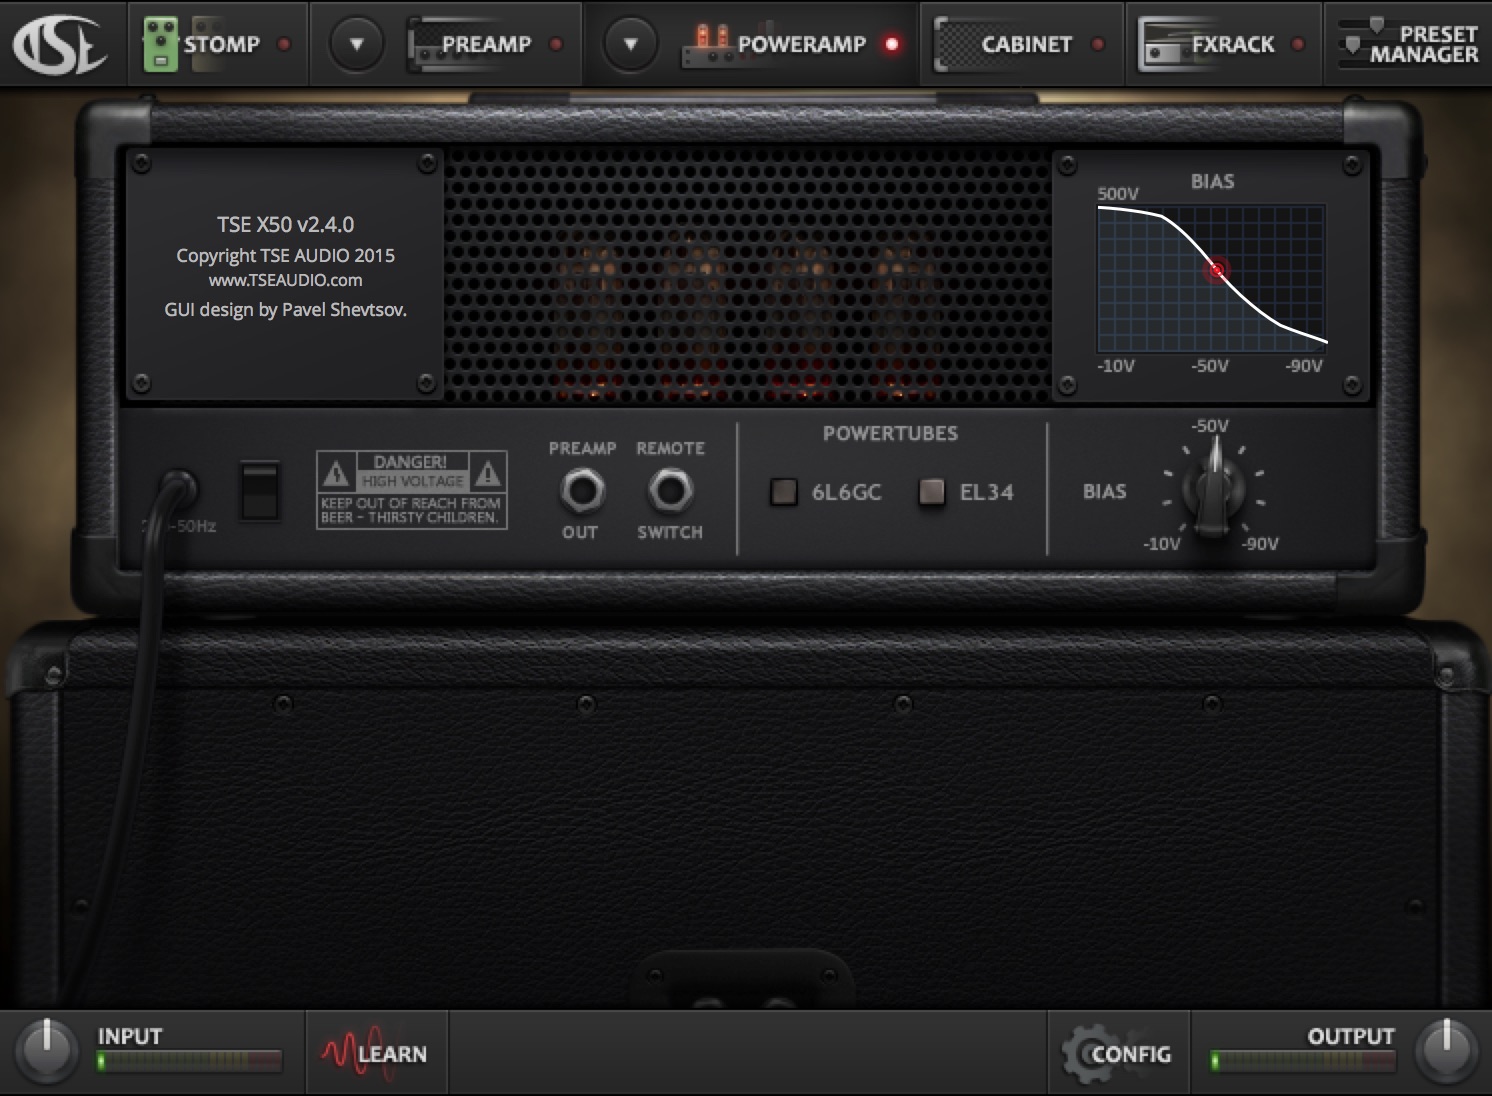
  6. Place your power-amp simulation of choice as the first plugin in your chain within your DAW. Most amp simulation plugins have built-in power amp simulation. Just turn off the pre-amp simulation and FX within the plugin so that it is only acting as a power amp simulator. (see the TSE X50V2 example below)8-power-amp-sim-example
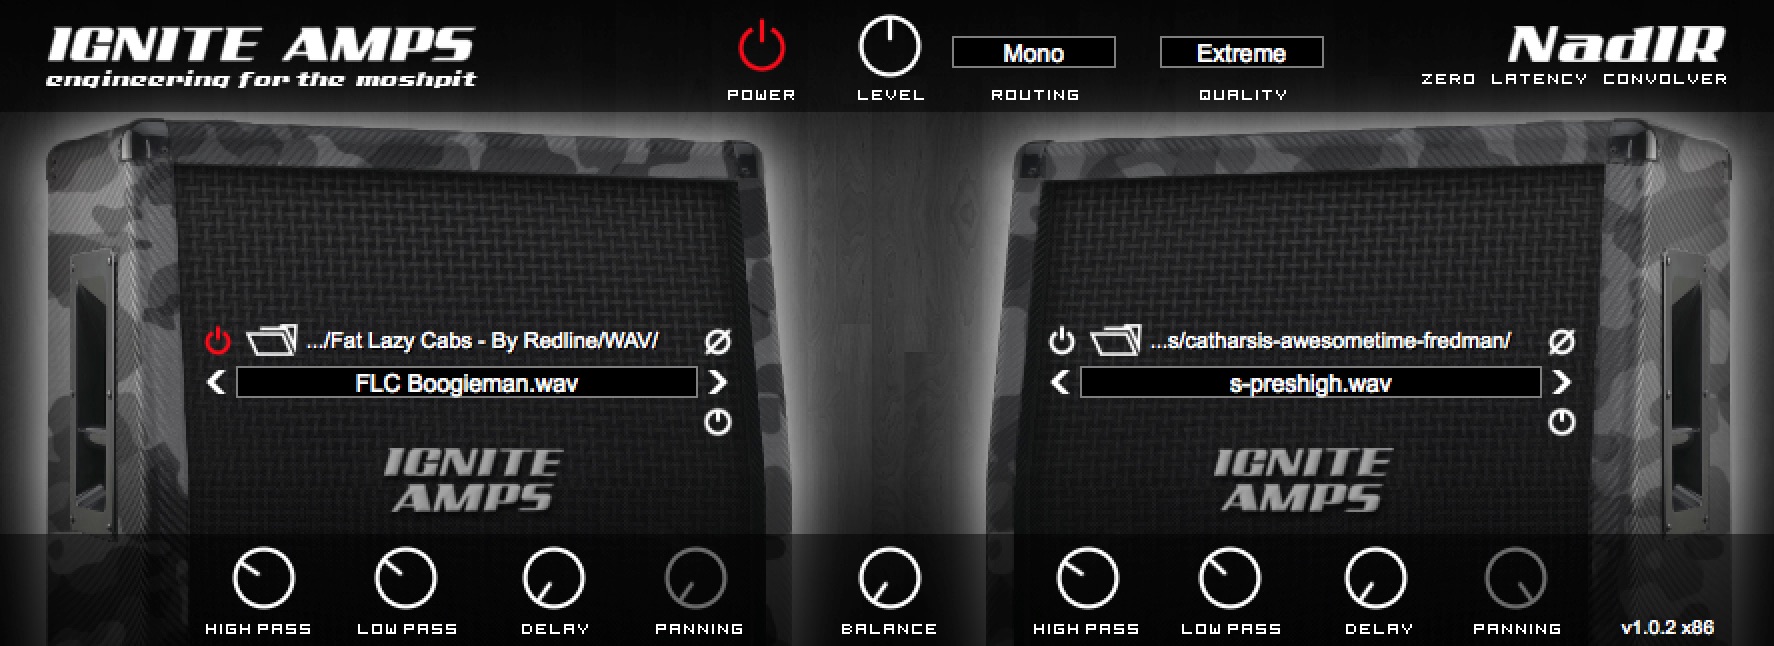
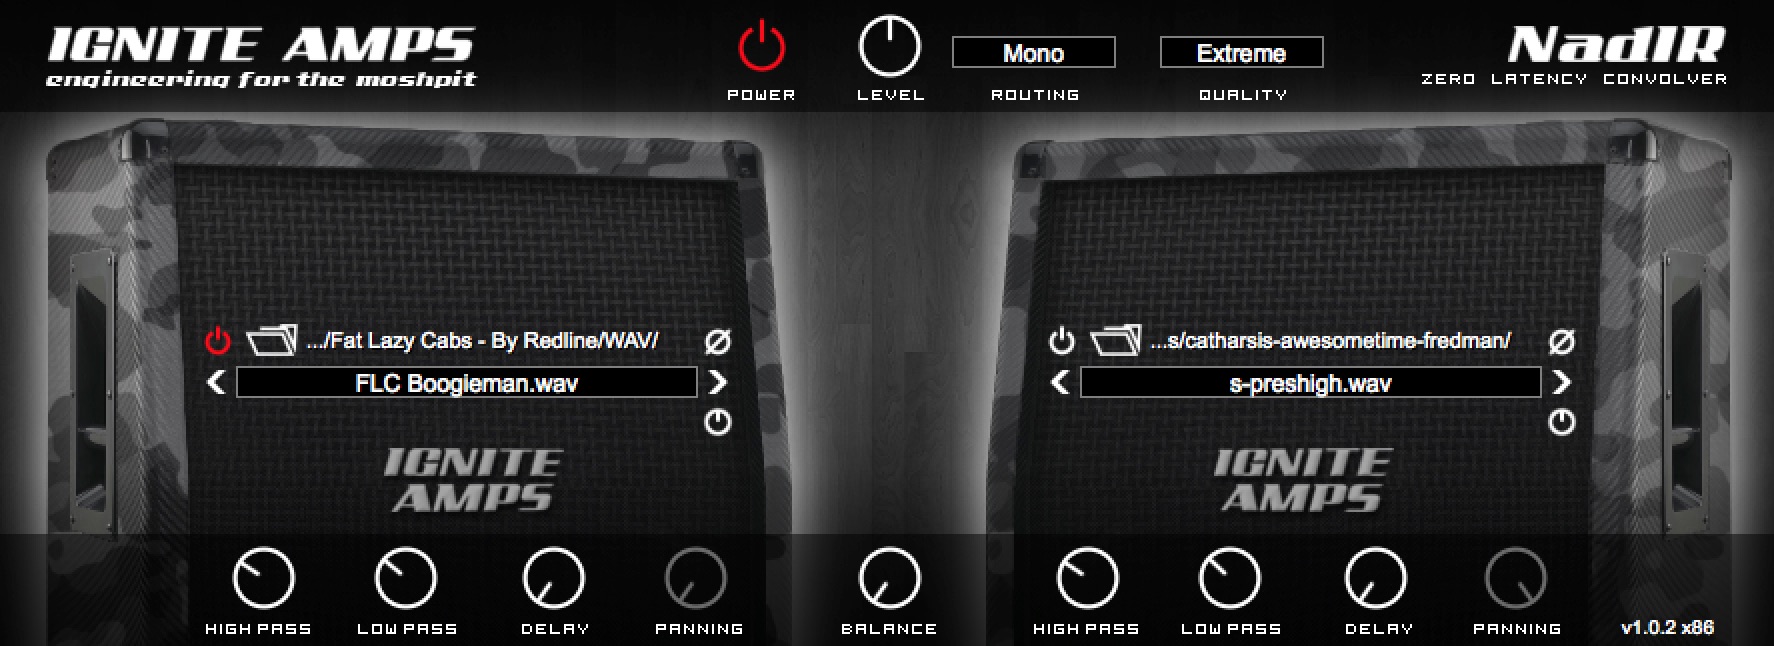
  7. Place your speaker simulation plugin as the 2nd plugin in your chain in your DAW. You can either use 3rd party cab IR’s such as the Ownhammer libraries with an impulse loader (NadIR by Ignite Audio is my favorite) or simply use the built-in speaker simulation suites in amp-sims such as Guitar Rig or Amplitube.9-speaker-sim-example

BONUS TIP: Some impulse responses are initially captured through neutral solid-state power amps with a very flat EQ response. Others are captured through tube power amps with a more colored response. Depending on which speaker impulse response you choose to use, you might not need any power amp simulation beforehand. The impulse will already have been captured through one.

Recording Option #4: Modeling/Profiling Amps + “Studio” Amps

10-modeling-amps-collage

Modeling/Profiling Amplifiers

One of the most popular and arguably most revolutionary developments in guitar tone of the past decade, is the rise of thedigital modeling amplifier”.

The ability to capture or model a specific tone, which can then be recalled instantly at any desired moment, with nothing more than the simple click of a button, offers countless practical and workflow-related benefits which weren’t really available until fairly recently.

When this type of digital amp simulation technology first started to come about, many people, including myself, remained unimpressed when shown side-by-side comparisons between the real deal and the “imitation”. Fast forward a few years later, and the technology used in high-end modeling and amp profiling has been improved to the point that most of these “non-believers” have been converted to the cause. Even the most trained ears would be hard-pressed to tell the difference between the two in a blind shootout.

NOTE: As I briefly mentioned in my previous Blog entry, this isn’t a question of digital being better than analog, or visa versa. However, I do strongly believe that anybody who is still clinging on to the ancient mindset of “digital is inferior to analog” is bound to miss out on an amazing opportunity to access an incredibly versatile array of tonal options, at an extremely affordable price-point. As I said in my previous Blog: If the end product is good, the gear used to get there is irrelevant!

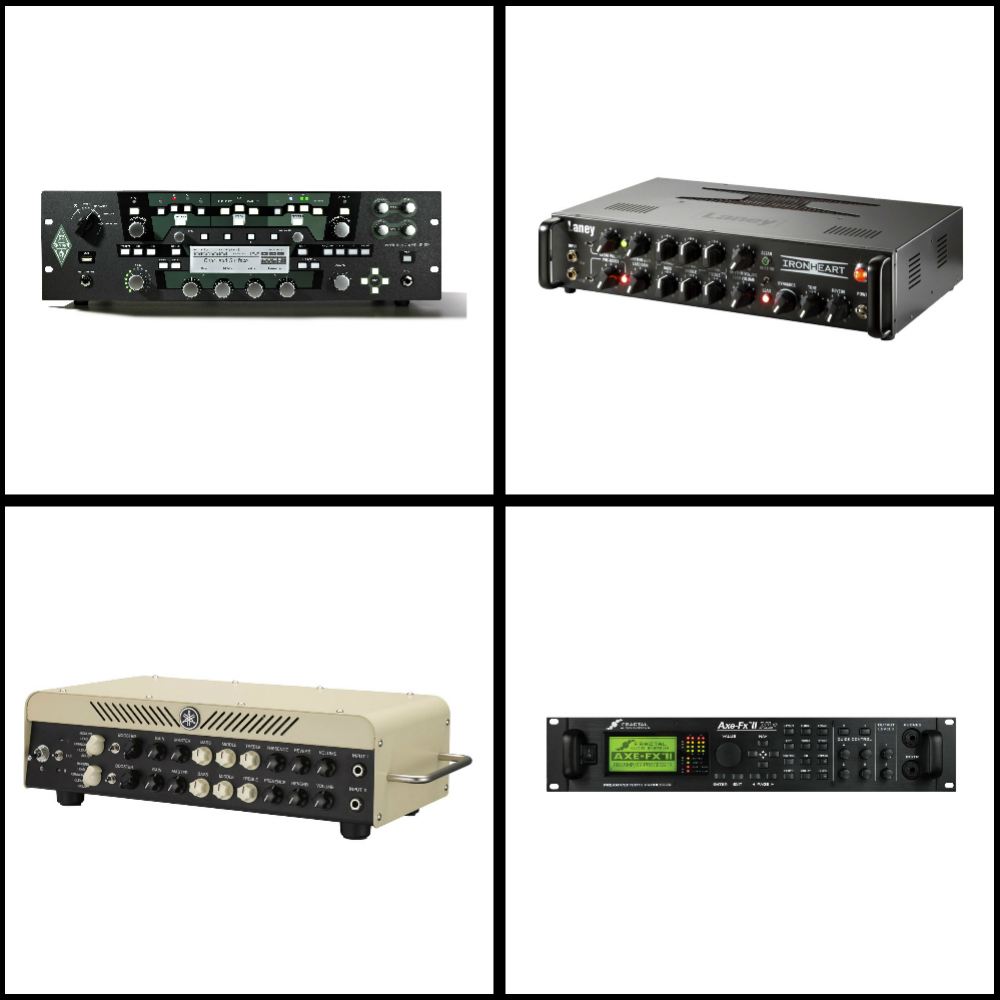
A List of Great Modeling/Profiling Amplifiers For You to Check Out
  • Kemper Profiling Amplifier
  • Axe FX
  • Line 6 Helix
  • Bias Head
  • Atomic Amplifire
  • Yamaha THR100H/HD
“Studio” Amplifiers

11-laney-ironheart-close-up

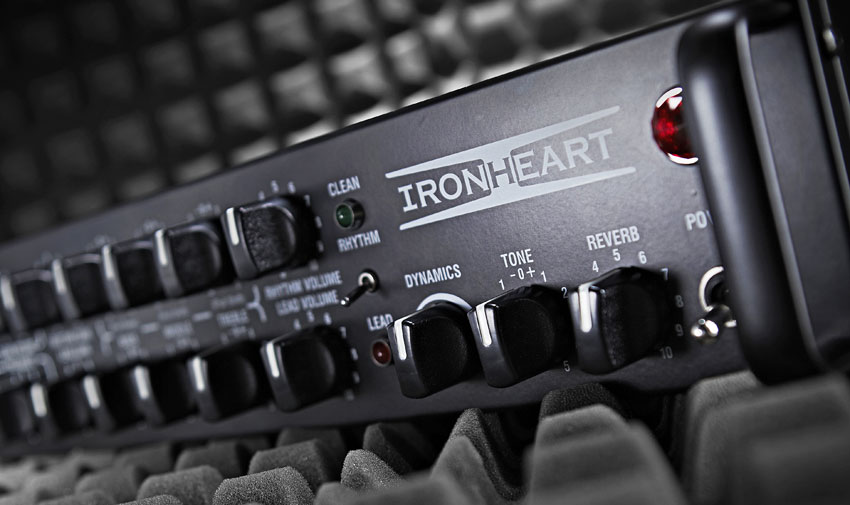
Studio amplifiers are a rather new hybrid guitar recording option. They aim to combine the sound and user-friendly interface of using an analog amplifier, with the functional benefits of having built-in Load-Boxes and speaker emulation.

These amps are usually available at a very reasonable price point. They offer a great alternative to some of the more expensive and extravagant modeling options. Unfortunately there aren’t too many options in this category available on the market just yet. However I have no doubt that more and more companies will start releasing some really strong contenders in this area pretty soon.

Personally, I’m huge fan of simplicity when it comes to guitar tone. Despite being one of the least expensive pieces of gear in my studio, I often opt for using my Laney Ironheart Studio over some of my other amp and speaker options simply because of how effortless it is to set up and dial in a good tone with.

Final Words

This concludes Part 2 of my “Recording Electric Guitars – Silent Recording Options” series. I hope that this article has given you some new ideas and plugins to try out during your next project.

Be sure to let me know in the comment section below if any of this information has helped you out, or if you have any further questions regarding anything I’ve talked about here.

Stay tuned for future articles on all things Recording and Production related!


Want mix tips from URM Academy? Read them here!

Nail The MixNail The Mix is our online mixing school that gives you REAL multi-tracks from REAL bands, plus a mixing class from the producer who recorded it. Past guests include Periphery, Chelsea Grin, Machine Head and State Champs. Join now for instant access!

BEN UMANOV: Building MetalSucks, The Business of Music Media, and Networking in the Digital Age

Ben Umanov is the co-founder of the influential blog MetalSucks and a key figure in the online metal media landscape. Alongside his partners, he grew the site from a simple WordPress blog in 2007 into a full-time business, eventually co-founding the Blast Beat Network, an ad network that includes prominent sites like Metal Injection. Umanov has also expanded his media footprint by launching Gear Gods, a site focused on the gear used by heavy musicians, and The Laugh Network, a similar ad network for the comedy world. Prior to his entrepreneurial ventures, he worked as a web project manager at Atlantic Records.

In This Episode

Ben Umanov of MetalSucks and the Blast Beat Network joins the show for a seriously insightful look at the business of running a modern media company. He breaks down the origin story of MetalSucks, from its humble beginnings to the nerve-wracking decision to quit a stable day job at Atlantic Records to go all-in. Ben offers a transparent look at the financial realities of that transition and the importance of passion and diversification, which led to the creation of sites like Gear Gods. The conversation also gets deep into the absolute necessity of networking, with the guys sharing stories on how personal connections have been the key to every major career move. For any producer or artist trying to navigate the industry, they also chop it up about the ever-changing social media game, discussing how to adapt to Facebook’s algorithm changes and why building a brand across multiple platforms—not just a single traffic source—is essential for long-term survival.

Products Mentioned

Timestamps

  • [0:47] Ben’s career path from blogger to running a major ad network
  • [2:55] How long it took for MetalSucks to become a full-time living
  • [4:26] The decision to quit a day job at Atlantic Records to go full-time
  • [7:31] Using multiple layers of motivation to achieve a difficult goal
  • [10:19] The financial reality of the first few years after taking the plunge
  • [13:40] Diversifying the business: The origin of Gear Gods and The Laugh Network
  • [18:01] Why creative professionals should keep an open mind about their career path
  • [20:06] Advice for getting started in the industry: Take any position you can get
  • [23:06] The critical importance of networking in the music business
  • [25:27] Are physical demos at shows still a valid promotional tool?
  • [28:54] Joey Sturgis’s unique method for filtering potential clients (cassette tapes!)
  • [31:55] How unsigned bands can get featured on MetalSucks
  • [34:32] The double-edged sword of relying on Facebook for website traffic
  • [36:26] Advice for bands dealing with Facebook’s decreased organic reach
  • [40:03] How MetalSucks is adapting with long-form content and a bigger YouTube presence
  • [44:48] The importance of brand awareness across multiple platforms
  • [49:56] Common mistakes bands make when submitting press kits
  • [54:51] Why a band’s live performance is the most important factor for success
  • [57:22] When a band with a great recording turns out to be a disaster in the studio
  • [58:35] The three-part formula for a successful band: music, live show, and business acumen

Recording Guitars – Silent Recording Options (Part 1)

Recording Guitars – Silent Recording Options (Part 1)

In our current age of digital recording technology, we now have more options available to us than ever before when it comes to capturing great guitar tones within a home studio environment/budget.

Here is an overview of what I consider to be some of the best silent-recording options available today:

Option #1: Digital Setup – Amp & Speaker Simulation Software + DI Boxes

The easiest and cheapest way to get into silent guitar recording is by using digital amp and speaker simulation plugins within your DAW.

A little backstory:

During my first few years of engineering, I couldn’t afford to buy multiple expensive tube-amps and speaker cabinets, and wouldn’t have had the space to crank them even if I could… All I owned at the time was a tiny Marshall combo, which was OK for practice purposes, but extremely limited when it came to recording and trying to get different tones out of it.

Discovering amp sims was a real game changer for me. It meant I could finally achieve results close to the sounds I had in my head, without annoying the neighbors, and with nothing more than a basic home studio setup.

Fast Forward to Today:

I thought that my old amp sims sounded pretty darn good back when I started out, but the technology used in amp and speaker simulation has improved leaps and bounds since those days. We have basically come to a point where the simulations are almost indistinguishable from the real deal.

Why Try Digital?
Why digital?
Here are some of the practical, and workflow related benefits of using amp-sims instead of analog amplifiers and cabinets:
  • Silent Recording: The ability to record silently at any time of day is amazing. I’ve had issues with neighbors complaining about noise in the past. Using amp sims solves this problem when you don’t have an alternative to recording your loud amps at home.
  • Consistency and Recall-Ability: There are lots of variables that go into creating a specific guitar tone: Mic choice, Mic placement, Speaker choice, Cabinet choice, Room placement, Amp settings, Tube choices… the list goes on! It’s difficult to maintain a specific signal chain throughout the duration of a whole album. It’s a real pain to replicate the tone if settings are changed, or something goes wrong with the gear for whatever reason. Amp simulation software gives you the ability to save your tones as presets. This means you have instant recall-ability and perfect consistency of tone across different songs within an album.
  • Variety and Comparison: Amp sims give you the ability to scroll through and compare between a huge variety of different amp and speaker choices with only a few clicks of your mouse. This means that you can find the right tone to fit the song or riff quickly. You can save hours of setting up gear in a room, or spending too much time wondering “what if?”
  • Repairs and Upkeep: Real amps are awesome! We all love the feeling of cranking a brutal tube amp through a loud 4×12 and feeling the room shake. However, things can go wrong at the most inconvenient of times and cost a ton to repair, and even then… There are no guarantees that the amp will even sound the same after an incident like this!
A few words on the Analog vs Digital Argument:

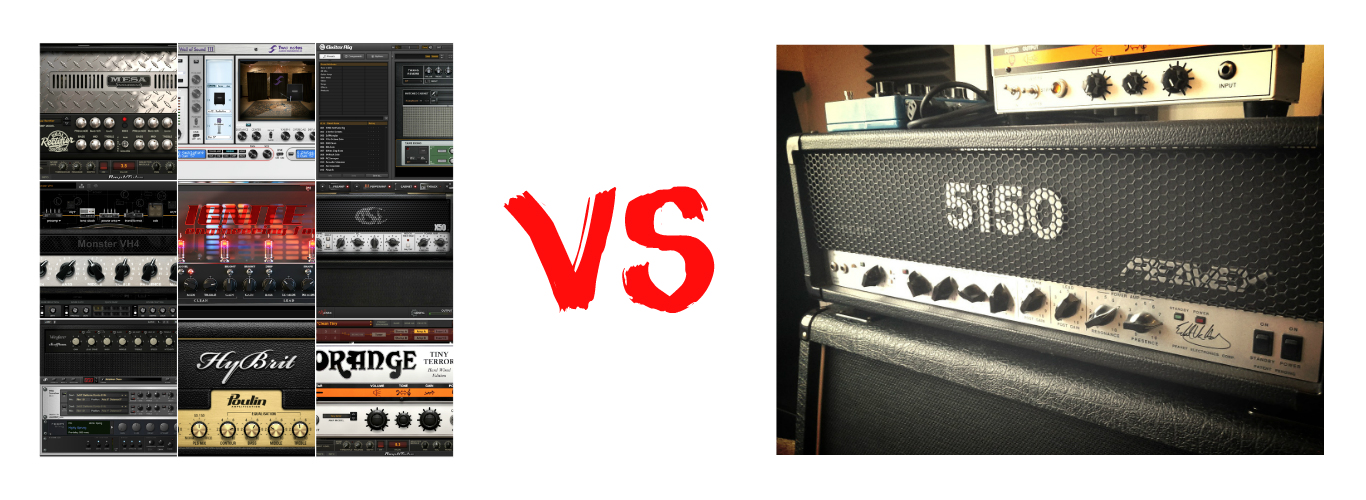
analog-vs-digital

I bet some of the “digital amp-sims suck…” analog fan-boys are starting to lose it right about now… The truth is; I’m not comparing digital to analog, or saying one is better than the other, they are both great! This blog is all about giving people options that can possibly cater to their current situations. At this point in Audio, the analog vs. digital argument is a huge waste of time… If it sounds good and offers a great workflow FOR YOU, then that’s all that matters! The methods you use to get to those results are irrelevant…

Going Digital – What do I need in order to get started?

An audio interface with an instrument input, amp simulator software, and a DI box (optional).

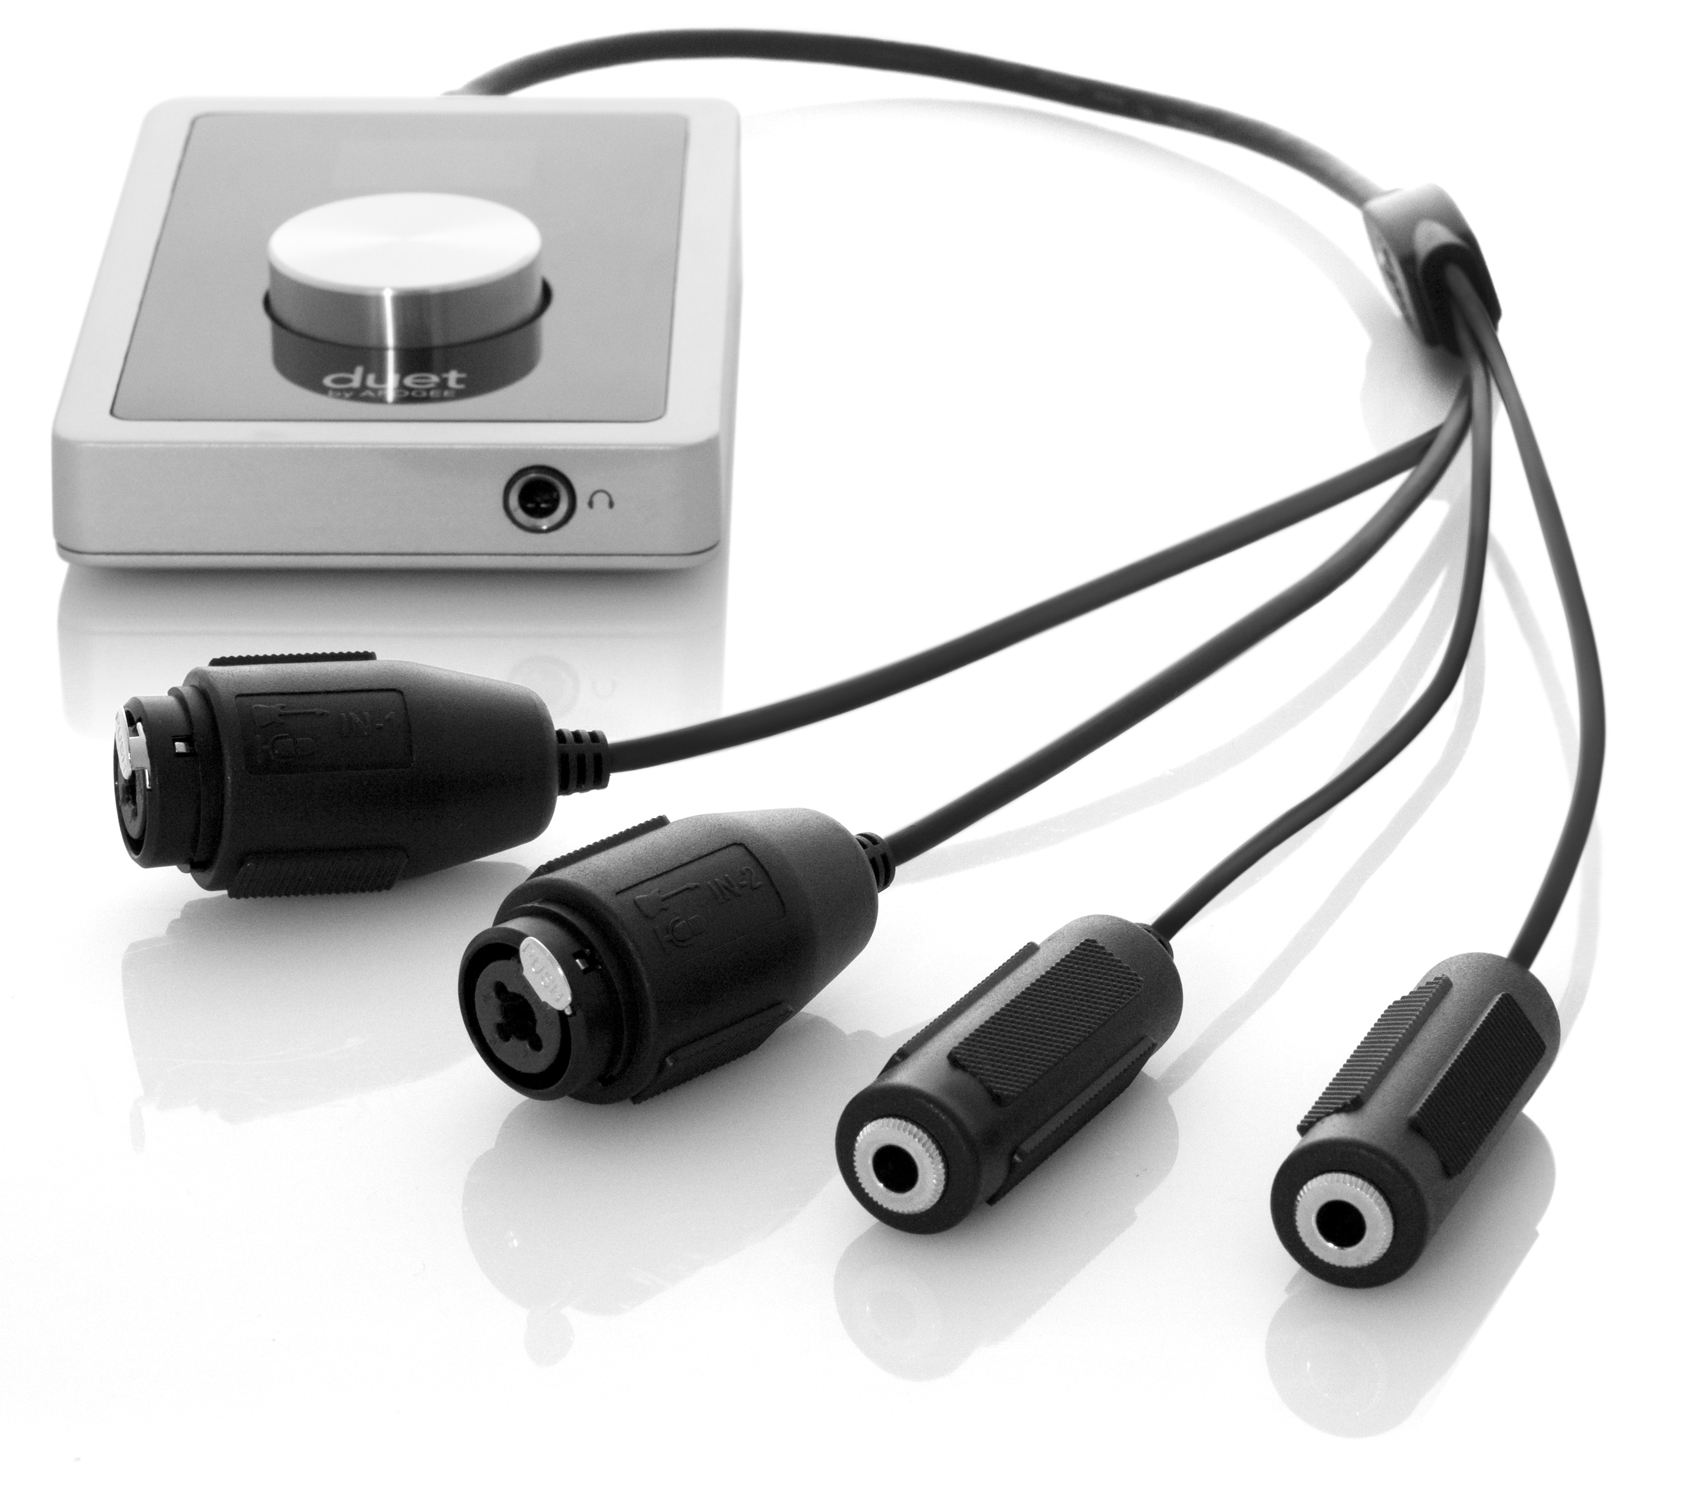
1 – Audio Interface:

audio-interface

Any audio interface with an instrument input (also known as a HI-Z input) should work just fine for recording the raw DI signal out of your guitar, and into your DAW. There are differences in quality between the HI-Z inputs on different Audio Interfaces depending on their price point. Don’t worry about that too much if you’re just getting into audio, or on a tight budget.

If anything, just make sure that the interface you use has enough input headroom to accommodate the instrument you’re going to be using. (EX: Some interfaces will clip even at the lowest input gain setting when used with active pickups)

2 – Amp/Speaker Simulation Software:

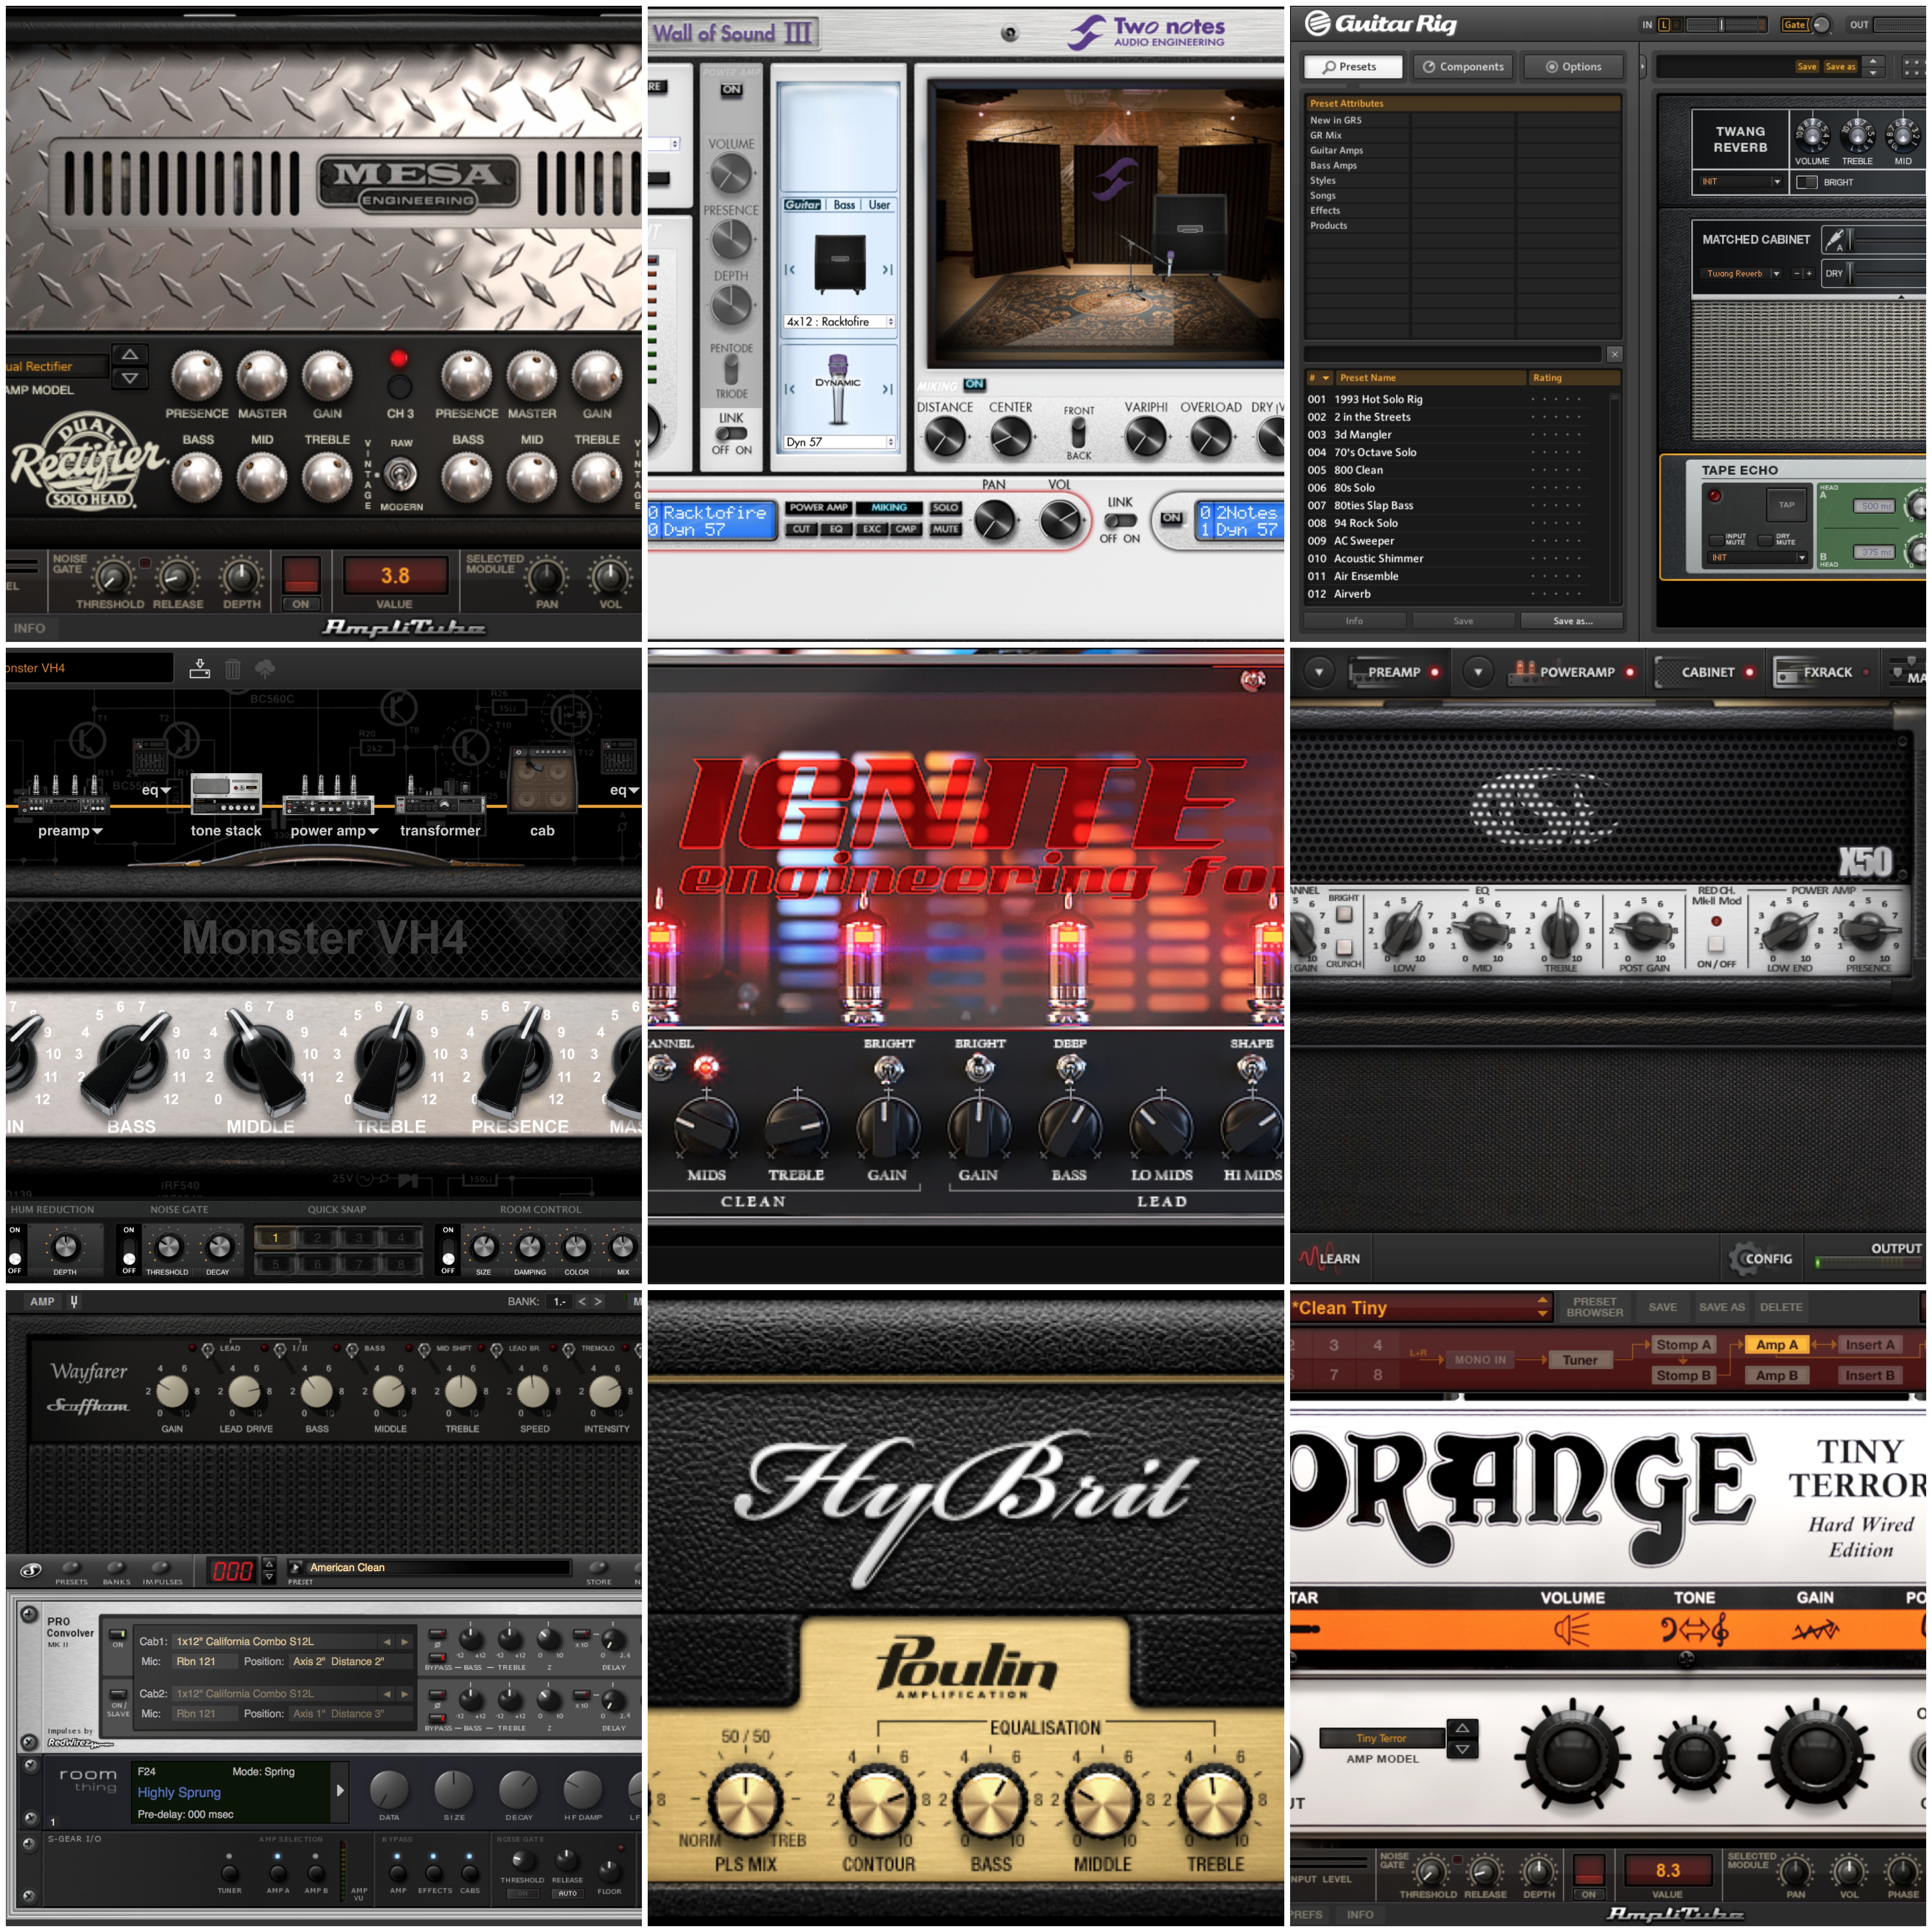
amp-sims-collage

There are absolutely TONS of simulation plugin options to choose from these days. Which one to use depends entirely on what you’re after and whether you want to stick to the freeware options, or try out a paid option:

NOTE: I won’t go into too much detail about the individual plugins in these lists, as they each offer a different set of features and functionality. These are simply meant to be lists of products which I have tried in the past, and managed to get good results with in my own projects. These are not comprehensive lists of all the simulation plugins known to man…

A – Paid “Complete Tone Suite” Amp/Speaker Sim Options:

These plugins essentially act as a “complete tone suite,” with built-in amp simulation, speaker simulation, guitar effects and post-processing options all under the same roof:

I’d highly recommend checking out some sound demos and doing your own research before you make a decision on which software to buy.

NOTE: These plugins are in no particular order:
  • Scuffham Amps – S Gear: My personal favorite amp-sim for vintage and warm sounding clean and crunch tones. I also really like their lush spring reverb algorithms. NOTE: S-Gear is now included in the Steven Slate everything bundle for only $24 a month!
  • X50-V2 – TSE Audio: Based on the classic Peavey 5150 Tube Amp, this the best high-gain amp-sim for metal in my opinion. Comes pre-loaded with some of the best impulse responses available.
  • Bias – Positive Grid: One of the more realistic amp-sims with the most tweakability. Gives you the option to try out different tubes, speaker types, amp bias settings etc. I have never really used Bias personally, as I find having too many options a bit daunting and feel like it slows down my workflow. Nevertheless, a great sounding amp sim.
  • Pod Farm – Line 6: One of the most popular amp-sim options for down-tuned metal. The favourite of many famous metal producers.
  • Toneforge Amp Sims – JST: Awesome sounding amp and speaker simulation designed by the main man Joey Sturgis himself. I don’t own these plugins personally, but have always been blown away whenever I’ve heard Joey using them in his videos and productions.
  • Amplitube 4 – IK Multimedia: The most user-friendly interface of any amp-sim in my opinion. Their newer MESA stuff is pretty killer for metal, I’m also a huge fan of their Ampeg sims for rock bass.
  • Guitar Rig 5 – Native Instruments: Very good clean amp emulations, offers a great selection of creativity-inspiring FX options to choose from. 
B – Freeware “Standalone” Amp-Sim Options:

These plugins are designed to purely simulate the amplifier portion of the guitar chain. They’re meant to be used in conjunction with a separate speaker-sim plugin:

  • LePou Amp Sims – LeGion (Peavey 5150), LexTac (Bogner XTC), Hybrit (Marshall JCM800), Lecto (Mesa Dual Rectifier) and Le456 (Engl 645): Arguably the best freeware amp-sims available, these have been around for quite along time and they still sound amazing!
  • The Emissary & The Anvil – Ignite Amps: Very good freeware amp-sims, they sound amazing and offer extremely user friendly interfaces.
C – Paid “Standalone” Speaker-Sim Options:

Most speaker simulation plugins serve the same core purpose; they load-up and host your impulse responses. The main differences between the individual plugins are in functionality, the extra features they offer to speed up your workflow, and whether they offer in-built IR’s or require additional 3rd party IR purchases:

  • Wall of Sound III – Two-Notes: A Speaker IR Loader which is designed to be used alongside the Torpedo Load Boxes. Wall of sound offers much more in terms of customisation and tweak-ability than most IR loaders when used in conjunction with the special IR packs which can be purchased on the Two-Notes website. It can also be used as a regular speaker IR loader with 3rd party IR’s if desired.
  • Cab Lab 3 – Fractal Audio: A Speaker IR Loader designed by the people who make AXE-FX. They offer many good paid IR packs on their website. (Misha Mansoor from Periphery has some amazing IR packs available on the fractal website)
  • MixIR2 – RedWirez: A very popular Speaker IR Loader made by the guys at RedWirez, they also sell great Speaker IR packs. (Nolly uses their bass cab IR’s while mixing Periphery)
D – Freeware “Standalone” Speaker-Sim Options:

These freeware options don’t come pre-loaded with any speaker IR’s. They are meant to be used with 3rd party IR packs which you can purchase separately:

  • NadIR – Ignite Amps: My personal favorite IR loader of choice, meant to be used with 3rd party Speaker IR’s. Offers a very simple and functional UI with built-in filters, IR blending, and latency adjustment options. I have been using NadIR for years on most of my projects and it has never let me down.
  • KefIR IR Loader: Another very simple Speaker IR loader, meant to be used with 3rd party Speaker IRs. I have never really used this plugin personally as it is Windows-only.
E – 3rd Party IR Packs:

Here is a brief list of 3rd party speaker IR packs for you to consider. All of these are great options. Which ones to go for really depends on what you’re looking for:

  • Fat Lazy Cabs Speaker IR Pack by Redline
  • Ownhammer Speaker IR Packs
  • RedWirez Speaker IR Packs
  • Rosen Digital Speaker IR Packs
  • Fractal Audio Speaker IR Packs
3 – DI BOXES (OPTIONAL):

(This step is OPTIONAL, and not “absolutely necessary”, as some would try to have you believe…)

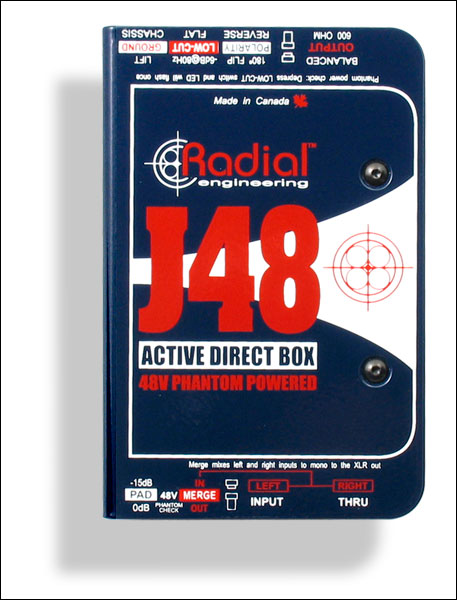
di-box

A good tip to squeeze an extra bit of quality out of your raw DI’s, is to use an external DI box instead of the built in HI-Z input on your audio interface.

Here’s a Common Question which I see asked often on forums: “If the HI-Z input on my interface is basically serving the same purpose, why should I invest in an external DI Box?”

The Answer?

The instrument inputs on a cheap/budget audio interface are usually constructed at a very low cost, without the luxury of taking up too much space within the chassis of the interface.

Think of it this way: How much money do you think was spent on a single component of a low-budget piece of gear which only costs $50-100 to produce in the first place???

DISCLAIMER: Don’t get me wrong! You can absolutely get the job done just fine by simply using the in-built DI options on your recording interface. I’m merely presenting you with a way to improve the quality of the raw DI’s you’re capturing. It’s completely up to you.

Here are some of the main benefits to using an external DI Box:
  • Superior construction quality: A purpose-built, high-quality DI Box will offer far improved impedance matching between the instrument and interface compared to the often cheap, built-in HI-Z inputs on most low-end interfaces. This will result in increased high-end fidelity of the recorded DI signal and an extended frequency response overall. In other words: “A more accurate representation of your instrument onto tape”.
  • Improved transient response: High-Quality DI boxes usually have more headroom available to accurately capture transient information without clipping and introducing unpleasant square wave distortion into the signal.
  • A (mostly) balanced signal path between your instrument and recording rig: This benefit applies mostly to live audio, but can also be very useful for maintaining a good signal/noise ratio. Especially in instances where the guitarist is far away from the recording interface or mic preamp in the studio. (Ex: When the Guitarist is in the live room while the interface/preamp is in a control room)
  • Good DI boxes usually have an in-built pad switch: This can be a useful feature in order to prevent your instrument from clipping your interface preamps. Most low-end interfaces don’t have a pad switch and will often clip your DI’s even at the lowest input level.
NOTE ON DI BOXES:

I can personally vouch that using a high quality outboard DI box such as a Radial J48 or Countryman 85 is a definite improvement over using the in-built HI-Z input on a cheap interface. HOWEVER, buying a DI box isn’t the solution to your guitar tone issues… it will merely give you an extra few % of quality. If you are unhappy with the way your guitar tones sound then you’re better off looking for the culprit in the other “more significant” parts of the chain. The instrument, the amp, the cab, or the guitarist come to mind. 

Final Words:

This concludes part 1 of my “Recording Electric Guitars – Silent Recording Options” series. I hope that this article has given you some new ideas and plugins to try out on your next project.

Be sure to let me know in the comment section below if this information has helped you out, or if you have any further questions regarding anything I’ve talked about here.

Stay tuned for part 2, where I will be talking about “Hybrid Silent Guitar Recording Options”


Want mix tips from URM Academy? Read them here!

Nail The MixNail The Mix is our online mixing school that gives you REAL multi-tracks from REAL bands, plus a mixing class from the producer who recorded it. Past guests include Periphery, Chelsea Grin, Machine Head and State Champs. Join now for instant access!

20 Simple Tricks To Make Your Next Mix FREAKIN SWEET (Part 2)

20 Simple Tricks To Make Your Next Mix FREAKIN SWEET (Part 2)

As mix engineers, we sometimes get too caught up in our EQ and compression based decisions during a mix. For this reason we can often fail to notice some of the equally important issues we should be dealing with through alternate means, and in return end up trying to fix these problems by using the wrong tools.

Here are 10 ideas/techniques that you might not have tried before, which you might want to consider trying while working on your next mix:

NOTE – I haven’t gone in to much detail on how to set up the following techniques in this blog post, as this is meant to be a list of ideas and not an indepth tutorial on each of these subjects. I might write individual guides for the following in the future, but for the moment, I’d recommend just googling anything in particular which you don’t quite understand.

1) Optimise Your Plugin Orders:
Optimize Your Plugin Orders

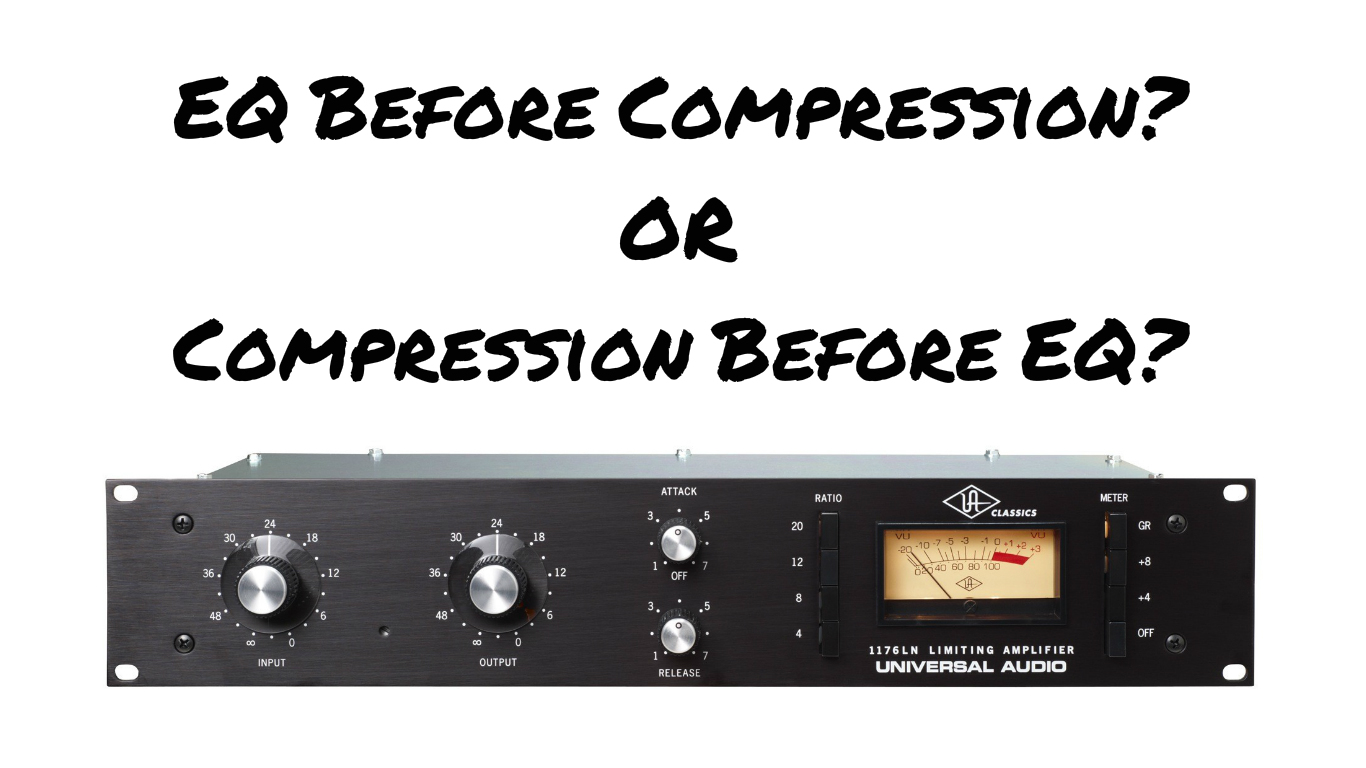
If you’ve been in the audio world for a while then you’ve surely seen this question asked and debated TOO MANY times…

The Definitive Answer? IT’S SITUATIONAL! There is no set rule as to which approach is better overall, and I have seen engineers get phenomenal results using either way. There are however certain benefits to using one or the other depending on what you’re trying to achieve…

Here are a few examples:

EQ>COMP: Boosting the high end on a vocal before compression will cause the compressor to react more on the sibilant words, effectively causing the compressor to act as another stage of de-essing/de-harshing.

COMP/DIST>EQ: If you’re processing a signal in parallel then it can sometimes make more sense to place an EQ after the compressor. This is because all of the tiny details and problems that weren’t apparent in the unprocessed signal will be brought up in level massively and begin to really stick out when heavily compressed or distorted. In a situation like this, it might make more sense to fix these issues after the fact with some reductive EQ.

EQ>COMP: Filtering the low-end or reducing some of the muddy lower-mid range before compressing a strummed acoustic guitar will cause the compressor to pump and distort less, allowing you to compress it harder without introducing unpleasant artefacts. The concept of experimenting with the order of plugins can also be applied to other kinds of processing. Here are some examples:

EQ>REVERB/DELAY: Try EQ’ing and filtering your effect sends instead of EQ’ing the effect returns (ex.place an EQ before your reverb on it’s own channel). This can lead to more natural sounding effects as you are not messing with the reverberated/delayed return signal but rather tweaking the exact signal you’re sending to be reverberated/delayed in the first place.

LIMITER>COMPRESSOR: A lot of engineers like to finish off a signal chain by placing a limiter at the end. I often use the same technique, but I personally also like to add an extra limiter at the beginning of my chain in order to lop-off the some of the extreme peaks and ease the load for my compressors down the line

2) Listen Like A Listener:

Listen like a listener

Think of your song as a whole. Your listeners will…

Sometimes we can end up skipping back and forth through sections of the song we are working on so many times that we begin to lose focus of the overall vision. Other times we can end up looking at the project purely from a technical aspect, and develop a sort of “tunnel vision” that renders us completely blind to some of the more important non-mix related problems within our track.

As mix engineers we are always striving to impress our peers (other engineers and people we look up to) with all of the minuscule tricks and tweaks we apply to our mixes. But the reality is that 99.9% of the people who listen to music won’t even notice any of those things, and will usually just go-off whether they like the song or not…

It’s important to be able to differentiate technical issues from issues with the quality of the song itself. You can have a technically perfect mix which sounds amazing, but if the song is no good then what’s the point?

No matter how far we progress in the art of production and mixing, it’s crucial remember that the mix isn’t what makes a successful song, it simply gives it a better fighting chance!

Try and answer a few of these questions to get a better understanding of what your listeners might care about when they listen to music:

  • Why is it you love certain songs by a band but hate others?
  • What does it take for a song to make you want to smash the replay button repetitively?
  • How much of an impact do you think the mix has on whether you like a particular song or not?
  • Would you still like your favorite songs if they weren’t mixed well?
Here’s an exercise to try out on a current mix you’re working on:

Once you’ve got your mix to a point where you think it’s pretty much done, take a break and let your ears recover, possibly even leave it and come back to it the next day.

After taking your break, sit back in your seat try and listen to the entire song from start to finish without pausing or tweaking ANYTHING. During this time, try and listen through the average listeners ears and make note of anything that sticks out to you. This isn’t meant to be a mixing-based exercise, try and determine if there is anything which might simply require a different approach, or if anything is particularly boring/uninspiring. What will the average Joe notice about the song?

Take Action:

Take note of these things as they become apparent, and try to determine whether these problems are mix related, production related, or simply song related. The next time you’re involved in the creation of a track, keep these things in mind and try to apply what you’ve learnt from your past mistakes.

In Conclusion:

Mixing is an amazingly complex and time-consuming skill to master, and I really do hope that you’re taking the time to learn all there is to learn about this wonderful profession. However, it’s important not to RELY on the mix to carry a song.

3) Time Your Effects to the Track:
3) Time Your Effects to the Track

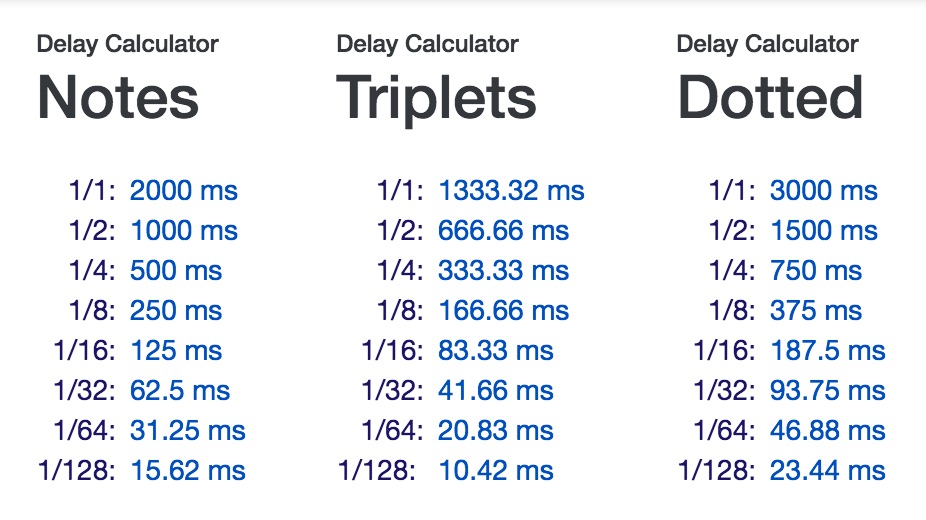
(Effect length calculation for 120BPM.)

Make your effects breath with your track.

If your reverb and delay tails are too long (for example: your snare reverb tail is still decaying through into the next snare hit, or your vocal delays are repeating unnecessarily for too long) then you are needlessly adding extra clutter, and sacrificing some of the punch of your mix.

The solution to this problem is to time your time-based effects to the tempo of your track so that they are only repeating and decaying as long as is necessary.

Using this technique won’t make a HUGE difference, but it will help open up an extra little bit of free space and in return, aid the clarity of your mix.

How can I start doing this?

– Use an FX length calculator! You can find these types of calculators online. My go-to is usually the Delay Calculator on nickfever.com, it’s extremely simple to use, and will save you from having to do the math yourself (however there is still a lot of value in learning how to do this manually).

– If you want to do this manually, you can follow this simple formula:

60,000ms (1 minute) ÷ Song BPM (beats per minute) = Time between 1/4 note beats (ms)

E.g = 60,000ms ÷ 120 BPM = 500ms

In this example, we have calculated the time between each quarter note of a song at 120 BPM.

After determining the time between each beat of a song we can then multiply or divide this number as many times as necessary in order to determine a suitable decay time and pre-delay time for our reverb.

4) Deadlines are Important:

Deadlines are Important


Make Yourself Accountable!

Accountability is a great motivator when it comes to working hard and getting things done quickly. The fear of being embarrassed or getting humiliated by having to fess up to something is truly one of the hardest things to do as a human being, especially when it comes to getting down from our high-horses as “all-knowing sound engineers” who always know better than our clients, and admitting that WE made a mistake.

Why Are Deadlines Important?

Through some recent experiences, I’ve discovered that I tend to achieve MUCH more in a short space of time when I’m aware that there are certain consequences if I fail to deliver on a promise. For this reason, I always try and set strict deadlines on when a certain job needs to be finished by, and make sure to inform people of these deadlines in order to keep my self accountable.

This way of working has an added bonus, which is that if you manage to deliver earlier than your deadline, then you’ll probably end up impressing your clients further, and giving them the impression that your on-the ball when it comes to their project.

However, be very careful to set realistic goals and not drastically over-sell yourself, as this can lead to even worse complications.

5) Filters Are Your Friend!
Filters Are Your Friend

If you don’t need it, get rid of it!

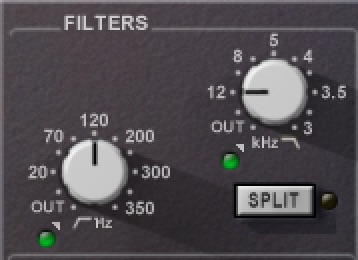
Most instruments (par the kick,toms and bass) don’t have much useful to offer below 70-100Hz on the low-end, and not many instruments have anything useful above 12-13kHz on the high-end either.

Filtering out the unnecessary low-end and high-end from instruments which don’t particularly need this information is an incredible way to carve out some much needed extra space within a mix.

NOTE –  It’s important to make these type of processing decisions in context of the whole mix, as it’s very difficult to judge the amount of low or high frequencies a specific element needs while out of context and you may end up removing too much.

A few benefits of filtering include the following:

Using High-Pass Filters

  • More space for the low-end of the kick and snare to punch through.
  • Increased headroom for the mastering stage.
  • Tight, punchy low-end in your mixes instead of boomy and undefined low-end.

Using Low Pass Filters

  • Less processed/more natural sounding mixes.
  • Bright mixes that don’t make your eyes hurt (yes, I did say eyes…)
  • More space for the instruments that really need this space, such as the vocals.
Some Other Cool Filtering Tricks to Try Out:

The Mix Buss Filtering Trick: Highly acclaimed Mix Engineer Serban Ghenea (Taylor Swift, Katy Perry, The Weeknd etc.) is known to use filters on his master buss in order to control the impact which the song has on the listener for each section of the track.

He achieves this by filtering out some of the low-end and high-end during the verses and then bypassing the filters when the chorus hits for a sense of added impact and size.

Why does this trick work?

This is a very similar concept to the fan-favorite “radio effect” which is used frequently in metal these days: When you have a section/instrument with a reduced frequency bandwidth within a song (ex: A vocal rolled off at 600hz and 2-5kHz) then your ears get used to the lack of lows and highs and start to think of that sound as the norm. Because of this phenomenon, when the lows and highs are then reintroduced abruptly, it instantly causes the same sound to seem much more impressive and impactful than it did before

Try Filtering with a Mid-Side EQ:

A really cool trick to try out on synths and other stereo sources is mid-side filtering. A mid-side EQ is a tool which can affect the side information of a stereo track without touching any of the mono information in the center. I’ve personally found that this method works really well when you have a stereo bass synth with too much low end mud on the sides. In a situation like this I would use a high-pass filter in “side” mode to filter out the low-end anywhere up to 400-600Hz, while leaving the original low-end in the middle of the stereo field intact.

6) EQ is Primarily a Tool for Improving, not for Fixing

EQ is Primarily a Tool for Improving

                                                                    (A Fitting Quote from Taylor Swift’s “Bad Blood”)

The less fixing you have to do during the mix, the more natural your end result is going to sound.

“Fix it in the mix” is a saying you hear a lot in the mixing world. This approach can work out in certain situations (as long as you’re experienced enough to know how to fix the problem), although it’s still a rather counterproductive way of doing things, as it just leads to more work and frustration later on in the process…

If you’re given the luxury of having a say on how the raw material for a project is going to sound, make sure that it’s recorded well and taken as far as it can possibly go before it ever hits the mixing stage.

Sometimes something as simple as changing the guitar tone, using a different mic or switching out a drum sample can save you from hours of future tweaking and trying to “make things fit”. It’s important to remember that the EQ’ing you do during the mixing stage shouldn’t be about trying to make things work together, it should be about making things work better together.

7) Comping in Context
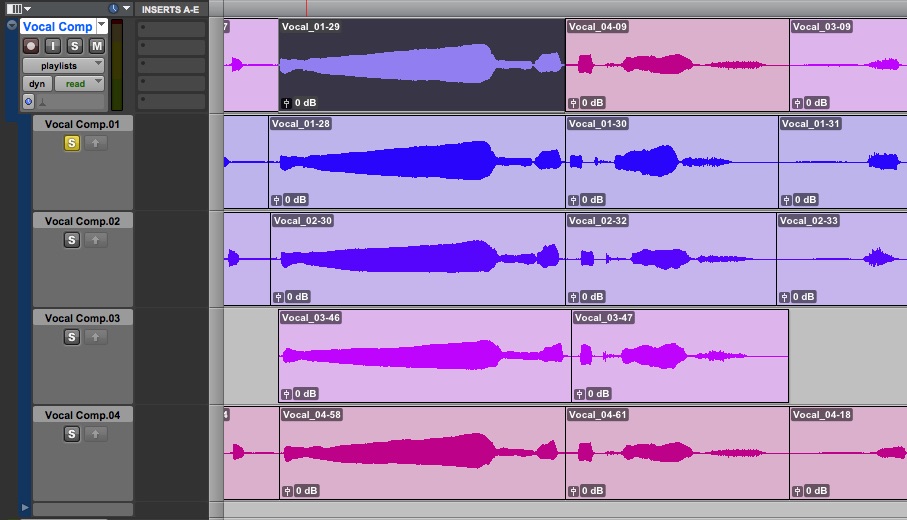
Comping in Context

                                                                                      (Comping a vocal in Pro-Tools)

Comping: It’s one of the most tedious, yet also one of the most rewarding processes that we usually end up having to do on a daily basis.

It’s quite a difficult feat to be able to transform a sloppy and pitchy performance into a masterpiece, and it takes a hell of a lot of practice to get to that level of editing and correction skill.

Here are a few things that will hopefully help speed up your progression the next time you choose to take the comping plunge:

My #1 Comping Tip:
  • COMP IN CONTEXT – It’s very important to have a point of pitch reference whenever you’re selecting which words or notes to use during editing. The more perfect the point of reference the better (synths or keys work well for this). The main reason for this, is that if you comp a vocal without playing it alongside a melodic element, you might end up choosing words that feel right, but aren’t necessarily perfectly in pitch. This can lead to more pitch correction required further down the line.
A Few Extra Comping/Editing Tips:
  • Manual over Automatic Timing Correction – I personally prefer using a good ole’ fashioned mouse and keyboard to align my tracks to the grid. I really like the idea of having complete control over the feel and swing of each particular note or word, and think that it produces more natural sounding results than those built-in to plugins like Melodyne.
  • Different Doubles –  If you tune your vocal doubles to the point that they’re too similar to your lead vocals, then you are basically defeating the purpose of having doubles in the first place, and might as well just use a widener plugin… The reason the concept of doubling and tripling vocals works, is because the unique variations and interactions between each take creates an awesome effect which a straight up doubler plugin can’t recreate in the same way. By auto-tuning your doubles into pitchperfect condition you are getting rid of these variations between tracks, and making this effect disappear.

TIP: It’s still a good idea to go ahead and tune your vocal harmonies as they are made up of separate notes. With harmonies, the more they are in tune, the better.

8) Question the Reasons Behind Your Decisions (aka: DON’T COPY):
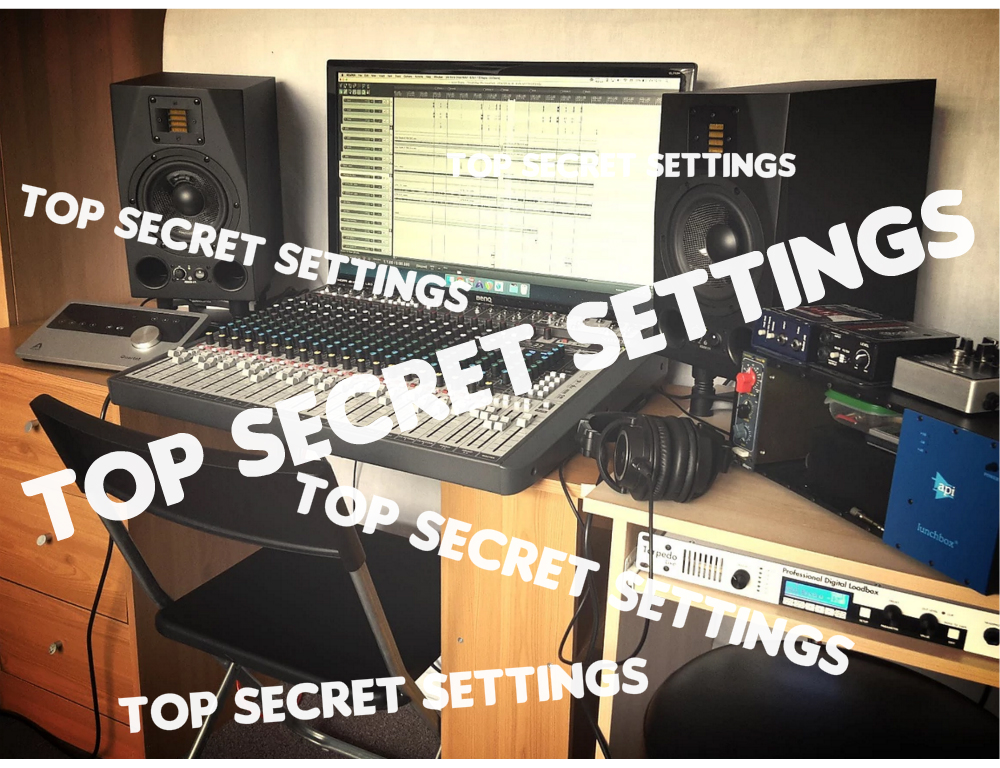
Question the Reasons Behind Your Decisions

                                                                               (My old setup at Brett Brothers Studio.)

Every action demands a valid reason.

Don’t just do something because you’ve always done it, or because you’ve heard that {insert famous engineer here} “always” does it…

One of the annoying things about music production, which is also one of the most important lessons to teach, is that it’s almost IMPOSSIBLE to get the exact same results twice (although this is also one of the things that makes music so special IMO).

There are simply too many variables in place for you to justify copying the same settings that you’ve seen somebody else use, or justify applying the same preset on different source material…

Some of these variables include:
  • The Microphones being used: Two different microphones will require completely different processing.
  • The Instruments being used: No two instruments sound exactly the same! (Just because certain processing sounds good on my Strat doesn’t mean it will sound good on your Les Paul…)
  • Microphone Placement: A single inch of difference in mic placement can make a night and day difference to your recorded source material.
  • The Singer’s Voice: Every singer has a UNIQUE voice with UNIQUE characteristics and tonality which will require UNIQUE treatment!
  • The Equipment being Recorded through: Pickups, Pedals, Amps, Poweramps, Preamps, Converters…THERE ARE TOO MANY VARIABLES, THEY ALL SOUND DIFFERENT!
  • The Room being used for Recording: The effect that the room has on how a mic will pick up a sound is HUGE!
  • The Room being used for Mixing: The mixing decisions that somebody else makes are strongly influenced by their listening environment and listening gear. Unless you’re %100 sure that they’re mixing through a perfectly treated setup then it makes absolutely no sense to even consider copying any of their EQ settings. (TBH, don’t copy other people’s settings anyway, it’s lame!)
  • The key of the song: This has a huge effect on the kind of processing a particular instrument will require. (Ex: A seriously down-tuned Djent track will need drastically different treatment to more standard Indie-Rock track.)
  • The genre of music: I hope this goes without saying, but a smooth Jazz vocal processing chain simply won’t work on an aggressive death metal vocal…
Conclusion:

Given all the evidence I’ve presented above, I hope I’ve gotten the point across…

No matter what you’ve heard or read about how a certain engineer “always” uses a certain method, make sure that every decision you make is necessary. Make sure you aren’t blindly following a formula which you’ve memorized, and that you are always bypassing and comparing in a before/after manner to make sure whatever you’re doing is heading in the right direction.

My advice would be that you’re better off trying to figure out why the engineers who you look up to make the mixing decisions they make, and trying to apply the concepts they use rather than trying to copy them exactly. Thinking like this is the best way for you to begin crafting YOUR OWN UNIQUE SOUND.

9) Share the Load:

Share The Load

Too much of a good thing…

Sometimes relying on a single process to fix a problem can lead to unnatural sounding results. Try using a few different stages of “fixing” to resolve a problem so that each processor isn’t having to work too hard.

Here are some examples of “sharing the load”:
  • Instead of pumelling a single compressor, try using a combination of pre-fx volume-automation, limiting, compression and post-fx volume automation in order to get a vocal to sound consistent and in your face.
TIP: A simple limiter at the start of your plugin chain to chop off the errant peaks can really ease the load on your compressors and stop them from bouncing all over the place.
  • Try a combination of pre-fx “manual sibilance volume automation” and regular deessing to get your vocal sibilance under control.
TIP: Check out the blog post I wrote on de-essing for URM, Death to Sibilance” for insight into a ton of great methods.
  • Instead of trying to filter or EQ out all of the harsh frequencies from your guitars, synths or overheads, try using some tape saturation to bleed-off some of the highend and warm them up.
TIP: Do some research on the characteristics of different tape types and tape speeds. Depending on which tape settings you use you can really help shape the tonal balance of your raw tracks from the get-go. This will also help give you a lot of insight into why classic recordings from the analog/tape era sound the way they do.
  • Instead of trying to suck out a bunch of low-mid flub on your palm-muted guitars with an EQ, set up a multi-band compressor to focus in on that specific frequency range and control the low-mids dynamically. This will lead to thicker sounding guitars, as the low-mids will remain intact when palm-mutes aren’t being played.

TIP: Google the Andy Sneap Waves C4 Settings for a great preset to get you started.

10) Live and Learn (AKA: YOUR BEST TEACHER IS YOUR LAST MISTAKE)

Live and Learn

Make your mistakes early on, you can’t skip from %0 to %100.

This is an issue I’ve really struggled with throughout my career as a sound engineer…

Early on in my mixing life I spent WAY too much time worrying about trying to make my mix perfect, and let this pursuit of perfection get in the way of my growth as an engineer. In return, I ended up never finishing anything because I was always too afraid to fail.

The cold-hard-simple truth is that you’re going to make mistakes in this business, it’s inevitable! You’re better off making your mistakes early on while there’s a minimal number of people around to realise them!

I learnt this lesson the hard way, and am still paying the price for the perfectionistic mindset I had early on to this day…

How can I get around this?

The greatest piece of advice I can give you in order to avoid this problem, is to make sure that your level of knowledge and experience are continuously increasing handin-hand. Don’t let your technical/theoretical knowledge build-up without ever being put into practice, DON’T BE AFRAID TO IMPROVE.

All the technical prowess in the world won’t add up to a good mix when it comes doing the actual work. You NEED to build upon past experiences.

Conclusion:

Making mistakes, learning from your mistakes, and learning from other’s mistakes is the best way to improve not only as a mixer, but at pretty much anything in life. Always strive to make your next mix better than your last, and in due time, you’ll have ironed out most of the flaws.

FINAL WORDS:

I hope that this article has given you some new ideas to try out during your next project. Be sure to let me know in the comment section below if any of this information has helped you out, or if you have any further questions regarding anything I’ve talked about here.

Stay tuned for more articles in the not-so-distant future!


Want more mix tips from URM Academy? Read part 1 here!

Nail The MixNail The Mix is our online mixing school that gives you REAL multi-tracks from REAL bands, plus a mixing class from the producer who recorded it. Past guests include Periphery, Chelsea Grin, Machine Head and State Champs. Join now for instant access!