Death To Sibilance: A Simple Guide To De-essing Vocals – By Thomas Brett
Over-sibilance is a problem with most recorded vocal tracks. Sibilance is the common name for some of the harsh sounds in the human voice such as “s,t,ch,th”. If not dealt with correctly, these sounds will cut through a mix in a very painful way. In other words, they make your mixes hard to listen to.
“De-Essing” is the process of reducing the level of these sibilant sounds in order to make the vocal sound more pleasant. I’m going to share some of my favorite de-essing tricks which can be used both during the mixing, and recording stages.
Tackling Sibilance in the Recording Stage:
The age old recording cliche says “get it right at the source.” I can’t argue with that. One of the best ways to reduce sibilance in your vocal tracks is to capture less sibilance in the first place.
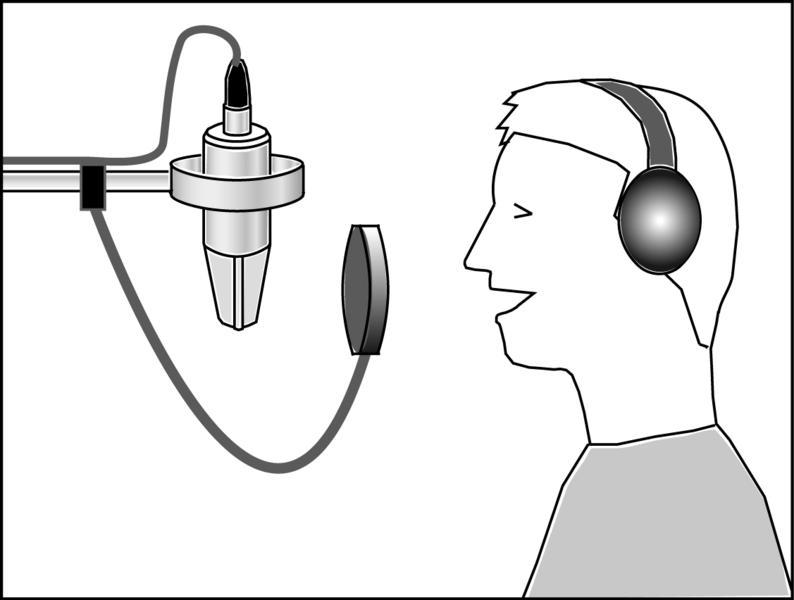 Vocalist singing around two fists (8 inches) away from a condenser microphone.
Don’t place the microphone too close to the singer’s mouth:
On condensers, try to keep the distance between the singer’s mouth and the capsule of the microphone at around 8 inches. Anything closer than this and the sibilance and plosive (bursts of air from P,B sounds) sounds in the vocal will be exaggerated.
The vocalist will often need to be closer than 8 inches on dynamic microphones like an SM7B. In cases like these try a combination of the methods outlined below.
(BONUS TIP: A good way to make sure the singer stays at the correct distance from the microphone is to tell them to sing at around two fists away. One fist between the mic and the pop filter, and one fist between the singer and the pop filter.)
Angle the microphone:
High frequency sounds are very directional. By angling the microphone so that it’s not in a direct line with the singer’s mouth you can reduce the amount of sibilance hitting the microphone directly. Plus, there’s the added benefit of reducing plosives (bursts of air from P,B sounds).
 Microphone aimed at the singers mouth at a 45 degree angle while the singer aims toward the pop filter.
Try the Pencil Trick:
This is a rather unconventional trick that I hadn’t heard about until Eyal Levi mentioned it while discussing this article. After doing some research and trying it myself, I must admit that it works surprisingly well! While this trick is primarily aimed at stopping plosives, it can sometimes help reduce sibilance as well.
This technique uses a pencil to block/reduce the amount of air hitting the diaphragm of the microphone, and in return reduce the high-end harshness in the sibilance.
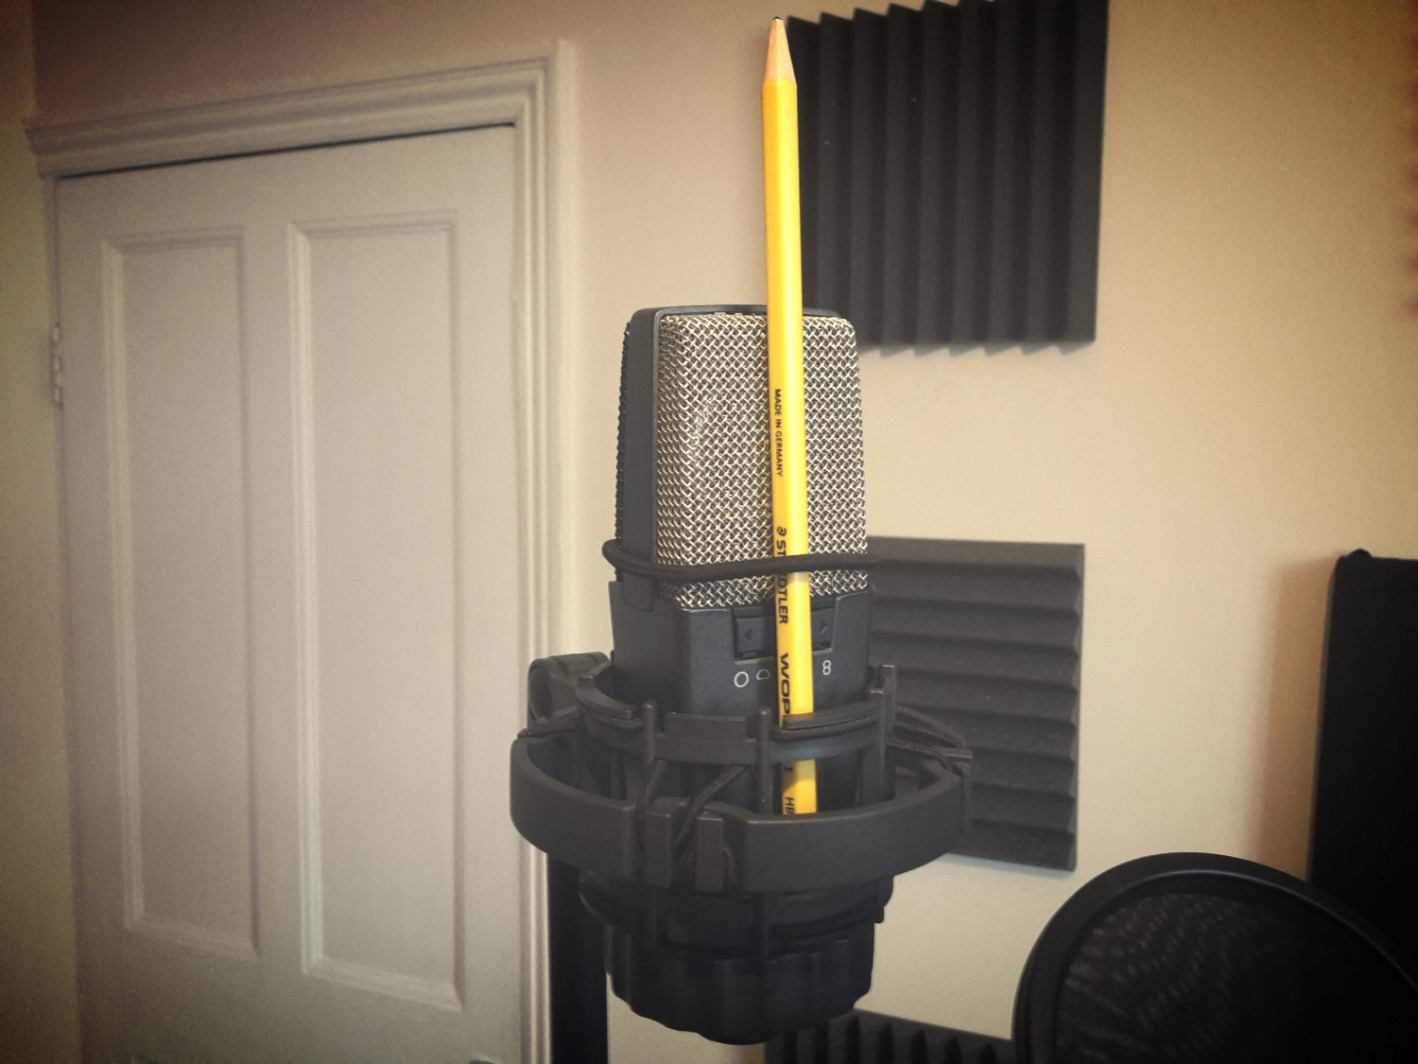 The Pencil Trick on an AKG c414
How to do the Pencil Trick:
- Find yourself a regular wooden pencil and a rubber band (a hair-band will also do the trick).
- Attach the pencil to the grill of the microphone so that it’s facing straight down over the center of the membrane.
- Experiment using this technique with and without a pop-filter. Depending on the severity of the sibilance, if you’re not careful, you might end up over-dulling the vocal in certain cases.
Tackling Sibilance in the Mixing Stage:
Don’t worry If a vocal hasn’t been recorded properly, or if the vocalist just happens to be extremely sibilant. Handling sibilance in a mix is relatively easy.
De-Esser Plugins:
The easiest and most popular method to De-Ess a vocal would be to use a De-Esser plugin.
Here’s a list of my favorite De-Esser plugins available on the market today:
- Fabfilter Pro-DS – My personal favorite. Offers the best customization and the most options.
- Waves R De-Esser
- Plugin Alliance SPL De-esser
What is a De-Esser?
A De-Esser is basically a compressor which is side-chained to the high-mid frequencies. When set correctly, a De-esser will only act upon the harsh and sibilant sounds within a vocal. Most De-Essers give you the ability to fine-tune which frequencies are being affected. By using these parameters you can determine where the problem areas are, and how the plugin reacts to them.
De-Essers usually offer two separate ways of reducing sibilance:
1 – Split-Band De-Essing:
A Split-Band De-Esser is a multi-band compressor which has been optimized for sibilant sounds. This setting will only affect the high frequencies of the sibilance (which the user can determine).
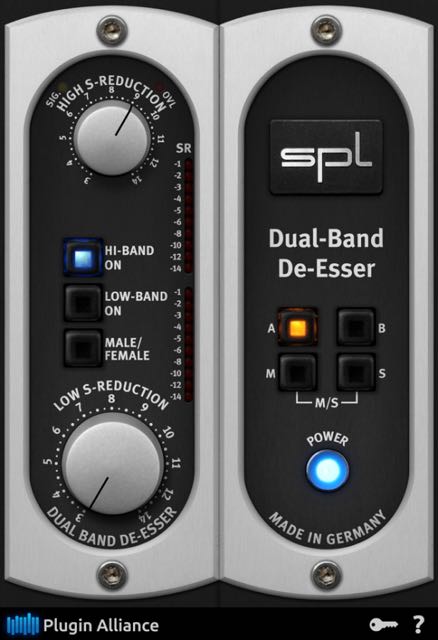 SPL De-Esser in Split-Band Mode
By using this setting you can effectively “dull” the sibilance, and in return cause less irritation to the listener’s ears.
2 – Wide-Band De-Essing:
Unlike Split-Band De-Essing, a wide-band De-esser will compress (turn down) the whole vocal track whenever a sibilant sound crosses the threshold parameter.
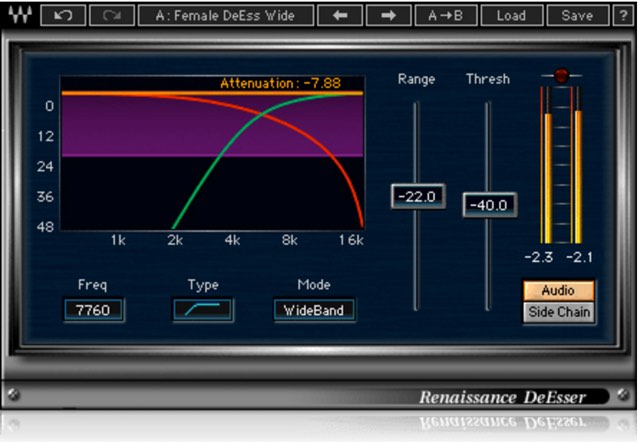 Waves R De-Esser in Wide-Band mode.
I personally prefer using De-Essers in the wide-band setting, as the esses are left intact frequency-wise and only reduced in volume instead.
How to use a De-Esser:
- Instantiate a De-Esser plugin as an insert on your vocal channel. The most common places to insert a De-Esser are usually at the very end, or beginning of your signal chain (or both).
- Loop a section of the vocal which has a lot of sibilance.
- Choose either wide-band or split-band mode depending on what’s available. Both of these settings work well, I personally prefer using the wide-band mode. It sounds more natural to me.
- Set the side-chain frequency of the De-Esser at somewhere between 5kHz to 10kHz. Some De-Essers only give you the option to center the side-chain around a certain frequency area. Others give you multiple frequency sliders in order to set the range between two frequencies.
- Set the range of the De-Esser. The range control determines the maximum amount of reduction which will be applied to the sibilance. I usually find that somewhere between 5 to 10 dB of reduction works well. Please note – this is very dependent on the amount of sibilance in any particular vocal track.
- Set the threshold parameter so that you are getting the desired amount of reduction.
Manual Volume Automation De-Essing:
De-Essing vocals manually is much more time-consuming compared to using a plugin. However, this method allows for much more control and fine-tuning on a per sibilant basis:
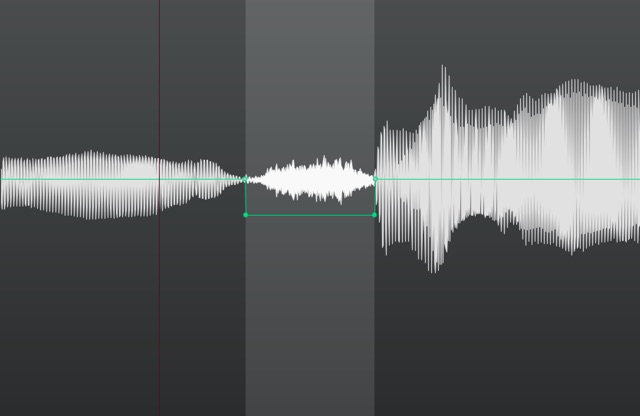 Reducing the volume of a single sibilant using automation.
When viewed in an editor, sibilant sounds within the waveform/vocal will appear like very dense blobs (due to mainly being made up of high frequency information). For this reason it’s very easy to quickly identify the sibilant sounds within a vocal.
Once you’ve spotted the sibilance, the next step is to add a volume envelope to each one and reduce them in volume by anywhere from 5-10dB.
This is basically the same as using a wide-band De-Esser, but with the added control of adjusting the volume for each sibilant separately. Although doing this by-hand is super accurate, the biggest downside is the fact that it takes much longer than just using a plugin.
Split Track De-Essing:
This method of De-Essing is not for the faint-hearted. It comprises of manually cutting each individual sibilant sound out of the vocal track one by one and moving them on to a second channel.
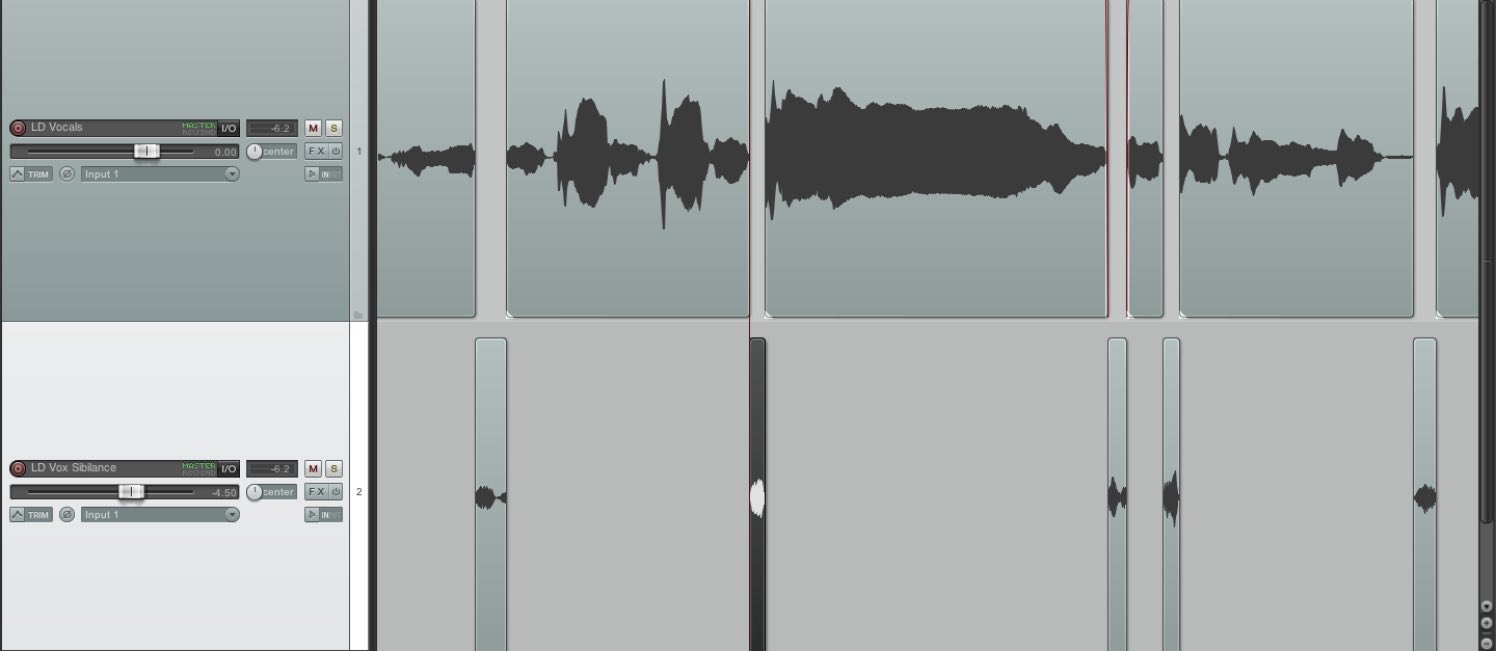 Splitting the sibilance on to a separate track and reducing the volume with the channel fader.
This process is the most tedious and labor intensive method of doing the job, but in return gives you full control over the amount of sibilance in your vocal, as well as the option to process the sibilance differently.
In Conclusion:
Using any of these techniques can lead to great results. It’s important to remember that there isn’t really a “correct” way to de-ess a vocal. I find that choosing which method to use really depends on your workflow, and how long you’re willing to spend on the de-essing process.
Try out these techniques in your own projects and make sure to experiment with using multiple techniques on a single vocal. Remember that splitting a process between multiple stages instead of relying on a single plugin or technique can sometimes be the key to more natural sounding results.
Thomas Brett is a producer, mixing engineer and songwriter at Brett Brothers recording studio in the UK. Check out the Brett Brothers studio website for more information and articles on all things mixing www.brettbrothersstudio.com
 Nail The Mix is our online mixing school that gives you REAL multi-tracks from REAL bands, plus a mixing class from the producer who recorded it. Past guests include Periphery, Chelsea Grin, Machine Head and State Champs. Join now for instant access!

Awesome!! Thanks for the tips!
nice, split track de-essing, never thought of that!
Was just working on some vocals and this came in handy!
Thank you for this fantastic post! I appreciate the clarity and all the pictures to explain the concepts in more detail
Thank you!
What also works well is an old analog EQ in the audio chain. When I grab podcasts and on-line streams, many do not use De-essing, or don’t even think that they need too. When those harsh S’s & T’s hit a compressor, that only adds to problem when on-air radio broadcasting. Using a fairly cheap EQ does the trick for me, where I can attenuate FREQ’s 5kHz, on up. Especially in AM radio, where you want your bandwidth kept under control. Still, some of these other tips are indeed great advice.