Recording Guitars – Silent Recording Options (Part 1)

Recording Guitars – Silent Recording Options (Part 1) | By Thomas Brett |

In our current age of digital recording technology, we now have more options available to us than ever before when it comes to capturing great guitar tones within a home studio environment/budget.

Here is an overview of what I consider to be some of the best silent-recording options available today:

Option #1: Digital Setup – Amp & Speaker Simulation Software + DI Boxes

The easiest and cheapest way to get into silent guitar recording is by using digital amp and speaker simulation plugins within your DAW.

A little backstory:

During my first few years of engineering, I couldn’t afford to buy multiple expensive tube-amps and speaker cabinets, and wouldn’t have had the space to crank them even if I could… All I owned at the time was a tiny Marshall combo, which was OK for practice purposes, but extremely limited when it came to recording and trying to get different tones out of it.

Discovering amp sims was a real game changer for me. It meant I could finally achieve results close to the sounds I had in my head, without annoying the neighbors, and with nothing more than a basic home studio setup.

Fast Forward to Today:

I thought that my old amp sims sounded pretty darn good back when I started out, but the technology used in amp and speaker simulation has improved leaps and bounds since those days. We have basically come to a point where the simulations are almost indistinguishable from the real deal.

Why Try Digital?
Why digital?
Here are some of the practical, and workflow related benefits of using amp-sims instead of analog amplifiers and cabinets:
  • Silent Recording: The ability to record silently at any time of day is amazing. I’ve had issues with neighbors complaining about noise in the past. Using amp sims solves this problem when you don’t have an alternative to recording your loud amps at home.
  • Consistency and Recall-Ability: There are lots of variables that go into creating a specific guitar tone: Mic choice, Mic placement, Speaker choice, Cabinet choice, Room placement, Amp settings, Tube choices… the list goes on! It’s difficult to maintain a specific signal chain throughout the duration of a whole album. It’s a real pain to replicate the tone if settings are changed, or something goes wrong with the gear for whatever reason. Amp simulation software gives you the ability to save your tones as presets. This means you have instant recall-ability and perfect consistency of tone across different songs within an album.
  • Variety and Comparison: Amp sims give you the ability to scroll through and compare between a huge variety of different amp and speaker choices with only a few clicks of your mouse. This means that you can find the right tone to fit the song or riff quickly. You can save hours of setting up gear in a room, or spending too much time wondering “what if?”
  • Repairs and Upkeep: Real amps are awesome! We all love the feeling of cranking a brutal tube amp through a loud 4×12 and feeling the room shake. However, things can go wrong at the most inconvenient of times and cost a ton to repair, and even then… There are no guarantees that the amp will even sound the same after an incident like this!
A few words on the Analog vs Digital Argument:

analog-vs-digital

I bet some of the “digital amp-sims suck…” analog fan-boys are starting to lose it right about now… The truth is; I’m not comparing digital to analog, or saying one is better than the other, they are both great! This blog is all about giving people options that can possibly cater to their current situations. At this point in Audio, the analog vs. digital argument is a huge waste of time… If it sounds good and offers a great workflow FOR YOU, then that’s all that matters! The methods you use to get to those results are irrelevant…

Going Digital – What do I need in order to get started?

An audio interface with an instrument input, amp simulator software, and a DI box (optional).

1 – Audio Interface:

audio-interface

Any audio interface with an instrument input (also known as a HI-Z input) should work just fine for recording the raw DI signal out of your guitar, and into your DAW. There are differences in quality between the HI-Z inputs on different Audio Interfaces depending on their price point. Don’t worry about that too much if you’re just getting into audio, or on a tight budget.

If anything, just make sure that the interface you use has enough input headroom to accommodate the instrument you’re going to be using. (EX: Some interfaces will clip even at the lowest input gain setting when used with active pickups)

2 – Amp/Speaker Simulation Software:

amp-sims-collage

There are absolutely TONS of simulation plugin options to choose from these days. Which one to use depends entirely on what you’re after and whether you want to stick to the freeware options, or try out a paid option:

NOTE: I won’t go into too much detail about the individual plugins in these lists, as they each offer a different set of features and functionality. These are simply meant to be lists of products which I have tried in the past, and managed to get good results with in my own projects. These are not comprehensive lists of all the simulation plugins known to man…

A – Paid “Complete Tone Suite” Amp/Speaker Sim Options:

These plugins essentially act as a “complete tone suite,” with built-in amp simulation, speaker simulation, guitar effects and post-processing options all under the same roof:

I’d highly recommend checking out some sound demos and doing your own research before you make a decision on which software to buy.

NOTE: These plugins are in no particular order:
  • Scuffham Amps – S Gear: My personal favorite amp-sim for vintage and warm sounding clean and crunch tones. I also really like their lush spring reverb algorithms. NOTE: S-Gear is now included in the Steven Slate everything bundle for only $24 a month!
  • X50-V2 – TSE Audio: Based on the classic Peavey 5150 Tube Amp, this the best high-gain amp-sim for metal in my opinion. Comes pre-loaded with some of the best impulse responses available.
  • Bias – Positive Grid: One of the more realistic amp-sims with the most tweakability. Gives you the option to try out different tubes, speaker types, amp bias settings etc. I have never really used Bias personally, as I find having too many options a bit daunting and feel like it slows down my workflow. Nevertheless, a great sounding amp sim.
  • Pod Farm – Line 6: One of the most popular amp-sim options for down-tuned metal. The favourite of many famous metal producers.
  • Toneforge Amp Sims – JST: Awesome sounding amp and speaker simulation designed by the main man Joey Sturgis himself. I don’t own these plugins personally, but have always been blown away whenever I’ve heard Joey using them in his videos and productions.
  • Amplitube 4 – IK Multimedia: The most user-friendly interface of any amp-sim in my opinion. Their newer MESA stuff is pretty killer for metal, I’m also a huge fan of their Ampeg sims for rock bass.
  • Guitar Rig 5 – Native Instruments: Very good clean amp emulations, offers a great selection of creativity-inspiring FX options to choose from. 
B – Freeware “Standalone” Amp-Sim Options:

These plugins are designed to purely simulate the amplifier portion of the guitar chain. They’re meant to be used in conjunction with a separate speaker-sim plugin:

  • LePou Amp Sims – LeGion (Peavey 5150), LexTac (Bogner XTC), Hybrit (Marshall JCM800), Lecto (Mesa Dual Rectifier) and Le456 (Engl 645): Arguably the best freeware amp-sims available, these have been around for quite along time and they still sound amazing!
  • The Emissary & The Anvil – Ignite Amps: Very good freeware amp-sims, they sound amazing and offer extremely user friendly interfaces.
C – Paid “Standalone” Speaker-Sim Options:

Most speaker simulation plugins serve the same core purpose; they load-up and host your impulse responses. The main differences between the individual plugins are in functionality, the extra features they offer to speed up your workflow, and whether they offer in-built IR’s or require additional 3rd party IR purchases:

  • Wall of Sound III – Two-Notes: A Speaker IR Loader which is designed to be used alongside the Torpedo Load Boxes. Wall of sound offers much more in terms of customisation and tweak-ability than most IR loaders when used in conjunction with the special IR packs which can be purchased on the Two-Notes website. It can also be used as a regular speaker IR loader with 3rd party IR’s if desired.
  • Cab Lab 3 – Fractal Audio: A Speaker IR Loader designed by the people who make AXE-FX. They offer many good paid IR packs on their website. (Misha Mansoor from Periphery has some amazing IR packs available on the fractal website)
  • MixIR2 – RedWirez: A very popular Speaker IR Loader made by the guys at RedWirez, they also sell great Speaker IR packs. (Nolly uses their bass cab IR’s while mixing Periphery)
D – Freeware “Standalone” Speaker-Sim Options:

These freeware options don’t come pre-loaded with any speaker IR’s. They are meant to be used with 3rd party IR packs which you can purchase separately:

  • NadIR – Ignite Amps: My personal favorite IR loader of choice, meant to be used with 3rd party Speaker IR’s. Offers a very simple and functional UI with built-in filters, IR blending, and latency adjustment options. I have been using NadIR for years on most of my projects and it has never let me down.
  • KefIR IR Loader: Another very simple Speaker IR loader, meant to be used with 3rd party Speaker IRs. I have never really used this plugin personally as it is Windows-only.
E – 3rd Party IR Packs:

Here is a brief list of 3rd party speaker IR packs for you to consider. All of these are great options. Which ones to go for really depends on what you’re looking for:

  • Fat Lazy Cabs Speaker IR Pack by Redline
  • Ownhammer Speaker IR Packs
  • RedWirez Speaker IR Packs
  • Rosen Digital Speaker IR Packs
  • Fractal Audio Speaker IR Packs
3 – DI BOXES (OPTIONAL):

(This step is OPTIONAL, and not “absolutely necessary”, as some would try to have you believe…)

di-box

A good tip to squeeze an extra bit of quality out of your raw DI’s, is to use an external DI box instead of the built in HI-Z input on your audio interface.

Here’s a Common Question which I see asked often on forums: “If the HI-Z input on my interface is basically serving the same purpose, why should I invest in an external DI Box?”

The Answer?

The instrument inputs on a cheap/budget audio interface are usually constructed at a very low cost, without the luxury of taking up too much space within the chassis of the interface.

Think of it this way: How much money do you think was spent on a single component of a low-budget piece of gear which only costs $50-100 to produce in the first place???

DISCLAIMER: Don’t get me wrong! You can absolutely get the job done just fine by simply using the in-built DI options on your recording interface. I’m merely presenting you with a way to improve the quality of the raw DI’s you’re capturing. It’s completely up to you.

Here are some of the main benefits to using an external DI Box:
  • Superior construction quality: A purpose-built, high-quality DI Box will offer far improved impedance matching between the instrument and interface compared to the often cheap, built-in HI-Z inputs on most low-end interfaces. This will result in increased high-end fidelity of the recorded DI signal and an extended frequency response overall. In other words: “A more accurate representation of your instrument onto tape”.
  • Improved transient response: High-Quality DI boxes usually have more headroom available to accurately capture transient information without clipping and introducing unpleasant square wave distortion into the signal.
  • A (mostly) balanced signal path between your instrument and recording rig: This benefit applies mostly to live audio, but can also be very useful for maintaining a good signal/noise ratio. Especially in instances where the guitarist is far away from the recording interface or mic preamp in the studio. (Ex: When the Guitarist is in the live room while the interface/preamp is in a control room)
  • Good DI boxes usually have an in-built pad switch: This can be a useful feature in order to prevent your instrument from clipping your interface preamps. Most low-end interfaces don’t have a pad switch and will often clip your DI’s even at the lowest input level.
NOTE ON DI BOXES:

I can personally vouch that using a high quality outboard DI box such as a Radial J48 or Countryman 85 is a definite improvement over using the in-built HI-Z input on a cheap interface. HOWEVER, buying a DI box isn’t the solution to your guitar tone issues… it will merely give you an extra few % of quality. If you are unhappy with the way your guitar tones sound then you’re better off looking for the culprit in the other “more significant” parts of the chain. The instrument, the amp, the cab, or the guitarist come to mind. 

Final Words:

This concludes part 1 of my “Recording Electric Guitars – Silent Recording Options” series. I hope that this article has given you some new ideas and plugins to try out on your next project.

Be sure to let me know in the comment section below if this information has helped you out, or if you have any further questions regarding anything I’ve talked about here.

Stay tuned for part 2, where I will be talking about “Hybrid Silent Guitar Recording Options”


Thomas Brett is a producer, mixing engineer and songwriter at Brett Brothers recording studio in the UK. Check out the Brett Brothers studio website for more information and articles on all things mixing www.brettbrothersstudio.com

Want mix tips from Thomas Brett? Read them here!

Nail The MixNail The Mix is our online mixing school that gives you REAL multi-tracks from REAL bands, plus a mixing class from the producer who recorded it. Past guests include Periphery, Chelsea Grin, Machine Head and State Champs. Join now for instant access!

20 Simple Tricks To Make Your Next Mix FREAKIN SWEET (Part 2)

20 Simple Tricks To Make Your Next Mix FREAKIN SWEET (Part 2) | By Thomas Brett |

As mix engineers, we sometimes get too caught up in our EQ and compression based decisions during a mix. For this reason we can often fail to notice some of the equally important issues we should be dealing with through alternate means, and in return end up trying to fix these problems by using the wrong tools.

Here are 10 ideas/techniques that you might not have tried before, which you might want to consider trying while working on your next mix:

NOTE – I haven’t gone in to much detail on how to set up the following techniques in this blog post, as this is meant to be a list of ideas and not an indepth tutorial on each of these subjects. I might write individual guides for the following in the future, but for the moment, I’d recommend just googling anything in particular which you don’t quite understand.

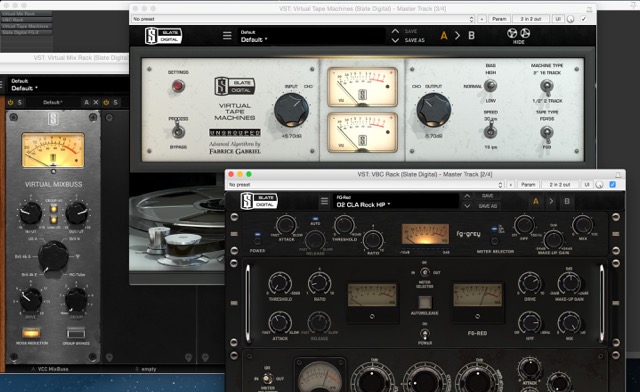
1) Optimise Your Plugin Orders:

Optimize Your Plugin Orders

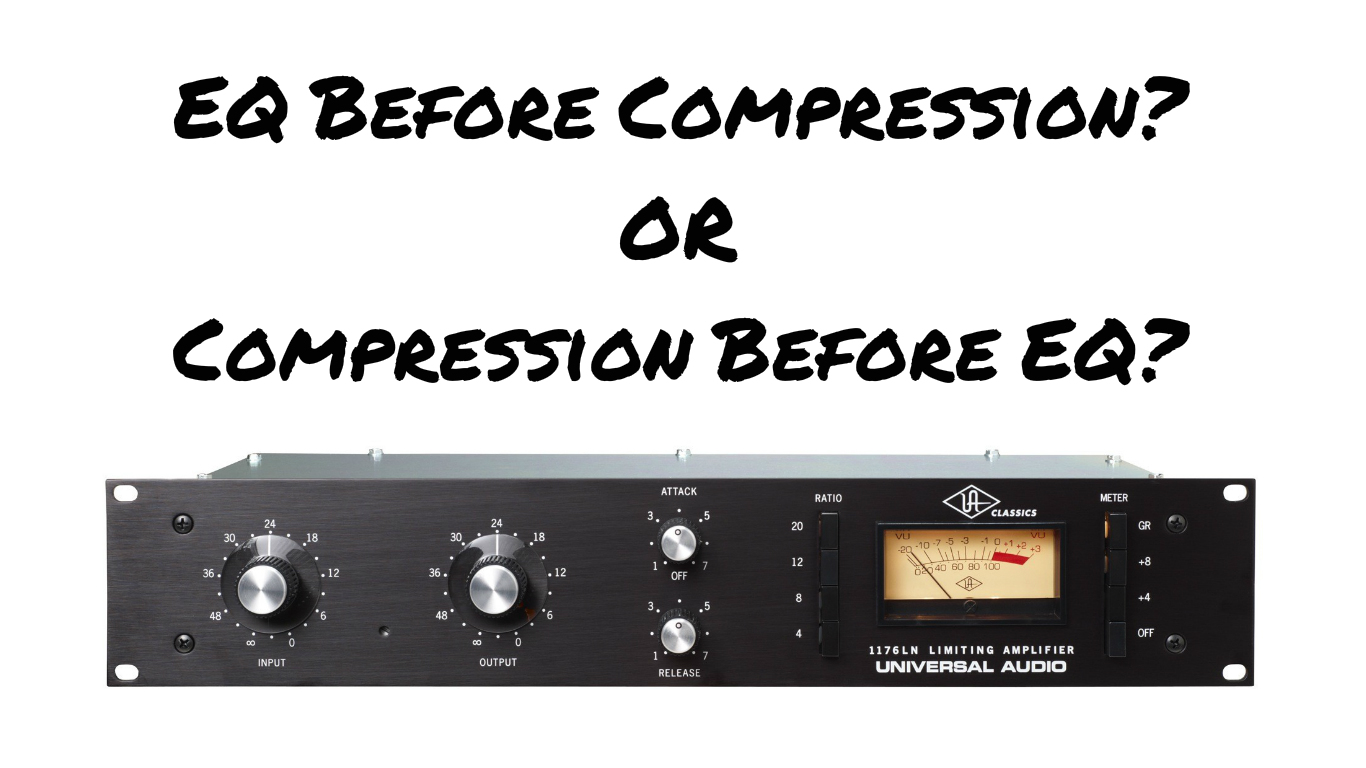
If you’ve been in the audio world for a while then you’ve surely seen this question asked and debated TOO MANY times…

The Definitive Answer? IT’S SITUATIONAL! There is no set rule as to which approach is better overall, and I have seen engineers get phenomenal results using either way. There are however certain benefits to using one or the other depending on what you’re trying to achieve…

Here are a few examples:

EQ>COMP: Boosting the high end on a vocal before compression will cause the compressor to react more on the sibilant words, effectively causing the compressor to act as another stage of de-essing/de-harshing.

COMP/DIST>EQ: If you’re processing a signal in parallel then it can sometimes make more sense to place an EQ after the compressor. This is because all of the tiny details and problems that weren’t apparent in the unprocessed signal will be brought up in level massively and begin to really stick out when heavily compressed or distorted. In a situation like this, it might make more sense to fix these issues after the fact with some reductive EQ.

EQ>COMP: Filtering the low-end or reducing some of the muddy lower-mid range before compressing a strummed acoustic guitar will cause the compressor to pump and distort less, allowing you to compress it harder without introducing unpleasant artefacts. The concept of experimenting with the order of plugins can also be applied to other kinds of processing. Here are some examples:

EQ>REVERB/DELAY: Try EQ’ing and filtering your effect sends instead of EQ’ing the effect returns (ex.place an EQ before your reverb on it’s own channel). This can lead to more natural sounding effects as you are not messing with the reverberated/delayed return signal but rather tweaking the exact signal you’re sending to be reverberated/delayed in the first place.

LIMITER>COMPRESSOR: A lot of engineers like to finish off a signal chain by placing a limiter at the end. I often use the same technique, but I personally also like to add an extra limiter at the beginning of my chain in order to lop-off the some of the extreme peaks and ease the load for my compressors down the line

2) Listen Like A Listener:

Listen like a listener

Think of your song as a whole. Your listeners will…

Sometimes we can end up skipping back and forth through sections of the song we are working on so many times that we begin to lose focus of the overall vision. Other times we can end up looking at the project purely from a technical aspect, and develop a sort of “tunnel vision” that renders us completely blind to some of the more important non-mix related problems within our track.

As mix engineers we are always striving to impress our peers (other engineers and people we look up to) with all of the minuscule tricks and tweaks we apply to our mixes. But the reality is that 99.9% of the people who listen to music won’t even notice any of those things, and will usually just go-off whether they like the song or not…

It’s important to be able to differentiate technical issues from issues with the quality of the song itself. You can have a technically perfect mix which sounds amazing, but if the song is no good then what’s the point?

No matter how far we progress in the art of production and mixing, it’s crucial remember that the mix isn’t what makes a successful song, it simply gives it a better fighting chance!

Try and answer a few of these questions to get a better understanding of what your listeners might care about when they listen to music:

  • Why is it you love certain songs by a band but hate others?
  • What does it take for a song to make you want to smash the replay button repetitively?
  • How much of an impact do you think the mix has on whether you like a particular song or not?
  • Would you still like your favorite songs if they weren’t mixed well?
Here’s an exercise to try out on a current mix you’re working on:

Once you’ve got your mix to a point where you think it’s pretty much done, take a break and let your ears recover, possibly even leave it and come back to it the next day.

After taking your break, sit back in your seat try and listen to the entire song from start to finish without pausing or tweaking ANYTHING. During this time, try and listen through the average listeners ears and make note of anything that sticks out to you. This isn’t meant to be a mixing-based exercise, try and determine if there is anything which might simply require a different approach, or if anything is particularly boring/uninspiring. What will the average Joe notice about the song?

Take Action:

Take note of these things as they become apparent, and try to determine whether these problems are mix related, production related, or simply song related. The next time you’re involved in the creation of a track, keep these things in mind and try to apply what you’ve learnt from your past mistakes.

In Conclusion:

Mixing is an amazingly complex and time-consuming skill to master, and I really do hope that you’re taking the time to learn all there is to learn about this wonderful profession. However, it’s important not to RELY on the mix to carry a song.

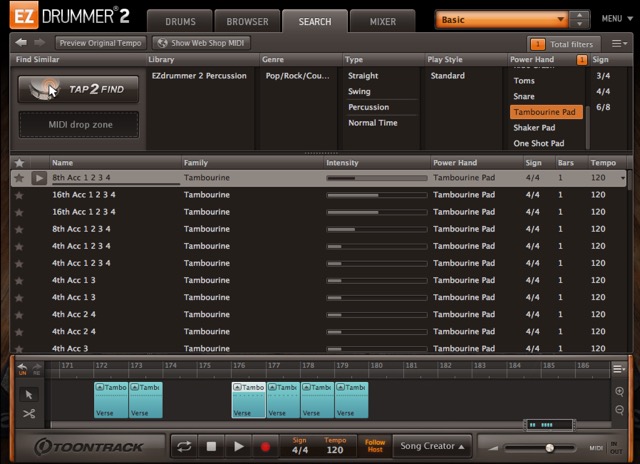
3) Time Your Effects to the Track:

3) Time Your Effects to the Track

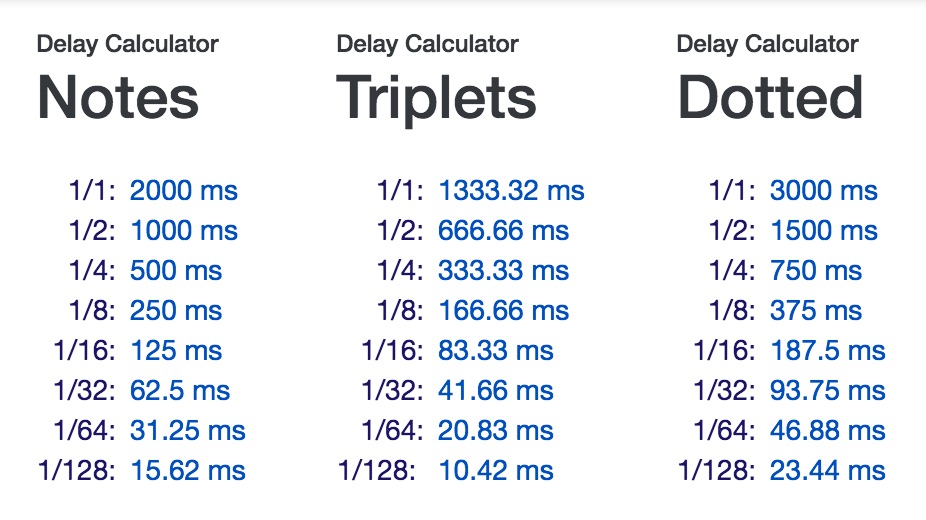
(Effect length calculation for 120BPM.)

Make your effects breath with your track.

If your reverb and delay tails are too long (for example: your snare reverb tail is still decaying through into the next snare hit, or your vocal delays are repeating unnecessarily for too long) then you are needlessly adding extra clutter, and sacrificing some of the punch of your mix.

The solution to this problem is to time your time-based effects to the tempo of your track so that they are only repeating and decaying as long as is necessary.

Using this technique won’t make a HUGE difference, but it will help open up an extra little bit of free space and in return, aid the clarity of your mix.

How can I start doing this?

– Use an FX length calculator! You can find these types of calculators online. My go-to is usually the Delay Calculator on nickfever.com, it’s extremely simple to use, and will save you from having to do the math yourself (however there is still a lot of value in learning how to do this manually).

– If you want to do this manually, you can follow this simple formula:

60,000ms (1 minute) ÷ Song BPM (beats per minute) = Time between 1/4 note beats (ms)

E.g = 60,000ms ÷ 120 BPM = 500ms

In this example, we have calculated the time between each quarter note of a song at 120 BPM.

After determining the time between each beat of a song we can then multiply or divide this number as many times as necessary in order to determine a suitable decay time and pre-delay time for our reverb.

4) Deadlines are Important:

Deadlines are Important


Make Yourself Accountable!

Accountability is a great motivator when it comes to working hard and getting things done quickly. The fear of being embarrassed or getting humiliated by having to fess up to something is truly one of the hardest things to do as a human being, especially when it comes to getting down from our high-horses as “all-knowing sound engineers” who always know better than our clients, and admitting that WE made a mistake.

Why Are Deadlines Important?

Through some recent experiences, I’ve discovered that I tend to achieve MUCH more in a short space of time when I’m aware that there are certain consequences if I fail to deliver on a promise. For this reason, I always try and set strict deadlines on when a certain job needs to be finished by, and make sure to inform people of these deadlines in order to keep my self accountable.

This way of working has an added bonus, which is that if you manage to deliver earlier than your deadline, then you’ll probably end up impressing your clients further, and giving them the impression that your on-the ball when it comes to their project.

However, be very careful to set realistic goals and not drastically over-sell yourself, as this can lead to even worse complications.

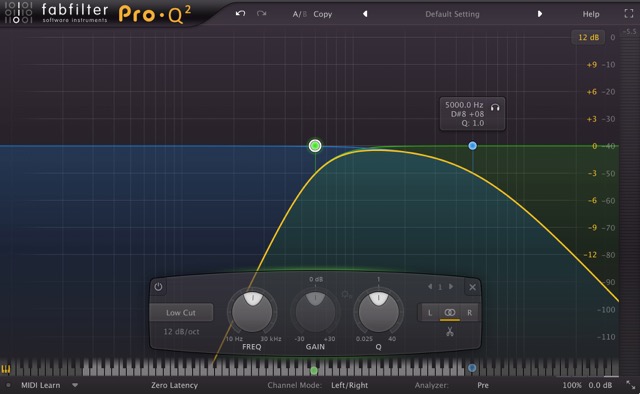
5) Filters Are Your Friend!

Filters Are Your Friend

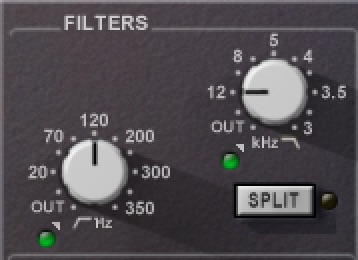
If you don’t need it, get rid of it!

Most instruments (par the kick,toms and bass) don’t have much useful to offer below 70-100Hz on the low-end, and not many instruments have anything useful above 12-13kHz on the high-end either.

Filtering out the unnecessary low-end and high-end from instruments which don’t particularly need this information is an incredible way to carve out some much needed extra space within a mix.

NOTE –  It’s important to make these type of processing decisions in context of the whole mix, as it’s very difficult to judge the amount of low or high frequencies a specific element needs while out of context and you may end up removing too much.

A few benefits of filtering include the following:

Using High-Pass Filters

  • More space for the low-end of the kick and snare to punch through.
  • Increased headroom for the mastering stage.
  • Tight, punchy low-end in your mixes instead of boomy and undefined low-end.

Using Low Pass Filters

  • Less processed/more natural sounding mixes.
  • Bright mixes that don’t make your eyes hurt (yes, I did say eyes…)
  • More space for the instruments that really need this space, such as the vocals.
Some Other Cool Filtering Tricks to Try Out:

The Mix Buss Filtering Trick: Highly acclaimed Mix Engineer Serban Ghenea (Taylor Swift, Katy Perry, The Weeknd etc.) is known to use filters on his master buss in order to control the impact which the song has on the listener for each section of the track.

He achieves this by filtering out some of the low-end and high-end during the verses and then bypassing the filters when the chorus hits for a sense of added impact and size.

Why does this trick work?

This is a very similar concept to the fan-favorite “radio effect” which is used frequently in metal these days: When you have a section/instrument with a reduced frequency bandwidth within a song (ex: A vocal rolled off at 600hz and 2-5kHz) then your ears get used to the lack of lows and highs and start to think of that sound as the norm. Because of this phenomenon, when the lows and highs are then reintroduced abruptly, it instantly causes the same sound to seem much more impressive and impactful than it did before

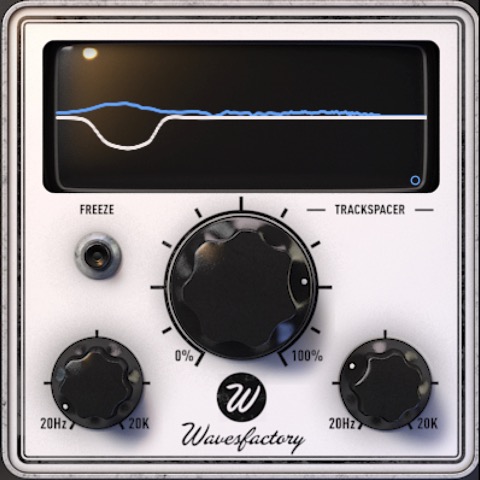
Try Filtering with a Mid-Side EQ:

A really cool trick to try out on synths and other stereo sources is mid-side filtering. A mid-side EQ is a tool which can affect the side information of a stereo track without touching any of the mono information in the center. I’ve personally found that this method works really well when you have a stereo bass synth with too much low end mud on the sides. In a situation like this I would use a high-pass filter in “side” mode to filter out the low-end anywhere up to 400-600Hz, while leaving the original low-end in the middle of the stereo field intact.

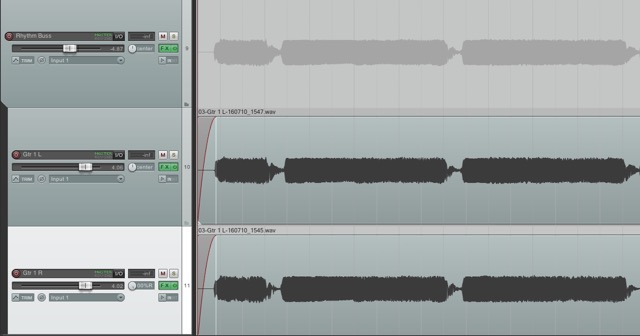
6) EQ is Primarily a Tool for Improving, not for Fixing

EQ is Primarily a Tool for Improving

                                                                    (A Fitting Quote from Taylor Swift’s “Bad Blood”)

The less fixing you have to do during the mix, the more natural your end result is going to sound.

“Fix it in the mix” is a saying you hear a lot in the mixing world. This approach can work out in certain situations (as long as you’re experienced enough to know how to fix the problem), although it’s still a rather counterproductive way of doing things, as it just leads to more work and frustration later on in the process…

If you’re given the luxury of having a say on how the raw material for a project is going to sound, make sure that it’s recorded well and taken as far as it can possibly go before it ever hits the mixing stage.

Sometimes something as simple as changing the guitar tone, using a different mic or switching out a drum sample can save you from hours of future tweaking and trying to “make things fit”. It’s important to remember that the EQ’ing you do during the mixing stage shouldn’t be about trying to make things work together, it should be about making things work better together.

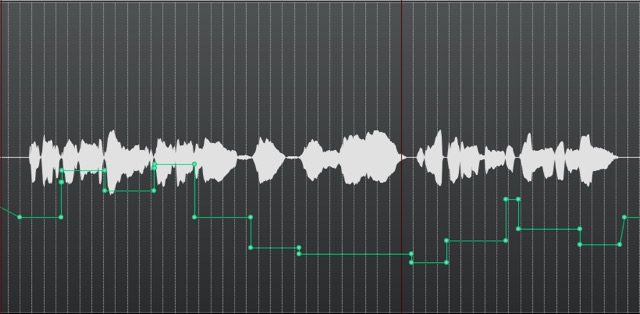
7) Comping in Context

Comping in Context

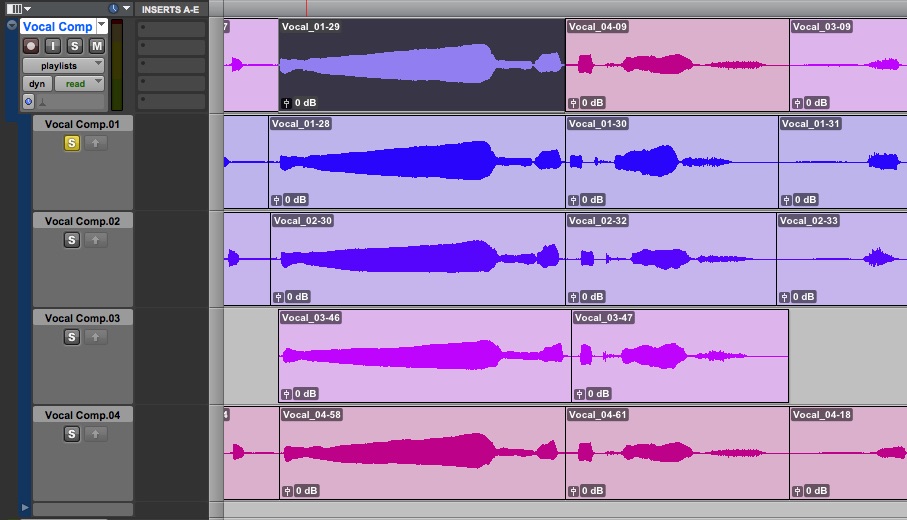
                                                                                      (Comping a vocal in Pro-Tools)

Comping: It’s one of the most tedious, yet also one of the most rewarding processes that we usually end up having to do on a daily basis.

It’s quite a difficult feat to be able to transform a sloppy and pitchy performance into a masterpiece, and it takes a hell of a lot of practice to get to that level of editing and correction skill.

Here are a few things that will hopefully help speed up your progression the next time you choose to take the comping plunge:

My #1 Comping Tip:
  • COMP IN CONTEXT – It’s very important to have a point of pitch reference whenever you’re selecting which words or notes to use during editing. The more perfect the point of reference the better (synths or keys work well for this). The main reason for this, is that if you comp a vocal without playing it alongside a melodic element, you might end up choosing words that feel right, but aren’t necessarily perfectly in pitch. This can lead to more pitch correction required further down the line.
A Few Extra Comping/Editing Tips:
  • Manual over Automatic Timing Correction – I personally prefer using a good ole’ fashioned mouse and keyboard to align my tracks to the grid. I really like the idea of having complete control over the feel and swing of each particular note or word, and think that it produces more natural sounding results than those built-in to plugins like Melodyne.
  • Different Doubles –  If you tune your vocal doubles to the point that they’re too similar to your lead vocals, then you are basically defeating the purpose of having doubles in the first place, and might as well just use a widener plugin… The reason the concept of doubling and tripling vocals works, is because the unique variations and interactions between each take creates an awesome effect which a straight up doubler plugin can’t recreate in the same way. By auto-tuning your doubles into pitchperfect condition you are getting rid of these variations between tracks, and making this effect disappear.

TIP: It’s still a good idea to go ahead and tune your vocal harmonies as they are made up of separate notes. With harmonies, the more they are in tune, the better.

8) Question the Reasons Behind Your Decisions (aka: DON’T COPY):

Question the Reasons Behind Your Decisions

                                                                               (My old setup at Brett Brothers Studio.)

Every action demands a valid reason.

Don’t just do something because you’ve always done it, or because you’ve heard that {insert famous engineer here} “always” does it…

One of the annoying things about music production, which is also one of the most important lessons to teach, is that it’s almost IMPOSSIBLE to get the exact same results twice (although this is also one of the things that makes music so special IMO).

There are simply too many variables in place for you to justify copying the same settings that you’ve seen somebody else use, or justify applying the same preset on different source material…

Some of these variables include:
  • The Microphones being used: Two different microphones will require completely different processing.
  • The Instruments being used: No two instruments sound exactly the same! (Just because certain processing sounds good on my Strat doesn’t mean it will sound good on your Les Paul…)
  • Microphone Placement: A single inch of difference in mic placement can make a night and day difference to your recorded source material.
  • The Singer’s Voice: Every singer has a UNIQUE voice with UNIQUE characteristics and tonality which will require UNIQUE treatment!
  • The Equipment being Recorded through: Pickups, Pedals, Amps, Poweramps, Preamps, Converters…THERE ARE TOO MANY VARIABLES, THEY ALL SOUND DIFFERENT!
  • The Room being used for Recording: The effect that the room has on how a mic will pick up a sound is HUGE!
  • The Room being used for Mixing: The mixing decisions that somebody else makes are strongly influenced by their listening environment and listening gear. Unless you’re %100 sure that they’re mixing through a perfectly treated setup then it makes absolutely no sense to even consider copying any of their EQ settings. (TBH, don’t copy other people’s settings anyway, it’s lame!)
  • The key of the song: This has a huge effect on the kind of processing a particular instrument will require. (Ex: A seriously down-tuned Djent track will need drastically different treatment to more standard Indie-Rock track.)
  • The genre of music: I hope this goes without saying, but a smooth Jazz vocal processing chain simply won’t work on an aggressive death metal vocal…
Conclusion:

Given all the evidence I’ve presented above, I hope I’ve gotten the point across…

No matter what you’ve heard or read about how a certain engineer “always” uses a certain method, make sure that every decision you make is necessary. Make sure you aren’t blindly following a formula which you’ve memorized, and that you are always bypassing and comparing in a before/after manner to make sure whatever you’re doing is heading in the right direction.

My advice would be that you’re better off trying to figure out why the engineers who you look up to make the mixing decisions they make, and trying to apply the concepts they use rather than trying to copy them exactly. Thinking like this is the best way for you to begin crafting YOUR OWN UNIQUE SOUND.
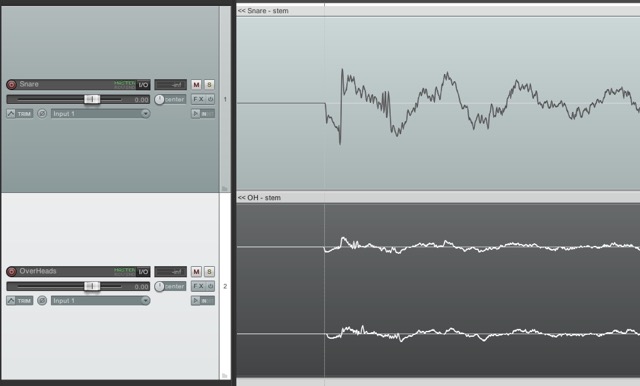
9) Share the Load:

Share The Load

Too much of a good thing…

Sometimes relying on a single process to fix a problem can lead to unnatural sounding results. Try using a few different stages of “fixing” to resolve a problem so that each processor isn’t having to work too hard.

Here are some examples of “sharing the load”:
  • Instead of pumelling a single compressor, try using a combination of pre-fx volume-automation, limiting, compression and post-fx volume automation in order to get a vocal to sound consistent and in your face.
TIP: A simple limiter at the start of your plugin chain to chop off the errant peaks can really ease the load on your compressors and stop them from bouncing all over the place.
  • Try a combination of pre-fx “manual sibilance volume automation” and regular deessing to get your vocal sibilance under control.
TIP: Check out the blog post I wrote on de-essing for URM, Death to Sibilance” for insight into a ton of great methods.
  • Instead of trying to filter or EQ out all of the harsh frequencies from your guitars, synths or overheads, try using some tape saturation to bleed-off some of the highend and warm them up.
TIP: Do some research on the characteristics of different tape types and tape speeds. Depending on which tape settings you use you can really help shape the tonal balance of your raw tracks from the get-go. This will also help give you a lot of insight into why classic recordings from the analog/tape era sound the way they do.
  • Instead of trying to suck out a bunch of low-mid flub on your palm-muted guitars with an EQ, set up a multi-band compressor to focus in on that specific frequency range and control the low-mids dynamically. This will lead to thicker sounding guitars, as the low-mids will remain intact when palm-mutes aren’t being played.

TIP: Google the Andy Sneap Waves C4 Settings for a great preset to get you started.

10) Live and Learn (AKA: YOUR BEST TEACHER IS YOUR LAST MISTAKE)

Live and Learn

Make your mistakes early on, you can’t skip from %0 to %100.

This is an issue I’ve really struggled with throughout my career as a sound engineer…

Early on in my mixing life I spent WAY too much time worrying about trying to make my mix perfect, and let this pursuit of perfection get in the way of my growth as an engineer. In return, I ended up never finishing anything because I was always too afraid to fail.

The cold-hard-simple truth is that you’re going to make mistakes in this business, it’s inevitable! You’re better off making your mistakes early on while there’s a minimal number of people around to realise them!

I learnt this lesson the hard way, and am still paying the price for the perfectionistic mindset I had early on to this day…

How can I get around this?

The greatest piece of advice I can give you in order to avoid this problem, is to make sure that your level of knowledge and experience are continuously increasing handin-hand. Don’t let your technical/theoretical knowledge build-up without ever being put into practice, DON’T BE AFRAID TO IMPROVE.

All the technical prowess in the world won’t add up to a good mix when it comes doing the actual work. You NEED to build upon past experiences.

Conclusion:

Making mistakes, learning from your mistakes, and learning from other’s mistakes is the best way to improve not only as a mixer, but at pretty much anything in life. Always strive to make your next mix better than your last, and in due time, you’ll have ironed out most of the flaws.

FINAL WORDS:

I hope that this article has given you some new ideas to try out during your next project. Be sure to let me know in the comment section below if any of this information has helped you out, or if you have any further questions regarding anything I’ve talked about here.

Stay tuned for more articles in the not-so-distant future!


Thomas Brett is a producer, mixing engineer and songwriter at Brett Brothers recording studio in the UK. Check out the Brett Brothers studio website for more information and articles on all things mixing www.brettbrothersstudio.com

Want more mix tips from Thomas Brett? Read part 1 here!

Nail The MixNail The Mix is our online mixing school that gives you REAL multi-tracks from REAL bands, plus a mixing class from the producer who recorded it. Past guests include Periphery, Chelsea Grin, Machine Head and State Champs. Join now for instant access!

Inspiration As The Picture Gets Clearer

Inspiration As The Picture Gets Clearer | By Jesse Cannon |

Demos are like fuzzy out of focus pictures; you can hear the broad strokes and main ideas, but details of what a performer is doing are often clouded in the lack of clarity, tightness and refinement of a demo. After all, that’s what makes it a demo and not a final recording. As we begin to see this picture clearer, it becomes more and more obvious what we should be doing to make it great. It’s inevitable as the picture becomes clearer, you’ll begin to see mistakes, timing inconsistencies, clashing notes and other flaws in your song.

One of the hardest parts of creating music is it doesn’t sound like a final mixed and mastered record when we’re making it. Garageband demos can sound unbearably harsh making it difficult to know if you need to work harder on the melody to get that feeling you get from your favorite records. Even in an expensive studio with a great producer/engineer the rough mix doesn’t quite sound like a finished record. For an inexperienced ear it can be hard to figure out if they should harshly judge what they’re hearing or that it’ll sound better as the process goes on.

To make matters worse, our brains have a tendency to see new flaws once we’re able to concentrate on other details. I often find singers get tunnel vision in their consideration of a song until their vocal is done. All of a sudden they can see parts of a song they never noticed before their tight focus on the vocal is completed.

When you’ve been working on a record for weeks on end, it can be a tense moment where someone points out a flaw that should have been caught two weeks ago. Just as despised is when someone realizes during the mix another melody or harmony is needed to make the song “perfect.” While we can wish this epiphany came weeks earlier, until we hear songs in their near completed or mixed form it’s often hard for musicians to know how they should sound during the development of a song. The reaction of those paying for the session or trying to get home at a reasonable hour can be harsh when a drum track recorded a month ago all of a sudden has a new found flaw.

Experimentation­

One of the biggest fights in the studio is when someone decides to start “experimenting” when another member of the team is concerned there’s not enough time to get everything they want to do done. When this experimenting is now being done “on the clock” it can start to become detrimental to the recording coming out optimally. While this doesn’t need to be a fight, the anger is not without justification in many cases. The fact is if studio time is limited so that you can record the ideas you had before entering, taking precious time to experiment can be costly to the overall project.

It should be known before entering the studio that even the least inspired musicians are probably going to get more inspired in the studio and tinker as they hear what’s possible. So if studio time isn’t allocated for this, you’re not going to be able to bring your songs to fruition as you see where new parts should be added. This means if you want this song to come out great, you need to be sure that you’ve drafted this song enough there won’t be knots to tie up or that you’ll have time to do this when there are. 


Jesse Cannon is a Brooklyn based record producer, mixer and mastering engineer. He is co-founder of Noise Creators a service that connects musicians to the best producers in music today. He is the author of Get More Fans: The DIY Guide To The New Music Business and the upcoming Processing Creativity.

Click here and listen to Jesse Cannon’s guest URM Podcast episode where we discuss strategies upcoming audio engineers can use to promote themselves, and lots of juicy mastering tips.

Click here to read Jesse Cannon’s previous URM blog entry, “Band Practice Is Toxic To Your Creativity.”

Nail The MixNail The Mix is our online mixing school that gives you REAL multi-tracks from REAL bands, plus a mixing class from the producer who recorded it. Past guests include Periphery, Chelsea Grin, Machine Head and State Champs. Join now for instant access!

Taking a Mix from Good to Great with Spatial Imaging

Taking a Mix from Good to Great with Spatial Imaging | By Joey Sturgis

Spatial imaging is a part of mixing that rarely gets talked about directly, and it’s easy to understand why. Who listens to a mix and immediately follows up with “Wow, the spatial imaging in that was insane”? If we could only be so lucky…

Instead, we focus on the elements that make up that space. We talk about things like width, depth, and size – all of which are elements of spatial imaging. Here are just a few of the ways that spatial imaging can elevate your mix:

Larger Than Life Sounds

Your sound doesn’t have to be loud to be huge. When something isn’t standing out in a mix, a lot of engineers dive for the volume or gain. Doing this again and again throughout a mix does nothing but push you further into the red and risks clipping your output.

Instead, mess around with stereo imaging. There are tons of approaches to transform a wimpy sounding mono source into a killer stereo sound. Rather than reaching for a compressor the next time a guitar part is falling flat, maybe grab a time-based plugin (reverb, delay, chorus, etc).

Everybody’s got a different approach to stereo imaging depending on what they’re trying to accomplish. We recently had Dan Korneff (Paramore, The Devil Wears Prada, Papa Roach) on the URM Podcast, where he shared his unique approach to using a stereo widener on guitars. Instead of the traditional approach of adding the widener on his guitar bus, Dan runs the widener in parallel, allowing him to tweak the EQ on his widened tracks while retaining the original sonic imprint of the guitars.

My approach is always slightly different depending on the track I’m working with, but I share a ton of my most-used methods in my latest course.

Finding the Third Dimension

Don’t let staring at your flat computer screen dictate your mixes. Use your ears to decide what needs more depth.

One of the greatest things about mixing in stereo is our ability to create 3D sound. Early on (we’re talking the Recording Stone Age), engineers would require giant rooms to move musicians around a single microphone to create depth. Now we have reverbs to create space around each instrument. We can pan the instrument around in digital space until it sits just right. What used to take hours of painstaking trial and error is now available at a few clicks of a button.

Perhaps the coolest tweak we can make to widen a sound – we can use delay to create width. All you need to do is duplicate a track, pan each on opposite sides, and then nudge it forward.

Not to the point of creating an echo, but enough to create a simulated reflection. We’re talking about nudging it by milliseconds. A change so small, it’s nearly impossible for untrained ears to hear. Try starting around the 10-30 ms range; too much and it’ll start sounding more like an echo. You’ll love how effective this can be at helping something like a guitar solo punch through a dense mix.

Tricks & Treats

I’m a huge fan of moving elements around a mix. Being able to take an element you hear on the left and having it whizz past you to the right? It’s awesome. But what if I told you that nothing moved at all?

With spatial imaging, things like automating a pan or reverb are tricking you into hearing motion. All that’s really going on is the volume decreasing in one speaker while it increases in another. I’m not sure if that’s supposed to be some big secret, but it’s tricking your ears into hearing movement.

To the end listener, these moving elements are usually a treat, keeping them interested in a way that a static mix just can’t.

Spatial Imaging Comes in Clutch as Your Last Resort

Spatial imaging can be a frustrated engineer’s best friend. Maybe you’ve gone through your toolbox, throwing every EQ, compressor, saturation & gain plugin you’ve got at a problem sound that won’t budge. You just need something to push it through the mix without sticking out like a sore thumb.

Small tweaks like applying a stereo widener to other elements can make room for that sound to breathe. Adding a bit of delay can replicate early reflections; once again tricking a listener’s ear into thinking something is closer to them than the original sound would have been.

The possibilities of spatial imaging are unique in that you’re already using them in your mix (even if you’re not taking advantage of them). Every track in your DAW has a pan knob on it, right? Are you able to duplicate those tracks? Route them mono-to-stereo and vice-versa?

Start messing around with the basic elements, and it won’t be long before you start to realize how much more powerful your stock DAW is than just something you capture audio in. If you’ve already played with panning til you’re blue in the face, experiment with time-based effects and how they interact with these concepts.

Want to see how I’m using Spatial Imaging to hack my mixes?

I go into much more detail about this subject in my Spatial Imaging Fast Track course, where I not only cover spatial imaging, but some of the ways I’m using it on every element of my mixes. I’ll show you my favorite tricks and give you the reasons behind them, available exclusively to our URM community. Check it out!


For more awesome tips on becoming a better producer, head on over to the URM Academy blog , subscribe to our podcast , and  [clickfunnels_clickpop exit=”true” id=”5j5usoiqwzl4doja” subdomain=”unstoppablerecordingmachine”]join our mailing list[/clickfunnels_clickpop].

Nail The MixNail The Mix is our online mixing school that gives you REAL multi-tracks from REAL bands, plus a mixing class from the producer who recorded it. Past guests include Periphery, Chelsea Grin, Machine Head and State Champs. Join now for instant access!

Become A Better Audio Engineer By Turning Off Your Phone

Become A Better Audio Engineer By Turning Off  Your Phone | By Joel Wanasek
Why I turn off my phone on the weekends:

It’s Saturday afternoon.

You’re supposed to be relaxing.

You’re sitting outside, doing something you enjoy with family, friends, or individually, and then something happens… Your phone vibrates.

You look at it, knowing you shouldn’t. It starts burning a hole in your mind. You NEED to know why someone called or texted you… Maybe it’s an emergency right?

You pick up the phone. Unlock it. There it is… a punishing text from a client with some sort of problem. In your mind you’re thinking, “it can wait until Monday (it really can).”

You go back to doing what you are doing. But, your mind keeps thinking about the situation. It’s distracting you. Others observe you as having “changed” or notice that you’re “zoning out” a lot.

You make excuses like “I’m just relaxing.” In reality you’re working on everything but relaxing. Thinking about solutions to the problem, outcomes, brainstorming, etc….

A few hours go by. You keep thinking about it. It’s eating you alive.

You text the person back eventually and exchange some thoughts.

You decide to sneak into work for an hour and fix the problem. This of course happens on Sunday. Monday rolls along and you still feel burnt out from last week, but you’re wondering why. I mean, you had the weekend off, right?

Ever have this problem?

It happens to me every weekend that I leave my phone on. Probably hundreds of times by now in my career. You’d think I would learn by now!

If you do not detach yourself physically via the phone’s power button and place it in an inconvenient location, that little piece of evil plastic doom will haunt you.

Mentally you NEED to relax at least 1 day a week if you want to stay super sharp and keep peak performance.

Being a workaholic myself who has put in more 80+ hour weeks that I’d ever want to admit to anyone, I will say that if you don’t pick at least 1 day a week to totally relax without distraction, you will burn out. Stress is cumulative and your can never restore your nervous system.

My recommendation is for you to choose 1 day a week and stay as far away as possible from the recording studio and music. Do something completely unrelated. When you return to work you will feel refreshed and excited about work instead of drained and punished by it.

Now let us extrapolate this on a yearly scale.

Not only am I a strong advocate of taking a day off each week, but I think you should take 1 month off a year and enjoy yourself. I’ve even spent as much as 2 ½ months off on vacation abroad in a year!

Why? Because the cumulative stress of work grinds down on you over time. It can kill your passion, your productivity, it can make you short tempered with your clients, and it can make you a miserable person.

A single day off a week should be viewed like maintenance. However, nothing relaxes you deeply and brings back your passion for work like a vacation of a minimum of 3 weeks. These 3 weeks need to be 100% totally interrupted with no email or phone. Trust me on this. I’ve made this mistake before! One phone call or email can set your mind back into stress. Having a few weeks with absolutely no distraction is amazing for the mind and body.

I suggest that If you really want to maximize this and if you have the money, then get on a plane and go to a different country with a unique culture.

The further you separate yourself from things that are familiar to you, the more you relax and enjoy yourself.

  1. What bad habits do you have when it comes to interruptions of relaxation time?
  2. What are you going to do to change those?
  3. Pick a day of the week and mark it on your calendar as your own personal time. Guard this time aggressively and use it wisely.

For more awesome tips on becoming a better audio engineer, head on over to the URM Academy blog and subscribe to our podcast.
Get notified when our blogs are published – [clickfunnels_clickpop exit=”true” id=”5j5usoiqwzl4doja” subdomain=”unstoppablerecordingmachine”]Join our mailing list![/clickfunnels_clickpop]

Nail The MixNail The Mix is our online mixing school that gives you REAL multi-tracks from REAL bands, plus a mixing class from the producer who recorded it. Past guests include Periphery, Chelsea Grin, Machine Head and State Champs. Join now for instant access!