When it comes to drum sounds, there is one man we reach out to when we have questions: Matt Brown (aka Professor Drum). He’s been our go-to drum tech on countless productions, and this man understands drums on a level that you’ll have to see to believe. He’s forgotten more about drums than 99.9% of us will ever learn in our lives!
And today, Eyal Levi sits down with him to talk about the huge (but poorly understood) impact that bearing edges have on drum sound.
We love Matt so much that we’ve roped him into creating the world’s most advanced, in-depth, and scientific drum production course: Ultimate Drum Production. The course launches soon, but in the meantime you can get a sneak preview of the kind of stuff he’ll be covering in this episode of Ask Professor Drum– get comfortable, because you’re gonna want to take a lot of notes on this one đ
Nail The Mix is our online mixing school that gives you REAL multi-tracks from REAL bands, plus a mixing class from the producer who recorded it. Past guests include Periphery, Gojira, Meshuggah, Machine Head, A Day To Remember and State Champs. Join now for instant access!
Although a lot of rock and metal engineers tend to approach vocals as kind of an afterthought to the drums and guitars, theyâre actually the most likely thing to catch a listenerâs attention and get them hooked the song!
Peripheryâs Spencer Sotelo
The bottom line is… Unless youâre working on some kind of obscure instrumental music, vocals are king, and with this being the case… You’d better know how to get them upfront and consistent in your mixes!
VIDEO: In the following NailTheMix excerpt, Periphery engineer/mixer Adam âNollyâ Getgood demonstrates one of the many stages of dynamic control you can apply to a vocal track in order to help sit at the forefront of a mix:
The Name Of The Vocal Mixing Game: Staged Dynamics Control
Our ears are naturally tuned to the way a human voice is meant to sound, so you canât afford to just slap some plugins across your vocal buss at the end of a mix and run the risk of ruining them… Especially when it comes to a tool as powerful as compression!
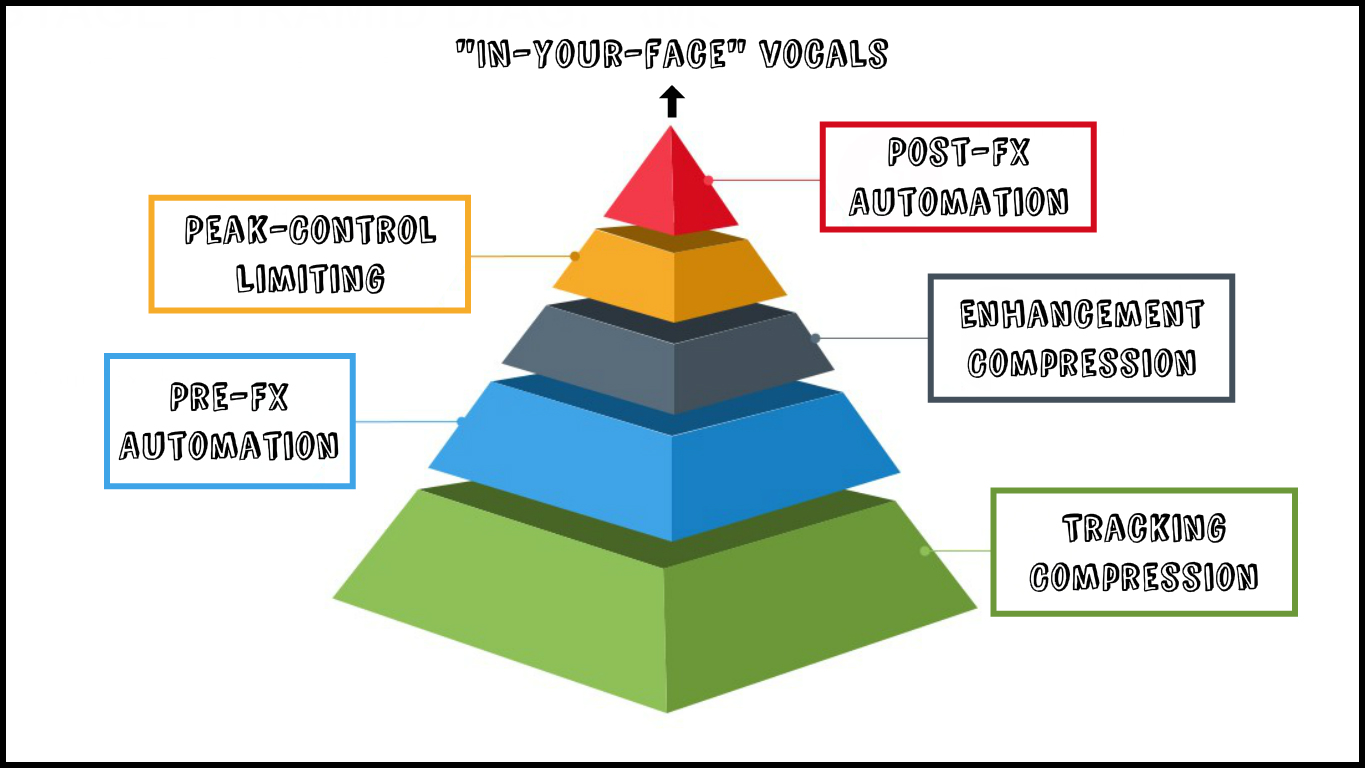
The best way to tame a vocal without squeezing the life out of it is to approach your dynamics control in multiple, incremental stages.
The 5 stages of dynamic control:
Pre-Read Disclaimer:The fact that Iâm teaching you about each of the following processing stages…Â Doesnât mean you have to use every single one of them every time you mix
Stage 1 – Tracking Compression/Limiting
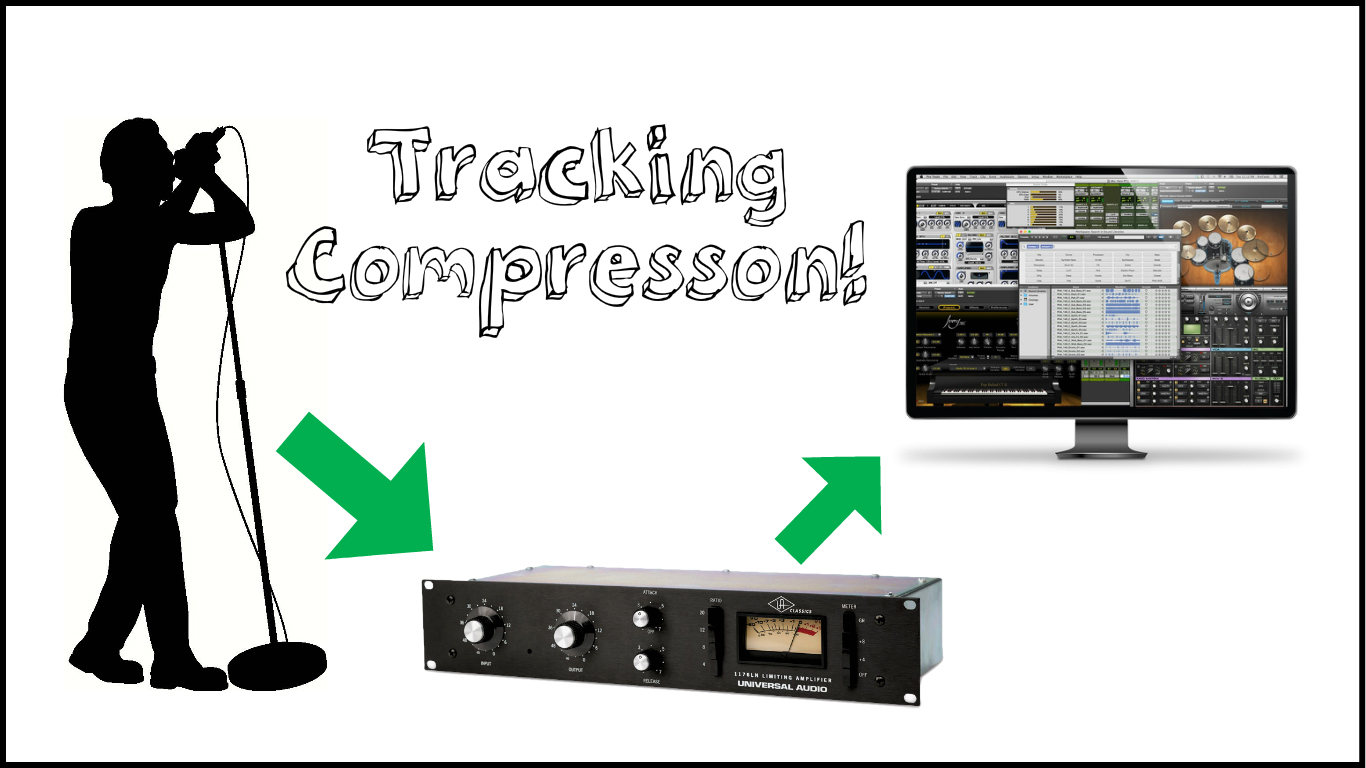
Tracking Vocals Through an 1176
A lot of engineers like to compress their vocal tracks during recording for a number of reasons:
It can help the singer and engineer to better hear the details of the performance theyâre tracking.
It means less compression is required from the get-go during mixing. (Also saving you some valuable CPU allocation!)
It can be fairly transparent: Fast-Attack/Fast-Release UA1176 or Distressor style compressors are common go-toâs for this purpose. (This kind of analog gear also has the added benefit of imparting some nice harmonic coloration/saturation to the signal… Making it more likely to cut through a mix later on!)
Itâs up to you to decide how much you want to compress during tracking, as itâs heavily dependent on context and genre. I personally prefer erring on the side caution and doing a maximum of 5-10dB gain reduction while tracking in order to keep my options open for later on.
NOTE:If you donât have any decent analog units at your disposal, you can simply emulate this kind of âtracking compressionâ in the box with a plugin version of the gear mentioned above with some similar settings. Just make sure that the plugin compressor you choose isnât adding any monitoring latency if youâre attempting to track through it.
Stage 2 – Pre-FX Volume Automation
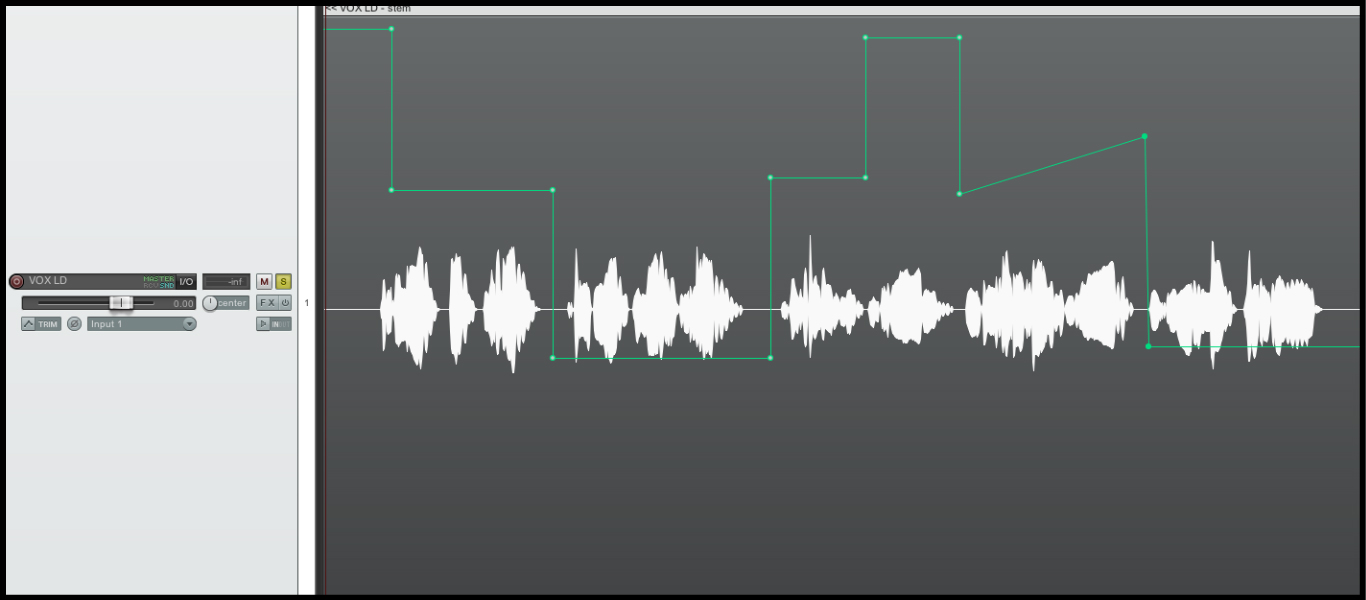
Pre-Fx Volume Automation in Reaper
Compression isnât exactly a discrete process, and can cause some fairly unpleasant sonic artefacts if pushed too hard… This is where pre-fx volume automation comes into play:
The primary reason a compressor might start âpumpingâ when pushed, is the fact that the release parameter isnât fast enough to keep up with the wide dynamic range of the incoming signal.
You might come across this issue if youâre dealing with a highly dynamic source, such as a vocal which is soft and âwhisper-yâ in the verses, but loud and aggressive in the choruses.
Setting-up a single compressor to dynamically even-out both of these extremes effectively – while also trying to avoid any pumping – is a rather futile task.
The solution is to manually go through your vocal, section by section, and even-out the large variations in dynamics with gain automation before itâs sent to a compressor.
By doing this, you can reduce the dynamic range of your source materials by 5⊠10⊠or even 20dB from the get-go in the cleanest way possible, all the while making them less likely to pump your compressors later on!
NOTE: How in-depth this volume automation should be is up to you. I personally like to do it in larger sections in order to save on time (verse, pre-chorus, chorus, etcâŠ), however some people will go through the entire track, automating the gain of each individual word up or down for maximum consistency!Itâs boring… but well worth it!
Stage 3 – âEnhancementâ Compression
Enhancement Compression
While the previous âlevelingâ stages Iâve talked about have focused on preserving the integrity of the performance as much as possible, this stage is designed to purposefully alter the transient information of a vocal in our favor:
Compressors arenât just great at leveling out volume inconsistencies in vocals… Theyâre also awesome for adding aggressive transient punch and sustain to the front and back ends of each word/sentence!
Much like weâd use a compressor with a slow-medium attack time / fast release to enhance the stick attack and ring/sustain of a drum hit, we can use the same concept to accentuate the initial consonants/sibilance and âbreathy end trail-offsâ of each word in a vocal track.
A lot of well-known engineers like using the âblue-faceâ UA 1176 compressor for this very purpose, as when itâs pushed hard (20dB+ gain reduction) with a slow attack/fast release time, it can add some real bright & gnarly âspitâ and âin your faceâ sustain to a vocal.
NOTE: If youâre still in the position of scratching your head every time the topic of compression is brought up, I strongly suggest you read through my âVisualising Compressionâ URM article from a few months back, in which I attempt to explain the whole concept in the simplest terms possible. DONâT PUT IT OFF ANY LONGER! – READ IT AND GET A GRASP OF COMPRESSION RIGHT NOW!
Stage 4 – Peak-Control Limiting

Peak Control Limiting
By this point, you should already be looking at a fairly controlled and dynamically cohesive vocal performance. However, chances are, there are still a few random untamed peaks that could be taken down a notch or two with some definitive brick-wall limiting:
Although these kind of sudden transient spikes may not appear too audible to our ears… They have the potential to unnecessarily trigger your mastering chain later on and cause your entire mix to duck in volume for a split second each time.
Applying a brick-wall limiter such as Wavesâ L1 or Fabfilter Pro-L to the back end of your vocal chain and adjusting the threshold so that itâs only lopping off the most offending peaks is a simple, non-destructive way of eliminating the problem for good.
Stage 5 – Post-FX Volume Automation
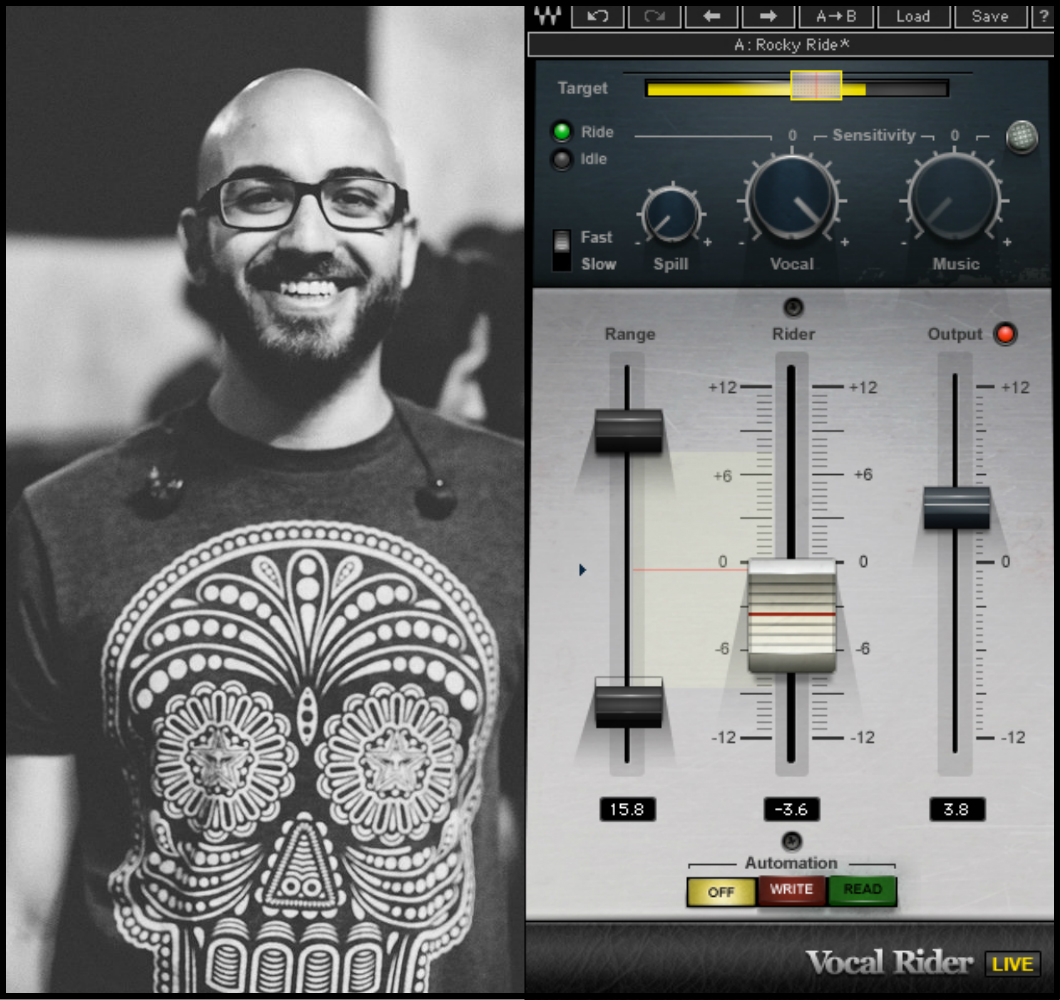
Nolly & Wavesâ Vocal Rider
This final stage is basically what Nolly was explaining in his NailTheMix excerpt at the beginning of this article with his use of Wavesâ Vocal Rider…. However, I tend to prefer manual automation instead:
While all of the previous methods of dynamic control Iâve mentioned in this article focus on getting the vocals themselves to be consistent and in your face… This stage is all about getting the vocals to remain on-top in the context of a dynamic instrumental arrangement.
Itâs simple: At the end of your mix, listen through the entirety of the track and see how the vocals are sitting against everything else on a section-by-section basis. If at any point theyâre too loud or getting a bit lost, call up a post-fx automation lane and write-in a broad 1-2dB gain tweak up or down. (Basically what Vocal Rider is doing, but more customisableâŠ)
NOTE: Make sure youâre not randomly skipping between sections when making these tweaks/decisions. As Nolly expertly demonstrated in the video above… The only way to truly judge the volume of an instrument in any given section is to listen to it in context of the entire song! Donât be lazy, if youâre gonna do something, do it right!
CONCLUSION:
I REPEAT: The fact that Iâve taught you about each of the following processing stages doesnât mean you have to use every single one of them every time you mix.
Although Iâll often apply all of them to a voice… I just as often find that you can achieve a great vocal sound with nothing more than a single 1176-style compressor and some basic volume automation!
Nevertheless⊠Itâs important that you have a good understanding of compression for pretty much everything youâll do in the world of audio… So make sure youâre putting in the time to experiment and learn everything you possibly can about it!
Final Words:
This concludes âIN YOUR FACE VOCALS (FT. PERIPHERY)â. I hope that this article has given you some new ideas to try out during your next project. Be sure to comment below if any of this information has helped you out, or if you have any questions.
Stay tuned for more production/mixing related articles in the not-so-distant future!
Nail The Mix is our online mixing school that gives you REAL multi-tracks from REAL bands, plus a mixing class from the producer who recorded it. Past guests include Periphery, Chelsea Grin, Machine Head and State Champs. Join now for instant access!

When it comes to drum sounds, there is one man we reach out to when we have questions: Matt Brown (aka Professor Drum). He’s been our go-to drum tech on countless productions, and this man understands drums on a level that you’ll have to see to believe. He’s forgotten more about drums than 99.9% of us will ever learn in our lives!
We love Matt so much that we’ve roped him into creating the world’s most advanced, in-depth, and scientific drum production course: Ultimate Drum Production. The course launches soon, but in the meantime you can get a sneak preview of the kind of stuff he’ll be covering in this episode of Ask Professor Drum– get comfortable, because you’re gonna want to take a lot of notes on this one đ
Nail The Mix is our online mixing school that gives you REAL multi-tracks from REAL bands, plus a mixing class from the producer who recorded it. Past guests include Periphery, Gojira, Meshuggah, Machine Head, A Day To Remember and State Champs. Join now for instant access!
Sick of the individual instruments in your mixes not gelling together properly?!?
Tired of your drums losing all of their punch during mastering?!?
Ever wish that there was a quicker, more efficient way of getting your mixes from âraw and boringâ to âpolished and excitingâ?!?
Sounds like you need some Top-Down Mixing in your workflow!
What is âTop-Downâ Mixing?
Simply put: Top-down mixing is when you apply some general âtone-shapingâ FX across busses/groups in order to cut down on time spent dialing in individual mix elements which most likely call for a certain degree of similar processing anyway.
In the following NailTheMix excerpt, EMMURE producers/mixers WZRD BLD and Jeff Dunne demonstrate the importance of having a top-down approach in their mixing workflow:
Stop fighting against yourself: A lot of us are guilty of just slapping some plugins across the master buss once our mix is done with a delusional âcherry on topâ mentality.
The problem with applying dynamics processing such as limiters and buss compressors onto an already-finished mix is the fact that they can really affect your transient information.
Letâs say youâve spent hours mixing a song to the point that youâre really happy with how the drums are punching you in the face. Throwing on a limiter at this point will probably just end up killing most of the âsmackâ youâve worked so hard on achieving, as well as causing the drums to lose their desired volume balance within the mix.
A better approach is to work on getting your drums to hit hard while the master limiter is already engaged in order to prevent any unpleasant surprises post-mastering.
NOTE: In the cases where taking a âhaphazardâ master buss approach results in a marginal improvement anyway, chances are it wouldâve worked even better if youâd just mixed into it from the beginningâŠ
Closer to âmixedâ from the get-go: Our ears are fickle. After listening to a few minutes of a raw mix that initially sounded dark and lifeless, theyâll slowly start to acclimatise… Eventually ignoring a lot of the issues which were blatantly apparent to begin with.
âCommercial mixes are so much brighter than any raw tracks youâll ever receive that inevitably almost every track is going to need some kind of low and high-end enhancement in order to compete with a mastered sound.â– Adam âNollyâ Getgood
For this very reason, itâs important that youâre not spending too much time listening to your individual instruments in the context of an unmixed arrangement. Otherwise youâll run the risk of deceiving yourself into thinking everything sounds better than it really does after fifteen minutes or so.
Applying some general polishing EQ across your master buss the moment you begin a mix can instantly help push your mix from ârawâ to âdecentâ… And in return, prevent your ears from settling on anything too mediocre from the get go.
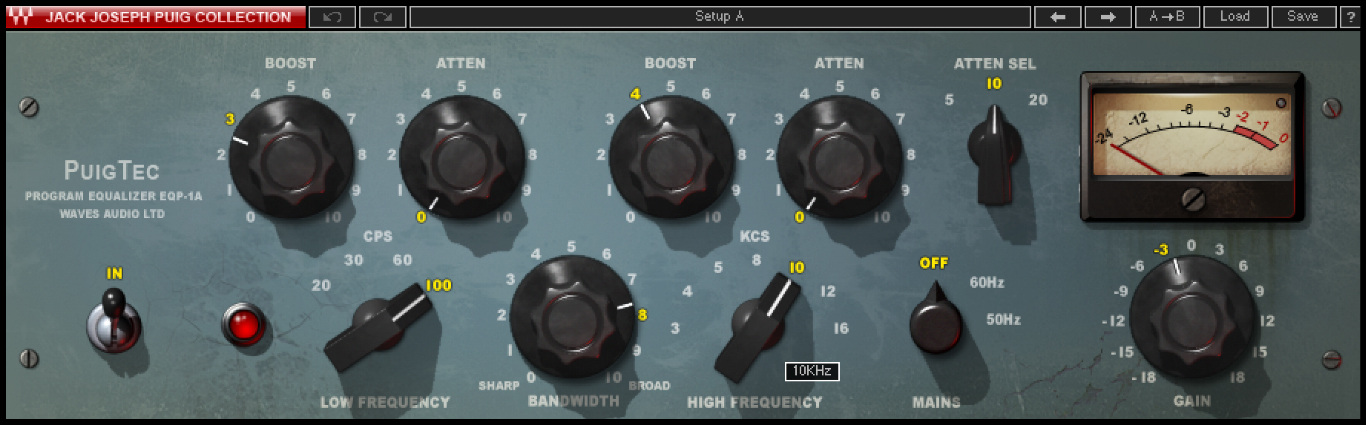
NOTE: A pretty standard approach to master buss EQ is to apply a sort of âsmiley face curveâ which accentuates the highs and lows, effectively having the same effect as scooping some of the midrange. Guys like CLA and Andrew Scheps have been known to use Pultec style EQâs for this purpose. Click here to learn more!
Example âsmiley faceâ master buss EQ settings on a Pultec style EQ.
TOP-DOWN MIXING TIPS:
Figure out what most of your mixes seem to need, come up with a good all-round starting point:
A lot of engineers have âgo-toâ drum samples and tones that they tend to reach for in certain musical situations.
Example: If you often find yourself gravitating towards the same few drum samples for a great rock drum sound, it only makes sense to come up with a good âballparkâ processing chain preset whichâll help you get them from A-Z a bit quicker.
Iâm not necessarily saying you should use the exact same settings every time you decide to go for a particular sound, but rather that you can use them as a good starting point and tweak them slightly to better fit the musical context.
You donât have to over-do it, but donât be afraid to crank it either:
Youâll often see random âprosâ on forums talking about how you should never have to boost/cut/compress more than a few dB at most while mixing, and never ever go anywhere near those numbers during mastering.
I CALL ABSOLUTE NONSENSE!
Watch any single one of the NailTheMix live mixing sessions and itâs clear to see that the actual professionals arenât particularly concerned with the numbers, and simply do whatever it takes to achieve the sounds theyâre after. (Whether it takes 20dB of processing or only 2dB of processing…)
NOTE: Take the Periphery NailTheMix session for instance – During his master buss rundown at the start of the live mix-through event, Nolly demonstrated how he applies a fairly substantial 5-6dB of upper-mid/high-end boost across the whole mix before even beginning to mess with any of the individual instrument channels. The result? AN INCREDIBLE MIX!
My point is… Trying out bold settings that might seem crazy to others is often how unique and interesting sounds are born! Trust your ears, not your eyes. If it sounds good, it is good!
Consider using separate instrument and vocal busses:
Although Iâve personally been a fan of the âtop-downâ approach for years, it wasnât until I began sending my vocals and instruments into separate mix busses that I really achieved the results I was looking for.
The primary reason for this was the interaction between the vocals and drums, and how they were reacting to my buss compression.
By keeping the vocals separate from every else, Iâm able to keep them on top of the mix without their volume ducking every time the snare hits. On the flipside, this also prevents the rest of the instruments from ducking every time the vocals jump up in volume.
NOTE: There are a million ways to set up your mix routing/bussing, and thereâs no such thing as âthe right wayâ. My best advice would be to do your research, and come up with something that works well given the particular tools you have at your disposal.
CONCLUSION:
Top-Down mixing is just one of the many tricks which can really have a huge impact on your ability to get great results fast in the studio.
If you want to further develop your skills as a mixer and eventually build a successful audio career, itâs hugely important that youâre always on the search for new methods of improving your workflow for better time management and efficiency.
This concludes âTOP-DOWN MIXING (Ft. Emmure)â. I hope that this article has given you some new ideas to try out during your next project. Be sure to comment below if any of this information has helped you out, or if you have any questions.
Stay tuned for more production/mixing related articles in the not-so-distant future!
Nail The Mix is our online mixing school that gives you REAL multi-tracks from REAL bands, plus a mixing class from the producer who recorded it. Past guests include Periphery, Chelsea Grin, Machine Head and State Champs. Join now for instant access!
When it comes to drum sounds, there is one man we reach out to when we have questions: Matt Brown (aka Professor Drum). He’s been our go-to drum tech on countless productions, and this man understands drums on a level that you’ll have to see to believe. He’s forgotten more about drums than 99.9% of us will ever learn in our lives!
Be the first to know when Matt’s class launches (and get access to special pre-order pricing) â¶ http://ultimatedrumproduction.com/notify-me
We love Matt so much that we’ve roped him into creating the world’s most advanced, in-depth, and scientific drum production course: Ultimate Drum Production. The course launches soon, but in the meantime you can get a sneak preview of the kind of stuff he’ll be covering in this episode of Ask Professor Drum– get comfortable, because you’re gonna want to take a lot of notes on this one đ
Nail The Mix is our online mixing school that gives you REAL multi-tracks from REAL bands, plus a mixing class from the producer who recorded it. Past guests include Periphery, Gojira, Meshuggah, Machine Head, A Day To Remember and State Champs. Join now for instant access!