
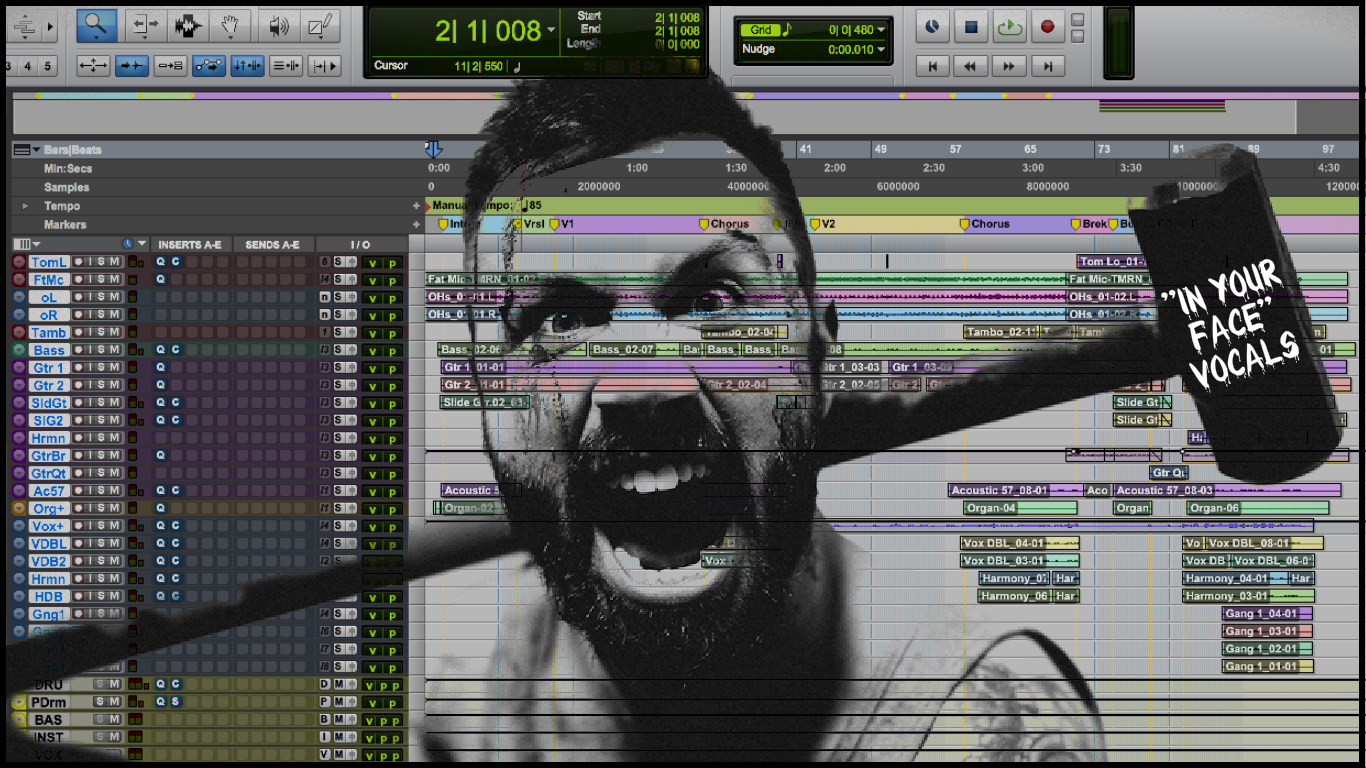
In Your Face Vocals (Ft. Nolly & Periphery)
urmadmin
Introduction:
Although a lot of rock and metal engineers tend to approach vocals as kind of an afterthought to the drums and guitars, they’re actually the most likely thing to catch a listener’s attention and get them hooked the song!
Periphery’s Spencer Sotelo
The bottom line is… Unless you’re working on some kind of obscure instrumental music, vocals are king, and with this being the case… You’d better know how to get them upfront and consistent in your mixes!
VIDEO: In the following NailTheMix excerpt, Periphery engineer/mixer Adam “Nolly” Getgood demonstrates one of the many stages of dynamic control you can apply to a vocal track in order to help sit at the forefront of a mix:
The Name Of The Vocal Mixing Game: Staged Dynamics Control
Our ears are naturally tuned to the way a human voice is meant to sound, so you can’t afford to just slap some plugins across your vocal buss at the end of a mix and run the risk of ruining them… Especially when it comes to a tool as powerful as compression!
The best way to tame a vocal without squeezing the life out of it is to approach your dynamics control in multiple, incremental stages.
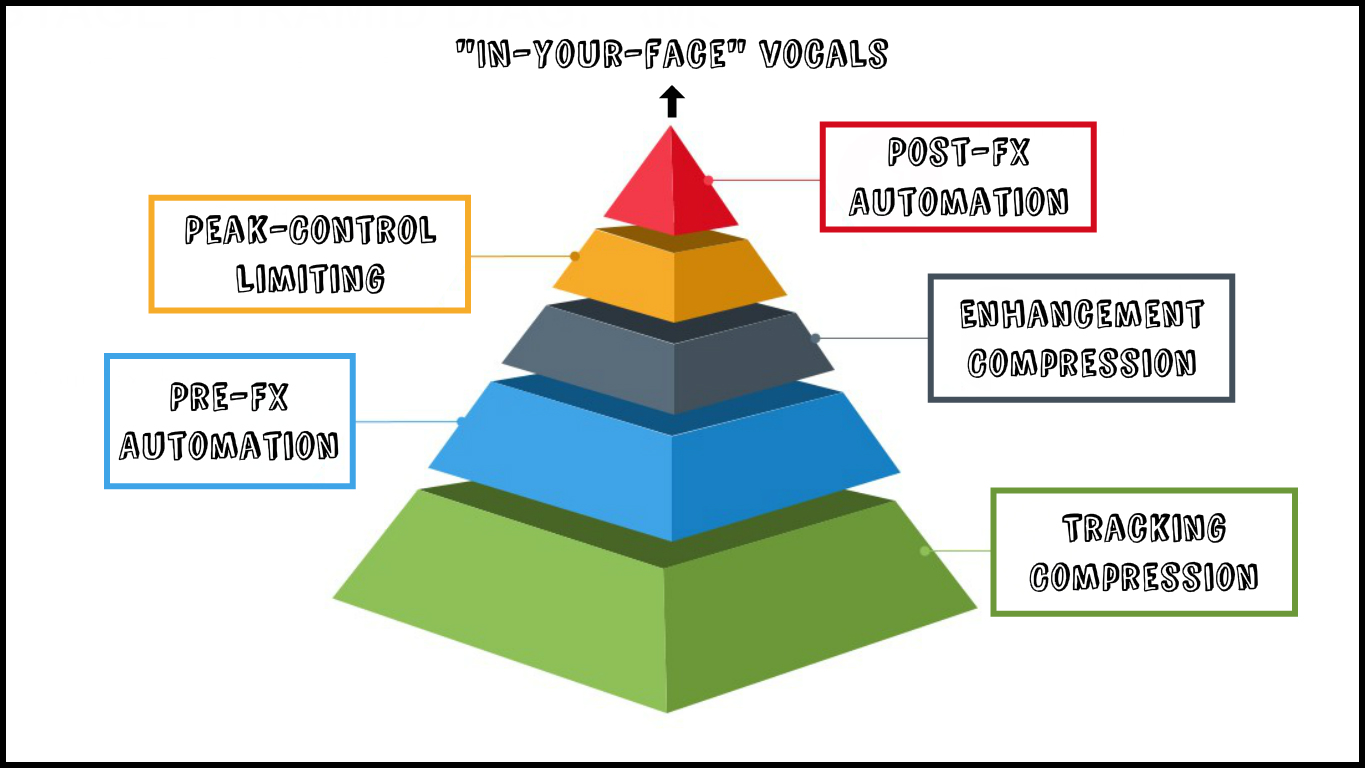
The 5 stages of dynamic control:
Pre-Read Disclaimer: The fact that I’m teaching you about each of the following processing stages… Doesn’t mean you have to use every single one of them every time you mix
Stage 1 – Tracking Compression/Limiting
![]()
Tracking Vocals Through an 1176
A lot of engineers like to compress their vocal tracks during recording for a number of reasons:
- It can help the singer and engineer to better hear the details of the performance they’re tracking.
- It means less compression is required from the get-go during mixing. (Also saving you some valuable CPU allocation!)
- It can be fairly transparent: Fast-Attack/Fast-Release UA1176 or Distressor style compressors are common go-to’s for this purpose. (This kind of analog gear also has the added benefit of imparting some nice harmonic coloration/saturation to the signal… Making it more likely to cut through a mix later on!)
- It’s up to you to decide how much you want to compress during tracking, as it’s heavily dependent on context and genre. I personally prefer erring on the side caution and doing a maximum of 5-10dB gain reduction while tracking in order to keep my options open for later on.
NOTE: If you don’t have any decent analog units at your disposal, you can simply emulate this kind of “tracking compression” in the box with a plugin version of the gear mentioned above with some similar settings. Just make sure that the plugin compressor you choose isn’t adding any monitoring latency if you’re attempting to track through it.
Stage 2 – Pre-FX Volume Automation
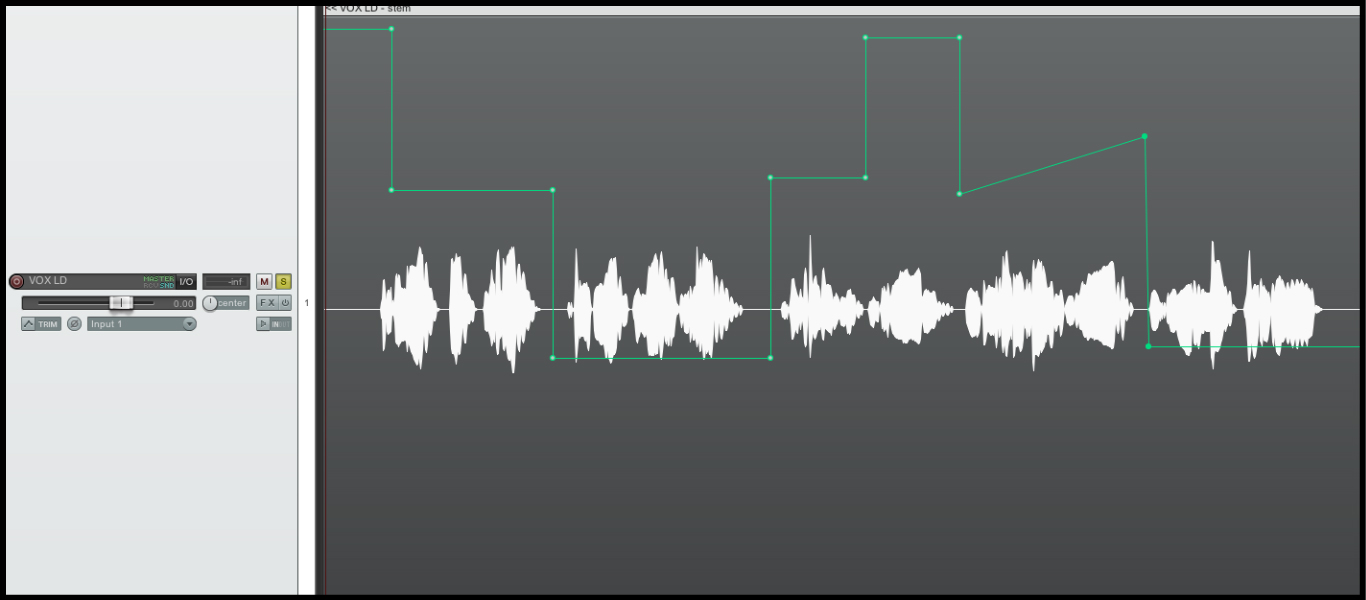
Pre-Fx Volume Automation in Reaper
Compression isn’t exactly a discrete process, and can cause some fairly unpleasant sonic artefacts if pushed too hard… This is where pre-fx volume automation comes into play:
- The primary reason a compressor might start “pumping” when pushed, is the fact that the release parameter isn’t fast enough to keep up with the wide dynamic range of the incoming signal.
- You might come across this issue if you’re dealing with a highly dynamic source, such as a vocal which is soft and “whisper-y” in the verses, but loud and aggressive in the choruses.
- Setting-up a single compressor to dynamically even-out both of these extremes effectively – while also trying to avoid any pumping – is a rather futile task.
- The solution is to manually go through your vocal, section by section, and even-out the large variations in dynamics with gain automation before it’s sent to a compressor.
- By doing this, you can reduce the dynamic range of your source materials by 5… 10… or even 20dB from the get-go in the cleanest way possible, all the while making them less likely to pump your compressors later on!
NOTE: How in-depth this volume automation should be is up to you. I personally like to do it in larger sections in order to save on time (verse, pre-chorus, chorus, etc…), however some people will go through the entire track, automating the gain of each individual word up or down for maximum consistency! It’s boring… but well worth it!
Stage 3 – “Enhancement” Compression

Enhancement Compression
While the previous “leveling” stages I’ve talked about have focused on preserving the integrity of the performance as much as possible, this stage is designed to purposefully alter the transient information of a vocal in our favor:
- Compressors aren’t just great at leveling out volume inconsistencies in vocals… They’re also awesome for adding aggressive transient punch and sustain to the front and back ends of each word/sentence!
- Much like we’d use a compressor with a slow-medium attack time / fast release to enhance the stick attack and ring/sustain of a drum hit, we can use the same concept to accentuate the initial consonants/sibilance and “breathy end trail-offs” of each word in a vocal track.
- A lot of well-known engineers like using the “blue-face” UA 1176 compressor for this very purpose, as when it’s pushed hard (20dB+ gain reduction) with a slow attack/fast release time, it can add some real bright & gnarly “spit” and “in your face” sustain to a vocal.
NOTE: If you’re still in the position of scratching your head every time the topic of compression is brought up, I strongly suggest you read through my “Visualising Compression” URM article from a few months back, in which I attempt to explain the whole concept in the simplest terms possible. DON’T PUT IT OFF ANY LONGER! – READ IT AND GET A GRASP OF COMPRESSION RIGHT NOW!
Stage 4 – Peak-Control Limiting

Peak Control Limiting
By this point, you should already be looking at a fairly controlled and dynamically cohesive vocal performance. However, chances are, there are still a few random untamed peaks that could be taken down a notch or two with some definitive brick-wall limiting:
- Although these kind of sudden transient spikes may not appear too audible to our ears… They have the potential to unnecessarily trigger your mastering chain later on and cause your entire mix to duck in volume for a split second each time.
- Applying a brick-wall limiter such as Waves’ L1 or Fabfilter Pro-L to the back end of your vocal chain and adjusting the threshold so that it’s only lopping off the most offending peaks is a simple, non-destructive way of eliminating the problem for good.
Stage 5 – Post-FX Volume Automation
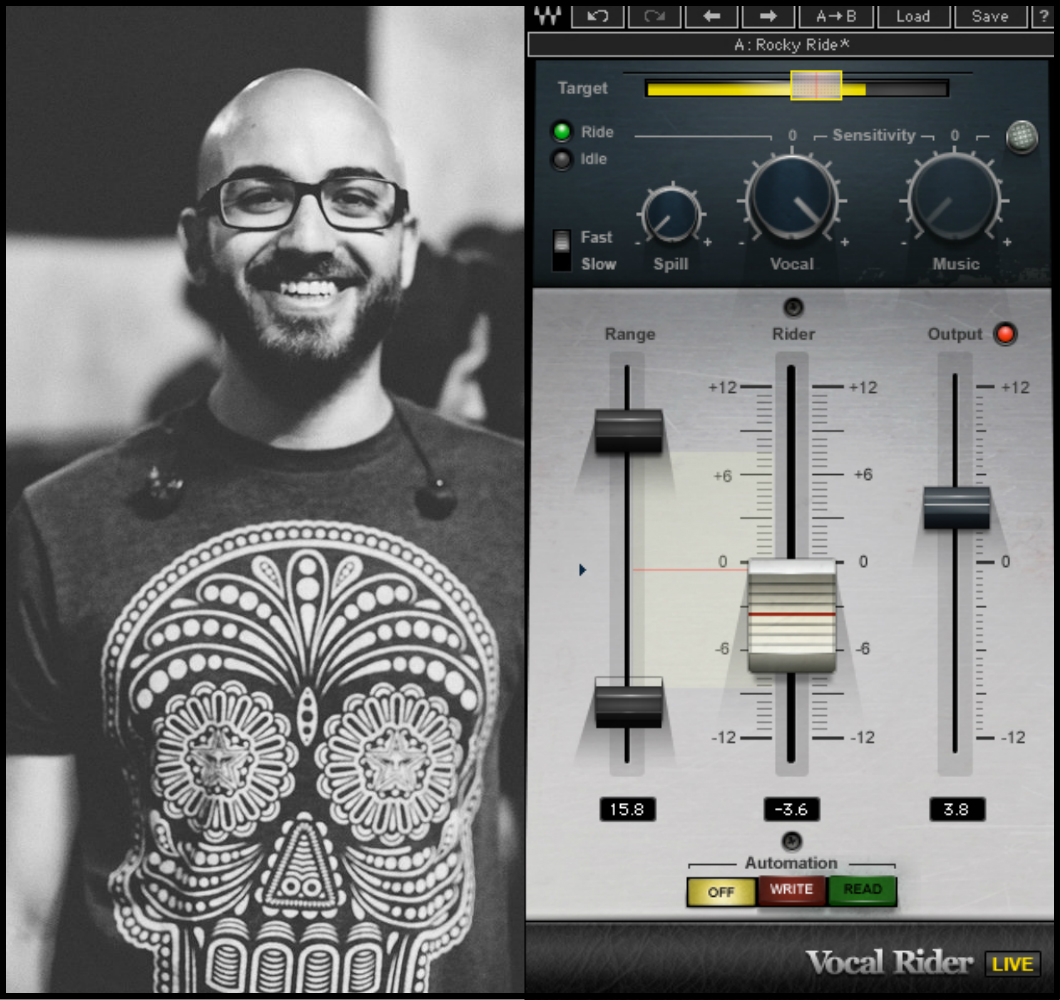
Nolly & Waves’ Vocal Rider
This final stage is basically what Nolly was explaining in his NailTheMix excerpt at the beginning of this article with his use of Waves’ Vocal Rider…. However, I tend to prefer manual automation instead:
- While all of the previous methods of dynamic control I’ve mentioned in this article focus on getting the vocals themselves to be consistent and in your face… This stage is all about getting the vocals to remain on-top in the context of a dynamic instrumental arrangement.
- It’s simple: At the end of your mix, listen through the entirety of the track and see how the vocals are sitting against everything else on a section-by-section basis. If at any point they’re too loud or getting a bit lost, call up a post-fx automation lane and write-in a broad 1-2dB gain tweak up or down. (Basically what Vocal Rider is doing, but more customisable…)
NOTE: Make sure you’re not randomly skipping between sections when making these tweaks/decisions. As Nolly expertly demonstrated in the video above… The only way to truly judge the volume of an instrument in any given section is to listen to it in context of the entire song! Don’t be lazy, if you’re gonna do something, do it right!
CONCLUSION:
I REPEAT: The fact that I’ve taught you about each of the following processing stages doesn’t mean you have to use every single one of them every time you mix.
Although I’ll often apply all of them to a voice… I just as often find that you can achieve a great vocal sound with nothing more than a single 1176-style compressor and some basic volume automation!
Nevertheless… It’s important that you have a good understanding of compression for pretty much everything you’ll do in the world of audio… So make sure you’re putting in the time to experiment and learn everything you possibly can about it!
Final Words:
This concludes “IN YOUR FACE VOCALS (FT. PERIPHERY)”. I hope that this article has given you some new ideas to try out during your next project. Be sure to comment below if any of this information has helped you out, or if you have any questions.
Stay tuned for more production/mixing related articles in the not-so-distant future!
Want mix tips from URM Academy? Read them here!
 Nail The Mix is our online mixing school that gives you REAL multi-tracks from REAL bands, plus a mixing class from the producer who recorded it. Past guests include Periphery, Chelsea Grin, Machine Head and State Champs. Join now for instant access!

