Analysis As a Learning Tool (Part 2)
urmadmin
Analysis As a Learning Tool (Part 2)
As audio engineers we’re always looking to improve our craft and take our mixes to the next level. Two of the key methods to speeding up this learning process are:
- Understanding the subtleties of the gear we’re using.
AND
- Knowing how to perform accurate analysis and comparisons.
Here are some of the primary tools which you can use in order to analyze and compare sounds or gear, while possibly gaining further insight into the techniques of the pros in the process:
EQ-Matching:
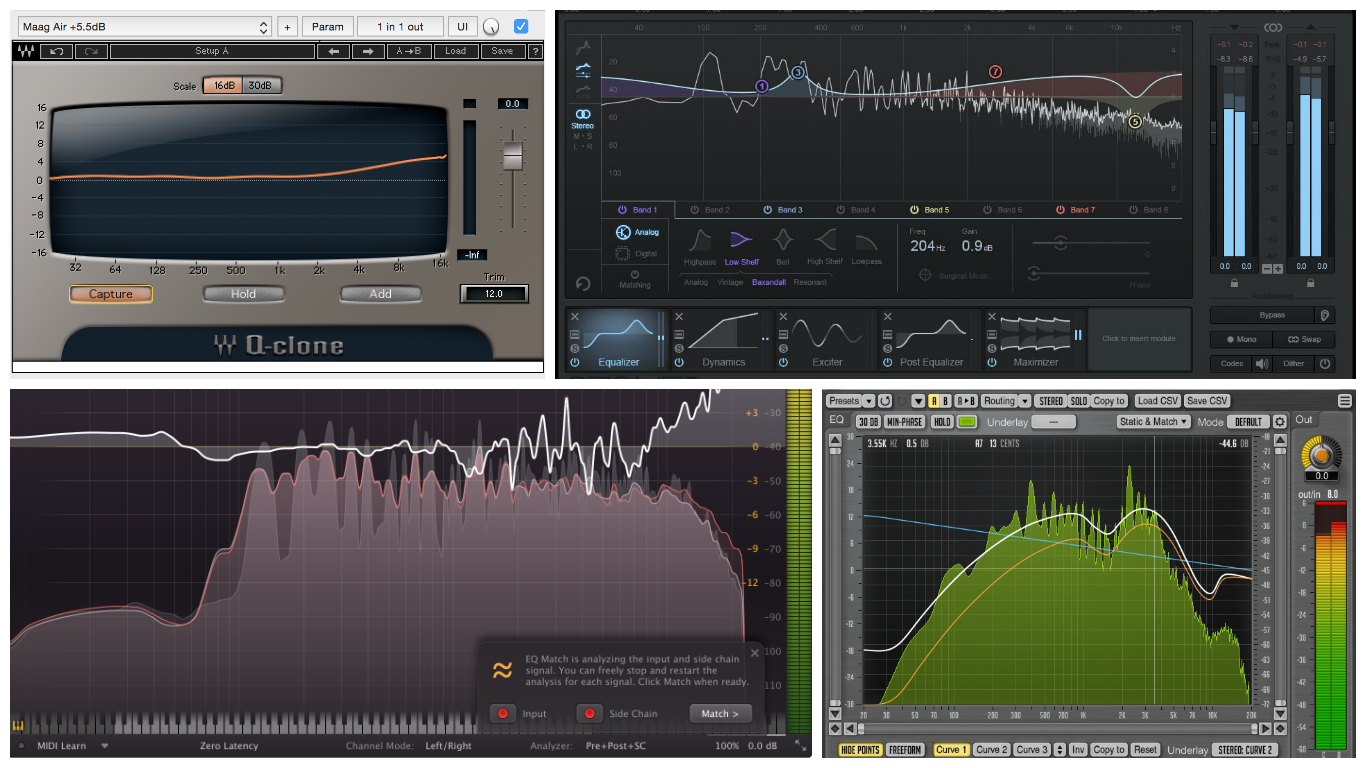
EQ-matching is an awesome feature which comes built-in to quite a few different EQ and mastering plugins these days. I often find myself using this tool as a means of testing certain things out, or simply confirming any frequency related suspicions I might have.
How Does EQ-Matching Work?
An EQ-match basically takes two signals you feed into it, compares their overall frequency information, and provides a corrective EQ curve which can be used to better match their tonal characteristics.
Although EQ-matching can’t achieve %100 replication due to the thousands of factors which go into capturing a specific source, it can really help towards getting you in the same ballpark as the sound you’re after.
Here are a few example situations where EQ-Matching might come in handy:
-
-
-
-
- Comparing Your Mixes to Your Reference Mixes: This is a cool method of pinpointing possible weaknesses within your track and smoothing them out. Check out David Glenn’s Pro Audio Files video for a great show and tell on this subject.
-
-
-
https://www.youtube.com/watch?v=1XNPJqQ_4NM
-
-
-
-
- Comparing Drum Samples: EQ matching is a great means of comparing your raw drum samples to processed drum samples. This can be an excellent learning tool which can help you figure out which areas your sounds might be lacking in.
-
-
-
NOTE: Check out my “Analysis As a Learning Tool – Part 1” blog from a few weeks ago for further insight into this technique)
-
-
-
-
- Fixing Tonal Imbalances Between Stereo Overheads: It’s not uncommon to encounter various tonal discrepancies between individual overhead mics – Check out Matthew Weiss’ Pro Audio Files video on this exact topic for an excellent demonstration on how to address these issues using EQ-matching.
-
-
-
https://www.youtube.com/watch?v=IV64UWEt-WI
I’m sure there are a bunch more similar situations and uses which could be added to this list, but I think you get the point…
Here’s A Practical Example of EQ-Matching In Everyday Mixing Practice:
I was recently working on a project where the acoustic guitar and vocals were tracked in a different country by the singer/guitarist of the band. We had some contact before he started the tracking process, so I was able to give him advice on microphone placement for each instrument beforehand. Overall, he managed to do a decent job with the recording.
HOWEVER
The vocal and acoustic guitar raws I received at the time of mixing came to me as stereo files, which I naturally assumed was just down to incorrect rendering settings. I began EQ’ing away at the vocals without really thinking twice about the fact they were on a stereo track. After a few minutes of tweaking, I realised that they were actually sounding quite “phasey” and weird…
Here is the process I used to determine/confirm the source of the culprit:
-
-
-
-
- I started out by splitting the stereo vocal track into two individual mono tracks using Reaper’s “explode channels” function.
-
- My second step was to perform an EQ-match between the two channels using Fabfilter Pro-Q2, in order to determine the tonal differences between them.
-
- As you can see below, the results of the EQ-match indicated that there was huge discrepancy in the amount of high and low-end information between the two channels.
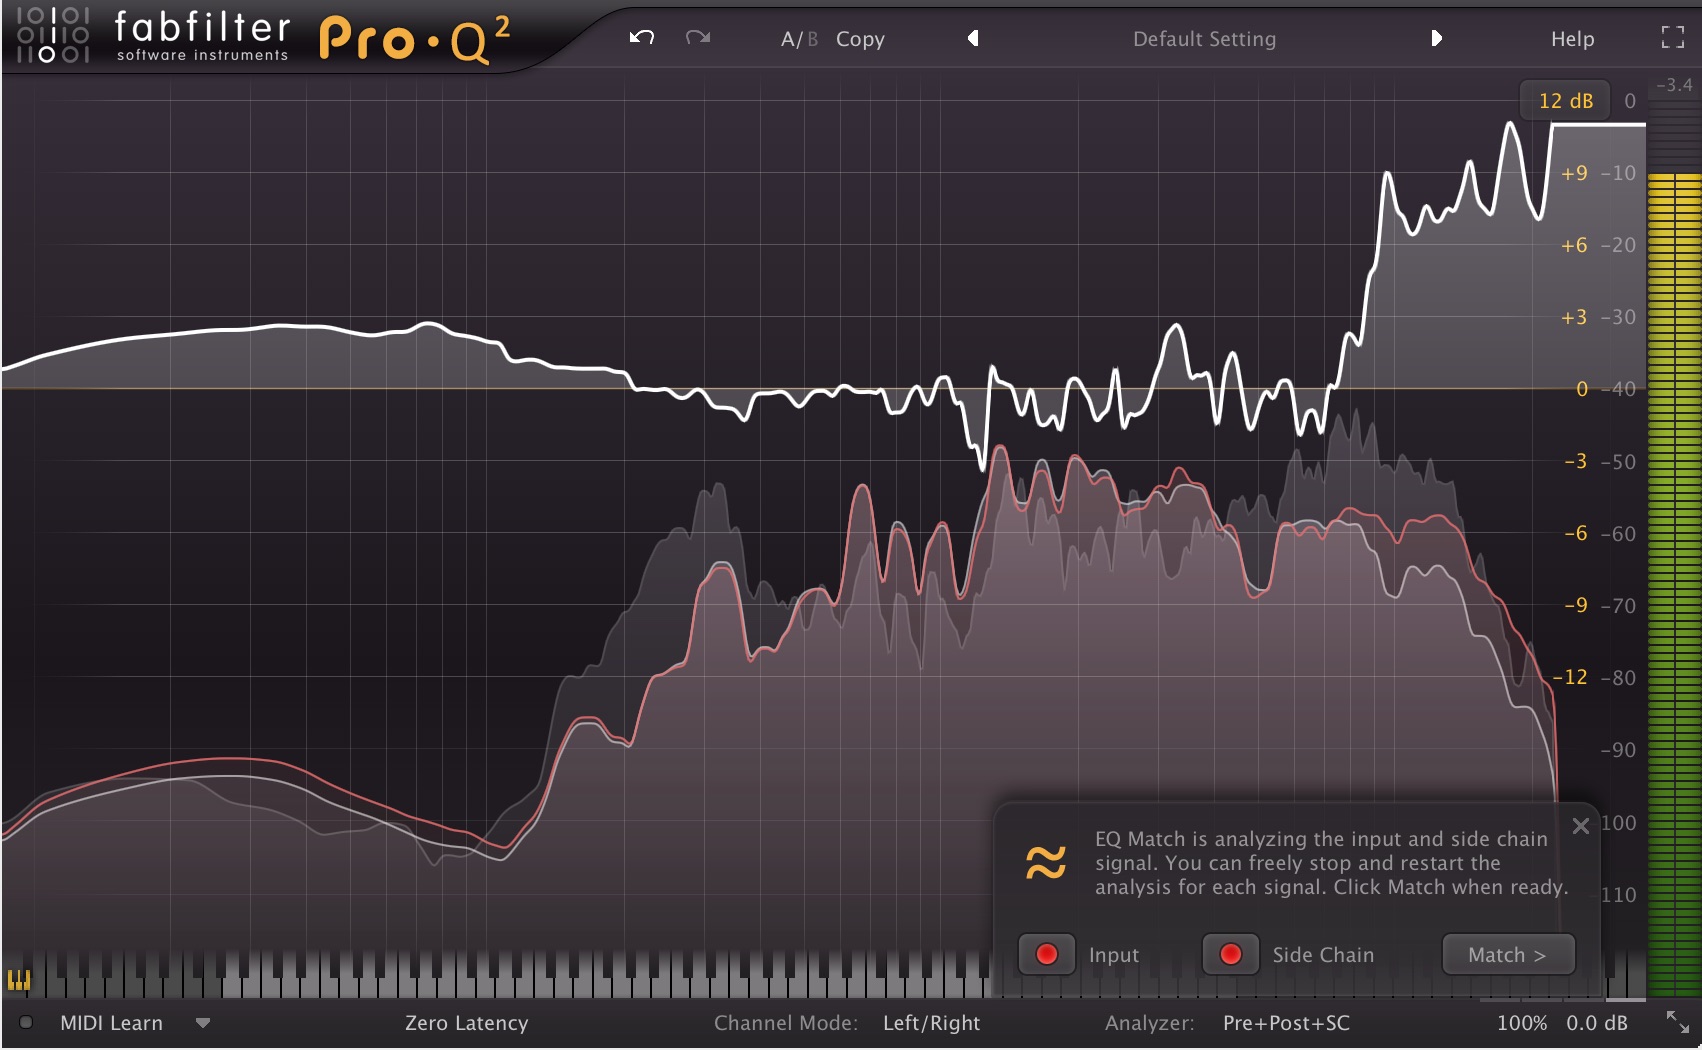
- As you can see below, the results of the EQ-match indicated that there was huge discrepancy in the amount of high and low-end information between the two channels.
-
- Notice how the mid-range between 200Hz – 7kHz is pretty consistent between the two channels, but how the content below and above this range is much more prevalent in one of them.
-
- By using this information we can tell that the vocals have actually been recorded in stereo, but that one of the capsules of the microphone was probably facing off-axis from the recorded sound source. (Due to the reduced proximity effect and lack of high-end clarity)
-
-
-
Long Story Short…
It turns out that the microphone which was used while tracking was an expensive AKG C24 stereo mic (Kind of like a stereo C12, but slightly different in sound), which he had borrowed from a friend. The problem is, due to his lack of recording knowledge (which I don’t blame him for) he had actually used both of the capsules in stereo while recording his vocals and acoustic guitar.
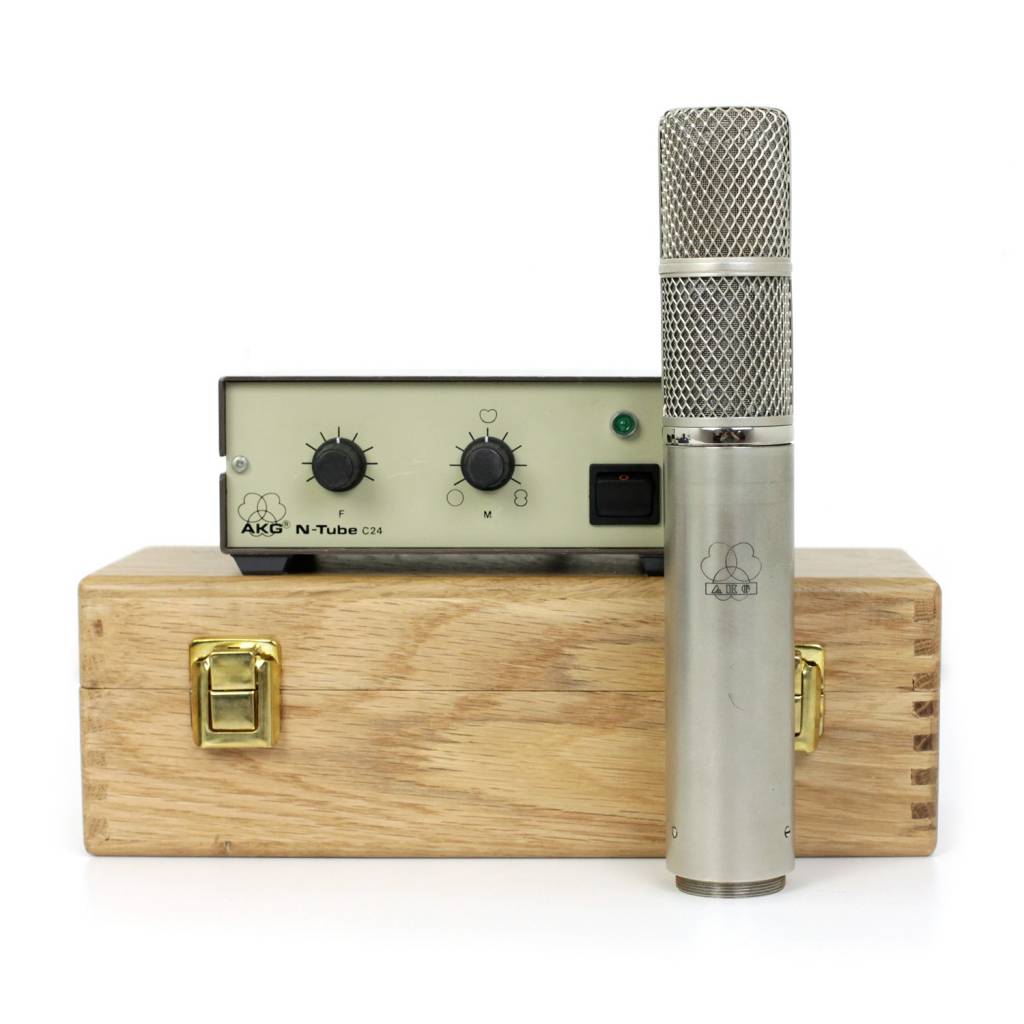
Overall, none of this was really a big issue… as I simply ended up using the recordings from the brighter, on-axis C24 capsule for the project and got rid of the extra channel captured by the second capsule.
Could I have instantly recognized that this was the problem from the get-go?
Sure… but my main purpose in telling you this story is to point out how EQ-matching was an extremely useful tool in confirming my suspicions quickly and accurately in order to aid my decision making mindset.
Waves Q-Clone:
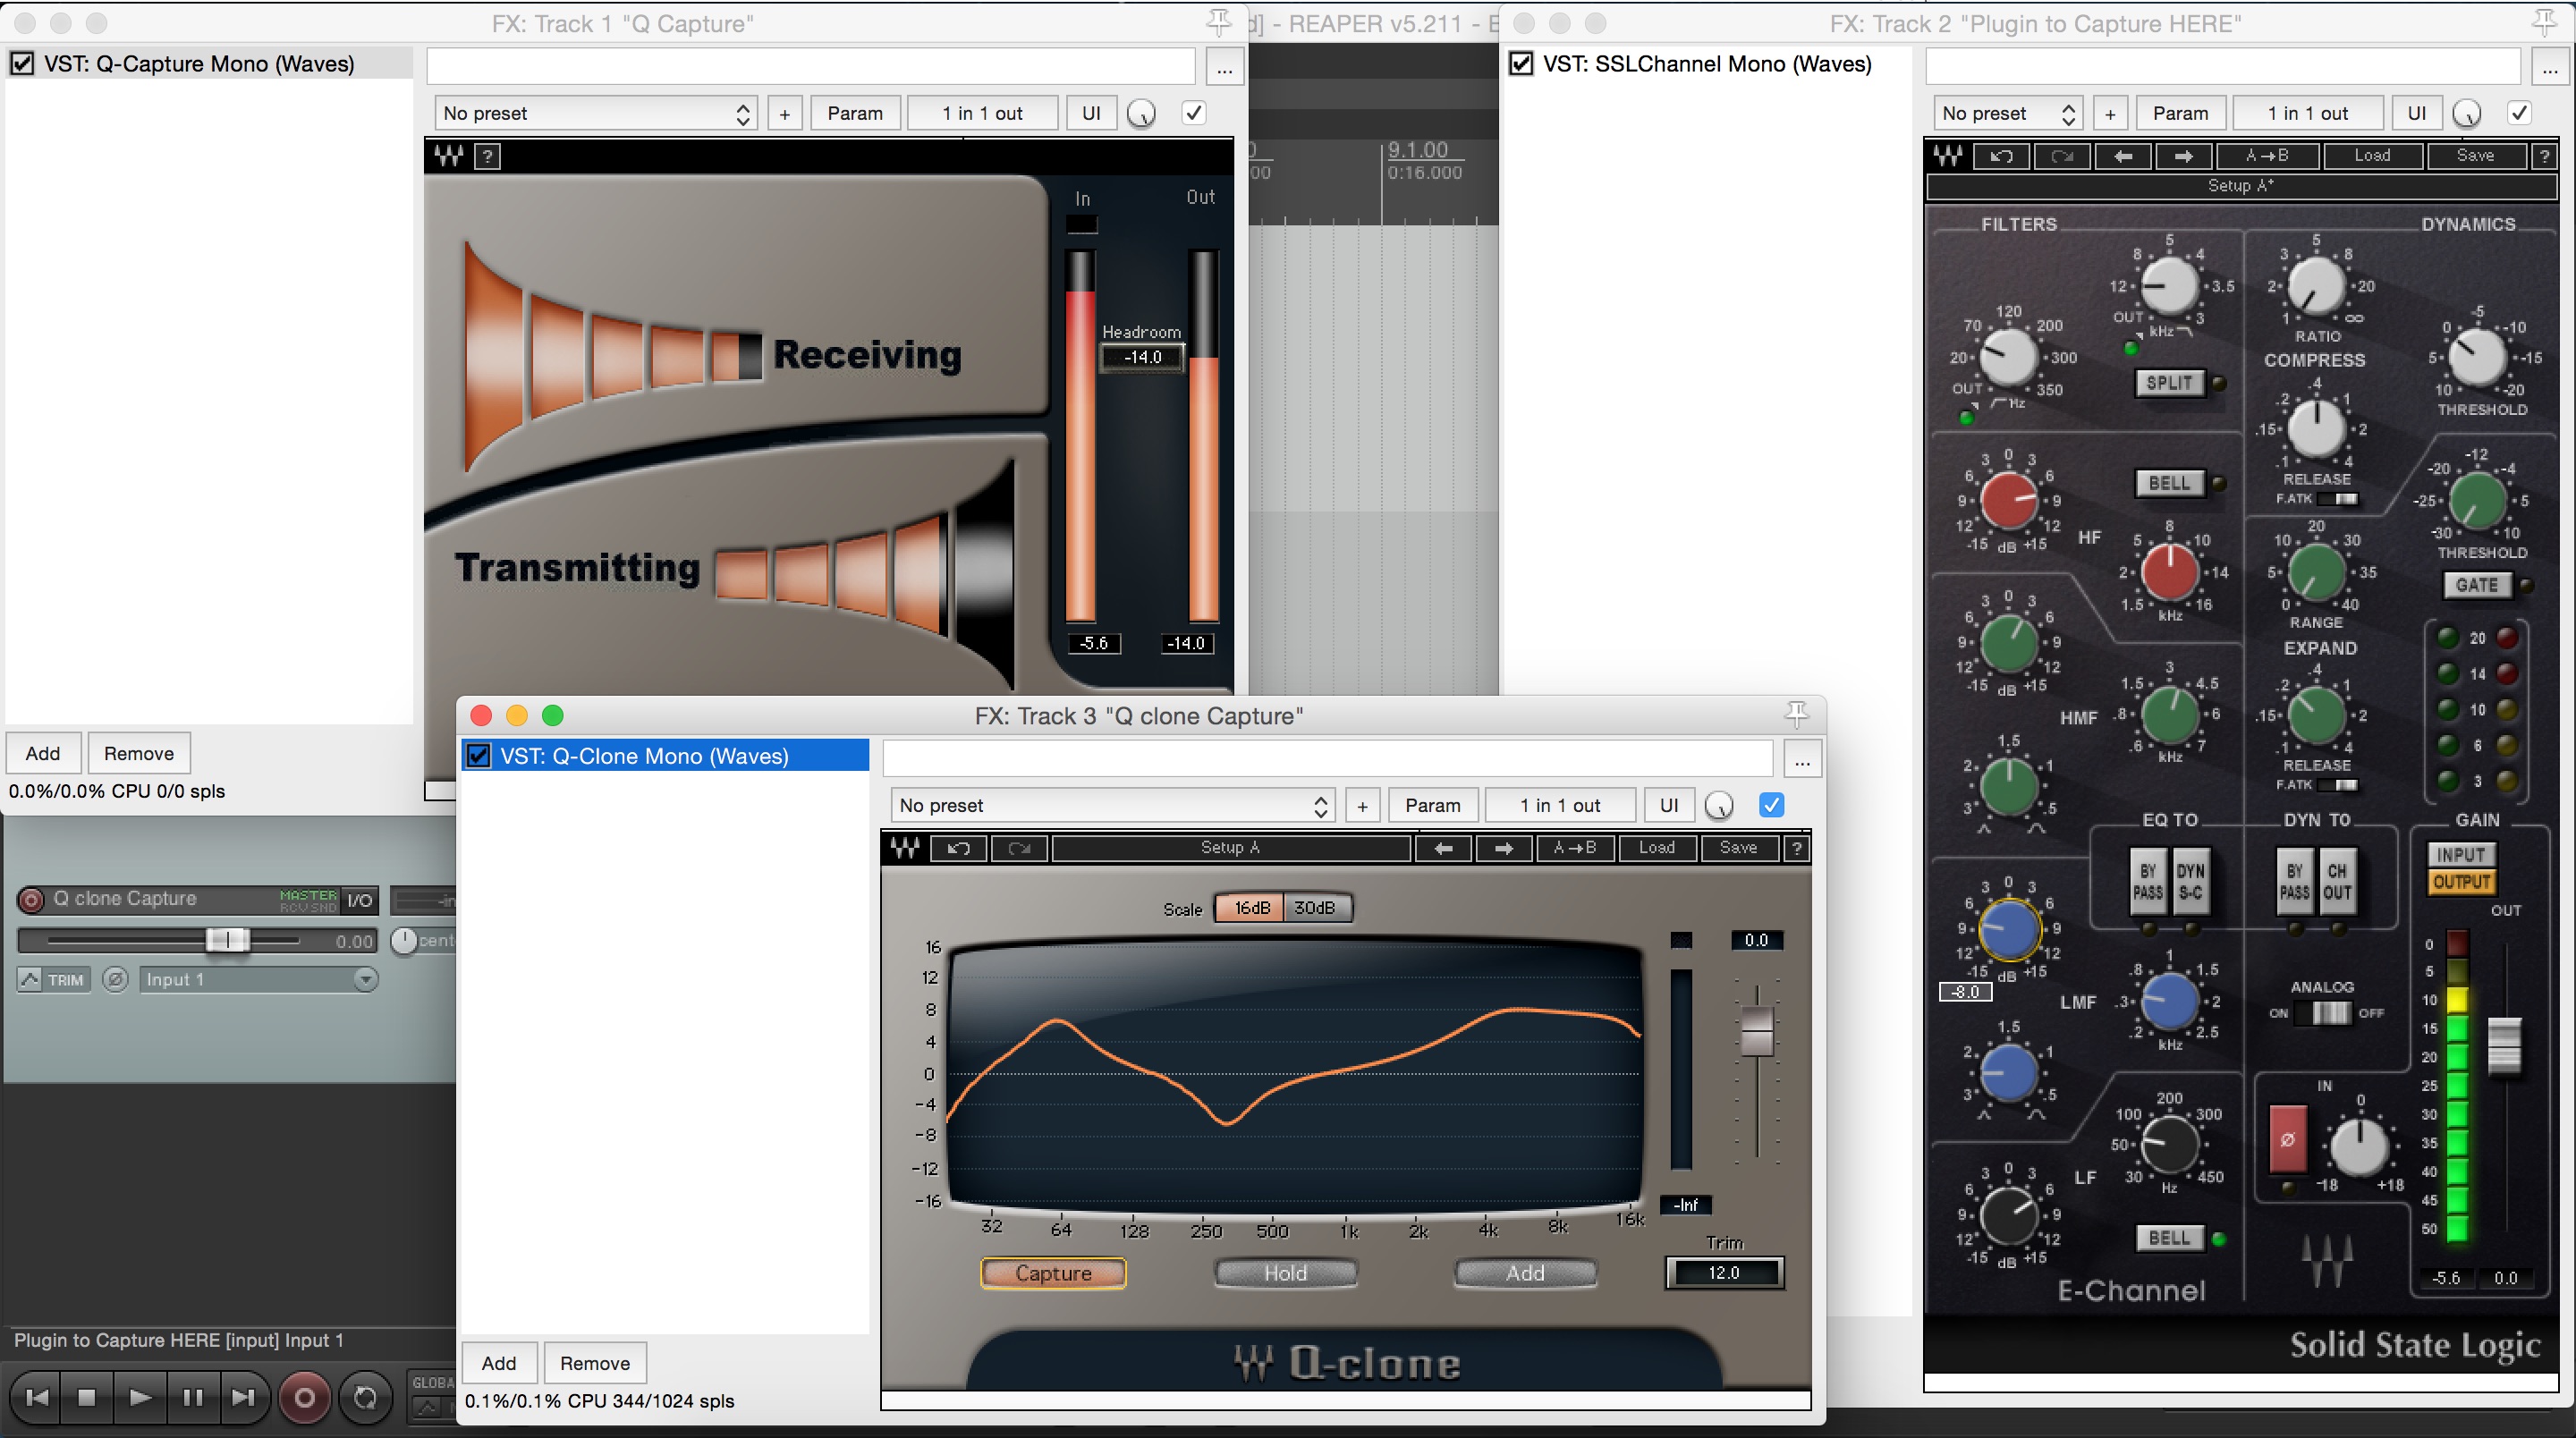
This is a fairly unique and interesting plugin which I use on a daily basis for various audio tests and analytical purposes. It isn’t an EQ-matching plugin or spectral analyser as such, but rather a sine-sweep generating convolution plugin which creates real-time impulse responses of the gear it’s being fed through.
Why Is This Useful?
Q-Clone was originally designed as a means of accurately capturing and reproducing the filter curves of expensive analog gear and giving engineers the option to use these curves across multiple tracks simultaneously. This was probably a great selling point when the plugin was initially released, but with the advent of excellent analog-modeled digital EQ’s being so widespread nowadays, this purpose seems a bit obsolete…
Obsolete? Then Why Are You Telling Us About It?
Despite the fact that Q-Clone may have outlived its’ original purpose, another extremely valuable use for this plugin is as a measurement device:
NOTE: I won’t attempt to explain how to set up and operate Q-Clone in this Blog, as it’s fairly complicated and will vary greatly depending on the DAW you’re using. The plugin manual is probably the first place you should look if you’re having any trouble getting it up and running, but I’m sure there are also some great in-depth tutorials available online.
Here are a few example Analytical uses for Waves Q-Clone:
1 – To Learn More About The EQ Curves of Various Analog-Modeled Processors:
-
-
-
-
-
-
- Slate VTM 15 IPS 456 16-Track Frequency Curve Analysis:
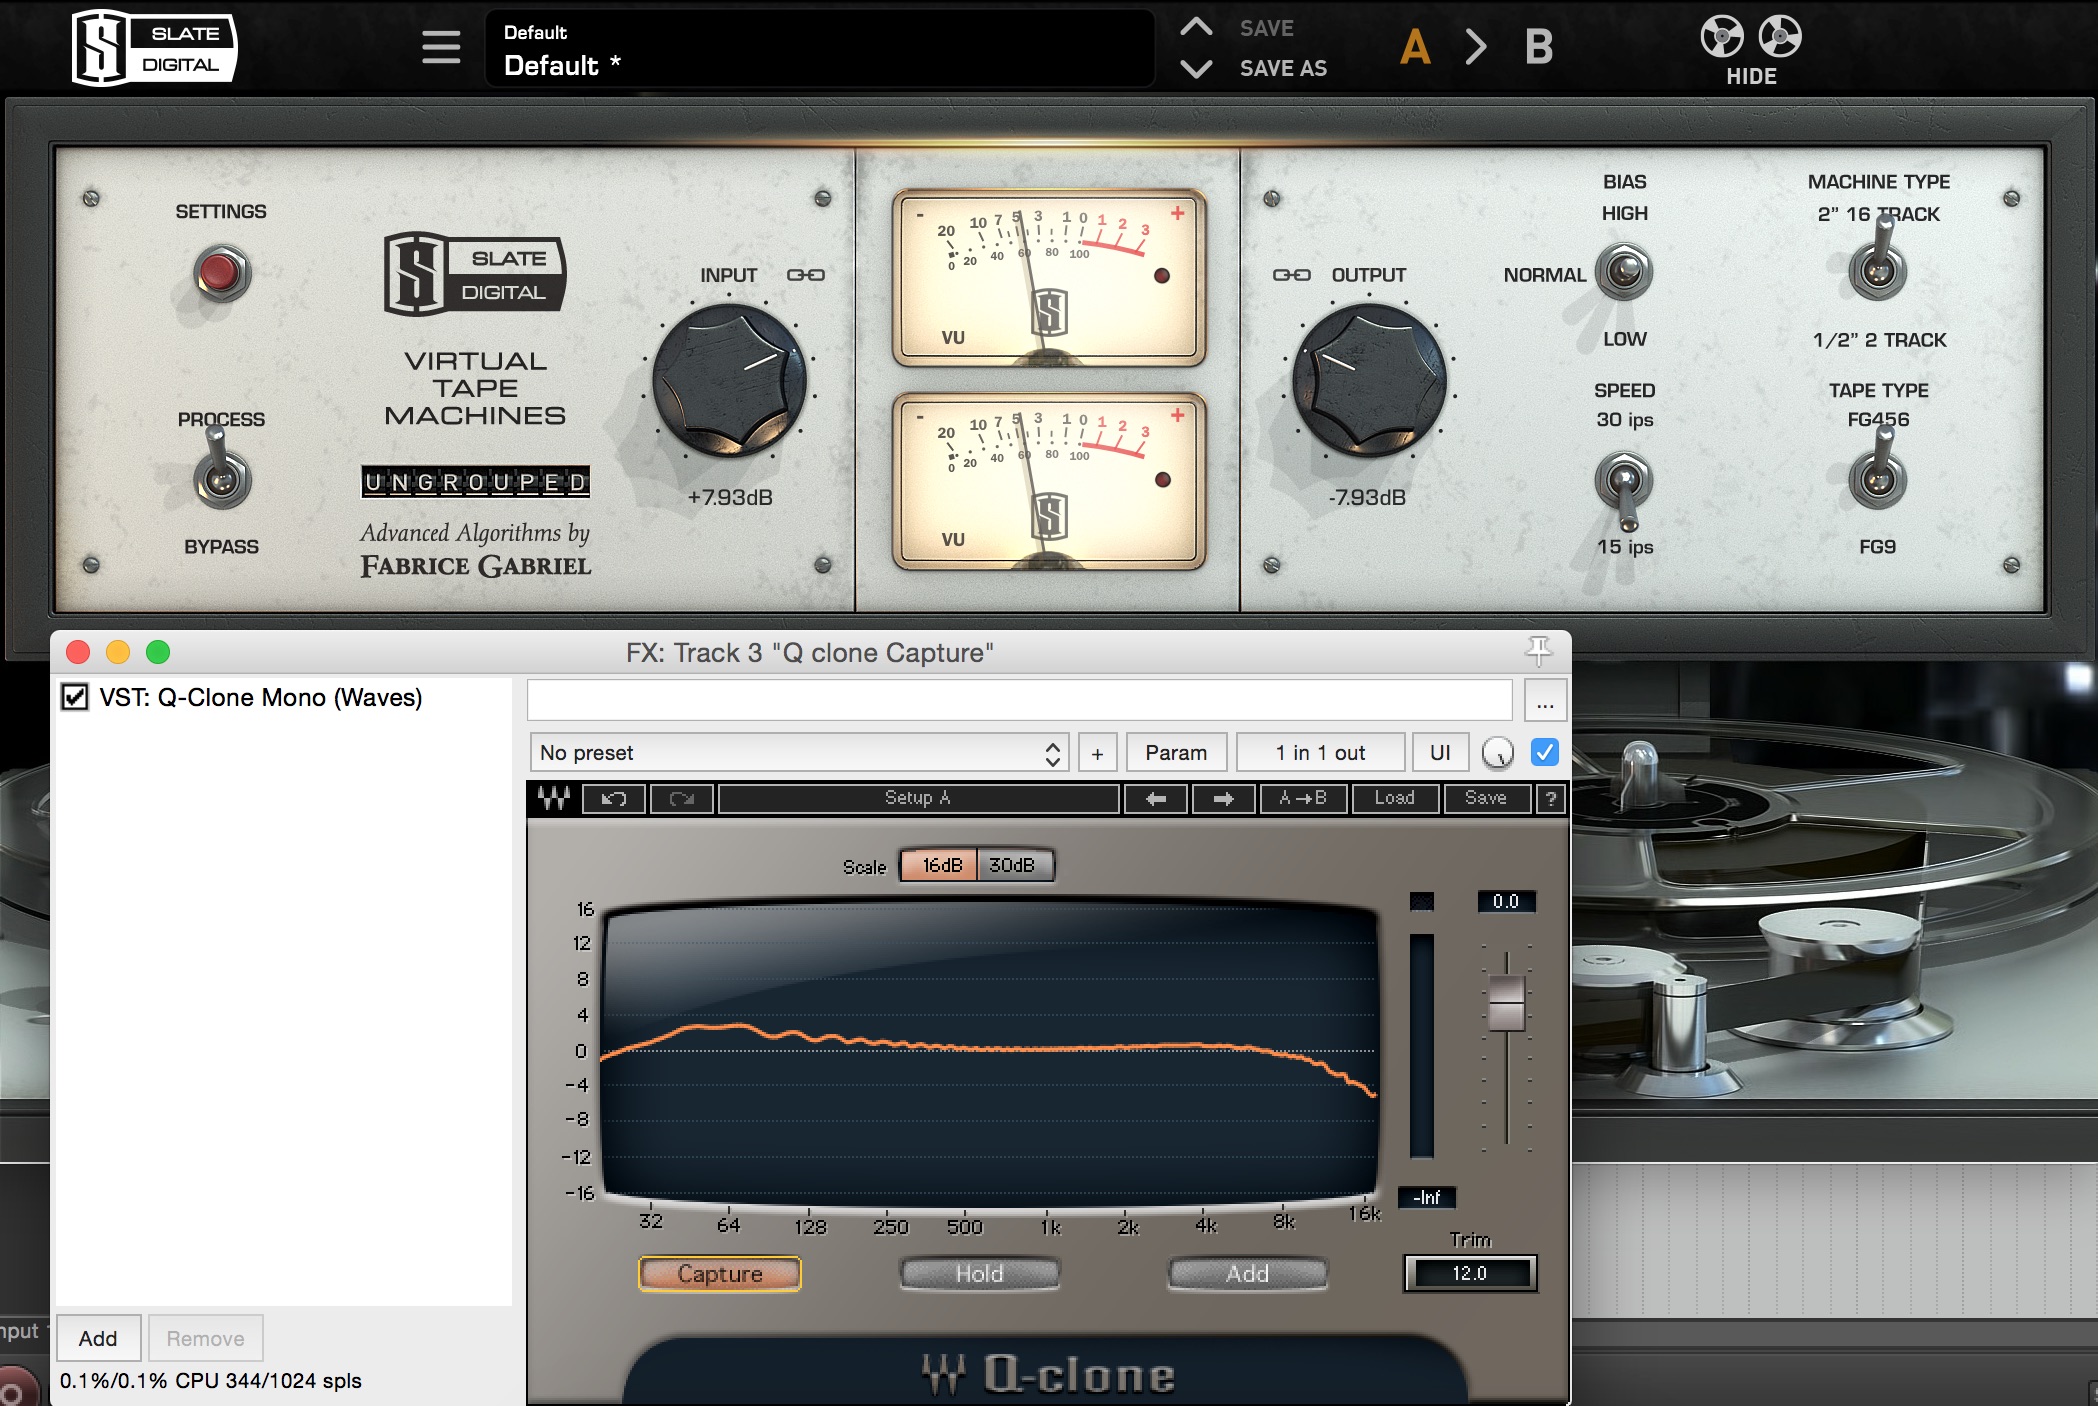
- Slate VTM 15 IPS 456 16-Track Frequency Curve Analysis:
-
-
-
-
-
Note: By using Waves Q-Clone I am able to go through the various tape-type and tape-speed settings available in VTM and gain a better understanding of how these settings are affecting my audio. Notice how the “vintage sounding” 15IPS 456 tape introduces a fair amount of low-end boost while also rolling off some of the high end.
Further examples of Waves Q-Clone in Action:
-
-
-
-
-
-
- Slate VCC Neve Console Analysis:
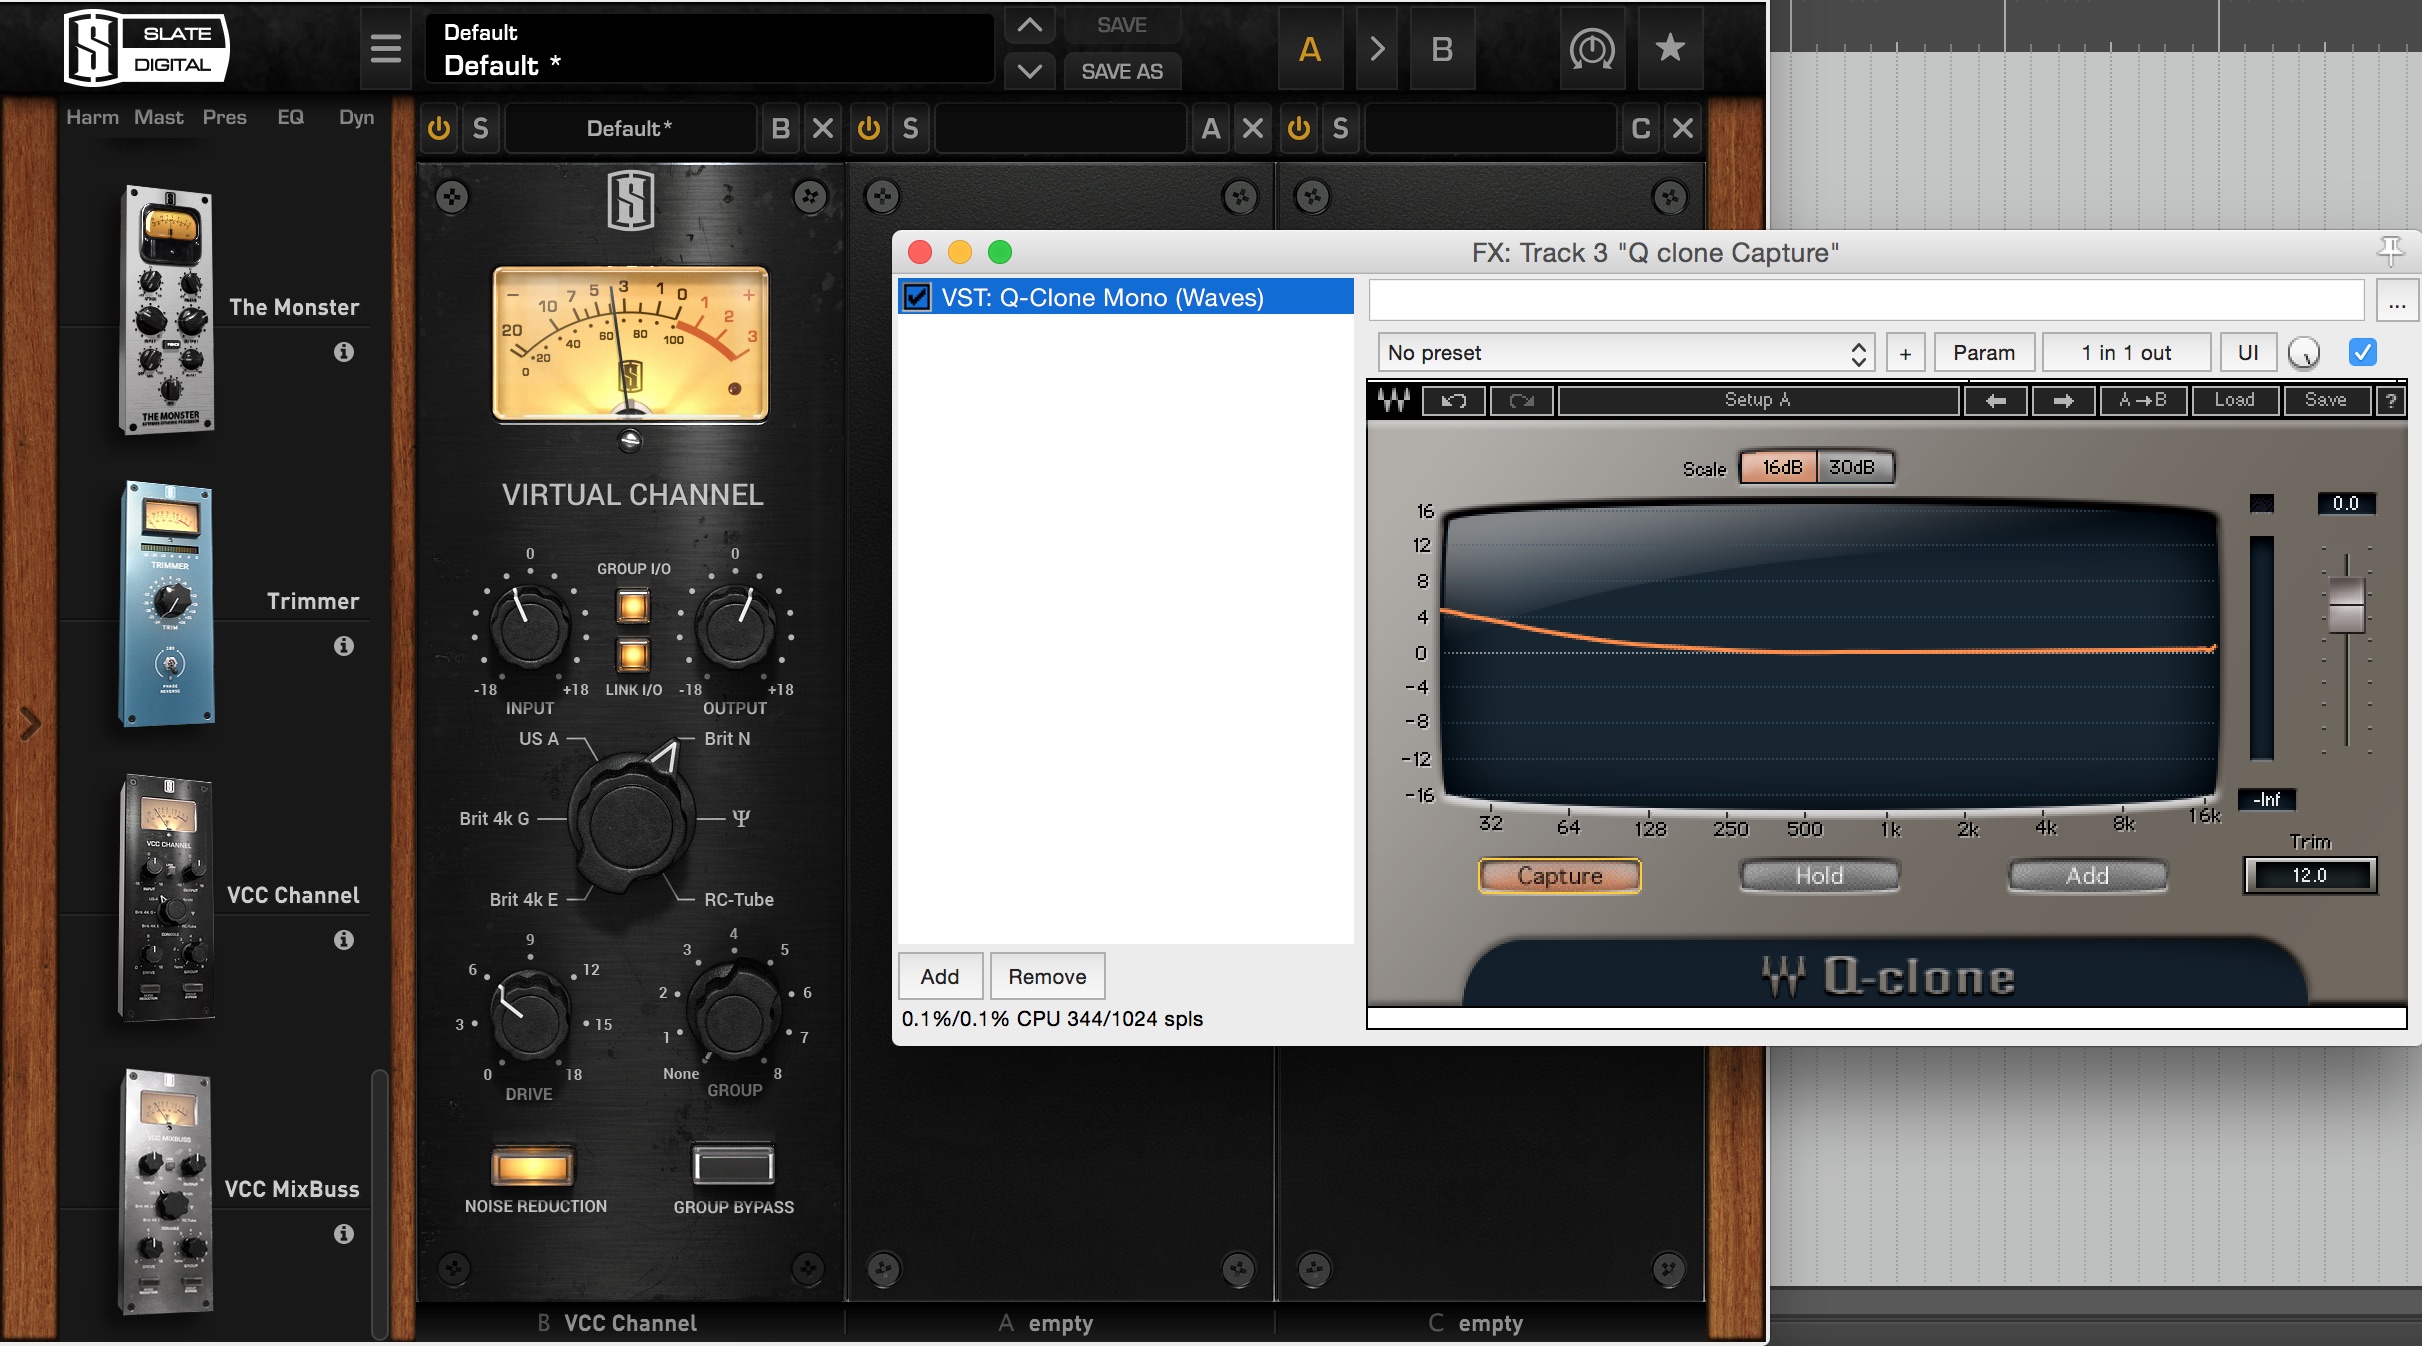
- Slate VCC Neve Console Analysis:
-
-
-
-
-
Note: On the Neve console setting, Slate VCC introduces a subtle low-end shelf which is part of the reason behind it’s classic “fat” neve sound.
-
-
-
-
-
-
- Waves PuigTec EQ Analysis:
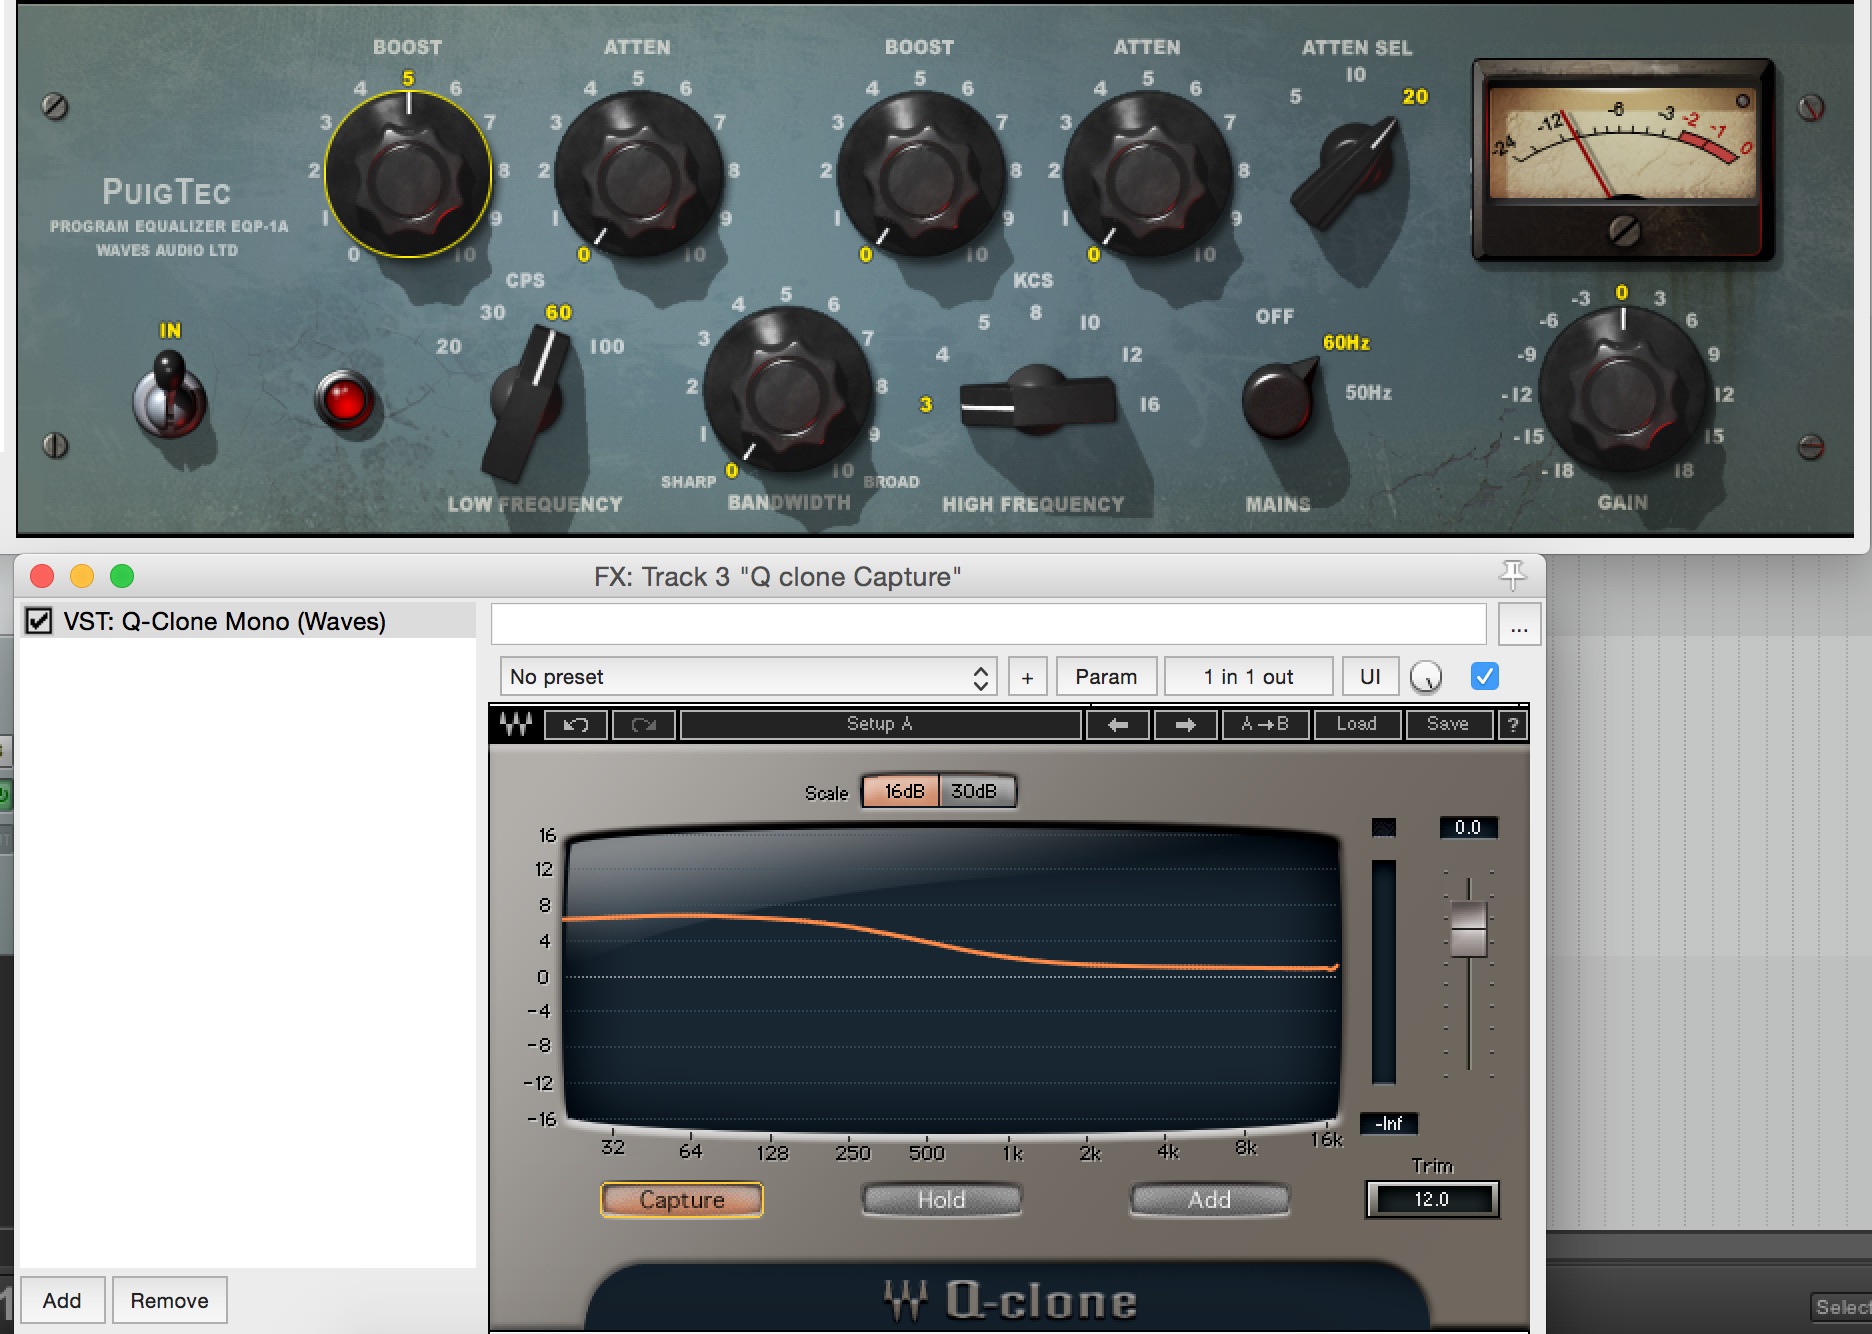
- Waves PuigTec EQ Analysis:
-
-
-
-
-
Note: Despite being set to 60Hz, the Puigtec’s low-shelf extends all the way up to 1kHz.
2 – To Discover The Secrets Behind Various “Magic Preset” Plugins:
NOTE: Before you start making fun of me: No, I wouldn’t usually use the plugins below while mixing… (Although, there’s no problem in doing so if you find a setting that sounds great!) These are simply for educational purposes!
-
-
-
-
-
-
- Waves CLA Drums “Kick” Analysis:
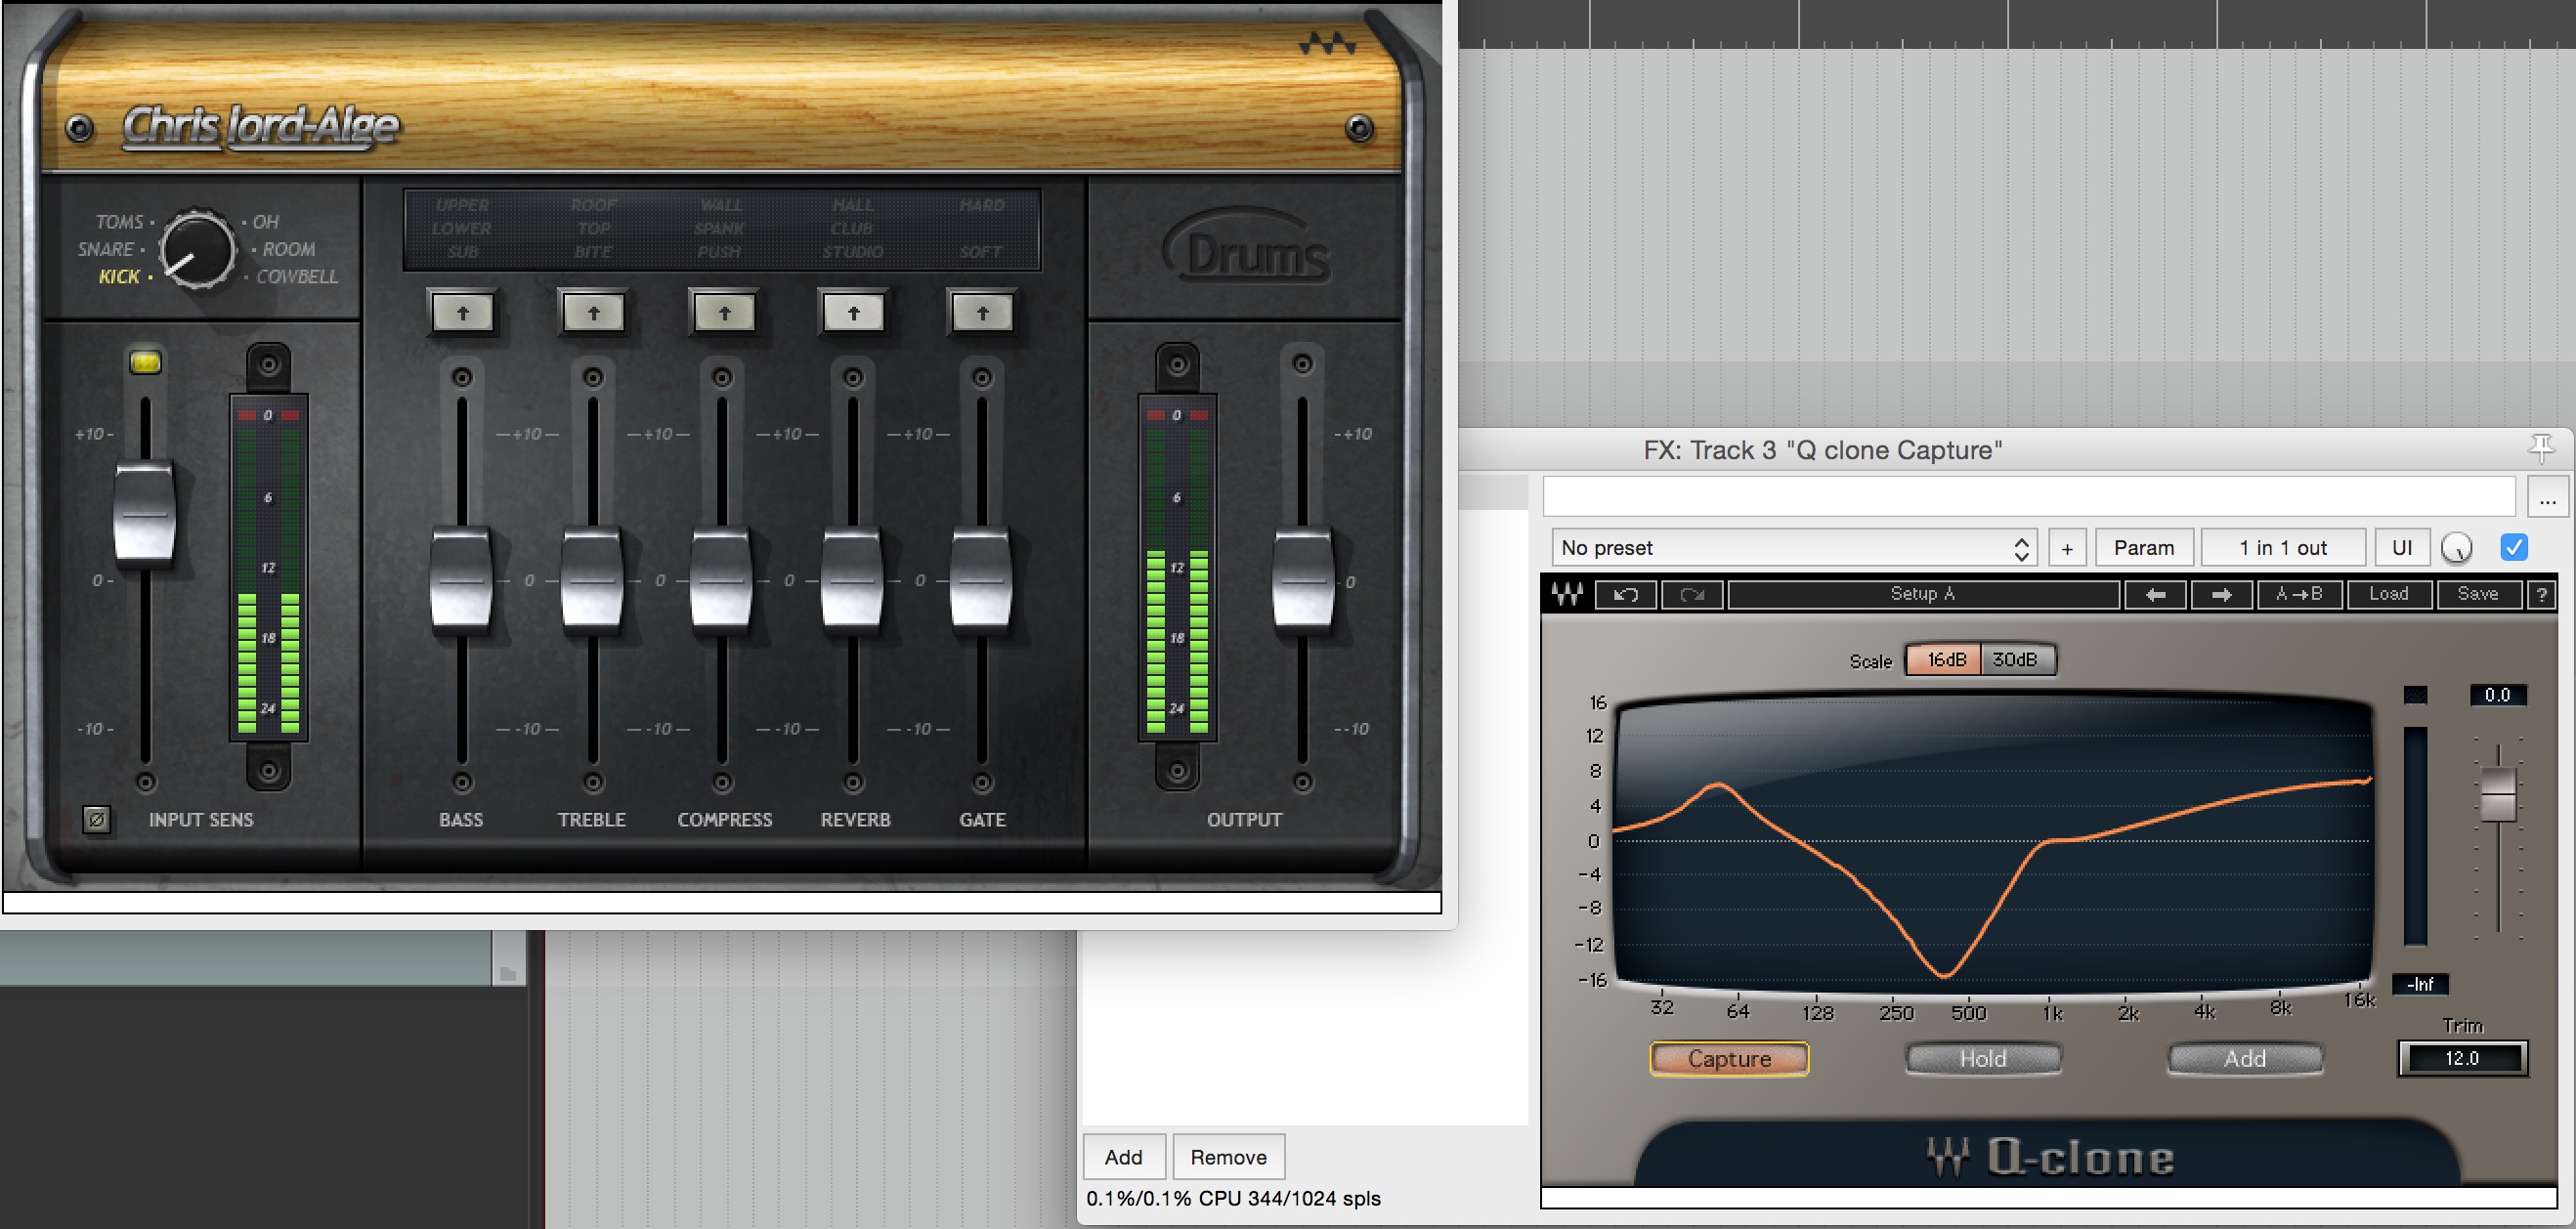
- Waves CLA Drums “Kick” Analysis:
-
-
-
-
-
Note: CLA clearly isn’t shy of scooping 15dB of mid-range on a kick drum…
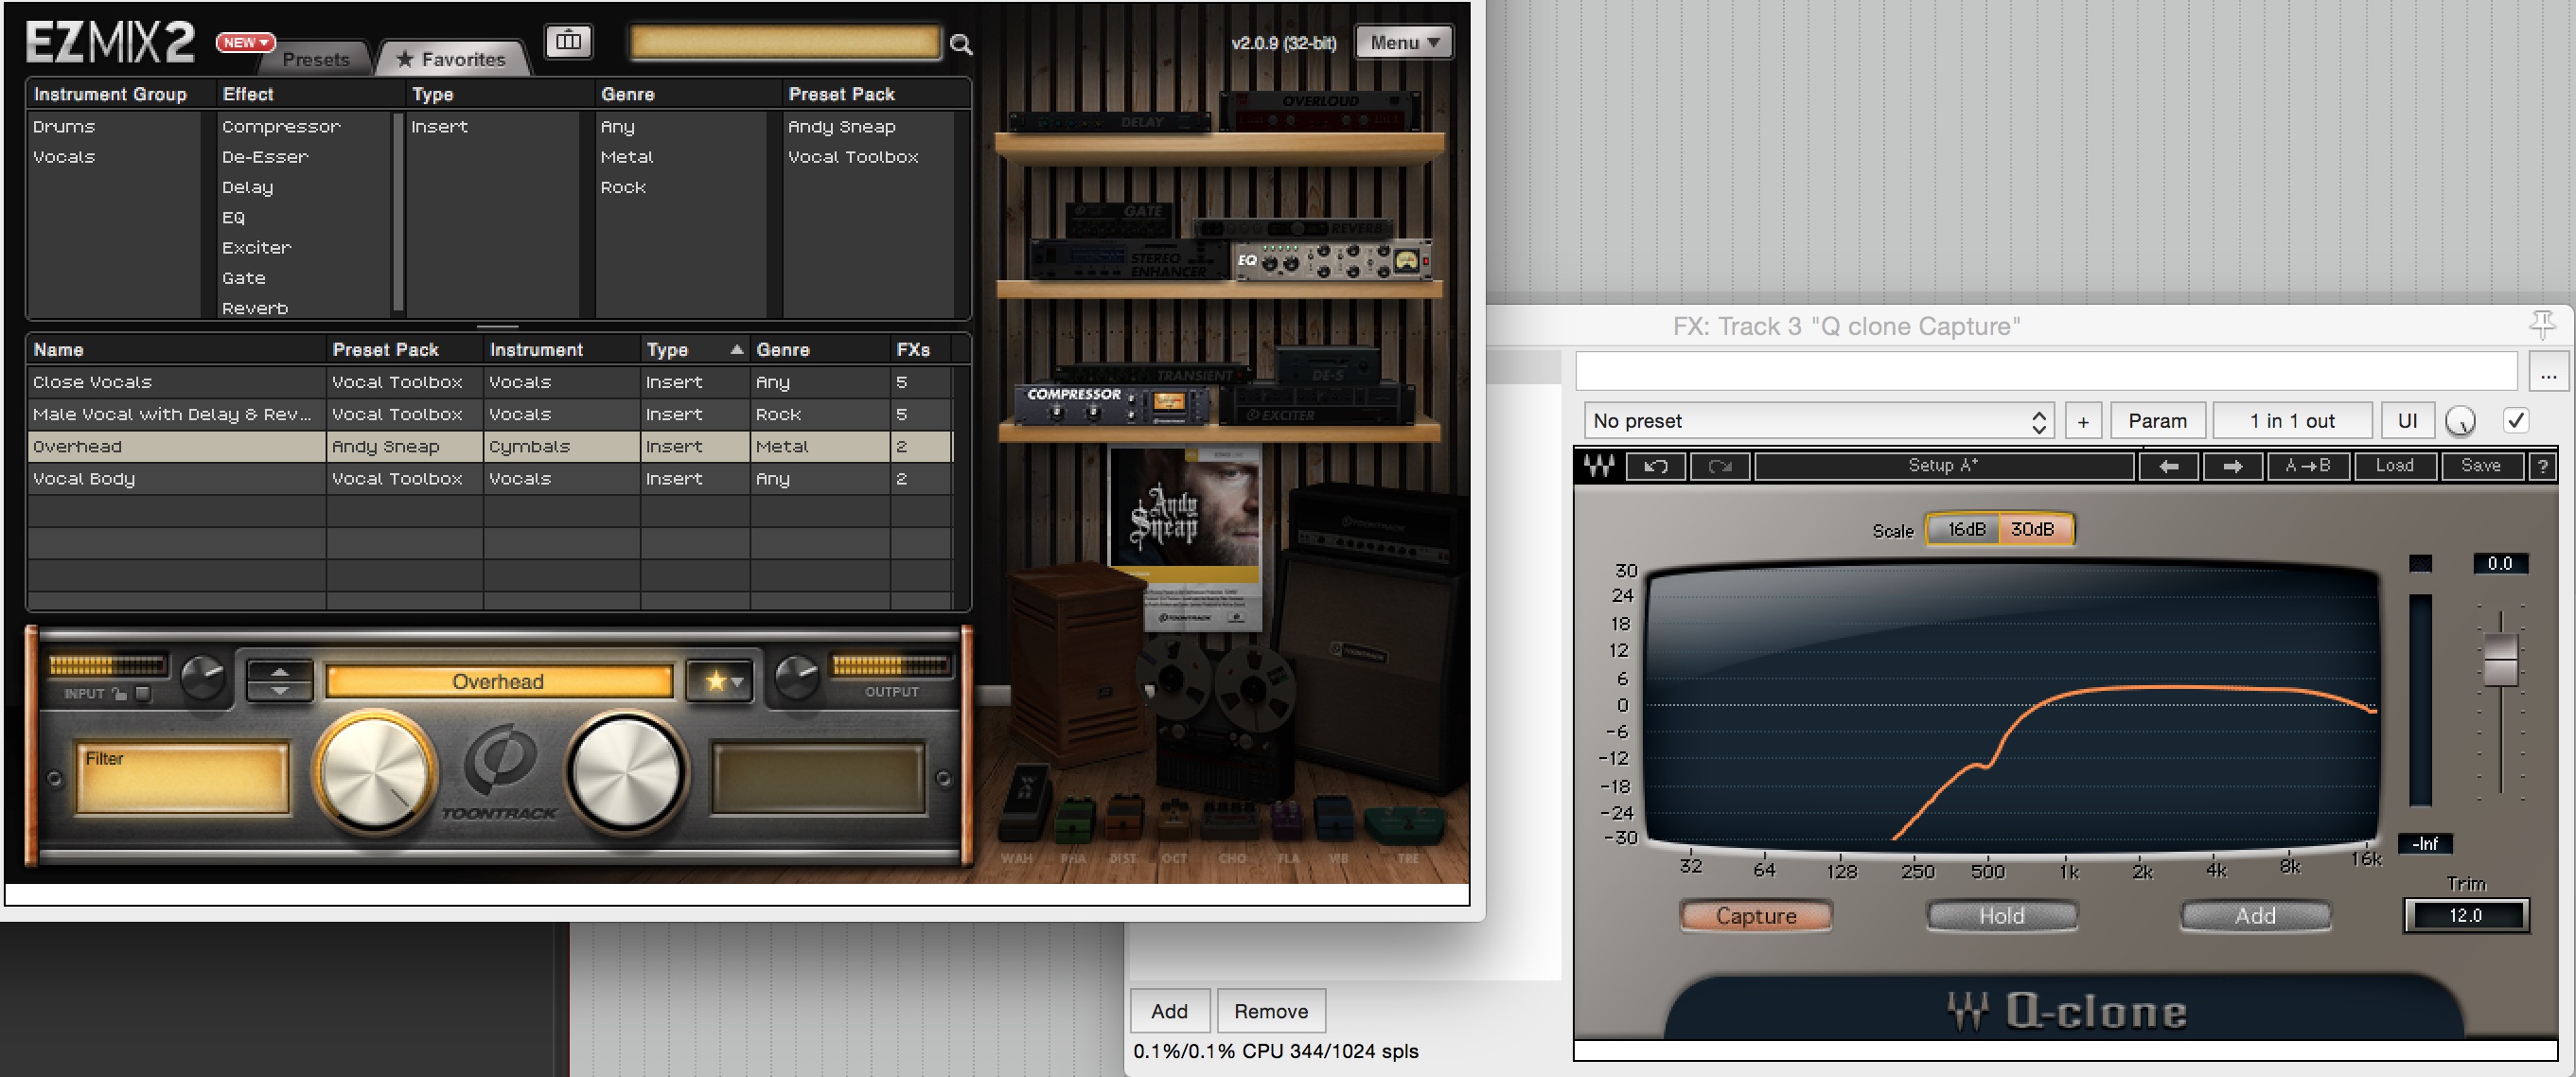
Note: A confirmation of the classic Andy Sneap “filter the overheads up to 500Hz” setting.
3 – To Analyse The Frequency Responses of Various Analog Gear:
In this case, I’m not talking exclusively about EQ’s. You can use Waves Q-Clone as tool for analysing and learning more about the frequency responses for pretty much any of the following pieces of gear:
-
-
-
-
-
-
- DI Boxes
-
- Audio Interfaces
-
- Outboard Preamps
-
- Headphone Amplifiers
-
- FX Pedals
-
- Etc…
-
-
-
-
-
Conclusion:
The simple fact about the music production business is that THERE IS NO SUBSTITUTE FOR HARD WORK. Analysis and comparison both play a huge part in the growth of an audio engineer, so unless you’re willing to put in the hours learning your gear and honing your craft, you can’t expect to turn out like Joey Sturgis, Eyal Levi or Joel Wanasek…
FINAL WORDS:
This concludes Part 2 of my “Analysis As a Learning Tool ” series of Blogs. I hope that this article has given you some new ideas to try out in your next project. Be sure to comment below if any of this information has helped you out, or if you have any questions.
Stay tuned for more production/mixing related articles in the not-so-distant future!
Want mix tips from URM Academy? Read them here!
 Nail The Mix is our online mixing school that gives you REAL multi-tracks from REAL bands, plus a mixing class from the producer who recorded it. Past guests include Periphery, Chelsea Grin, Machine Head and State Champs. Join now for instant access!
