
5 Desert Island Plugins – Learn To Do More With Less
urmadmin
Introduction:
Choosing which plugins to buy when you’re first starting out can be a bit overwhelming. There are thousands to choose from, and it’s easy to get sucked into a never-ending vortex of wanting to buy/try all of the “latest-and-greatest” plugins as soon as they come out.
The problem is, once you start gaining some further experience in audio, you begin to realise that you can actually get great results with pretty much any tool, and that the hundreds of fairly similar plugins you’ve impulse-bought over the years are just sitting in a long list, gathering dust…
Throughout my career, I’ve managed to streamline my plugin choices to the point that I’m only using what’s actually necessary and best for the success of my mixes.
Based on experience, If I had to get rid of all but 5 of my plugins today, Here are the ones I’d keep to cover all of my basic mixing needs:
1 – Waves SSL E-Channel (Broad EQ, Compression, Gating)
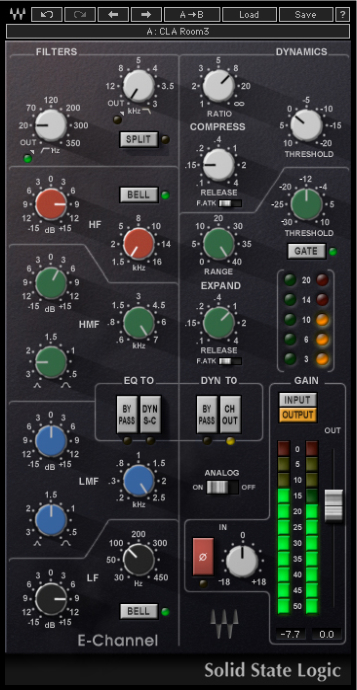
Why SSL-E?
A – Broad & Musical EQ: SSL EQ’s are some of the most beloved in the industry, and have been used as a processing workhorse on thousands of incredible-sounding, chart-topping albums.
- The fact that you’re not staring at a fancy graphics interface while EQ-ing on an SSL means that you’re more likely to use your ears and eliminates any decisions based purely on what you’re seeing .
- Being limited to 4 bands of equalisation helps prevent you from overdoing things, while simultaneously teaching you to work in broad and musical strokes that actually make a noticeable difference.
- There’s a lot to learn from analysing the built-in Chris Lord-Alge presets. Although I wouldn’t recommend using them blindly, seeing which frequencies he prefers to boost/cut and how drastically he likes to tweak them can be a real eye-opener.
- The SSL’s high and low-pass filters are set respectively at 18dB/12dB per-octave slopes, and prevent any unnecessary messing about with filter settings.
B – Classic Compressor: SSL compressors are well known for their punchy and aggressive sound. The fact that you can adjust your compression, EQ and gate settings all within the same single-window user interface makes this plugin incredibly direct and workflow-friendly.
- The controls on a compressor are some of the most difficult things for an audio newcomer to get their head around. Unlike most compressors, the SSL E-Channel compressor doesn’t have a variable attack knob, but instead, comes with 2 classic go-to settings that each have their own distinct sound.
- For general compression, you can’t go wrong with the classic slow-attack, fast-release, 4:1 ratio settings. Simply turn the threshold knob to taste and witness the smoothed-out, punchy goodness!
- The SSL-E compressor also works well as a leveling limiter with the ratio cranked all the way up and the fast-attack switch engaged.
C – Easy-To-Use Gate: A lot of gate plugins come with a convoluted amount of controls and overly-fancy graphics interfaces. The SSL’s gate/expander section is super-simple to use, and does a great job of eliminating any unwanted bleed.
- You can easily switch between drastic gating or more-subtle expansion settings with the single click of a button, making it easy to experiment with different settings in a time-efficient manner.
- Similarly to the compressor, there’s a simple 2-way switch for selecting your gate attack-time quickly and moving on.
SSL E-Channel – Conclusion: Mixing legends such as Chris Lord-Alge, Andy Wallace and Randy Staub have been mixing multi-platinum hits on SSL consoles for decades. If it’s good enough for them, it’s good enough for me.
2 – Soundtoys Decapitator (Saturation, Distortion, Creative FX)
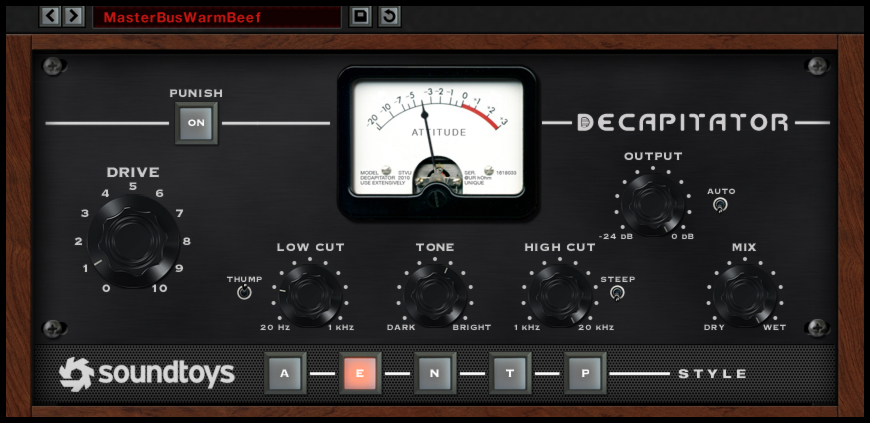
Why Decapitator?
A – Multiple “Colours” To Choose From: One of the primary reasons decapitator is my go-to saturation plugin is the fact that it’s extremely versatile.
- Each of the “style” buttons at the bottom of the user interface represent a different piece of classic analog hardware, including gear from Neve, Ampex, Thermionic Culture and EMI/Chandler LTD, and each offer a unique & musical sonic character.
- The fact that you can switch between multiple saturation circuits with a few simple mouse clicks really allows you to hear the clear tonal differences between them and choose the right one to fit your particular sounds.
B – Great Built-In Tone-Shaping: Decapitator has an excellent built-in EQ section which allows you to shape your pre & post-distortion signals to sound exactly as desired without having to rely on additional processing from elsewhere.
- The tone knob allows you to dial-in how the plugin will favour the frequency content of your raw signal, and is a quick & easy way of brightening your signal to cut through nicely in a dense mix.
- The low-cut control built-into Decapitator is Pre-Saturation, meaning that you can control the low-end of your signal before it hits the distortion circuit in order to prevent any unpleasant “distorted low-end farting”.
- The high-cut control is post-distortion and allows you to roll-off any sharp & spitty high-end that was brought up during the signal “warming” process.
C – Blend It: The built-in mix knob allows you to blend your processed signal in underneath your original without having to balance multiple faders or mess with additional routing.
- One of the annoying things about working in a DAW vs. working on an Analog mixing desk is the fact that you can’t balance multiple faders simultaneously to find the correct blend. Having a built-in Mix knob solves this issue, and allows you to find the perfect blend between dry/wet with the single move of a mouse.
Decapitator – Conclusion: Saturation is one of the key ingredients to an analog-esque, vibey mix which is full of life and attitude. Decapitator delivers everything we’ve come to love and expect from pushing great analog gear hard, and allows you to take it one step further with an excellent EQ section.
3 – Valhalla VintageVerb (Reverb, Modulation, Creative FX)
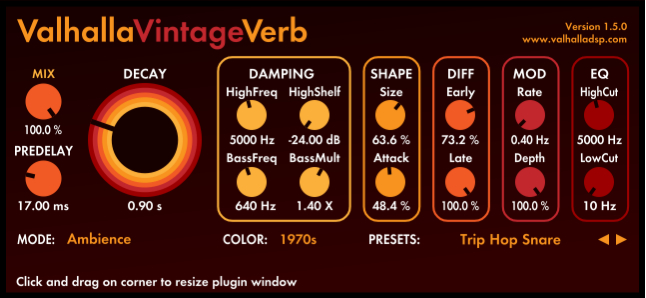
Why Valhalla?
A – Create The Perfect Space: Valhalla VintageVerb comes with a great selection of reverb algorithms which include everything you could ever need for adding some ambient depth and realism to your tracks.
- Each reverb mode comes in 3 “colours” including “1970’s”, “1980’s” and “now”, allowing you to simulate the distinct characteristics of classic reverb units throughout the course of music history. Depending on what you’re going for, simply switching between these settings can help get you really close to the exact sound you’re after!
- By tweaking the shape and diffusion sections, you can create pretty much any acoustic space you put your mind to, and in the process, transform your mixes into an immersive sonic experience.
- The built-in Damping & EQ sections allow you to tweak your resulting reverb even further in order to help it slot into a dense mix without taking up too much space.
B – Modulation: The included modulation (chorus) section is great for adding some extra movement and width to reverb tails, and can result in beautiful & lush soundscape effects.
VintageVerb – Conclusion: There are a huge amount of great reverb plugins available nowadays. Although a lot of the impulse-response-based options sound great, they’re generally fairly limited as to how much you can tweak them. VintageVerb solves this problem for me, and allows me to create unique spaces to fit my own specifications.
4 – Soundtoys Echoboy (Delay, Lo-FI, Creative FX)
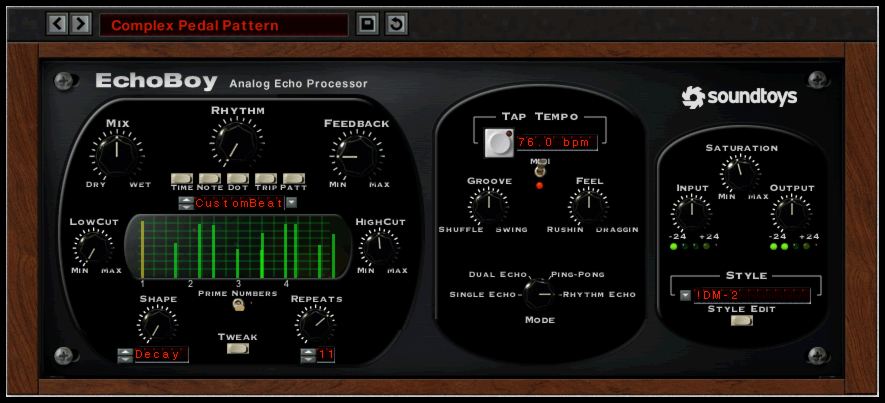
Why EchoBoy?
A – Tons Of Classic Sounds: Rather than being stuck with a single delay sound, Echoboy allows you to choose from a large selection of vintage gear emulations including legendary Tape, Tube, Stompbox and Rack units.
B – Built-In Filtering: The built in high & low-cut filters allow you easily reduce the bandwidth of your delay returns in order to prevent them from taking up too much frequency real-estate.
- Filtering out any unnecessary low-end “mud” and high-end “splatter” from your FX sends will go a long way towards reducing muddiness, while also helping them to cut through the mix via effectively channeling them into the mid-range.
- EchoBoy feeds back into itself after each repetition, meaning that each echo will continuously get a little more saturated and rolled off.
C – Saturation Section: EchoBoy’s built-in saturation section is great for adding some analog grit and “character” to your delay returns.
- Applying some subtle (or not-so-subtle) saturation/distortion to your delay FX can really help them stand-out against your raw signal allow them to be heard more clearly in the mix.
- Although “clean” delay FX are useful in certain circumstances, warming them up usually goes a long way towards giving them some pleasant analog character which can help maintain a listener’s interest.
D – Not Just For Echoes: Although Echoboy is primarily a delay plugin, it can also be used as an awesome Lo-Fi plugin. By simply setting the delay time and feedback controls to 0ms and tweaking the saturation section, you’re basically just imparting the unique analog characteristics of whichever emulation you’ve chosen onto the raw signal in real-time.
EchoBoy – Conclusion: When it comes to value for money, EchoBoy is extremely hard to beat. It just has everything you could ever ask for in a delay plugin, and more!
P.S. I once went without EchoBoy for a month when I lost my iLok, I can honestly say that it was one of the most depressing months of my mixing career!
5 – Fabfilter Pro-Q2 (Surgical EQ, Frequency Analyser, M/S Processing, Match EQ)
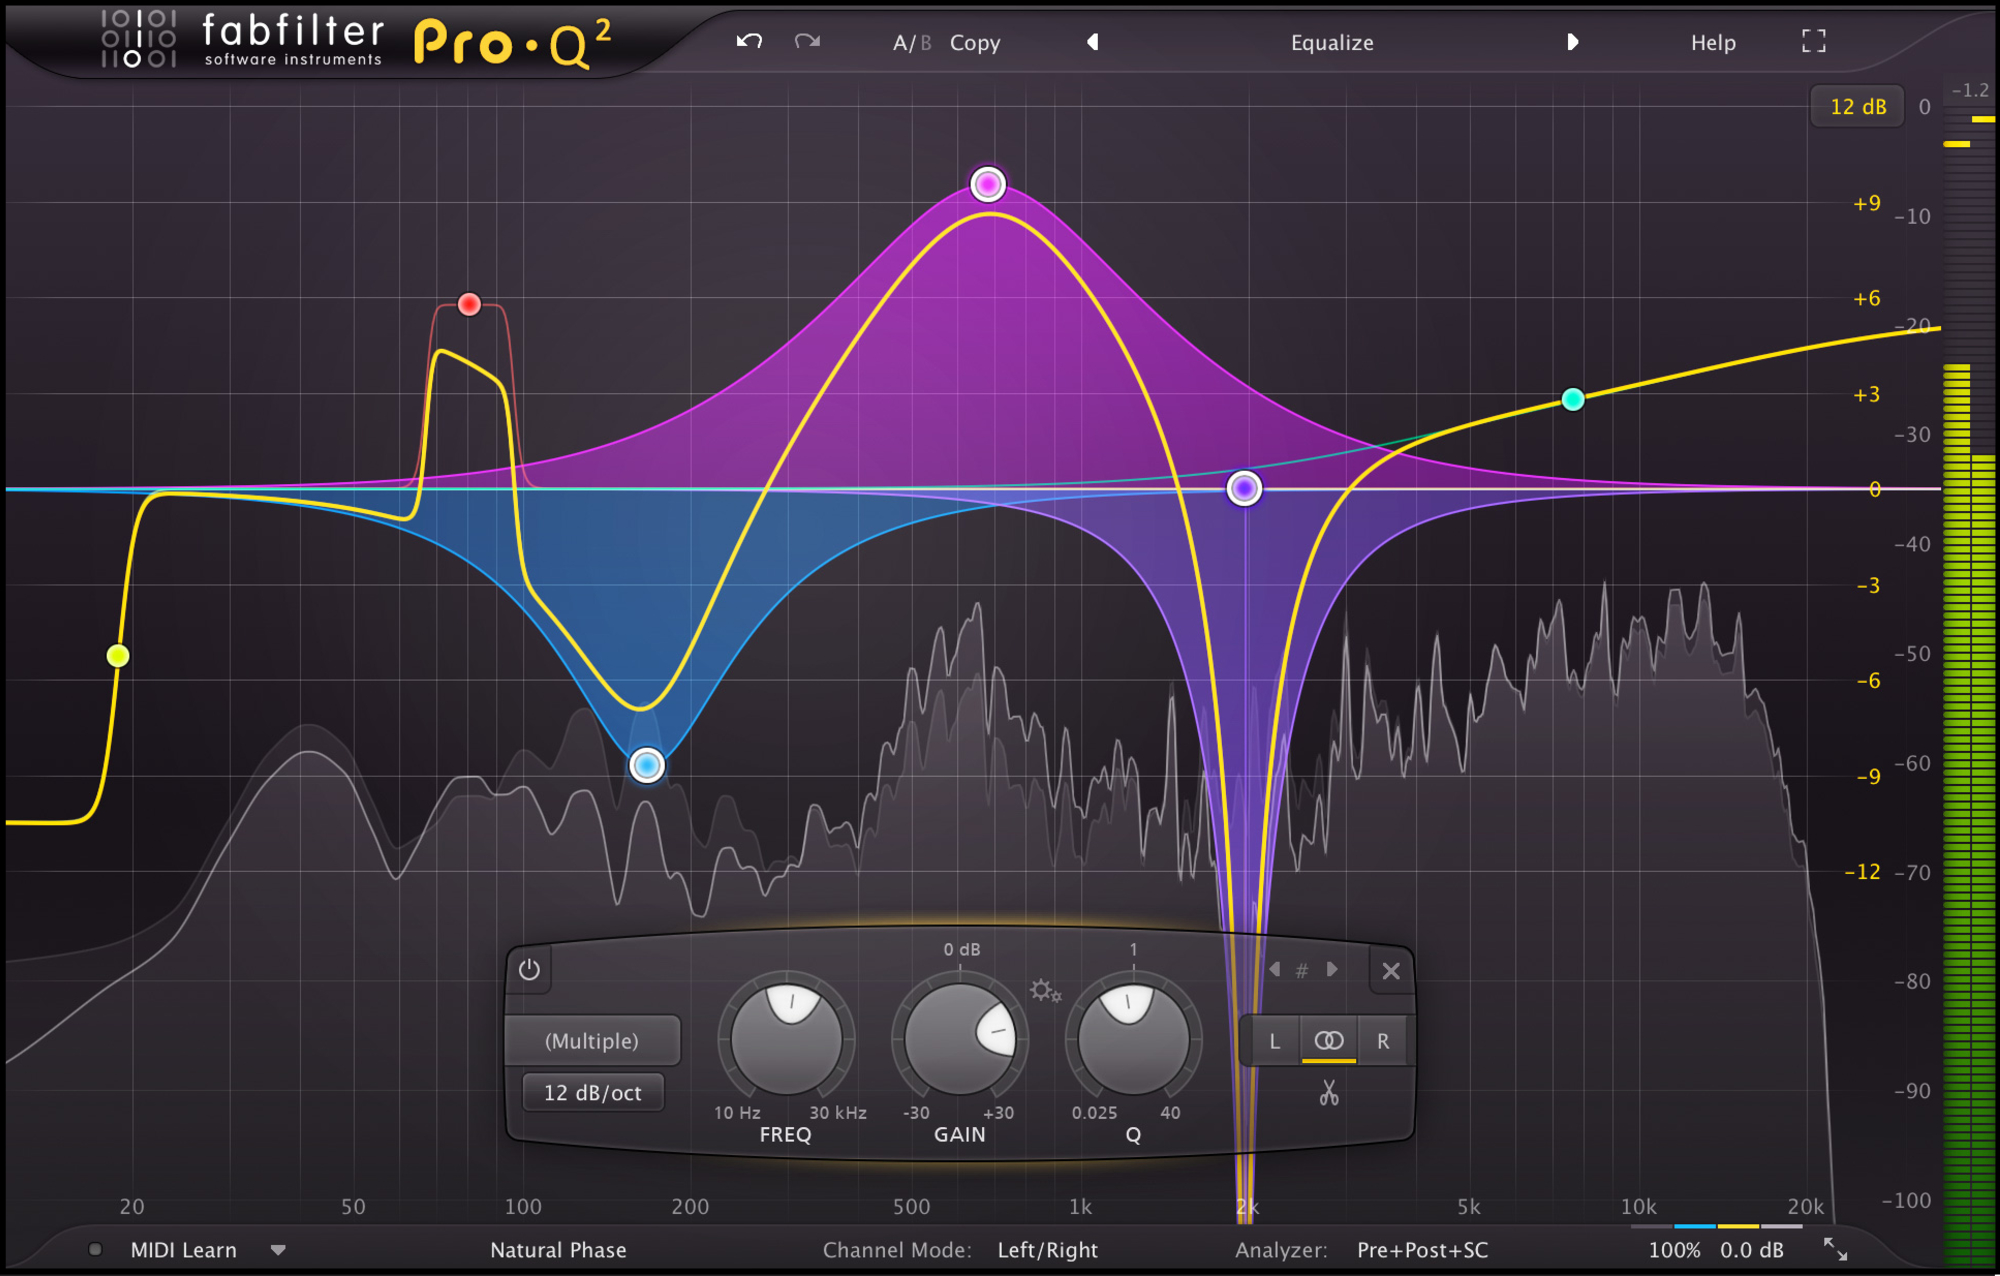
Why Pro-Q2?
A – Surgical Monster: Although Pro-Q2 is a great tool for pretty much any equalisation task, one area where it particularly shines is narrow “surgical” EQ.
- The built-in spectrum analyser is a hugely useful tool for pinpointing and eliminating problems as quickly as possible.
- The fact that you can solo each individual EQ band also makes it easier to isolate and hone-in on specific sounds, really helping you to speed up the diagnostics process.
B – Mid-Side: Each band of EQ you instantiate within Pro-Q can be assigned to stereo, mid, or side mode.
- Using Mid-Side EQ to affect the side channels of a signal without affecting the middle of the stereo spectrum is a great way of carving out some additional space from synthetic sounds such as Synths and FX returns.
- While in Mid-Side Mode, Pro-Q2 also allows you to balance the overall mid/side information of a stereo track with a simple % knob, making it easy to remove unwanted ambient information from 3rd party drum samples by simply turning down the information on the sides.
C – Side-Chain “Match EQ”: Pro-Q2’s side-chaining and match-eq capabilities make it a great tool for comparing, matching, and analysing multiple sources accurately.
- Although I rarely rely on match-eq curves in an actual mix, it can come in extremely handy when trying to confirm any tonal mismatch suspicions I may have to do with stereo-mic’d sources such as drum overheads or double-tracked instruments.
- Using Match-EQ to determine any major inconsistencies between L/R channels takes the guessing out of the equation, and helps give a clear idea of how to best correct the underlying issue.
NOTE: Pro-Q2 is also great for broad additive strokes and filtering, however I’m skipping over those features as I’ve already talked about them in the SSL-E section of this Blog.
Pro-Q2 – Conclusion: Fabfilter’s Pro-Q2 is undoubtedly my most used plugin of all time. You simply won’t find a better all-round EQ with as much bang-for-buck as this tool has to offer.
Overall Conclusion:
You don’t need to own a huge number of plugins to get a good mix! As long as you’ve got a single, high-quality tool for each purpose… And make the most of each tool by learning to use them effectively, you’re good to go!
The next time you see a plugin which you don’t own go on sale, take a step back and try to determine whether there’s another piece of gear which you’d be better off saving-up for instead.
SPEND YOUR MONEY WISELY!
Final Words:
This concludes “5 Desert Island Plugins – Learn To Do More With Less.” I hope that this article has given you some new ideas to try out during your next project. Be sure to comment below if any of this information has helped you out, or if you have any questions.
Stay tuned for more production/mixing related articles in the not-so-distant future!
Want mix tips from URM Academy? Read them here!
 Nail The Mix is our online mixing school that gives you REAL multi-tracks from REAL bands, plus a mixing class from the producer who recorded it. Past guests include Periphery, Chelsea Grin, Machine Head and State Champs. Join now for instant access!

