Mixing Secrets – Volume 5: Synths | By Thomas Brett |
Introduction to the series:
In this weekly series of Blogs I’ll attempt to take you through some of the most popular and effective audio processing techniques used in professional studios all over the world.
Each installment of this series will focus on a different instrument and provide you with links to relevant video examples of industry-leading engineers demonstrating these techniques.
This week, we’re exploring a weird and wonderful world that helps bridge the gap between heavy music and the mainstream: Synths
Here are some tips and tricks from the EDM world on how to make your Synths sound awesome:
1 – Channel Their Energy (Envelope Automation):
 A great way of limiting the amount of audio real-estate your synth sounds are taking up in the mix is through the use of tactical volume automation.
The Problem?
When it comes to rock and metal production, synths are generally used in a supporting role rather than as a main attraction. In these cases, a key part to making them fit well with the numerous other elements within the mix is to make sure they aren’t taking up too much space at any given moment.
NOTE: The most common way to resolve this kind of clashing is through the use of Side-Chain Compression, which I won’t be talking about in this Blog as I’ve already discussed it thoroughly in previous Articles.
– Check out my “20 Simple Mix Tricks” Blog from a few months back for an in-depth explanation of side-chaining and a few practical examples:
https://urm.academy/20-simple-mix-tricks-part-1/
Although side-chain compression is probably the most commonly used technique to resolve this issue, my personal preference is to use Volume Envelope Automation:
Manual Volume Envelopes:
The most obvious way of doing this is via manually writing in volume envelopes in order to help reduce any clashing/masking that may be occurring between instruments:
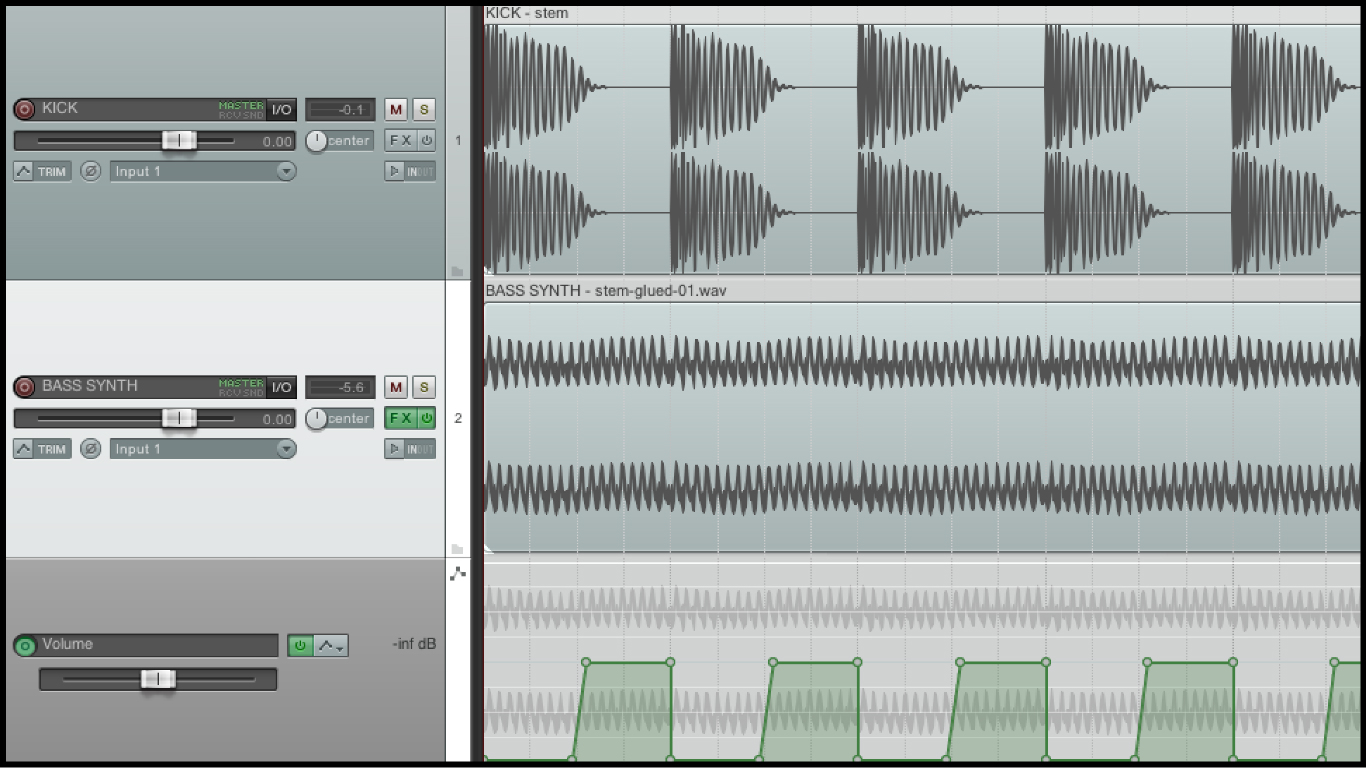
In the example above, I’ve applied a manually written volume envelope onto a Synth-Bass in order to duck its overall level every time the kick drum is playing. This produces similar results to the classic “side-chain the kick to the bass” technique, but allows for further customisation and enhanced curve manipulation.
Although manually writing in exact automation curves is technically the most accurate way of weaving your synth sounds around the other elements in the mix, it’s also the most time-consuming… Cue “Kickstart”:
Automated Volume Envelopes – Nicky Romero’s “Kickstart”:
With “Kickstart”, Chart-topping EDM Producer Nicky Romero designed a plugin that aims to simplify this process in an intuitive way:
https://www.youtube.com/watch?v=g3XpTKpUem4
By providing the user with a great selection of tempo-synced volume envelopes to experiment with. Kickstart helps slim down the side-chaining process down to just a few clicks of a mouse button.
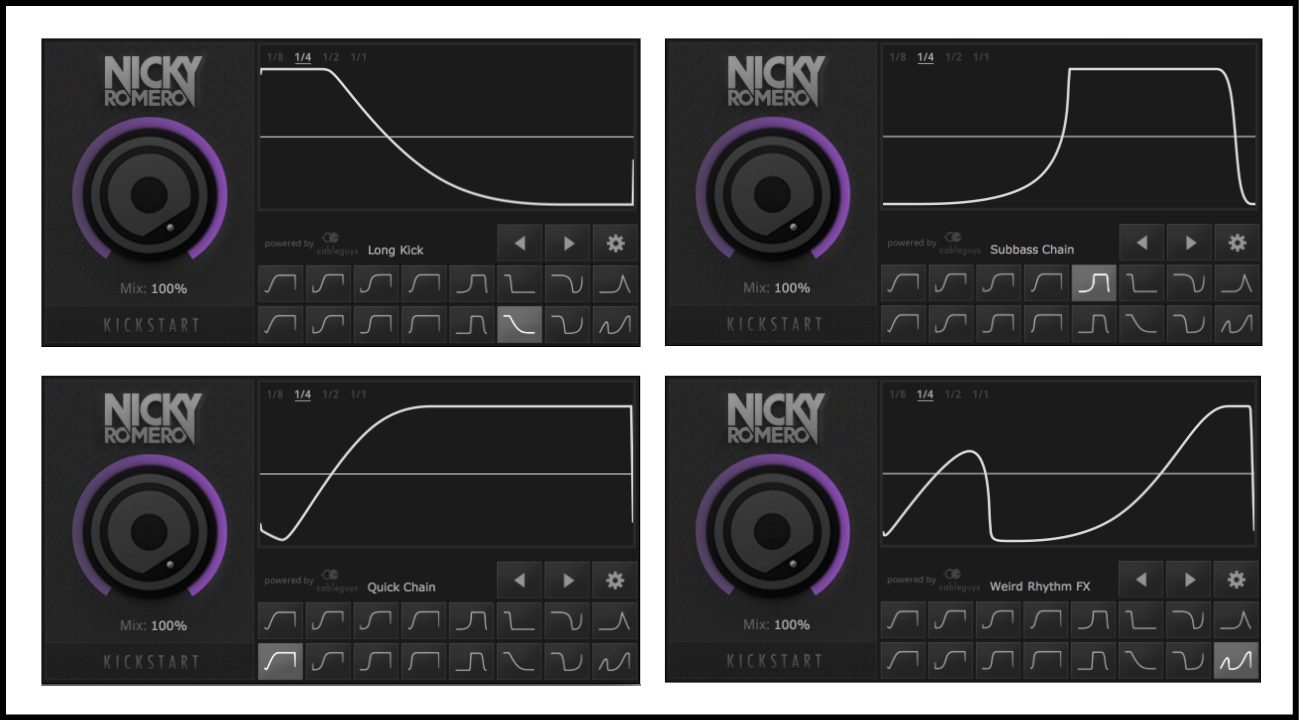 A few examples of the volume envelopes Kickstart has to offer.
How Do I Use It?
It’s super-simple: Insert the plugin on your Synth channel, choose the envelope and note value that work best for the specific part and you’re good to go!
DJ/Producer Nicky Romero demonstrates various EDM mixing techniques, including using his “Kickstart” volume envelope automation plugin:
https://www.youtube.com/watch?v=A88CTrQtgi4
2 – Cut Them Down To Size ( Mid-Side EQ):
 A typical metal mix consists of some pretty intense elements that each require their own frequency range in order to convey their full impact. Can you really afford to clutter up this vital space with “huge” synth sounds?
The Problem:
A common misconception a lot of beginners have while learning to mix is that every element in the mix needs to be huge in order to achieve a “big” sounding result. The truth is, the real secret to a mix that punches you in the gut is making everything fit together and work as one cohesive unit.
How does this apply to Synths?
Unlike EDM and its’ sub-genres in which synths are the primary mid-range instrument, rock and metal is already at near-full capacity in this area from the get-go due to multiple distorted guitar parts and clanky bass guitars.
For this reason, It’s probably a good idea to trim off some of the excess fat from your synth sounds in order to leave more space for the instruments that really need it.
The fact that a lot of Synth Sounds are used in stereo makes them a prime candidate for one of my all-time favourite tools:
Mid-Side Equalisation
Mid-Side EQ allows for independent control over the middle and side channels of a stereo signal:
- This kind of processing is especially powerful and effective when applied to synthesised sounds as they tend to handle drastic EQ manipulation more comfortably than most “organic” or acoustic elements.
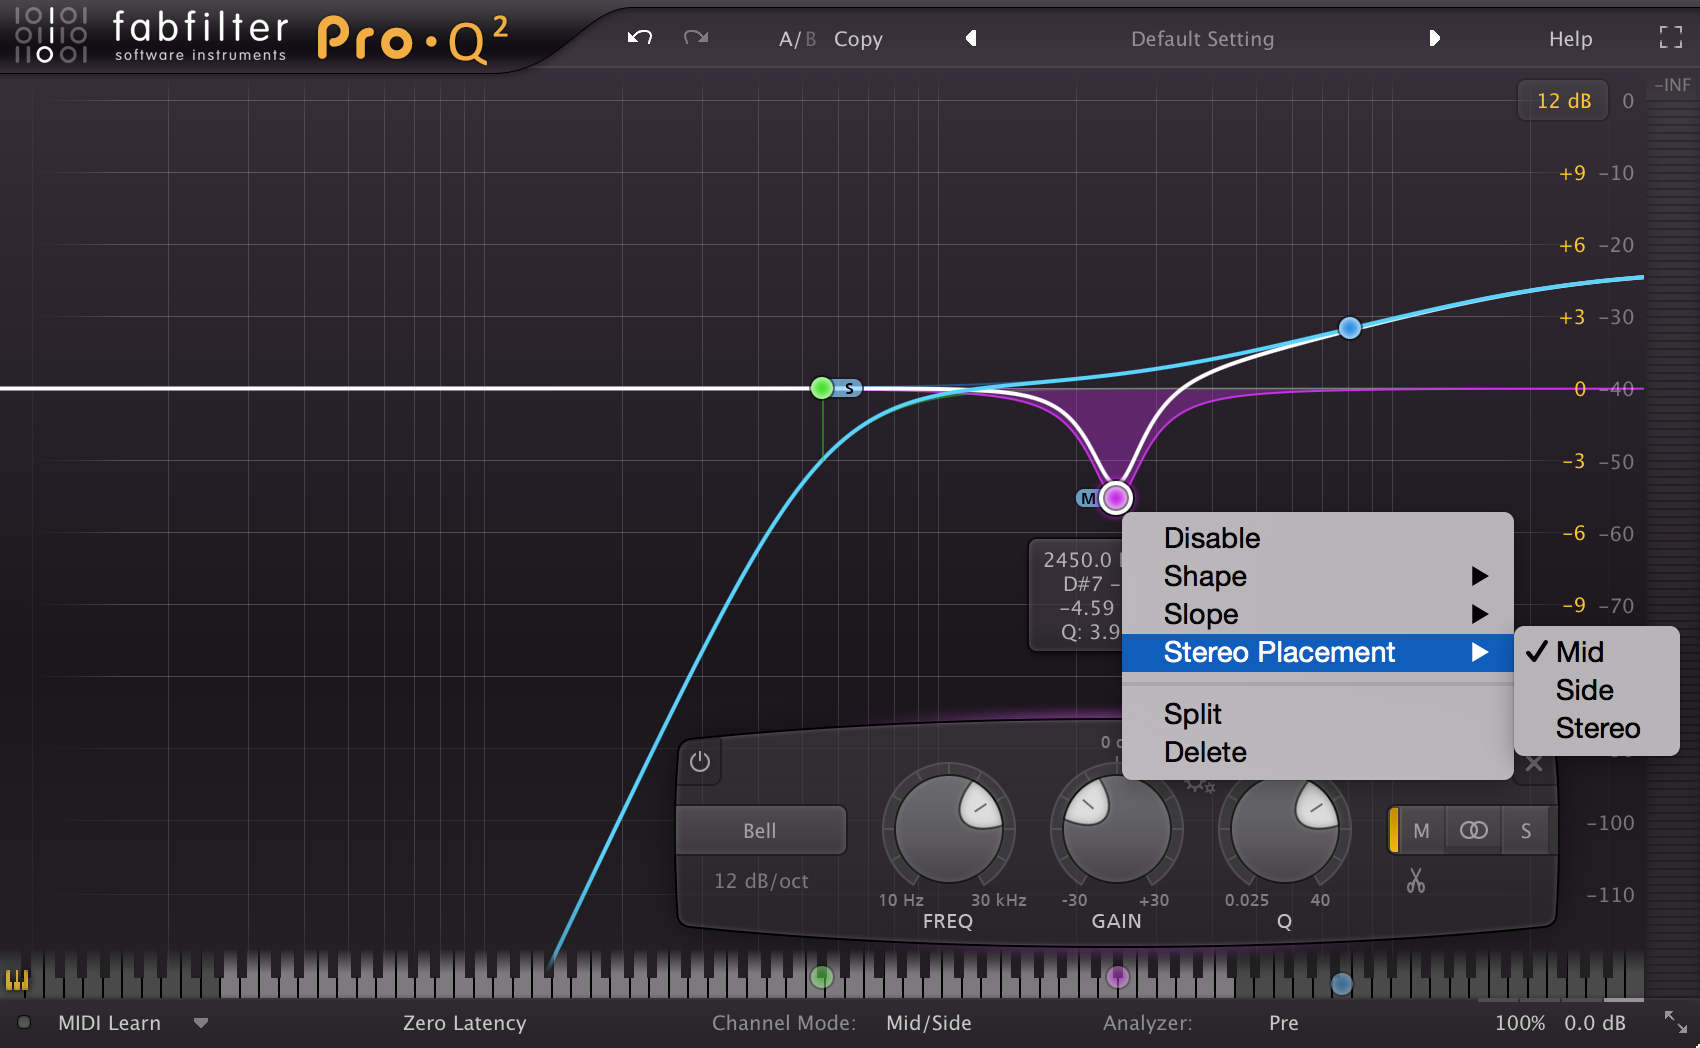
In the example above, I’ve used FabFilter’s Pro-Q2 EQ plugin in Mid-Side mode to demonstrate some uses for this kind of processing when it comes to synths.
- A high-pass filter on the sides-only to help channel the low-end into the center of the stereo field – This is a great way of focusing the low-end of your mix and keeping it nice and punchy.
- A bell-cut in the presence range on the center channel to free up some space for the vocals to live – Cutting this area with a mid-side EQ rather than a Stereo EQ allows you to retain some of the bite in the synths while carving out a nice hole in the middle for the vocals to slot right into.
- A gentle high-shelf on the side channels to help widen the sound and push it out further from the center – Wide mixes are awesome. Brightening the high-end information on the sides of a synth will help make them appear larger than life.
NOTE: These are just a few examples of the many powerful tricks you can apply via mid-side equalisation while processing synth sounds. Try it out for yourself – I’m sure you’ll come up with some cool uses in no time!
3 – Send Them To Space! (Creative FX):
 Synthesised sounds are like a blank canvas on which you can splash out your creative colors and completely go-to-town.
A Chance To Experiment:
Metal tends to be fairly formulaic as to how the instruments are laid out and treated within the stereo field: Rhythm guitars are usually dry and panned hard-left and right, the bass guitar goes in the middle, the kick drum needs a clicky high-end, etc, etc…
Most of the time, these “unwritten rules” of metal production exist for valid reasons and therefore tend to be the obvious choice. (The main one being that the majority of our favourite classic metal albums sound this way…)
When it comes to synths however, there aren’t really any constraining rules due to the immense number of possibilities and variations in personal taste involved in the creation process. For this reason you can afford to go crazy with your use of delays, reverbs, phasers… Pretty much any kind of effect you can get your hands on!
Here are a few creative FX Plugins to try out the next time you’re mixing Synths:
SoundToys PanMan:
SoundToys’ PanMan plugin allows you to automate tempo-synced Panning envelopes to give your Synths some awesome movement and excitement in the mix:
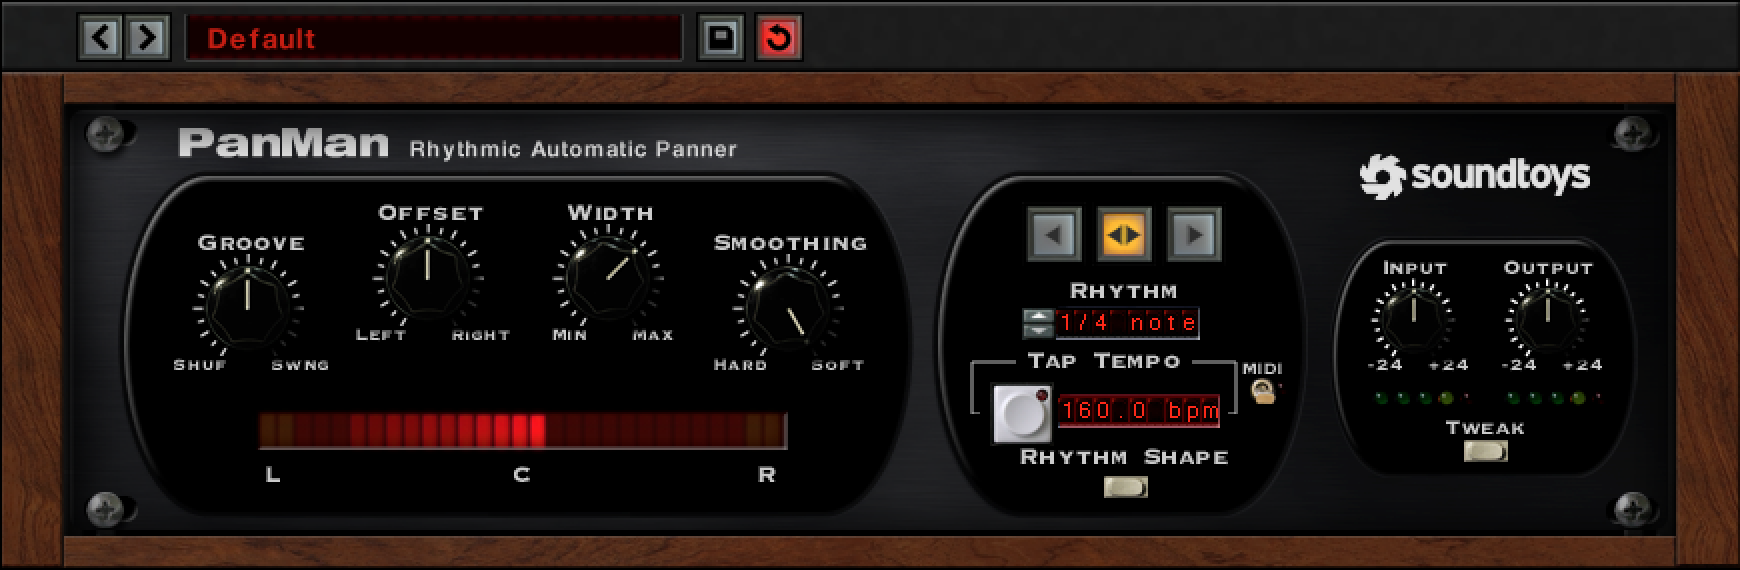
- Adding BPM Synced panning to your Synths can help turn them into a kind of additional percussive element and give your track a “Rhythmic Lift”.
- This effect works REALLY WELL in “ethereal” intro or bridge sections where you’re trying to convey a spaced-out vibe.
- Using this effect as a reverb or delay send is awesome for achieving super-wide FX returns for mono instruments.
Side-Chain Gating:
Everybody’s heard of Side-Chain Compression – but have you ever tried Side-Chain Gating?
- The concept is fairly similar: You sidechain a Synth to a percussive element like a kick drum. The difference is, instead of the kick triggering a compressor on the synth every time it hits, it will open up a gate on the synth channel.
- This effect is awesome for achieving humanised, rhythmic synth sounds that take up little space in a mix.
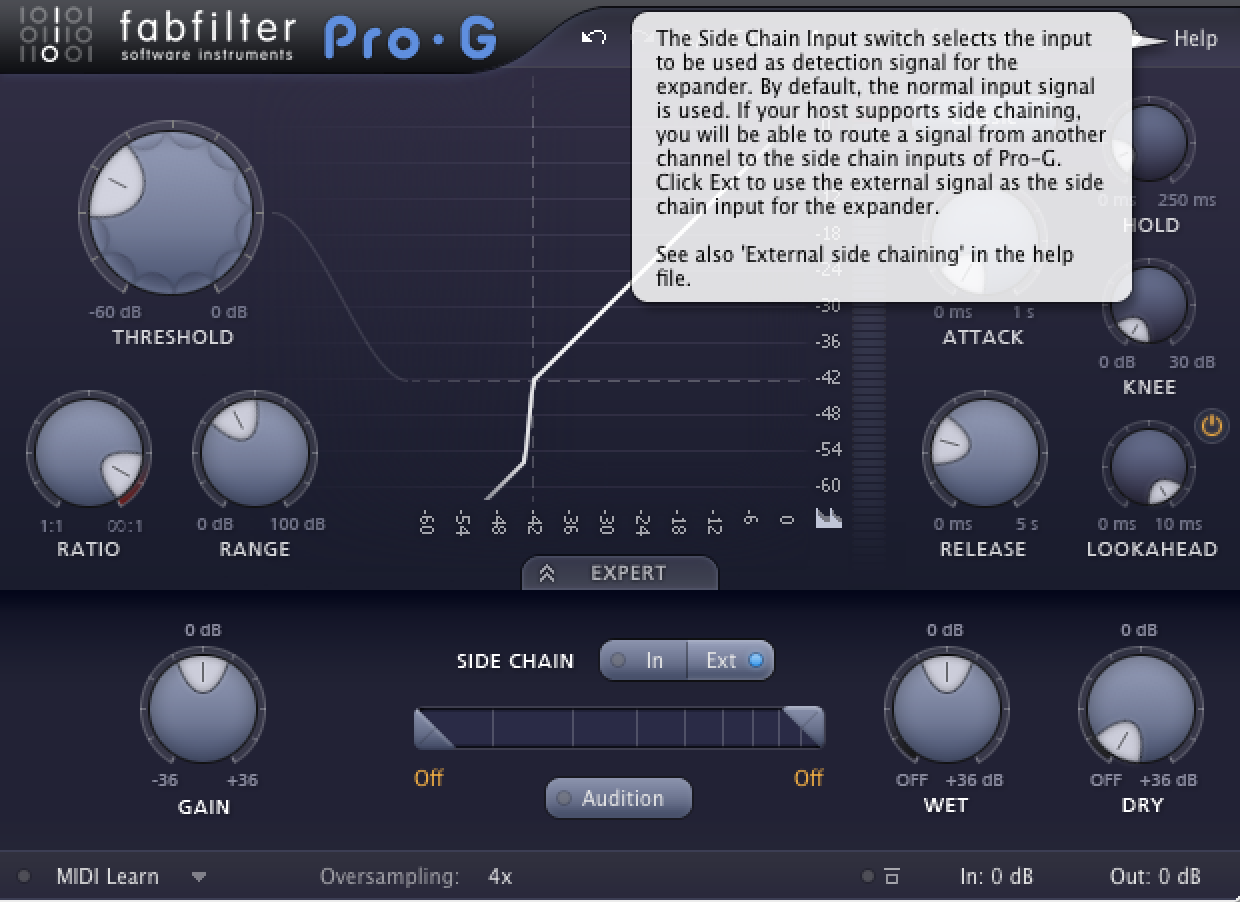
- Any old gate with a built-in external side-chain function will work for this job. My personal favourite tool for this application is FabFilter’s Pro-G due to the huge amount of customisation it offers.
ReaperMania’s Kenny Gioia Demonstrates Side-Chain Gating:
https://www.youtube.com/watch?v=E9gZNXUlNms
Sugar Bytes Turnado:
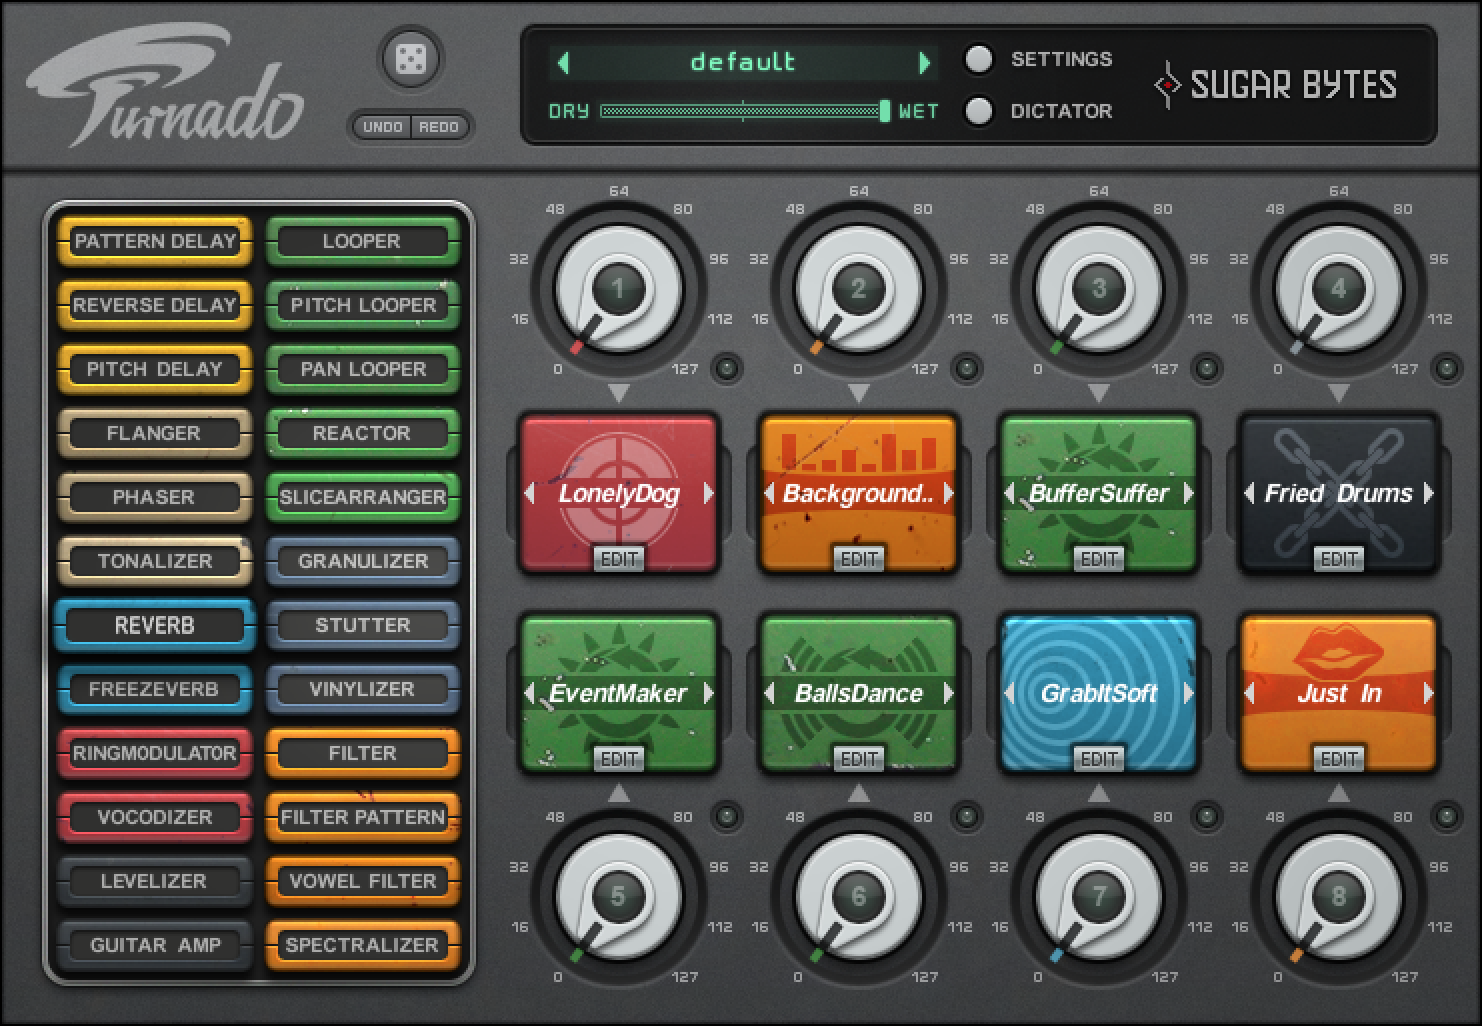
A fairly recent favourite of mine is Sugar Bytes’ amazing “Turnado” Multi-FX plugin:
-
Dozens of unique and interesting effects to choose from with minimum technical hassle.
-
Automating individual (or multiple) parameters allows for some awesome sound-design possibilities never-before-heard sounds.
-
The wet-dry control comes in handy when trying to maintain some of the direct punch of the original synth sound.
The guys at Pro Tools Expert demonstrate Turnado on Synth sounds:
https://www.youtube.com/watch?v=Non9s-jajzU
4 – Make Them Move (Parameter Modulation):
 Unlike a lot of elements in a metal mix that tend to remain rather static throughout the duration of the track, synths can really benefit from some serious movement in order to imply various emotions or a certain sense of progression.
Here are a few Synthesiser Parameters you should consider experimenting with using Automation:
Filter Cut-Off Frequencies:
Starting out with a fairly rounded and smooth synth sound and gradually transitioning into a more present sound with more high-end does a great job of building excitement in the listener. A great way of achieving this effect is through automating your Synth Cut-Off frequencies in time with the track:
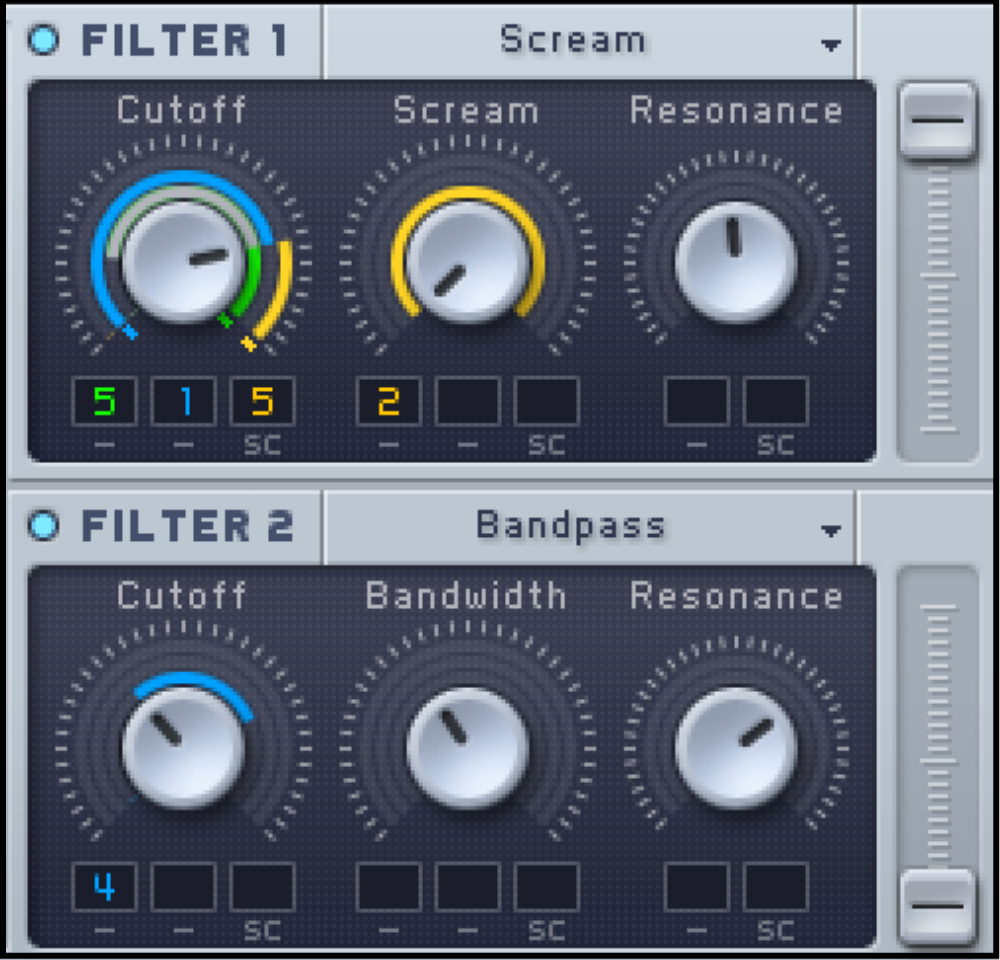 Cut-Off frequency controls in NI Massive.
- Having extremely gradual transitions between smooth and grainy synth sounds over long periods of time conveys a certain tension which eventually begs for a huge release in the form of a hard-hitting drop or impact.
NOTE: Listen to Deadmau5’s track “Strobe” for a prime example of this effect.
Check out this video for a great demonstration of filter automation on a synth sound:
https://www.youtube.com/watch?v=GmCo6JqQaow
ADSR Envelopes:
Automating the attack and release parameters of your synth patches is another great way of creating “living” sounds that spark an increased interest in whoever’s listening:
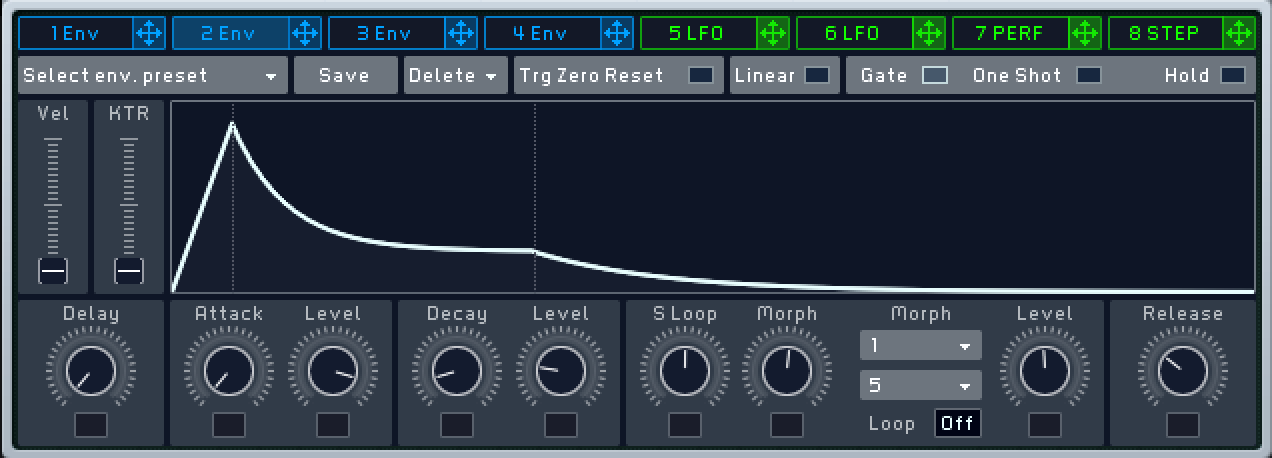 An ADSR Envelope in NI Massive
- Boosting the initial transient of the synth during the chorus and decreasing it again for the verses can really give each section a boost or decrease in energy.
- Another method of doing this is to create a parallel “Synth transient” track which only consists of an initial “click” sound. You can then automate this track in and out to give your initial synth more punch.
Check out this tutorial for a great demonstration of Synth transient enhancement:
https://www.youtube.com/watch?v=wkQa1V-UkHo
5 – Synth Frequency Guide (EQ):
Synths are fairly similar to guitars when it comes to EQ, and generally require comparable processing. Remember that the context in which your synth sounds are being used will also determine how heavily they should be treated. Aka: a synth bass is comparable to a bass guitar, a pad or pluck sound is comparable to a rhythm tone and a synth lead is comparable to a lead guitar, etc…
Keeping this knowledge in mind will help you make the right decisions when EQ’ing your Synths for each specific purpose.
A Quick Word On Additive/Reductive EQ Methodology:
It’s important to note that the EQ’ing route you choose to go down when processing will dictate whether or not you’ll need to address certain frequency bands in a specific way. Keep this in mind when EQ’ing, as you don’t necessarily NEED to mess with EVERY SINGLE frequency band just because I’ve told you about it.
Example: If you’re boosting a lot of high and low-end then you won’t need to remove as much mid-range, and vice versa…
Here are some of the general areas to look at while EQ’ing Synths:
Note: Take these numbers as general guidelines, not as hard and fast rules! The exact frequencies you’ll need to boost/cut will vary greatly from track to track due to the sheer amount of variables involved in the recording process. Always make sure to sweep around and fish for the areas which complement the sound best!
Low “Boom & Sub” @ Between 20-200Hz: How you should deal with the low-end information on a Synth sound depends on what role it’s being used in:
- Treat the low-end of a Synth-Bass similarly to a bass guitar.
- You can often afford to filter out some of the low-end information from Pad, Lead & Pluck sounds and treat them similarly to guitars.
TIP: Try using the “split processing” technique I mentioned in my “Mixing Secrets – Bass” Article from a few weeks back in order to achieve a tight and aggressive synth bass sound:
https://urm.academy/mixing-secrets-volume-bass/
Low-Mid “Mud” @ ~200-250Hz: This area generally requires some carving in order for the synth to take up less space in the mix. Don’t remove too much however, as lot of the “meat” of a synth also lives in this range:
- In a dense mix, you might want to filter out some of this area in order to leave room for the bass guitar to live.
- I’ll often automate high-pass filters on a per-section basis depending on how much low-end is necessary from the Synths in context. AKA: You can afford more low-end in Sparse sections etc…
TIP: Multi-Band compression is often a better solution for controlling the low-mids than removing them with EQ. Check out my “Mixing Secrets – Guitars” Article for more information on this trick:
https://urm.academy/mixing-secrets-volume-4-guitars/
Mid-Range “Clutter” @ ~500Hz: A wide “scoop” in this area will often help open up a lot of frequency real-estate for your guitars and drums to live in.
Mid-Range “Flatness” @ ~800Hz: A cut in this area can really help prevent the synths from poking out of the mix unnaturally and prevent them from sounding too “nasal”.
NOTE: Don’t automatically reach for a reductive EQ in every area I’ve mentioned – Use your ears! I’ve found that 800Hz can end up sounding awesome when boosted on a synth-bass in some situations…
Upper-Mid “Presence” @ ~1-2kHz: Boosting this range will go A LONG WAY towards making a lead or bass-synth cut through the mix and sound “in your face”:
- Sweep a bell boost in this area in context of the whole mix in order to find the perfect spot for the particular synth sound you’re using.
- Don’t go overboard with these boosts if you’re synths are playing simultaneously with your vocals, as they’ll most likely start to overpower them.
Upper-Mid “Harshness” @ ~2.5kHz: If necessary, you can remove some harshness in this area in order to make some extra space for your vocals to live in.
- In the case of a lead Synth solo section this area can potentially aid in the sound cutting through a dense mix, so don’t just blindly get rid of it!
High-End “Fizz” @ Above ~8kHz: Much like electric guitars, a lot of distorted/saturated synth sounds will have a fair bit of fizzy high-end content above ~8kHz:
- Although this information can be useful towards helping the sound cut through and remain upfront in certain situations, it can also really get in the way of the clarity of your guitars and vocals in the case of a dense metal arrangement.
- Using a gentle (or not-so-gentle) Low-Pass filter to get rid of as much of this content as necessary will go a long way towards making your synths sit more comfortably within the bigger picture.
TIP: Try using a steep 24+ dB/Octave Low-Pass filter to get rid of high-end hiss without drastically altering the tonal character of a synth sound.
Conclusion:
Although Synthesis may appear complex at first, the creative possibilities it has to offer once you overcome the learning curve are well worth the effort.
Having the knowledge and skills necessary to be able to provide electronic music elements when necessary will go a long way towards making your services more desirable to potential customers and even help open up new streams of revenue in the future.
Whether you like it or not, Synths are a part of the metal world at this point:
So get on with it and learn how to NAIL THEM IN THE MIX!
FINAL WORDS:
This concludes “Mixing Secrets – Synths.” I hope that this article has given you some new ideas to try out during your next project. Be sure to comment below if any of this information has helped you out, or if you have any questions.
Stay tuned for more production/mixing related articles in the not-so-distant future!
Thomas Brett is a producer, mixing engineer and songwriter at Brett Brothers recording studio in the UK. Check out the Brett Brothers studio website for more information and articles on all things mixing www.brettbrothersstudio.com
Read Mixing Secrets – Volume 1: Vocals here!
Read Mixing Secrets – Volume 2: Bass here!
Read Mixing Secrets – Volume 3: Drums here!
Read Mixing Secrets – Volume 4: Guitars here!
 Nail The Mix is our online mixing school that gives you REAL multi-tracks from REAL bands, plus a mixing class from the producer who recorded it.
Comments 5
Loving it again bro, keep it up
Thanks! Appreciate the support 😀
Pingback: [ URM BLOG ] Mixing Secrets - Volume 4: Guitars
Pingback: [ URM BLOG ] Mixing Secrets - Volume 3: Drums
Pingback: [ URM BLOG ] Mixing Secrets - Volume 2: Bass