Analysis As a Learning Tool (Part 1) | By Thomas Brett |
As audio engineers we’re always looking to improve our craft and take our mixes to the next level. Two of the key methods to speeding up this learning process are:
- Understanding the subtleties of the gear we’re using.
AND
- Knowing how to perform accurate analysis and comparisons.
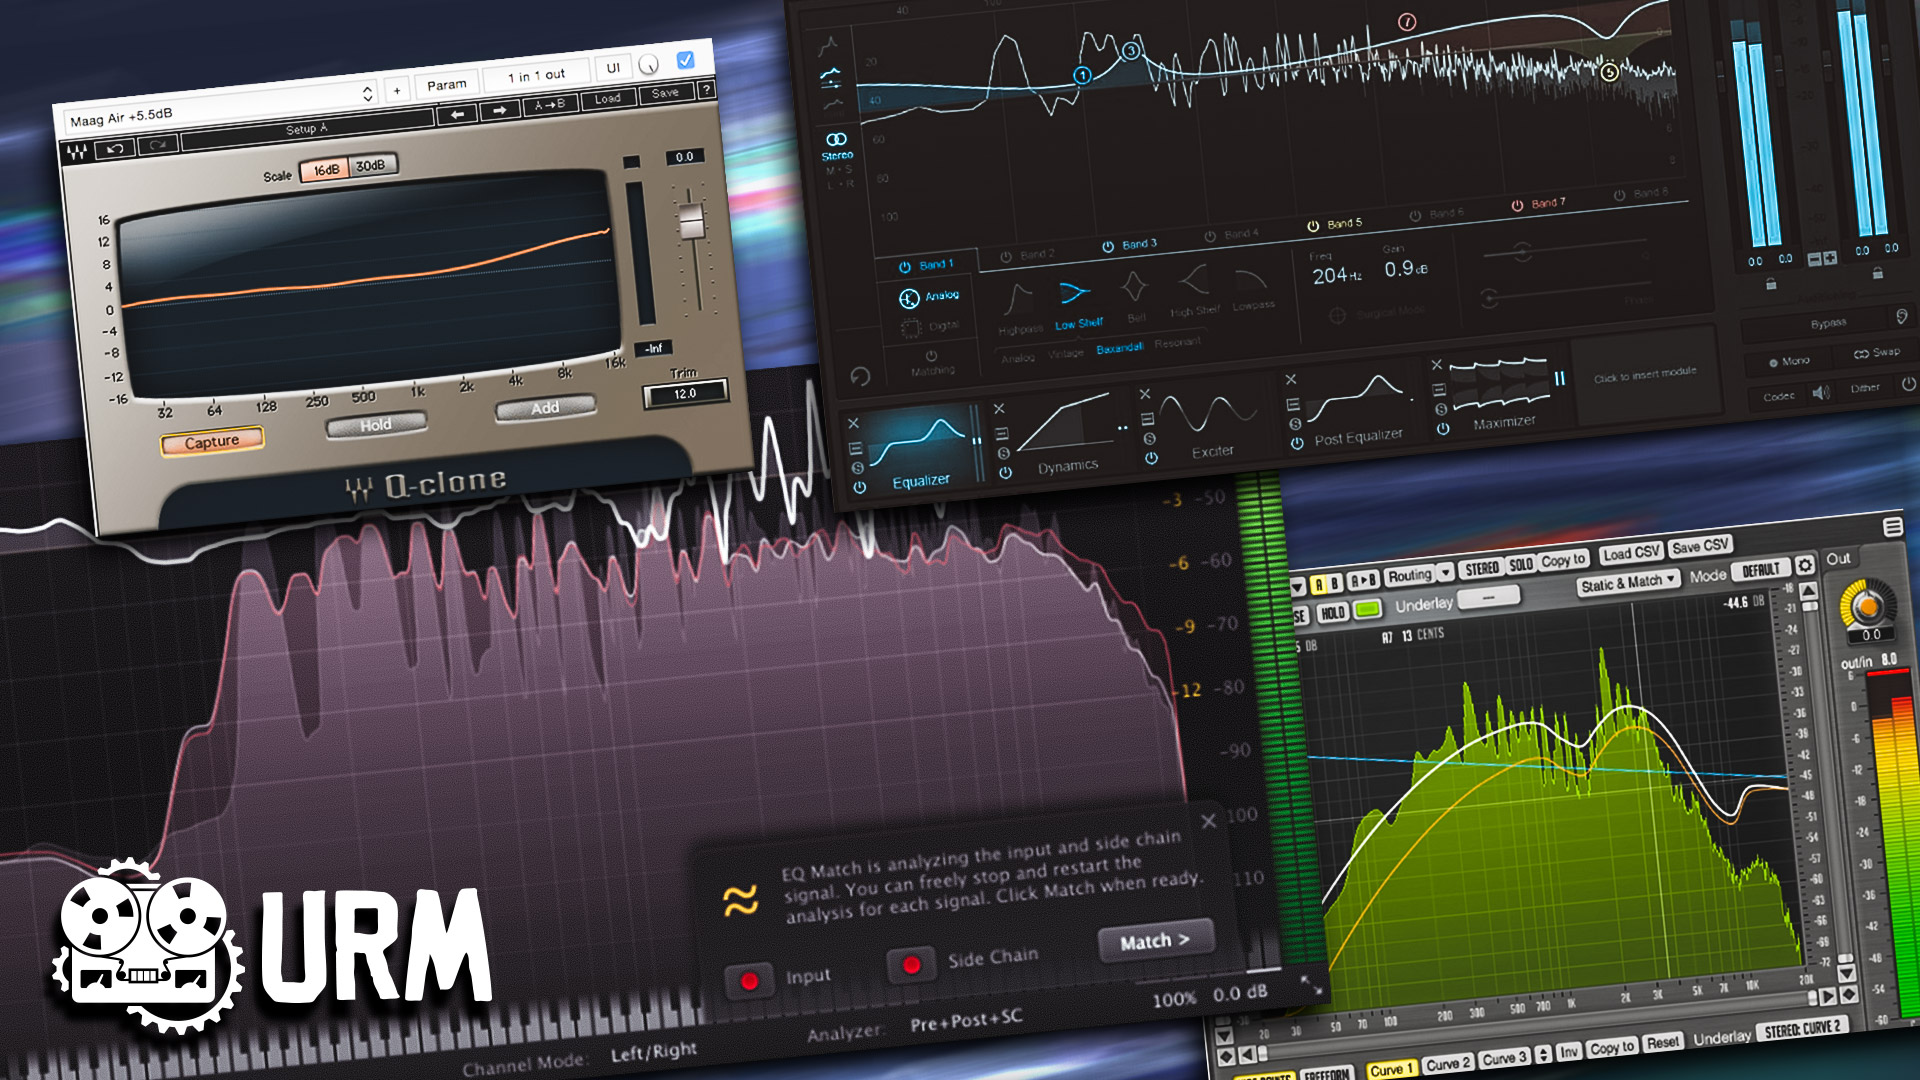
Here are some of the primary tools which you can use in order analyze and compare between sounds or gear, while possibly gaining further insight into the techniques of the pros in the process:
Spectrum Analyzers:
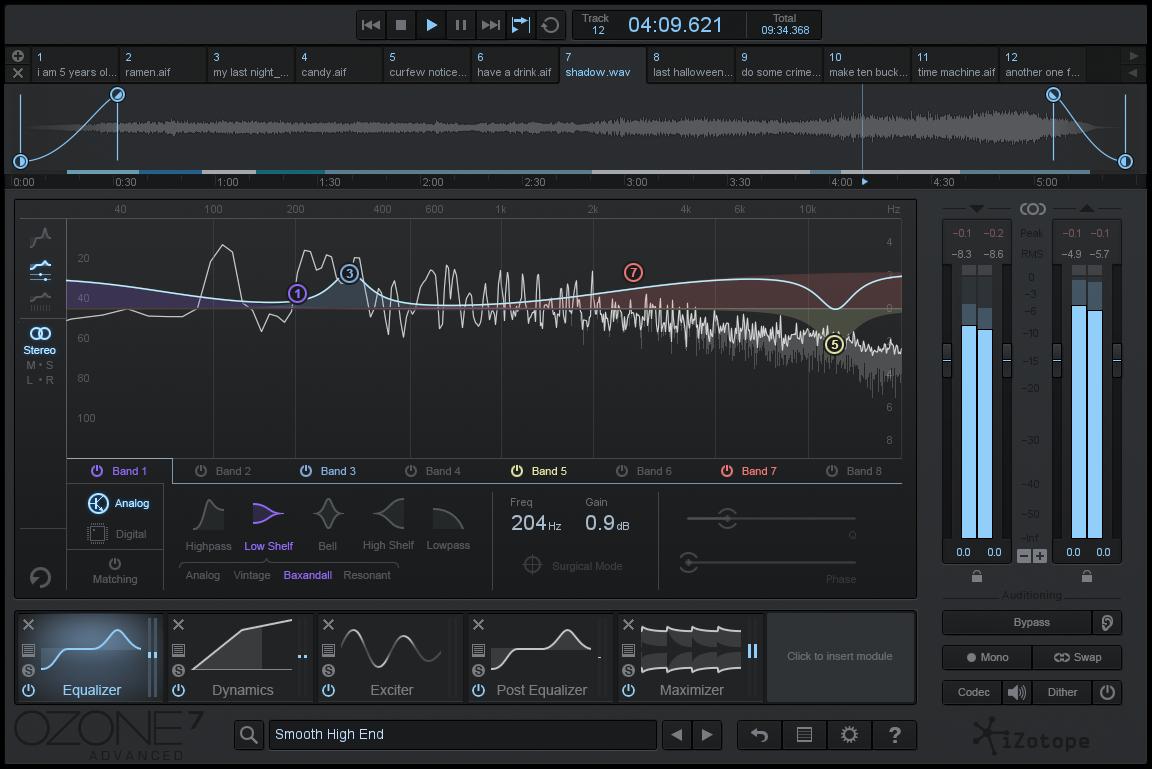
A spectrum analyzer is basically a utility tool which displays a graphic representation of the frequency content present within an audio signal at any given moment.
This type of visual aid can be an invaluable tool for quickly locating issues with certain frequencies, analyzing pre-processed tracks, or providing a solid point of reference in less than optimal listening circumstances.
NOTE: Although I’m a big spectrum analyzer user myself and often need some visual aid in order to fix certain problems quickly, it’s important not to rely too heavily on visuals while mixing, as this can become a problem in and of itself.
Remember: EARS BEFORE EYES!
A prime example of a successful engineer who uses spectrum analyzers effectively and creatively in their recording and mixing process is Nolly from Periphery:
Adam “Nolly” Getgood – Drum Samples Analysis:
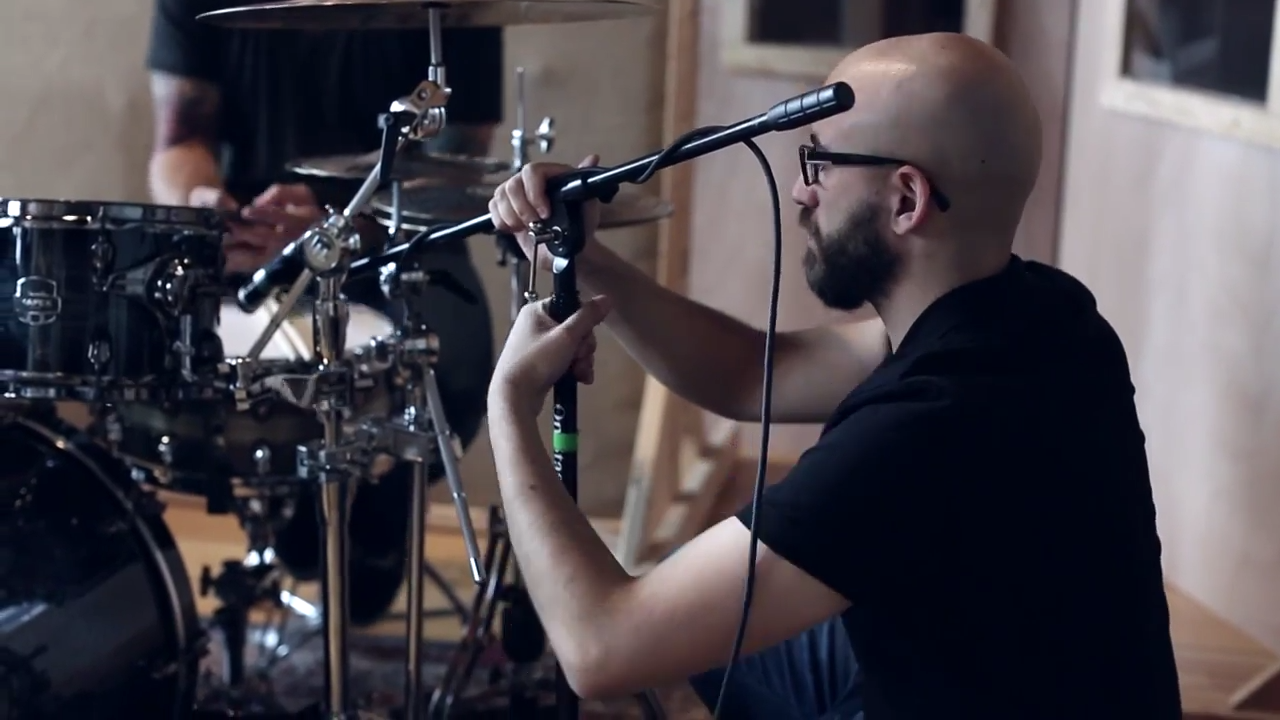
I’m a huge fan of Nolly’s productions, but more specifically, his drum sounds. Achieving clear, punchy, dynamic and natural sounding drums in a dense progressive metal mix without the use of sample replacement is no easy feat, yet Nolly seems to pull it off every time.
NOTE: Check out the new Devin Townsend Project album “Transcendence” for an example of Nolly’s amazing drum production skills.
How does he do It?
One of the clear reasons behind Nolly’s awesome drum mixing talent, is the fact that despite not being a drummer himself, he obviously has a great fundamental understanding of how drums and drummers work. I’d be willing to bet that this understanding of drums is partly owed to the large amount of time he’s spent analyzing various famous drum sounds, and the effort he’s put into attempting to replicate them in his own mixes.
How do I know this?
At some point last year I watched the Periphery CreativeLive course, which offered some great insight into Nolly’s drum mixing techniques (I’d highly recommend purchasing the course, as I learnt a lot from watching it).
One of the things he mentioned which really caught my attention, was how he had spent time analyzing a bunch of his favorite processed kick drum samples in a spectrum analyzer, and noticed that they had certain characteristic similarities between them.
One of the characteristics he mentioned in particular, was how the fundamental low and high-end information in each of these processed samples appeared to peak around the same level on the graph. At the time of hearing this I was intrigued, so I decided to test out his theory for myself using various professionally processed samples I’ve collected throughout the years.
Here are some of the results of my tests:
NOTE: Each kick sample in these examples was processed by a different A-List Mixing Engineer.
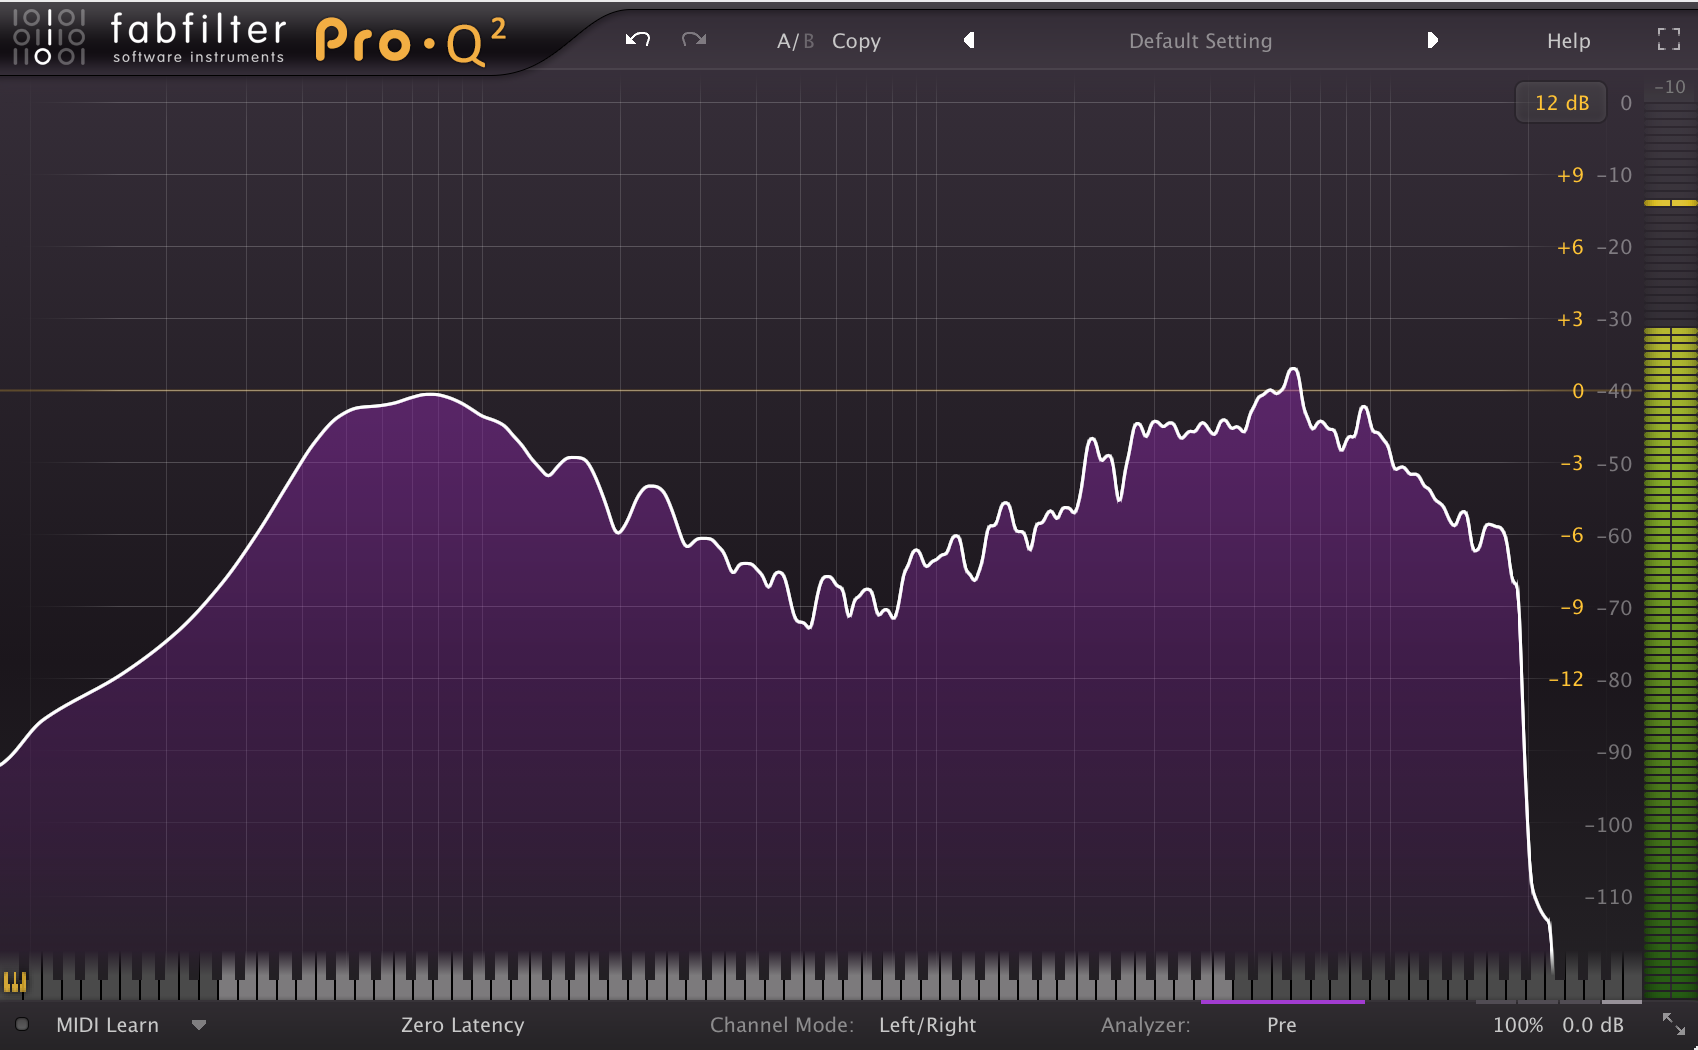
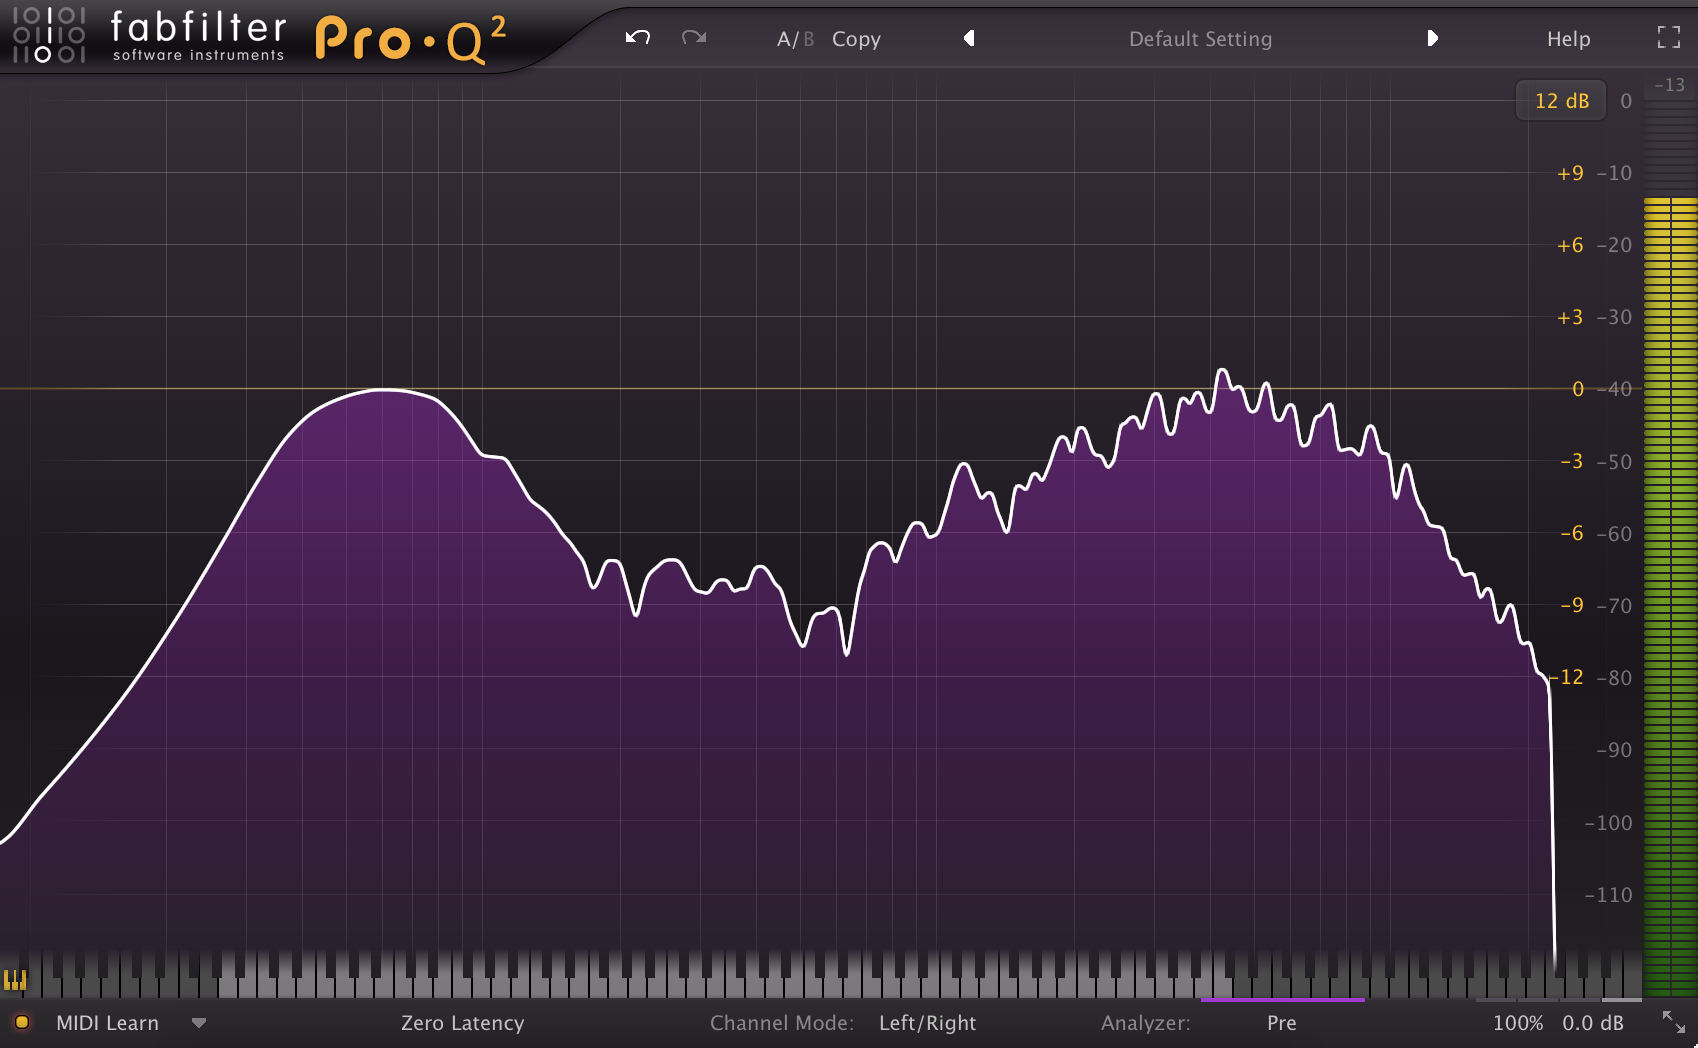
1st Famous Metal Engineer Kick:
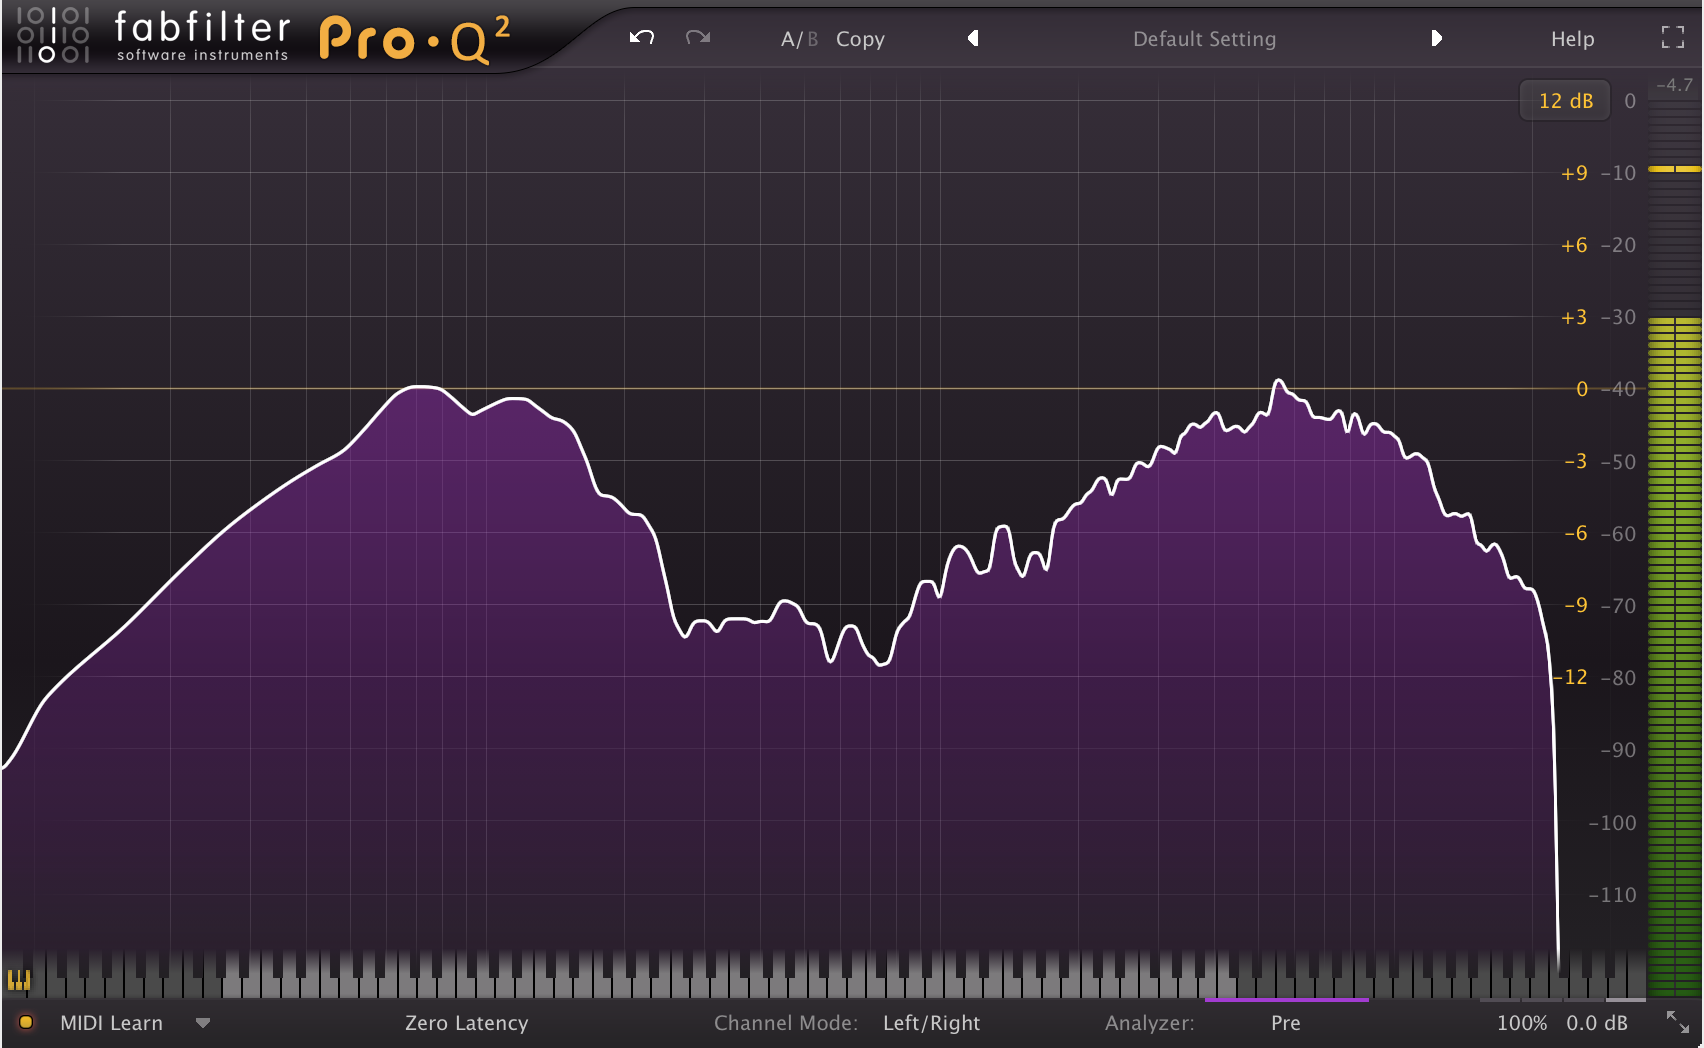
2nd Famous Metal Engineer Kick:
3rd Famous Metal Engineer Kick:

4 – And finally, here’s what one of the kick samples from Andy Sneap’s Metal Machine EzDrummer pack looks like on the same graph:
A Few Key Observations Based on the Examples Above:
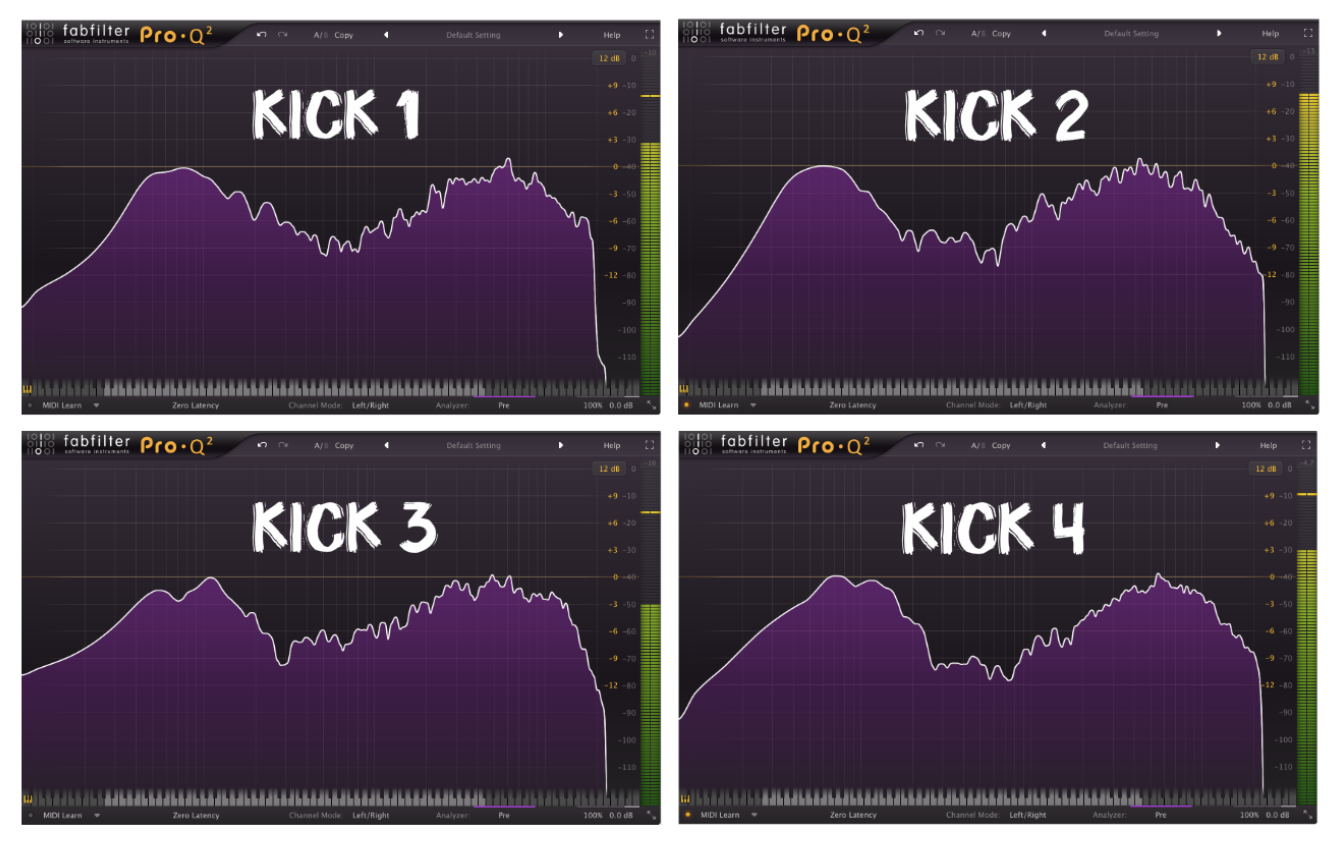
- Notice how the fundamental low and upper mid-range bumps in all of the kick drums shown above are peaking around the same volume within each sample, despite the fact that they were each mixed by a different engineer…
- Another obvious thing which these samples have in common are the various scoops in the mids.
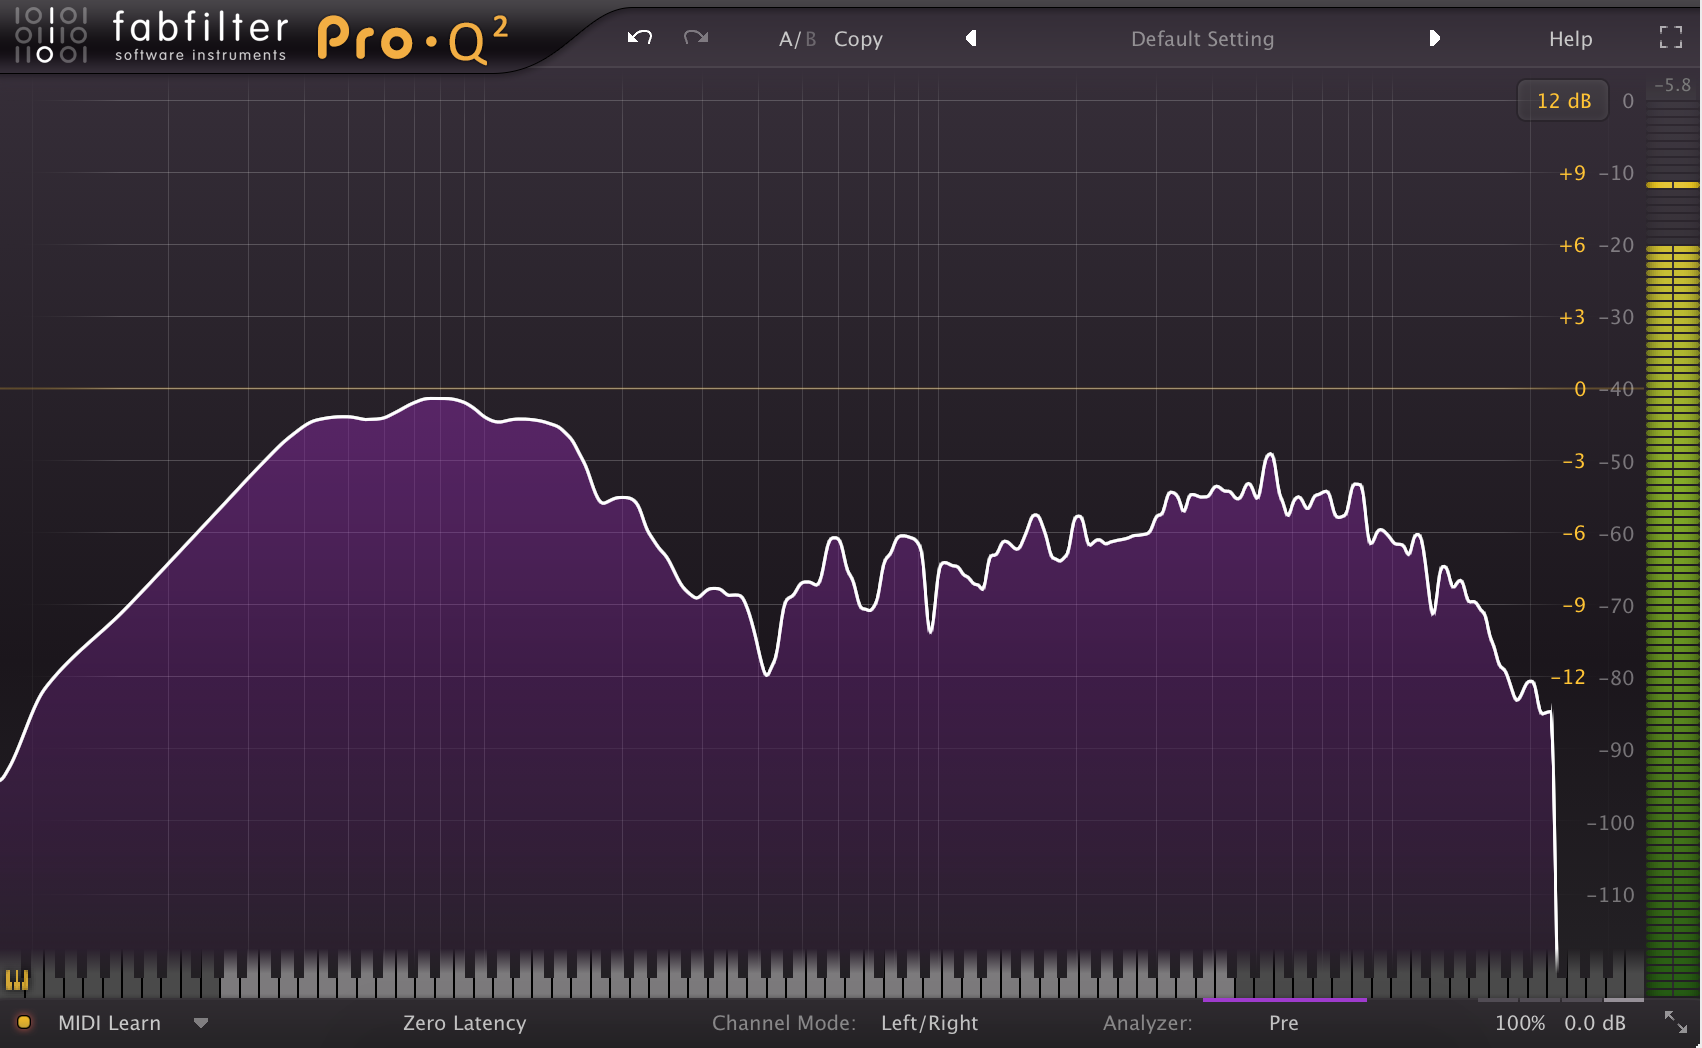
Just to give you some extra perspective, here’s what a professionally recorded and completely unprocessed kick drum looks like on a spectrum analyzer:
Unprocessed Kick Sample:
Some Observations On The Unprocessed Kick Sample Compared to one of the A-List Engineer Processed Samples:
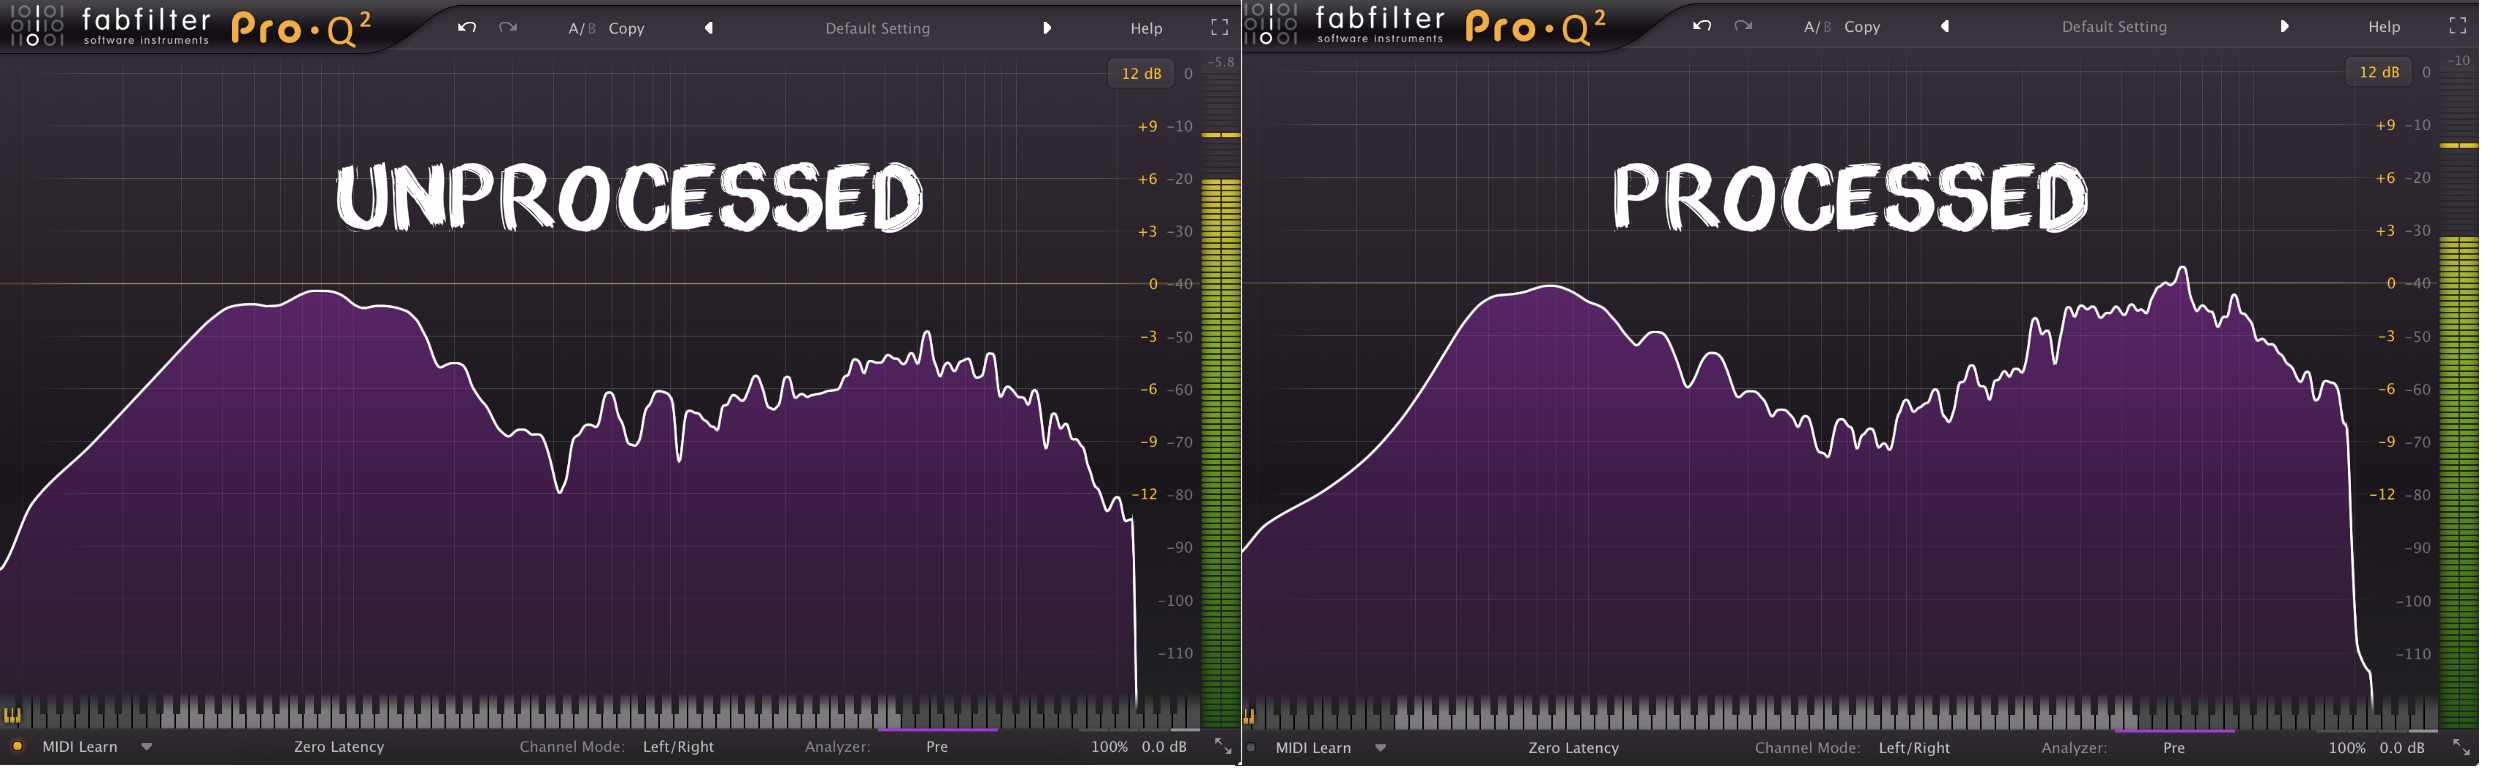
- Notice how the low-end of the unprocessed kick is quite broad and undefined, while the low-end in the processed sample is more focused and tight.
- Notice the 8-10dB (ish) difference in volume between the low-end bump around 80Hz and upper mid-range slap/click of the kick between 3-8kHz in the unprocessed sample, but how the equivalent areas are both peaking around the zero mark in the processed sample.
- Notice the large mid frequency peaks between 400-900Hz in the unprocessed sample, but how the mid range in the processed sample is a lot smoother throughout the same range.
- Notice the difference in level between the sub low-end content in each kick and how some filtering or reduction has probably been applied to the subs in the processed sample.
- Notice how 10kHz+ high-end content of the unprocessed kick is much lower in volume than that of the processed kick, indicating that a high-shelf was probably used to give it a lift.
Drum Sample Analysis Conclusion:
As you can see from the list of observations above, we’ve managed to pinpoint some of the key areas of kick drum processing which we might want to pay attention to, with nothing more than a simple spectrum analysis comparison.
FINAL NOTE: This doesn’t mean that you should stop using your ears and start mixing by sight in a “paint by numbers” fashion, as every kick drum is different and it most likely won’t work out very well.
Hopefully this brief demonstration has given you a new appreciation of the spectrum analyzer, and given you some ideas into how you can use it as a learning tool.
FINAL WORDS:
This concludes Part 1 of my “Analysis As a Learning Tool ” series of Blogs. I hope that this article has given you some new ideas to try out during your next project. Be sure to let me know in the comment section below if any of this information has helped you out, or if you have any further questions regarding anything I’ve talked about here.
Stay tuned for Part 2 of “Analysis As a Learning Tool” and more production/mixing related articles in the not-so-distant future!
Thomas Brett is a producer, mixing engineer and songwriter at Brett Brothers recording studio in the UK. Check out the Brett Brothers studio website for more information and articles on all things mixing www.brettbrothersstudio.com
Want mix tips from Thomas Brett? Read them here!
 Nail The Mix is our online mixing school that gives you REAL multi-tracks from REAL bands, plus a mixing class from the producer who recorded it. Past guests include Periphery, Chelsea Grin, Machine Head and State Champs. Join now for instant access!
Comments 5
Very interesting!
Glad you think so!
Good article
Pingback: [ URM BLOG ] Analysis As A Learning Tool (Part 2)
Pingback: [ URM BLOG ] Mixing Secrets - Volume 3: Drums