20 Simple Tricks To Make Your Next Mix FREAKIN SWEET (Part 2) | By Thomas Brett |
As mix engineers, we sometimes get too caught up in our EQ and compression based decisions during a mix. For this reason we can often fail to notice some of the equally important issues we should be dealing with through alternate means, and in return end up trying to fix these problems by using the wrong tools.
Here are 10 ideas/techniques that you might not have tried before, which you might want to consider trying while working on your next mix:
NOTE – I haven’t gone in to much detail on how to set up the following techniques in this blog post, as this is meant to be a list of ideas and not an indepth tutorial on each of these subjects. I might write individual guides for the following in the future, but for the moment, I’d recommend just googling anything in particular which you don’t quite understand.
1) Optimise Your Plugin Orders:
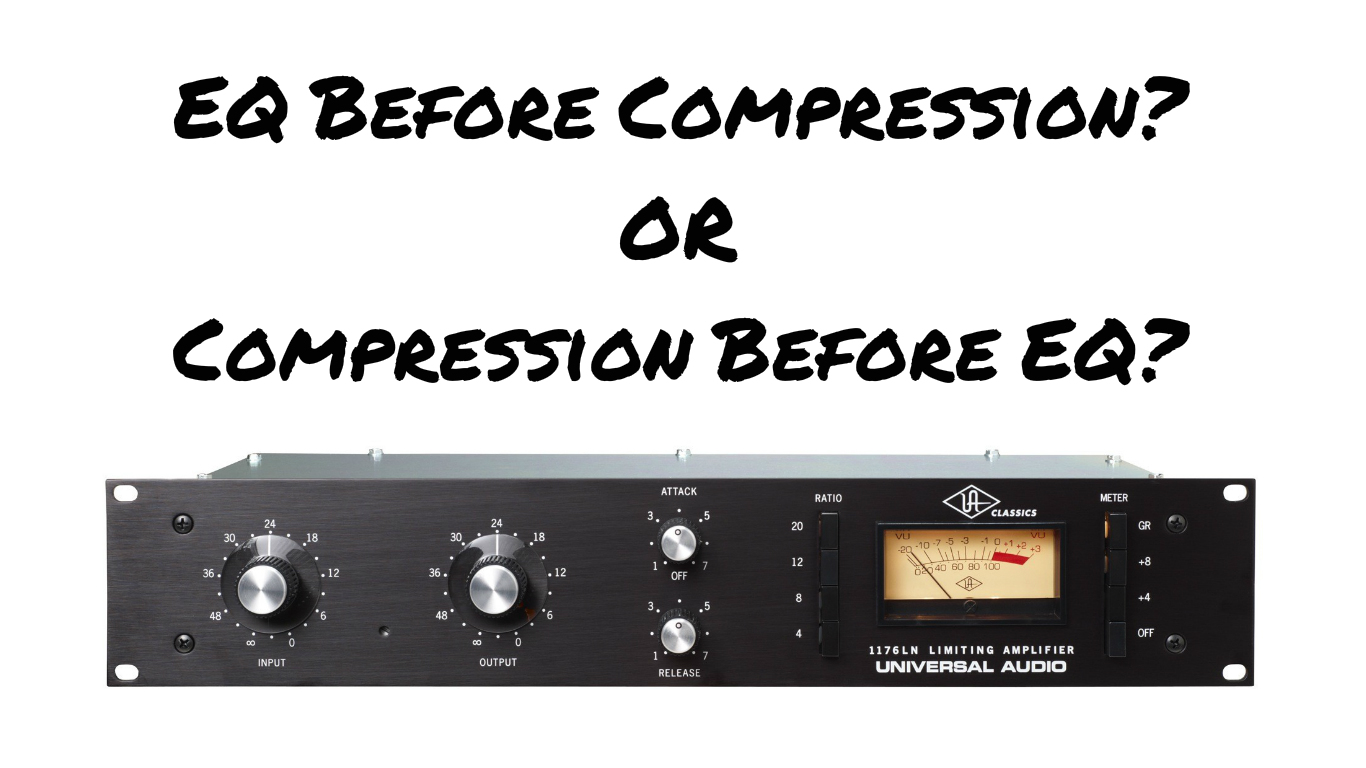
If you’ve been in the audio world for a while then you’ve surely seen this question asked and debated TOO MANY times…
The Definitive Answer? IT’S SITUATIONAL! There is no set rule as to which approach is better overall, and I have seen engineers get phenomenal results using either way. There are however certain benefits to using one or the other depending on what you’re trying to achieve…
Here are a few examples:
EQ>COMP: Boosting the high end on a vocal before compression will cause the compressor to react more on the sibilant words, effectively causing the compressor to act as another stage of de-essing/de-harshing.
COMP/DIST>EQ: If you’re processing a signal in parallel then it can sometimes make more sense to place an EQ after the compressor. This is because all of the tiny details and problems that weren’t apparent in the unprocessed signal will be brought up in level massively and begin to really stick out when heavily compressed or distorted. In a situation like this, it might make more sense to fix these issues after the fact with some reductive EQ.
EQ>COMP: Filtering the low-end or reducing some of the muddy lower-mid range before compressing a strummed acoustic guitar will cause the compressor to pump and distort less, allowing you to compress it harder without introducing unpleasant artefacts. The concept of experimenting with the order of plugins can also be applied to other kinds of processing. Here are some examples:
EQ>REVERB/DELAY: Try EQ’ing and filtering your effect sends instead of EQ’ing the effect returns (ex.place an EQ before your reverb on it’s own channel). This can lead to more natural sounding effects as you are not messing with the reverberated/delayed return signal but rather tweaking the exact signal you’re sending to be reverberated/delayed in the first place.
LIMITER>COMPRESSOR: A lot of engineers like to finish off a signal chain by placing a limiter at the end. I often use the same technique, but I personally also like to add an extra limiter at the beginning of my chain in order to lop-off the some of the extreme peaks and ease the load for my compressors down the line
2) Listen Like A Listener:

Think of your song as a whole. Your listeners will…
Sometimes we can end up skipping back and forth through sections of the song we are working on so many times that we begin to lose focus of the overall vision. Other times we can end up looking at the project purely from a technical aspect, and develop a sort of “tunnel vision” that renders us completely blind to some of the more important non-mix related problems within our track.
As mix engineers we are always striving to impress our peers (other engineers and people we look up to) with all of the minuscule tricks and tweaks we apply to our mixes. But the reality is that 99.9% of the people who listen to music won’t even notice any of those things, and will usually just go-off whether they like the song or not…
It’s important to be able to differentiate technical issues from issues with the quality of the song itself. You can have a technically perfect mix which sounds amazing, but if the song is no good then what’s the point?
No matter how far we progress in the art of production and mixing, it’s crucial remember that the mix isn’t what makes a successful song, it simply gives it a better fighting chance!
Try and answer a few of these questions to get a better understanding of what your listeners might care about when they listen to music:
- Why is it you love certain songs by a band but hate others?
- What does it take for a song to make you want to smash the replay button repetitively?
- How much of an impact do you think the mix has on whether you like a particular song or not?
- Would you still like your favorite songs if they weren’t mixed well?
Here’s an exercise to try out on a current mix you’re working on:
Once you’ve got your mix to a point where you think it’s pretty much done, take a break and let your ears recover, possibly even leave it and come back to it the next day.
After taking your break, sit back in your seat try and listen to the entire song from start to finish without pausing or tweaking ANYTHING. During this time, try and listen through the average listeners ears and make note of anything that sticks out to you. This isn’t meant to be a mixing-based exercise, try and determine if there is anything which might simply require a different approach, or if anything is particularly boring/uninspiring. What will the average Joe notice about the song?
Take Action:
Take note of these things as they become apparent, and try to determine whether these problems are mix related, production related, or simply song related. The next time you’re involved in the creation of a track, keep these things in mind and try to apply what you’ve learnt from your past mistakes.
In Conclusion:
Mixing is an amazingly complex and time-consuming skill to master, and I really do hope that you’re taking the time to learn all there is to learn about this wonderful profession. However, it’s important not to RELY on the mix to carry a song.
3) Time Your Effects to the Track:
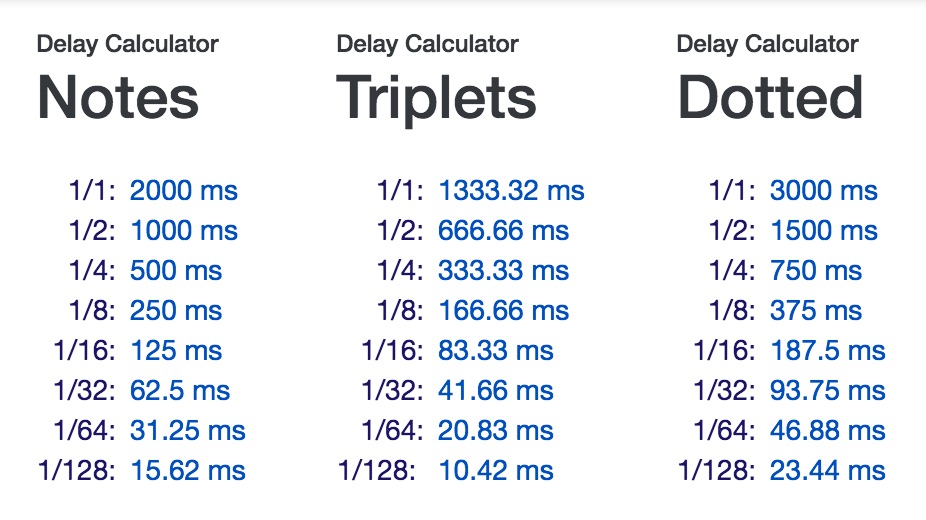
(Effect length calculation for 120BPM.)
Make your effects breath with your track.
If your reverb and delay tails are too long (for example: your snare reverb tail is still decaying through into the next snare hit, or your vocal delays are repeating unnecessarily for too long) then you are needlessly adding extra clutter, and sacrificing some of the punch of your mix.
The solution to this problem is to time your time-based effects to the tempo of your track so that they are only repeating and decaying as long as is necessary.
Using this technique won’t make a HUGE difference, but it will help open up an extra little bit of free space and in return, aid the clarity of your mix.
How can I start doing this?
– Use an FX length calculator! You can find these types of calculators online. My go-to is usually the Delay Calculator on nickfever.com, it’s extremely simple to use, and will save you from having to do the math yourself (however there is still a lot of value in learning how to do this manually).
– If you want to do this manually, you can follow this simple formula:
60,000ms (1 minute) ÷ Song BPM (beats per minute) = Time between 1/4 note beats (ms)
E.g = 60,000ms ÷ 120 BPM = 500ms
In this example, we have calculated the time between each quarter note of a song at 120 BPM.
After determining the time between each beat of a song we can then multiply or divide this number as many times as necessary in order to determine a suitable decay time and pre-delay time for our reverb.
4) Deadlines are Important:

Make Yourself Accountable!
Accountability is a great motivator when it comes to working hard and getting things done quickly. The fear of being embarrassed or getting humiliated by having to fess up to something is truly one of the hardest things to do as a human being, especially when it comes to getting down from our high-horses as “all-knowing sound engineers” who always know better than our clients, and admitting that WE made a mistake.
Why Are Deadlines Important?
Through some recent experiences, I’ve discovered that I tend to achieve MUCH more in a short space of time when I’m aware that there are certain consequences if I fail to deliver on a promise. For this reason, I always try and set strict deadlines on when a certain job needs to be finished by, and make sure to inform people of these deadlines in order to keep my self accountable.
This way of working has an added bonus, which is that if you manage to deliver earlier than your deadline, then you’ll probably end up impressing your clients further, and giving them the impression that your on-the ball when it comes to their project.
However, be very careful to set realistic goals and not drastically over-sell yourself, as this can lead to even worse complications.
5) Filters Are Your Friend!
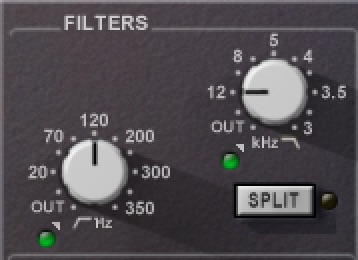
If you don’t need it, get rid of it!
Most instruments (par the kick,toms and bass) don’t have much useful to offer below 70-100Hz on the low-end, and not many instruments have anything useful above 12-13kHz on the high-end either.
Filtering out the unnecessary low-end and high-end from instruments which don’t particularly need this information is an incredible way to carve out some much needed extra space within a mix.
NOTE – It’s important to make these type of processing decisions in context of the whole mix, as it’s very difficult to judge the amount of low or high frequencies a specific element needs while out of context and you may end up removing too much.
A few benefits of filtering include the following:
Using High-Pass Filters
- More space for the low-end of the kick and snare to punch through.
- Increased headroom for the mastering stage.
- Tight, punchy low-end in your mixes instead of boomy and undefined low-end.
Using Low Pass Filters
- Less processed/more natural sounding mixes.
- Bright mixes that don’t make your eyes hurt (yes, I did say eyes…)
- More space for the instruments that really need this space, such as the vocals.
Some Other Cool Filtering Tricks to Try Out:
The Mix Buss Filtering Trick: Highly acclaimed Mix Engineer Serban Ghenea (Taylor Swift, Katy Perry, The Weeknd etc.) is known to use filters on his master buss in order to control the impact which the song has on the listener for each section of the track.
He achieves this by filtering out some of the low-end and high-end during the verses and then bypassing the filters when the chorus hits for a sense of added impact and size.
Why does this trick work?
This is a very similar concept to the fan-favorite “radio effect” which is used frequently in metal these days: When you have a section/instrument with a reduced frequency bandwidth within a song (ex: A vocal rolled off at 600hz and 2-5kHz) then your ears get used to the lack of lows and highs and start to think of that sound as the norm. Because of this phenomenon, when the lows and highs are then reintroduced abruptly, it instantly causes the same sound to seem much more impressive and impactful than it did before
Try Filtering with a Mid-Side EQ:
A really cool trick to try out on synths and other stereo sources is mid-side filtering. A mid-side EQ is a tool which can affect the side information of a stereo track without touching any of the mono information in the center. I’ve personally found that this method works really well when you have a stereo bass synth with too much low end mud on the sides. In a situation like this I would use a high-pass filter in “side” mode to filter out the low-end anywhere up to 400-600Hz, while leaving the original low-end in the middle of the stereo field intact.
6) EQ is Primarily a Tool for Improving, not for Fixing

(A Fitting Quote from Taylor Swift’s “Bad Blood”)
The less fixing you have to do during the mix, the more natural your end result is going to sound.
“Fix it in the mix” is a saying you hear a lot in the mixing world. This approach can work out in certain situations (as long as you’re experienced enough to know how to fix the problem), although it’s still a rather counterproductive way of doing things, as it just leads to more work and frustration later on in the process…
If you’re given the luxury of having a say on how the raw material for a project is going to sound, make sure that it’s recorded well and taken as far as it can possibly go before it ever hits the mixing stage.
Sometimes something as simple as changing the guitar tone, using a different mic or switching out a drum sample can save you from hours of future tweaking and trying to “make things fit”. It’s important to remember that the EQ’ing you do during the mixing stage shouldn’t be about trying to make things work together, it should be about making things work better together.
7) Comping in Context
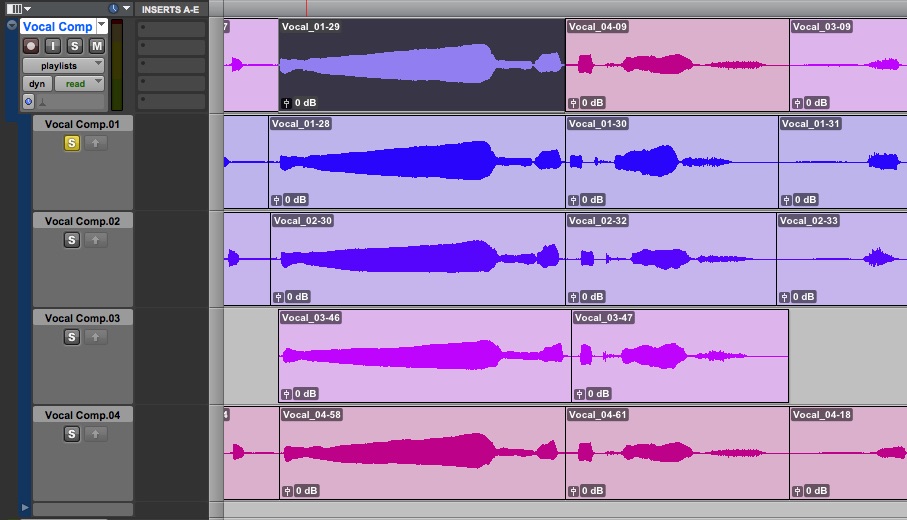
(Comping a vocal in Pro-Tools)
Comping: It’s one of the most tedious, yet also one of the most rewarding processes that we usually end up having to do on a daily basis.
It’s quite a difficult feat to be able to transform a sloppy and pitchy performance into a masterpiece, and it takes a hell of a lot of practice to get to that level of editing and correction skill.
Here are a few things that will hopefully help speed up your progression the next time you choose to take the comping plunge:
My #1 Comping Tip:
- COMP IN CONTEXT – It’s very important to have a point of pitch reference whenever you’re selecting which words or notes to use during editing. The more perfect the point of reference the better (synths or keys work well for this). The main reason for this, is that if you comp a vocal without playing it alongside a melodic element, you might end up choosing words that feel right, but aren’t necessarily perfectly in pitch. This can lead to more pitch correction required further down the line.
A Few Extra Comping/Editing Tips:
- Manual over Automatic Timing Correction – I personally prefer using a good ole’ fashioned mouse and keyboard to align my tracks to the grid. I really like the idea of having complete control over the feel and swing of each particular note or word, and think that it produces more natural sounding results than those built-in to plugins like Melodyne.
- Different Doubles – If you tune your vocal doubles to the point that they’re too similar to your lead vocals, then you are basically defeating the purpose of having doubles in the first place, and might as well just use a widener plugin… The reason the concept of doubling and tripling vocals works, is because the unique variations and interactions between each take creates an awesome effect which a straight up doubler plugin can’t recreate in the same way. By auto-tuning your doubles into pitchperfect condition you are getting rid of these variations between tracks, and making this effect disappear.
TIP: It’s still a good idea to go ahead and tune your vocal harmonies as they are made up of separate notes. With harmonies, the more they are in tune, the better.
8) Question the Reasons Behind Your Decisions (aka: DON’T COPY):
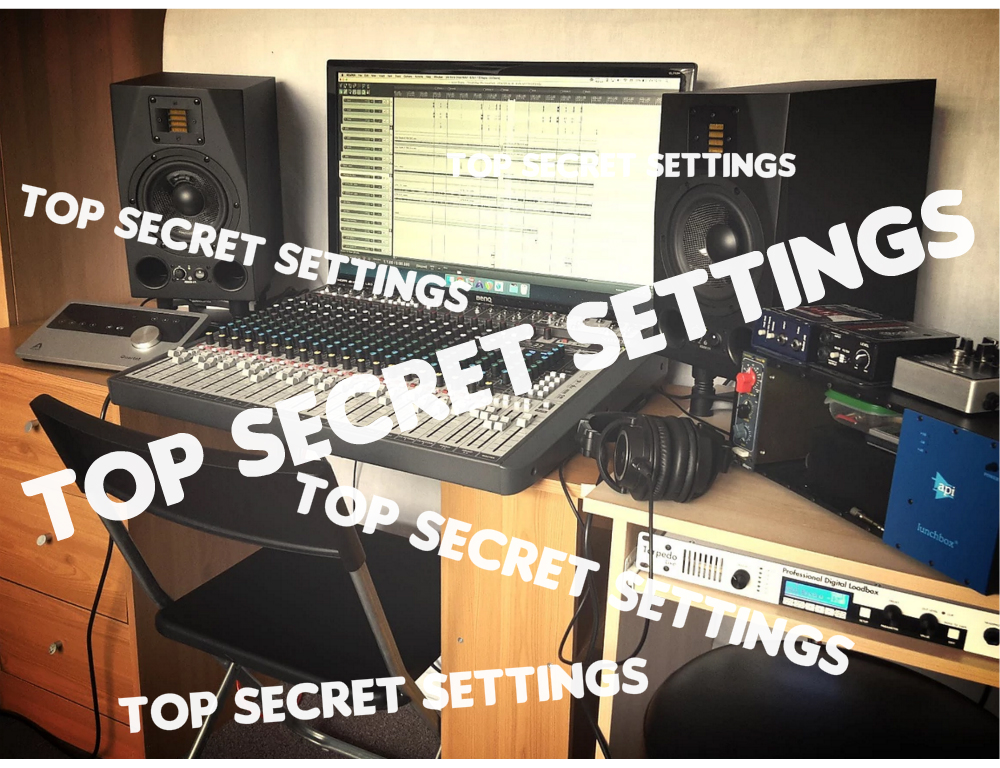
(My old setup at Brett Brothers Studio.)
Every action demands a valid reason.
Don’t just do something because you’ve always done it, or because you’ve heard that {insert famous engineer here} “always” does it…
One of the annoying things about music production, which is also one of the most important lessons to teach, is that it’s almost IMPOSSIBLE to get the exact same results twice (although this is also one of the things that makes music so special IMO).
There are simply too many variables in place for you to justify copying the same settings that you’ve seen somebody else use, or justify applying the same preset on different source material…
Some of these variables include:
- The Microphones being used: Two different microphones will require completely different processing.
- The Instruments being used: No two instruments sound exactly the same! (Just because certain processing sounds good on my Strat doesn’t mean it will sound good on your Les Paul…)
- Microphone Placement: A single inch of difference in mic placement can make a night and day difference to your recorded source material.
- The Singer’s Voice: Every singer has a UNIQUE voice with UNIQUE characteristics and tonality which will require UNIQUE treatment!
- The Equipment being Recorded through: Pickups, Pedals, Amps, Poweramps, Preamps, Converters…THERE ARE TOO MANY VARIABLES, THEY ALL SOUND DIFFERENT!
- The Room being used for Recording: The effect that the room has on how a mic will pick up a sound is HUGE!
- The Room being used for Mixing: The mixing decisions that somebody else makes are strongly influenced by their listening environment and listening gear. Unless you’re %100 sure that they’re mixing through a perfectly treated setup then it makes absolutely no sense to even consider copying any of their EQ settings. (TBH, don’t copy other people’s settings anyway, it’s lame!)
- The key of the song: This has a huge effect on the kind of processing a particular instrument will require. (Ex: A seriously down-tuned Djent track will need drastically different treatment to more standard Indie-Rock track.)
- The genre of music: I hope this goes without saying, but a smooth Jazz vocal processing chain simply won’t work on an aggressive death metal vocal…
Conclusion:
Given all the evidence I’ve presented above, I hope I’ve gotten the point across…
No matter what you’ve heard or read about how a certain engineer “always” uses a certain method, make sure that every decision you make is necessary. Make sure you aren’t blindly following a formula which you’ve memorized, and that you are always bypassing and comparing in a before/after manner to make sure whatever you’re doing is heading in the right direction.
My advice would be that you’re better off trying to figure out why the engineers who you look up to make the mixing decisions they make, and trying to apply the concepts they use rather than trying to copy them exactly. Thinking like this is the best way for you to begin crafting YOUR OWN UNIQUE SOUND.
9) Share the Load:

Too much of a good thing…
Sometimes relying on a single process to fix a problem can lead to unnatural sounding results. Try using a few different stages of “fixing” to resolve a problem so that each processor isn’t having to work too hard.
Here are some examples of “sharing the load”:
- Instead of pumelling a single compressor, try using a combination of pre-fx volume-automation, limiting, compression and post-fx volume automation in order to get a vocal to sound consistent and in your face.
TIP: A simple limiter at the start of your plugin chain to chop off the errant peaks can really ease the load on your compressors and stop them from bouncing all over the place.
- Try a combination of pre-fx “manual sibilance volume automation” and regular deessing to get your vocal sibilance under control.
TIP: Check out the blog post I wrote on de-essing for URM, “Death to Sibilance” for insight into a ton of great methods.
- Instead of trying to filter or EQ out all of the harsh frequencies from your guitars, synths or overheads, try using some tape saturation to bleed-off some of the highend and warm them up.
TIP: Do some research on the characteristics of different tape types and tape speeds. Depending on which tape settings you use you can really help shape the tonal balance of your raw tracks from the get-go. This will also help give you a lot of insight into why classic recordings from the analog/tape era sound the way they do.
- Instead of trying to suck out a bunch of low-mid flub on your palm-muted guitars with an EQ, set up a multi-band compressor to focus in on that specific frequency range and control the low-mids dynamically. This will lead to thicker sounding guitars, as the low-mids will remain intact when palm-mutes aren’t being played.
TIP: Google the Andy Sneap Waves C4 Settings for a great preset to get you started.
10) Live and Learn (AKA: YOUR BEST TEACHER IS YOUR LAST MISTAKE)

Make your mistakes early on, you can’t skip from %0 to %100.
This is an issue I’ve really struggled with throughout my career as a sound engineer…
Early on in my mixing life I spent WAY too much time worrying about trying to make my mix perfect, and let this pursuit of perfection get in the way of my growth as an engineer. In return, I ended up never finishing anything because I was always too afraid to fail.
The cold-hard-simple truth is that you’re going to make mistakes in this business, it’s inevitable! You’re better off making your mistakes early on while there’s a minimal number of people around to realise them!
I learnt this lesson the hard way, and am still paying the price for the perfectionistic mindset I had early on to this day…
How can I get around this?
The greatest piece of advice I can give you in order to avoid this problem, is to make sure that your level of knowledge and experience are continuously increasing handin-hand. Don’t let your technical/theoretical knowledge build-up without ever being put into practice, DON’T BE AFRAID TO IMPROVE.
All the technical prowess in the world won’t add up to a good mix when it comes doing the actual work. You NEED to build upon past experiences.
Conclusion:
Making mistakes, learning from your mistakes, and learning from other’s mistakes is the best way to improve not only as a mixer, but at pretty much anything in life. Always strive to make your next mix better than your last, and in due time, you’ll have ironed out most of the flaws.
FINAL WORDS:
I hope that this article has given you some new ideas to try out during your next project. Be sure to let me know in the comment section below if any of this information has helped you out, or if you have any further questions regarding anything I’ve talked about here.
Stay tuned for more articles in the not-so-distant future!
Thomas Brett is a producer, mixing engineer and songwriter at Brett Brothers recording studio in the UK. Check out the Brett Brothers studio website for more information and articles on all things mixing www.brettbrothersstudio.com
Want more mix tips from Thomas Brett? Read part 1 here!
 Nail The Mix is our online mixing school that gives you REAL multi-tracks from REAL bands, plus a mixing class from the producer who recorded it. Past guests include Periphery, Chelsea Grin, Machine Head and State Champs. Join now for instant access!

Comments 6
awesome write up!
Education 101. Awesome!
I’m glad you like my calculator.
Here’s a more direct link:
http://nickfever.com/music/delay-calculator
Author
I link to your calculator in lots of my courses FYI. It’s a great resource!
Thank you
WOW. Excellent! Best article ever. Refreshing. thank you! Richard